
P0031 on 2013-2017 Honda Accord 3.5L V6: A/F Sensor Heater Circuit Causes and Fixes
For a 2013-2017 Honda Accord V6, P0031 almost always means the heater inside the Bank 1, Sensor 1 Air/Fuel Ratio sensor has failed. This is the upstream sensor on the rear cylinder bank near the firewall. Before replacing, check the 10A fuse labeled 'A/F HEATER' (A19) in the under-hood fuse box. Replacing the correct sensor (Denso 234-5137 is a common aftermarket choice) is the most frequent fix, costing about $90-$150 for the part.
- P0031 on this car is almost certainly a bad Air/Fuel Ratio sensor on the rear (firewall) cylinder bank.
- Always check the 10A 'A/F HEATER' fuse (A19) in the under-hood fuse box before replacing any parts.
- Use an OEM, Denso, or NTK sensor for the replacement; cheap aftermarket sensors are known to cause persistent issues.
- Accessing the rear sensor is difficult and likely requires removing the front strut tower brace.
What's Unique About the 2013-2017 Honda Accord
On the Honda J35 3.5L V6, the engine is mounted transversely, meaning "Bank 1" is the cylinder bank closer to the firewall (the rear bank), which is notoriously harder to access than Bank 2 at the front. The code specifically points to the upstream sensor on this rear bank. Access often requires removing the plastic engine cover and sometimes the strut tower brace that runs across the top of the engine bay. While aftermarket brands may use a universal sensor, Honda often specifies different part numbers for the front and rear bank sensors due to slight variations like wire length, making it important to get the correct part for Bank 1.
Symptoms You May Notice
- Check Engine Light is on 🎬 Watch: Understanding the causes and fixes for the P0031 code.
- Decreased fuel economy
- Rough idle, especially on cold starts
- Failing a vehicle emissions test
- Replacing the wrong oxygen sensor (e.g., replacing the Bank 2 sensor at the front of the engine, or the downstream Sensor 2 after the catalytic converter).
Most Likely Causes
- Failed Bank 1, Sensor 1 Air/Fuel Ratio Sensor 🔴 High Probability → Shop Oxygen Sensor The internal heater element of the sensor is a common failure point over time due to constant, rapid heat cycles. It's a wear-and-tear component.
How to confirm: After confirming the fuse and wiring are good, test the resistance of the heater circuit pins on the sensor itself with a multimeter. A reading of 'OL' (Open Loop/infinite resistance) or a very low, shorted reading confirms failure. The expected resistance is typically very low, in the range of 2.5-4.0 ohms when cold for a genuine Honda sensor. 🎬 Watch: How to diagnose and fix a heater circuit fault.
Typical fix: Replace the Bank 1, Sensor 1 Air/Fuel Ratio sensor. This is the upstream sensor on the rear cylinder bank, near the firewall. 🎬 See this walkthrough for replacing a J-series V6 oxygen sensor.
Est. part cost: $90-$280 - Blown A/F Heater Fuse 🟡 Medium Probability A short circuit in the sensor's internal heater element can draw excessive current, causing the corresponding fuse to blow as a protective measure.
How to confirm: Check the under-hood fuse box for the fuse labeled 'A/F HEATER'. On 9th-gen Accords, this is fuse A19, a 10A fuse. Visually inspect if it's blown or check for continuity with a multimeter.
Typical fix: Replace the blown fuse. If the new fuse blows immediately, it confirms a dead short exists in the wiring or, more likely, the sensor itself that must be diagnosed further.
Est. part cost: $1-$5 - Damaged Wiring or Connector ⚪ Low Probability The wiring harness is near the hot exhaust manifold and can become brittle, melt, or be damaged by rodents. The connector can also fill with moisture, corrode, or loosen over time.
How to confirm: Visually inspect the wiring harness and connector for the Bank 1, Sensor 1 A/F sensor. Look for any signs of melting, fraying, chew marks, or corrosion on the pins.
Typical fix: Repair the damaged section of wiring or replace the connector pigtail. Honda offers a specific anti-rodent electrical tape (P/N 4019-2317) that can be used to protect the repair.
Est. part cost: $10-$50
Rare But Worth Checking
- Faulty Powertrain Control Module (PCM): This is extremely rare. The PCM is the last component to suspect. All other possibilities, including the sensor, fuse, and wiring, should be exhaustively checked before considering a PCM issue.
Diagnosis Steps
- Read the trouble codes with an OBD-II scanner to confirm P0031 is present.
- Locate and check the 'A/F HEATER' fuse (A19, a 10A fuse) in the under-hood fuse box. Replace if blown.
- If the fuse is good, locate the Bank 1, Sensor 1 A/F sensor. It is on the rear cylinder bank (near the firewall), upstream of the catalytic converter. You may need to remove the strut tower brace for access.
- Carefully inspect the sensor's wiring harness and connector for any obvious damage, such as melting, fraying, or corrosion.
- If the visual inspection passes, disconnect the sensor and turn the ignition to the 'ON' position (engine off).
- Use a multimeter to test for 12-volt power and a good ground on the vehicle's harness-side of the connector. Lack of power or ground indicates a wiring issue that needs to be traced.
- If power and ground are present, test the resistance between the two heater circuit pins on the sensor itself (often the two same-colored wires). A reading of infinite resistance (open) or a dead short (near zero ohms) indicates the sensor's heater has failed. A good OEM sensor should read between 2.5 and 4.0 ohms.
- If all tests pass but the code persists, the issue may be intermittent or, in very rare cases, related to the PCM.
Parts You'll Likely Need
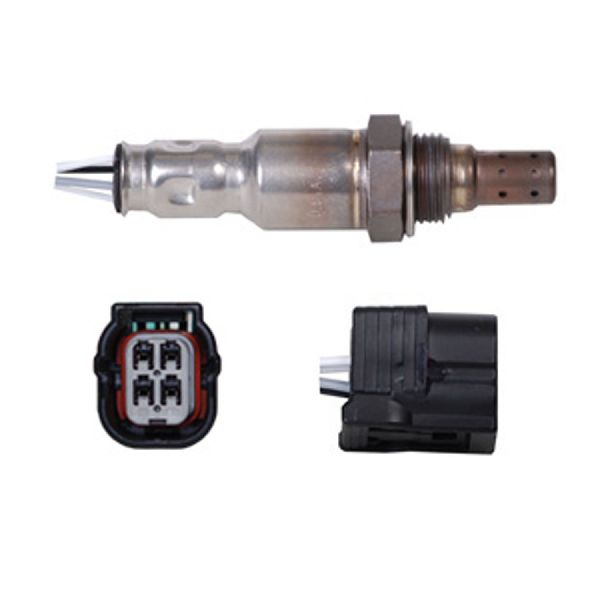
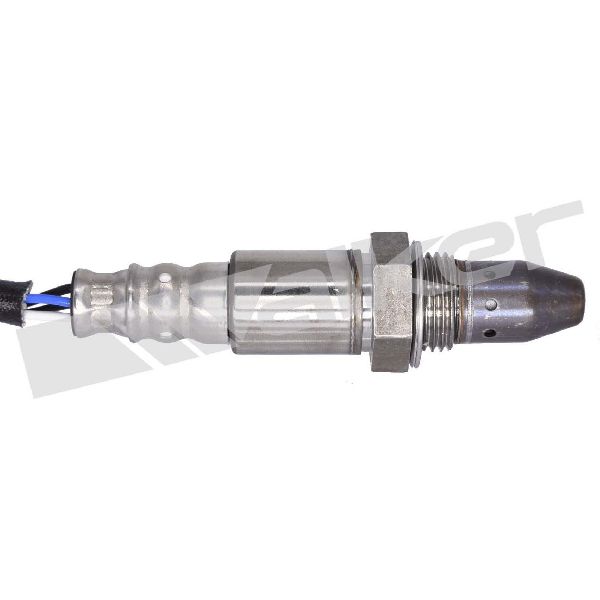
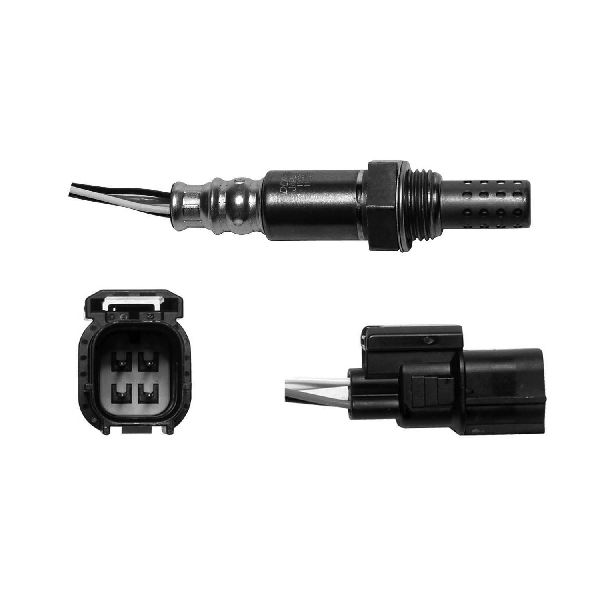
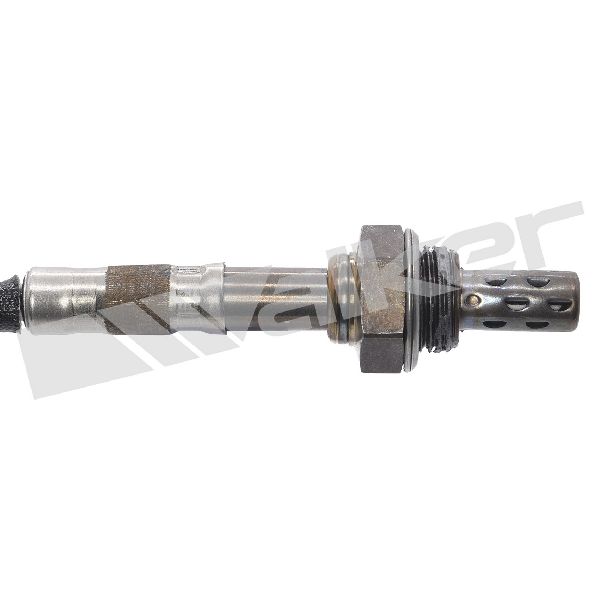
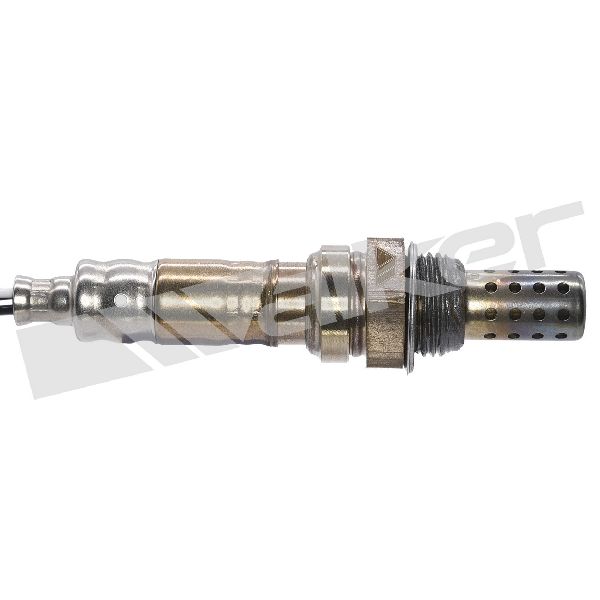
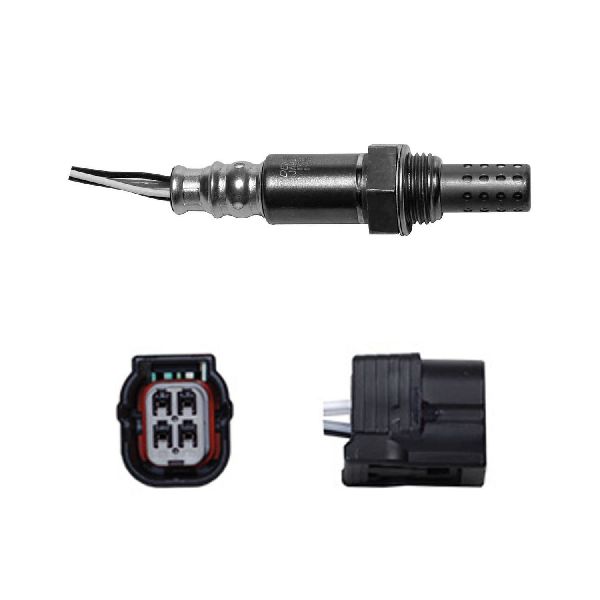
- Air/Fuel Ratio Sensor (Bank 1, Sensor 1)
(OEM #36531-R70-A02)— This is the upstream sensor for the rear cylinder bank. Its internal heater is the component that fails, triggering the P0031 code.
Trusted brands: Denso (P/N: 234-5137), NGK/NTK
OEM price range: $200-$280
Aftermarket price range: $90-$150 - Oxygen Sensor Socket — A special 22mm (7/8") offset, slotted socket is required to remove and install the sensor without damaging the wire. Access to the rear sensor is tight, making this tool essential.
Trusted brands: Lisle, OEMTOOLS, GearWrench
Aftermarket price range: $10-$30
Related Codes That Often Appear With This One
- P0134 — Indicates 'O2 Sensor Circuit No Activity Detected (Bank 1 Sensor 1)'. If the heater fails, the sensor may not reach operating temperature and will not produce a signal, triggering this code alongside P0031.
- P0171 — Indicates 'System Too Lean (Bank 1)'. A faulty A/F sensor can send incorrect data, causing the PCM to make improper fuel adjustments that lead to a lean or rich condition.
- P0051 — This is the identical 'Heater Control Circuit Low' fault but for Bank 2, Sensor 1 (the front, easier-to-access sensor). It's common for these sensors to fail around the same time/mileage.
Platform-Specific Known Issues
- Difficult Access to Rear Sensor: The Bank 1 sensor is on the rear of the engine against the firewall. Access is tight. Many owners report that removing the front strut tower brace (the black bar running between the two strut towers) is necessary to get enough room to work and apply torque to the sensor.
Mechanic-Grade Diagnostic Values
- A/F Sensor Heater Circuit Resistance — expected: 2.5 to 4.0 Ω (Ohms) when measured across the two heater pins (often same-colored wires) on a cold sensor.. Failure: A reading of OL (open circuit) or near 0 Ω (short circuit).
- A/F Sensor Heater Circuit Voltage (at harness connector) — expected: Battery voltage (approx. 12V) with ignition on, engine off.. Failure: Significantly less than 12V or 0V indicates a problem with the power supply from the fuse/relay.
- Mode $06 - A/F Sensor Heater Current — expected: The measured value should be above the minimum limit specified by the ECU.. Failure: A current reading below the minimum threshold (e.g., a diagnostic document for a similar system specified a threshold of 0.17 Amps) will trigger the fault.
Hidden / Shadow Codes Worth Checking
- Mode $06, TID: $05/$06, CID: $81/$81: This refers to the onboard diagnostic monitor for the Catalyst system on a V6, which includes checks for the A/F sensor heater circuit. Advanced scan tools can read this data to see the raw current measurement (in mA) that the PCM is using to determine if the heater circuit is performing correctly, even before a DTC is set permanently. (see via An advanced OBD-II scan tool capable of displaying Mode $06 test results.)
Scan Tool Commands That Help
- Honda HDS (Honda Diagnostic System): Data List > HO2S (AF) S1 HEATER — This parameter shows the live ON/OFF command status from the PCM to the sensor's heater. It's used to confirm if the PCM is attempting to activate the heater. If the status is 'OFF' when it should be 'ON' (e.g., engine running, coolant temp > 0°C), it could point to a PCM logic issue or an overriding fault condition.
Wiring & Ground Locations
- G101 — Typically located on the intake manifold, serving as a main ground point for the engine wiring harness.. A poor or corroded main engine ground can introduce resistance and voltage drops into various sensor circuits, including the A/F sensor heater circuit, potentially causing a P0031 code even if the sensor itself is good.
- A/F Sensor Connector (Bank 1, Sensor 1) — Attached to the A/F sensor, with the harness side routed near the top rear of the engine, close to the firewall.. This is the primary test point. The two same-colored wires are for the heater circuit. One pin should have ~12V power from the A/F heater fuse/relay, and the other is the control wire to the PCM. Testing for power, ground, and resistance happens here.
Real Owner Repair Stories
- driveaccord.net forum user (2014 Honda Accord V6) — Check Engine Light with code P0031.
❌ Tried (didn't work) The user did not report trying other fixes first, but noted the primary challenge was physical access to the sensor.
✅ What actually fixed it Replacing the Bank 1, Sensor 1 (rear, firewall side) A/F sensor with a Denso 234-5137 part resolved the code.
OEM Part Supersession History
36531-R70-A01→36531-R70-A02— Standard part revision by the manufacturer, likely for minor improvements in materials or manufacturing process.
Model Year Variations Within This Range
- 2013-2017: The J35Y1 engine was used in V6 models with an automatic transmission, while the J35Y2 (with slightly different power figures) was used in the rare V6 coupe with a manual transmission. This distinction does not affect the diagnosis or repair of code P0031, as the A/F sensor and its circuitry are the same.
Diagnostic Flowchart
Other Known Issues on This Vehicle
Issues unrelated to this code that are worth knowing about as an owner of this generation:
- Starter Motor Failure / Grinding 🟠 Medium — Common, especially on 2013-2016 models. Symptoms include a grinding noise or a click with no crank. (Ref: Honda TSB 16-002.)
- VCM (Variable Cylinder Management) Related Issues 🟠 Medium — Can lead to increased oil consumption, fouled spark plugs, and engine vibrations over the vehicle's life.
- Torque Converter Judder 🟡 Low — A shudder or vibration may be felt between 20-60 mph under light throttle. Often caused by deteriorated transmission fluid. (Ref: Honda TSB 17-043 (for Odyssey, but methodology is relevant).)
- Failing LED Daytime Running Lights (DRL) 🟡 Low — Very common on 2016-2017 models. The LED strip partially or fully dims. (Ref: Warranty Extension (10 years/unlimited miles) per TSB 19-042.)
- Excessive Oil Consumption 🟠 Medium — Some owners report needing to add oil between changes. Can be exacerbated by VCM operation.
Used vs. New Parts: Buying Guide for This Vehicle
When a used part is the smart pick: For this repair, a used part is only recommended for the wiring connector pigtail if the original is physically damaged. A used A/F sensor is not advised as its internal heater is a wear item with a finite lifespan.
Donor-vehicle mileage cap: roughly under 80000 miles for the part to have meaningful remaining life.
What to inspect on the donor part:
- For a connector pigtail: ensure the plastic is not brittle or cracked.
- Check for clean, corrosion-free electrical pins.
- Verify the wiring insulation is flexible and not hardened or melted.
OEM-only on this vehicle (don't cheap out):
- Air/Fuel Ratio Sensor
Aftermarket brands forum-validated for this vehicle:
- Denso (OEM manufacturer)
- NTK (OEM manufacturer)
Brands owners have reported issues with on this vehicle:
- Unbranded sensors from online marketplaces (eBay, Amazon)
- Universal sensors that require splicing wires
- Bosch (some forum users report inconsistent results on Honda applications)
Real Owner Stories
Aggregated from forums and TSBs cited above. Mileages and costs reflect what owners reported in those sources.
Honda Accord V6 3.5
Symptoms: Check engine light with codes P0031 and P0134; poor fuel economy of 8 km/l.
What fixed it: Other users suggested checking for vacuum leaks or issues with the catalytic converter if a new sensor didn't solve the problem.
Source hint: Reddit thread titled 'No puedo seguir pagando esto' or similar translations
2013 Accord Sport 2.4L
Symptoms: P0031 Code present.
What fixed it: Replacing the sensor with Denso 234-9131.
Source hint: driveaccord.net - Thread 'P0031 Code on 2013 Accord Sport'
Related OBD-II Codes
Frequently Asked Questions
Where is the Bank 1 Sensor 1 located on my Accord V6?
Which fuse should I check for a P0031 code on a 9th-gen Accord?
What is the correct resistance for a genuine Honda A/F sensor heater circuit?
Is there a specific part recommended to prevent rodent damage to the sensor wiring?
Does TSB 16-002 relate to my P0031 code?
Can I use a used A/F sensor to fix this issue?
Helpful Videos

We Have This Part in Stock

The information in this article is provided for general reference and educational purposes only. Vehicle specifications, procedures, and part compatibility can vary by production date, trim level, and region. Always consult your vehicle's factory service manual and verify part numbers before purchasing or performing repairs. Safety-critical components such as airbags, seat belts, and braking systems should be installed by a qualified professional.
- Honda Accord:
- 🧭 Diagnostic Flowchart
- 🎬 Helpful Videos
- 🛍️ Shop This Part
- What's Unique About the 2013-2017 Honda Accord
- Symptoms You May Notice
- Most Likely Causes
- Rare But Worth Checking
- Diagnosis Steps
- Parts You'll Likely Need
- Related Codes That Often Appear With This One
- Platform-Specific Known Issues
- Mechanic-Grade Diagnostic Values
- Hidden / Shadow Codes Worth Checking
- Scan Tool Commands That Help
- Wiring & Ground Locations
- Real Owner Repair Stories
- OEM Part Supersession History
- Model Year Variations Within This Range
- Other Known Issues on This Vehicle
- Used vs. New Parts: Buying Guide for This Vehicle
- Real Owner Stories
- Honda Accord V6 3.5
- 2013 Accord Sport 2.4L
- Related OBD-II Codes
- Frequently Asked Questions
- 🎟️ Get 5% Off