
P0031 on 2006-2011 Honda Civic 1.8L: A/F Sensor Heater Circuit Causes and Fixes
On a 2006-2011 Honda Civic, code P0031 almost always means the internal heater in the upstream Air/Fuel Ratio (oxygen) sensor has failed. Replacing the sensor (Bank 1, Sensor 1) is the most common fix. Before replacing, check the A/F sensor fuse in the under-hood fuse box. Expect to pay ~$70-$120 for a quality aftermarket sensor (Denso/NTK) or ~$160-$240 for a genuine Honda part. This is a DIY-friendly repair with a difficulty of 2/5.
- P0031 on your Civic points directly to a problem with the heater in your primary (upstream) A/F sensor.
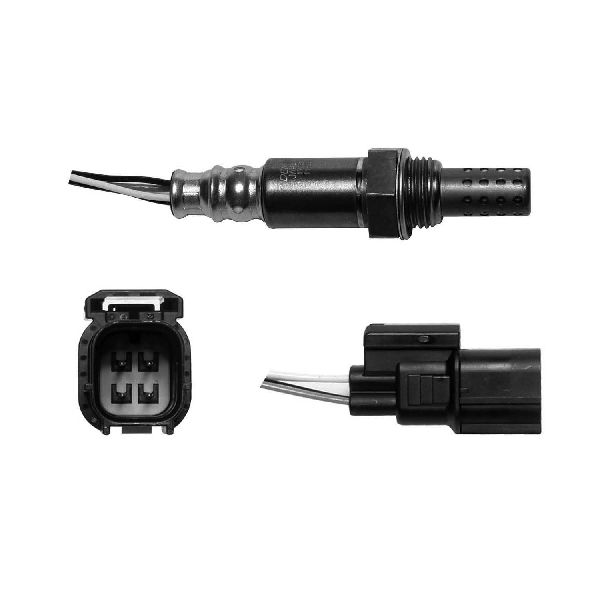
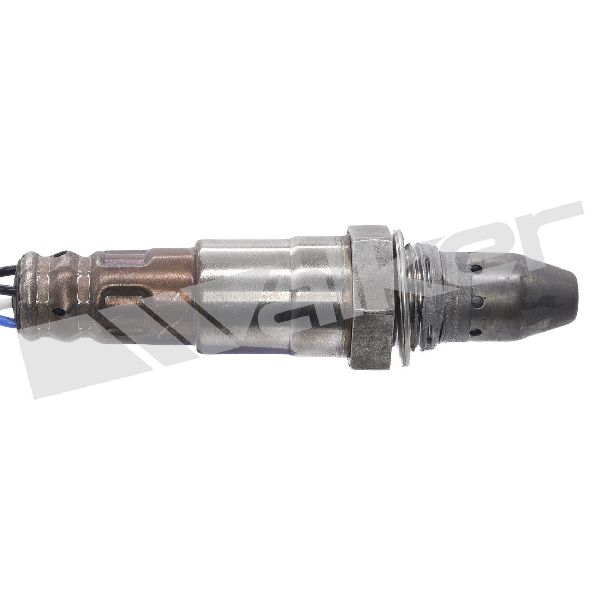
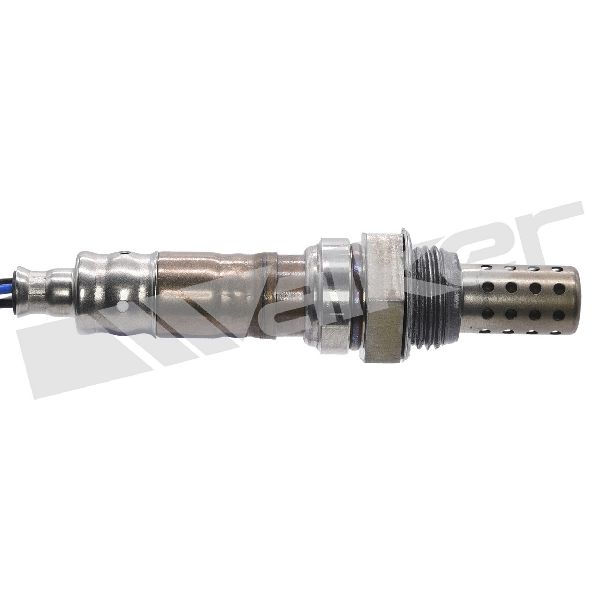
- The most likely fix by a wide margin is to replace the upstream A/F sensor (Honda Part #36531-RNA-A01 or Denso #234-9062).
- Before buying parts, check the 15A 'A/F SENSOR' fuse in the under-hood fuse box and inspect the wiring for any visible damage.
- This is a very manageable DIY repair that requires an O2 sensor socket but is otherwise simple, as the sensor is easy to access in the engine bay.
What's Unique About the 2006-2011 Honda Civic
For the 8th generation Honda Civic with the R18A1 engine, this code is a very common and straightforward issue. The upstream A/F sensor is known to fail with age and mileage, but thankfully it is extremely accessible at the front of the engine bay, mounted directly on the exhaust manifold's integrated catalytic converter. This makes diagnosis and replacement much simpler compared to vehicles where the sensor is difficult to reach. There are no widespread design flaws or complex platform-specific issues associated with this code; it's typically a standard wear-and-tear component failure. Forum users on 8thcivic.com widely report this as a simple DIY fix.
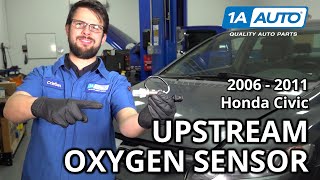
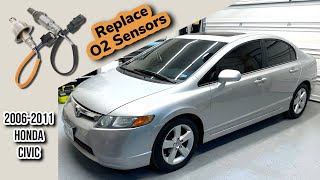
🎬 Watch: Step-by-step guide to replacing the upstream sensor.Symptoms You May Notice
- Check Engine Light is on
- Decreased fuel economy
- Rough idle, especially on cold starts
- Failure to pass an emissions test
- Occasional stall on first start in cold weather
- Replacing the downstream (post-catalytic converter) oxygen sensor. P0031 specifically refers to Sensor 1, which is the upstream sensor.
- Replacing the sensor without first checking the 'A/F SENSOR' fuse in the under-hood fuse box.
Most Likely Causes
- Failed Air/Fuel Ratio Sensor (Bank 1, Sensor 1) 🔴 High Probability → Shop Oxygen Sensor The internal heater element is a common failure point on oxygen sensors as they age from constant, rapid heat cycles. This is the most cited repair on owner forums.
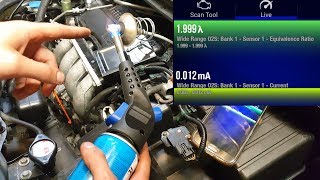
How to confirm: Disconnect the sensor and measure the resistance between the two heater pins (usually the two wires of the same color, often black). A healthy sensor for this vehicle should have a resistance of approximately 1.0-4.0 ohms at room temperature. An open circuit (infinite resistance) or a short (near zero resistance) confirms a bad heater element. 🎬 See how to test an Air/Fuel ratio sensor with a multimeter.
Typical fix: Replace the upstream Air/Fuel Ratio sensor. It is highly recommended to use the OEM supplier (Denso) or an equivalent quality brand like NTK, as forum members report issues with cheaper generic sensors.
Est. part cost: $70-$240 - Blown Fuse or Faulty Relay ⚪ Low Probability
How to confirm: Locate and inspect the fuse for the A/F sensor heater circuit. On the 2006-2011 Civic, this is typically a 15A fuse located in position 2 of the under-hood fuse box, labeled 'A/F SENSOR'. Check for 12V power at the sensor's harness connector (on the appropriate wire) with the key on. The heater circuit is powered by the A/F sensor relay, which is part of the integrated relay module in the fuse box.
Typical fix: Replace the blown fuse. If the fuse blows again immediately, a short circuit in the wiring or sensor must be diagnosed.
Est. part cost: $1-$10 - Damaged Wiring or Connector ⚪ Low Probability Wiring is exposed to high heat near the exhaust manifold, which can cause insulation to become brittle and crack over time. Rodent damage is also a possibility.
How to confirm: Visually inspect the wiring harness leading to the A/F sensor for any signs of melting, chafing, or breaks. Check the connector for corrosion, bent pins, or a loose connection. A 'wiggle test' on the harness while monitoring sensor data can sometimes reveal an intermittent fault.
Typical fix: Repair the damaged section of the wiring harness or clean/replace the connector. Honda sells a specific anti-rodent electrical tape (P/N 4019-2317) that can be used to wrap new repairs.
Est. part cost: $10-$50
Rare But Worth Checking
- Faulty Powertrain Control Module (PCM): This is very uncommon. The PCM's internal driver for the heater circuit can fail. All other possibilities, especially the sensor, fuse, and wiring, should be exhaustively ruled out before considering PCM replacement.
Diagnosis Steps
- Read the code with an OBD-II scanner to confirm P0031 is the only code present.
- Visually inspect the upstream A/F sensor's wiring harness and connector for any obvious damage, such as melting, fraying, or loose connections.
- Check the 15A fuse in position 2 of the under-hood fuse box, labeled 'A/F SENSOR'. Replace if blown.
- If the fuse is good, disconnect the sensor's electrical connector. With the ignition key in the 'ON' position (engine off), use a multimeter to verify that there is battery voltage (approx. 12V) being supplied to the heater circuit pin on the harness side.
- With the sensor still disconnected, use a multimeter to measure the resistance across the two heater pins on the sensor itself (typically the two black wires). The specification is approximately 1.0-4.0 ohms. An open circuit (infinite resistance) or a short (near zero resistance) indicates the sensor's internal heater has failed and the sensor must be replaced.
- If the sensor resistance is within spec and the wiring/fuse are good, the fault may lie with the PCM's driver circuit, but this is extremely rare and should be professionally diagnosed.
Parts You'll Likely Need
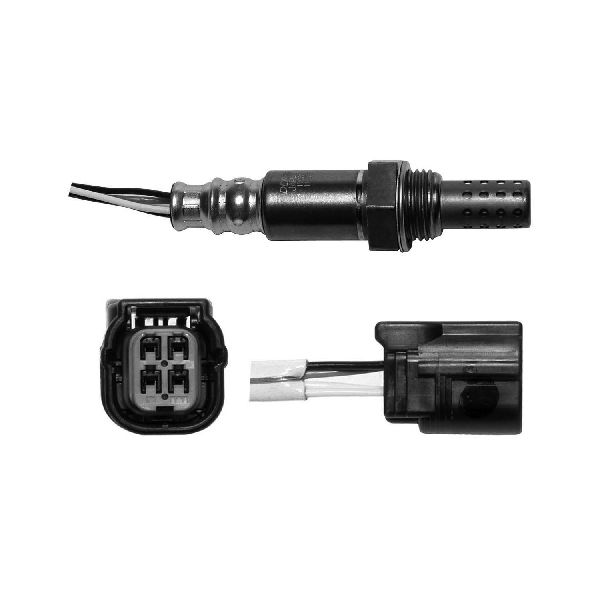
- Upstream Air/Fuel Ratio Sensor (Bank 1, Sensor 1)
(OEM #36531-RNA-A01)— This is the most common cause of a P0031 code, as the internal heater element fails over time.
Trusted brands: Denso (OEM Supplier, P/N: 234-9062), NGK/NTK, Bosch
OEM price range: $160-$240
Aftermarket price range: $70-$120
Platform-Specific Known Issues
- Use of Penetrating Oil: The sensor can be very tight in the exhaust manifold. Owners on forums recommend spraying the base of the sensor with a quality penetrating oil (like PB Blaster or Liquid Wrench) and letting it soak, ideally while the exhaust is warm but not hot, to make removal easier.
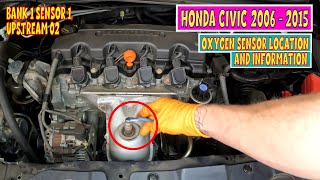
- Tool Requirement: A special 22mm (or 7/8") offset oxygen sensor socket is required to remove and install the sensor without damaging the wiring. 🎬 Watch: Identifying Bank 1 Sensor 1 on your Honda Civic. These are widely available at auto parts stores.
Mechanic-Grade Diagnostic Values
- A/F Sensor Heater Current Draw — expected: Greater than 0.8 A when commanded ON by the PCM.. Failure: Less than 0.8 A, which indicates an open circuit or high resistance.
- A/F Sensor Heater Circuit Power Supply — expected: Approximately 12V (Battery Voltage) at the harness connector with Key On, Engine Off.. Failure: 0V indicates a blown fuse, bad A/F sensor relay, or a break in the power wire from the fuse box.
- Continuity between A/F Sensor connector and PCM — expected: Below 1 Ω on the heater control wire.. Failure: High or infinite resistance (OL) indicates a break in the wire between the sensor and the PCM.
Scan Tool Commands That Help
- Honda HDS (or equivalent pro-level scanner): A/F Sensor Heater Test — This is a bidirectional test that commands the heater circuit on and off, allowing a technician to monitor voltage and current in real-time to confirm if the PCM driver is functioning and if the circuit is complete. This is useful for differentiating a wiring/PCM issue from a sensor failure.
Wiring & Ground Locations
- A/F Sensor Connector (C131) — On the front of the engine, connected to the upstream A/F sensor on the exhaust manifold.. This is the primary test point. Pin 1 (BLK/YEL) should have battery voltage from the A/F sensor relay. Pin 2 (BLK/WHT) is the heater control wire that the PCM pulses to ground. Pins 3 and 4 are for the sensor signal.
- G101 — On the thermostat housing, near the upper radiator hose on the driver's side of the engine.. This is a critical ground point for the PCM and multiple engine sensors. While not a direct cause of P0031 alone, a loose or corroded G101 can cause erratic voltage and sensor readings across the system, potentially contributing to or mimicking sensor circuit faults.
- Under-hood Fuse/Relay Box — Driver's side of the engine bay.. Contains the 15A 'A/F SENSOR' fuse (position 2) and the integrated A/F Sensor Relay. Power flows from the battery, through this fuse and relay, to the A/F sensor's heater circuit.
Real Owner Repair Stories
- Reddit user on r/MechanicAdvice (Jeep Wrangler (concept applies universally)) — Check Engine Light with P0031.
❌ Tried (didn't work) Replaced the O2 sensor twice., Disconnected the battery to clear the code.
✅ What actually fixed it The underlying issue was not fully resolved in the thread, but the critical takeaway for others was the realization that simply disconnecting the battery does not always properly clear codes or reset monitors. The proper procedure is to use an OBD-II scan tool to clear the code. If the code returns immediately, it confirms a hard fault exists in the wiring or PCM, as the sensor itself was already replaced. - CivicForums.com user (2002 Honda Civic (similar principle)) — Hesitation when starting from a stop after replacing the primary O2 sensor.
❌ Tried (didn't work) Replacing the original NTK sensor with a new Bosch sensor.
✅ What actually fixed it The hesitation problem was caused by an incompatible Bosch O2 sensor. The user reported that even though it was listed for the vehicle, it caused performance issues. Re-installing the old sensor temporarily removed the hesitation (but brought back the CEL). The final fix was replacing the sensor with the correct OEM-equivalent NTK brand (part #24291 for that model), which resolved both the hesitation and the check engine light. This highlights the importance of using OEM or validated aftermarket brands like Denso/NTK on Hondas.
OEM Part Supersession History
36531-RNA-A01→No supersession found. This part number remains the correct OEM part for the 2006-2011 Civic 1.8L.— N/A
Heads up: While there is no supersession, be aware that part number 36531-R1A-A01 is for the 2012-2015 Civic and is not compatible, despite looking similar.
Diagnostic Flowchart
Other Known Issues on This Vehicle
Issues unrelated to this code that are worth knowing about as an owner of this generation:
- Cracked Engine Block 🔴 High — Affects some 2006-2008 and early 2009 models. Can cause coolant loss and overheating. Honda issued a warranty extension (TSB 10-048) to 10 years/unlimited mileage, which has now expired. (Ref: TSB 10-048)
- Defective Sun Visors 🟡 Low — Extremely common across all years. The visor splits at the seam, loses tension, and droops, obstructing vision. A class-action lawsuit resulted in a warranty extension (7 years/100k miles), which has now expired. (Ref: Class-Action Lawsuit Settlement (Cooper v. American Honda Motor Co., Inc.))
- Clear Coat / Paint Failure 🟠 Medium — Widespread issue, particularly on dark colors (black, blue, red). The clear coat peels and flakes, typically starting on the roof, hood, and trunk. Honda offered a limited warranty extension for some colors/VINs, but many owners were not covered. (Ref: Limited Warranty Extension (now expired))
- Uneven Rear Tire Wear 🟠 Medium — Common problem where rear tires wear unevenly on the inside edge, causing road noise often mistaken for a bad wheel bearing. Caused by faulty rear upper control arms from the factory. (Ref: TSB 08-017 (later superseded))
- Failing Engine Mounts 🟠 Medium — The passenger-side hydraulic engine mount is a common failure item, leading to excessive vibration at idle and while in gear.
Used vs. New Parts: Buying Guide for This Vehicle
When a used part is the smart pick: For this specific repair, a used part is NEVER recommended. Oxygen sensors are wear items with a finite lifespan, and the heater element is the most common failure point. A used sensor has an unknown amount of life left and is very likely to fail soon, if it doesn't arrive already faulty.
What to inspect on the donor part:
- Not applicable. Do not buy a used A/F ratio sensor.
OEM-only on this vehicle (don't cheap out):
- While not strictly 'OEM-only', it is highly recommended to use either the genuine Honda part (36531-RNA-A01) or the direct OEM supplier, Denso (234-9062). Using other brands is a common cause of premature failure or incompatibility issues.
Aftermarket brands forum-validated for this vehicle:
- Denso (OEM supplier)
- NTK (NGK)
Brands owners have reported issues with on this vehicle:
- Generic, unbranded 'eBay' sensors
- Bosch sensors have been reported by some Honda owners to cause performance issues or have a shorter lifespan in this specific application.
Real Owner Stories
Aggregated from forums and TSBs cited above. Mileages and costs reflect what owners reported in those sources.
2010 Honda Civic
Symptoms: Check Engine light with code P0420.
What fixed it: Replaced the upstream air/fuel ratio sensor with a Denso 234-9124.
Source hint: youtube.com - Denso 234-9124 Air Fuel Sensor
2007 Honda Civic
Symptoms: Check Engine Light with code P0031.
What fixed it: Replaced the upstream A/F sensor with a Denso brand sensor.
Source hint: ClubCivic.com Forum Thread
Related OBD-II Codes
Frequently Asked Questions
Which specific brand of sensor should I buy for my 2006-2011 Civic to fix P0031?
Where is the fuse for the A/F sensor heater located on the 8th Gen Civic?
I'm having trouble removing the sensor from the exhaust manifold; any tips?
Does the 2006-2011 Acura CSX have this same P0031 issue?
Could my P0031 code be related to the cracked engine block TSB 10-048?
How can I test if the sensor itself is bad before buying a new one?
Helpful Videos
We Have This Part in Stock


The information in this article is provided for general reference and educational purposes only. Vehicle specifications, procedures, and part compatibility can vary by production date, trim level, and region. Always consult your vehicle's factory service manual and verify part numbers before purchasing or performing repairs. Safety-critical components such as airbags, seat belts, and braking systems should be installed by a qualified professional.
- Honda Civic:
- 🧭 Diagnostic Flowchart
- 🎬 Helpful Videos
- 🛍️ Shop This Part
- What's Unique About the 2006-2011 Honda Civic
- Symptoms You May Notice
- Most Likely Causes
- Rare But Worth Checking
- Diagnosis Steps
- Parts You'll Likely Need
- Platform-Specific Known Issues
- Mechanic-Grade Diagnostic Values
- Scan Tool Commands That Help
- Wiring & Ground Locations
- Real Owner Repair Stories
- OEM Part Supersession History
- Other Known Issues on This Vehicle
- Used vs. New Parts: Buying Guide for This Vehicle
- Real Owner Stories
- 2010 Honda Civic
- 2007 Honda Civic
- Related OBD-II Codes
- Frequently Asked Questions
- 🎟️ Get 5% Off