
P0031 on 2012-2017 Toyota Camry: Heater Circuit Causes and Fixes for Bank 1 Sensor 1
On a 2012-2017 Toyota Camry, code P0031 almost always means the front upstream Air/Fuel Ratio sensor (Bank 1, Sensor 1) has failed. First, check the 'A/F HTR' fuse in the engine bay fuse box. If the fuse is good, replacing the sensor is the most likely fix. The correct resistance for the sensor's heater circuit is typically between 0.8 and 1.8 ohms. Expect to pay $160-$190 for an OEM-quality Denso sensor, and it's a very DIY-friendly job on the 4-cylinder engine.
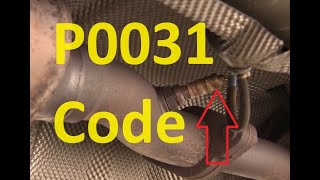
- P0031 points to a failure in the heater circuit of the upstream Air/Fuel Ratio sensor (Bank 1, Sensor 1).
- ALWAYS check the 'A/F HTR' fuse in the engine bay fuse box before buying any parts. This is a simple, 5-minute check that can save you over $150.
- If the fuse is good, the sensor itself has most likely failed. Test the sensor's heater pins for a resistance between 0.8 and 1.8 ohms.
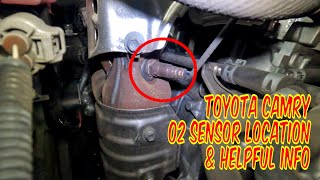
- For the 2.5L 4-cylinder engine, the sensor is very easy to access on the front of the exhaust manifold. For the 3.5L V6, it is on the rear (firewall side) and is difficult to access.
- Use a Denso brand replacement sensor (part #234-9128), as they are the original equipment manufacturer for Toyota and ensure proper performance. Using other brands is a common cause of a repeat failure.
What's Unique About the 2012-2017 Toyota Camry
For the 2012-2017 Camry, especially the popular 2.5L 4-cylinder (2AR-FE) model, this is a straightforward and common issue. The Bank 1 Sensor 1 is located right on the front of the exhaust manifold, 🎬 Watch: Locate the Bank 1 Sensor 1 on your 2.5L engine. making it exceptionally easy to access and replace compared to many other vehicles. On the 3.5L V6 (2GR-FE), however, Bank 1 is the rear bank against the firewall, and accessing Sensor 1 is significantly more difficult, often requiring the removal of the airbox and intake manifold. Toyota uses Denso as its original equipment (OE) supplier for these sensors, and sticking with the Denso brand for replacement is highly recommended by mechanics and owners in forums to ensure compatibility and avoid persistent codes.
Symptoms You May Notice
- Check Engine Light is on
- Decreased fuel economy
- Rough idle, especially when the engine is cold
- Vehicle may hesitate during acceleration
- Failing an emissions test
- Replacing the oxygen sensor without first checking the A/F heater fuse. A blown fuse is a simple fix that is often overlooked.
- Replacing the wrong sensor. P0031 specifically refers to Bank 1, Sensor 1 (upstream), not the downstream sensor (Sensor 2). On the V6, Bank 1 is on the firewall side, a common point of confusion.
- Using a cheaper, non-OEM (non-Denso) or universal sensor. These often have incorrect heater resistance values, causing the P0031 code to persist even with a new part.
Most Likely Causes
- Faulty Bank 1, Sensor 1 Air/Fuel Ratio Sensor 🔴 High Probability → Shop Oxygen Sensor The internal heater element within the sensor is a common failure point due to age and countless heat cycles. It's considered a wear-and-tear item.
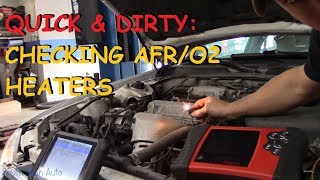
How to confirm: After confirming the fuse and wiring are good, test the resistance of the heater circuit pins on the sensor itself with a multimeter. 🎬 See how to test an AFR heater circuit with a multimeter. A reading outside the manufacturer's specification (typically 0.8 - 1.8 ohms at room temperature) confirms the sensor is bad. An open circuit (infinite resistance) or a direct short (near zero resistance) are clear indicators of failure.
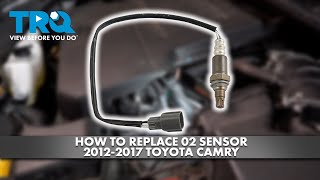
Typical fix: Replace the Bank 1, Sensor 1 Air/Fuel Ratio sensor. 🎬 Watch this step-by-step guide to replacing your oxygen sensor. Using a non-Denso or universal sensor is a common mistake that can cause the code to return immediately.
Est. part cost: $160-$260 - Blown A/F Heater Fuse or Relay 🟡 Medium Probability A short circuit in the sensor's heater element or its wiring can cause the corresponding fuse to blow as a protective measure.
How to confirm: Locate the fuse box in the engine bay and check the fuse labeled 'A/F HTR' or similar (e.g., EFI MAIN). Visually inspect if the fuse is blown or test for continuity with a multimeter. This should be the very first check performed.
Typical fix: Replace the blown fuse. If it blows again immediately, a short circuit exists in the wiring or the sensor itself and must be found.
Est. part cost: $1-$5 - Damaged Wiring or Connector ⚪ Low Probability The wiring harness is close to the hot exhaust manifold and can become brittle, melt, or corrode over time, leading to a short or open circuit. Water intrusion into the connector can also cause a short.
How to confirm: Visually inspect the wiring harness and connector leading to the sensor for any signs of melting, chafing, or corrosion. Unplug the connector and check for 12-volt power on the harness side with the key on. Lack of power points to a problem upstream towards the relay/fuse box.
Typical fix: Repair or replace the damaged section of the wiring harness or the connector.
Est. part cost: $10-$50
Rare But Worth Checking
- Faulty Engine Control Module (ECM): This is extremely rare. The ECM's internal driver for the heater circuit can fail, but this should only be considered after all other possibilities (sensor, fuse, wiring) have been definitively ruled out by a professional. In some Toyota platforms, a P0031 code has been documented alongside requests for Skid Control ECU replacement, as noted in NHTSA ODI #10531943.
Diagnosis Steps
- Read the code with an OBD-II scanner to confirm P0031 is the primary code.
- Open the fuse box in the engine compartment and locate the fuse for the Air/Fuel heater (often labeled 'A/F HTR' or 'EFI MAIN'). Visually inspect the fuse and test for continuity. Replace it if it's blown. This is the most common and cheapest fix.
- If the fuse is good, locate the Bank 1, Sensor 1 A/F sensor. On the 2.5L 4-cylinder, it's on the front of the exhaust manifold. On the 3.5L V6, it's on the rear bank (firewall side), which is much harder to access.
- Inspect the sensor's wiring harness and connector for any visible damage, such as melting, fraying, or corrosion.
- Disconnect the sensor. With the ignition key in the 'ON' position (engine off), use a multimeter to check for 12V power at the heater circuit pins on the vehicle's harness connector. If there is no voltage, the problem is in the wiring or relay.
- If power is present, use the multimeter set to Ohms to measure the resistance across the two heater pins on the sensor itself (these are typically the two wires of the same color). A good sensor should read between 0.8 and 1.8 ohms. A reading of OL (Open Loop/infinite) or near 0 ohms indicates the sensor has failed.
- If the sensor tests good and power is present at the harness, there may be an issue with the ground side of the circuit or, rarely, the ECM itself.
Parts You'll Likely Need
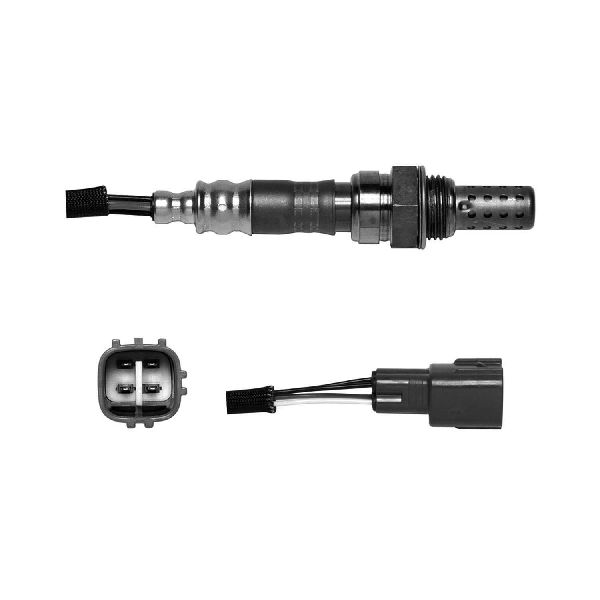
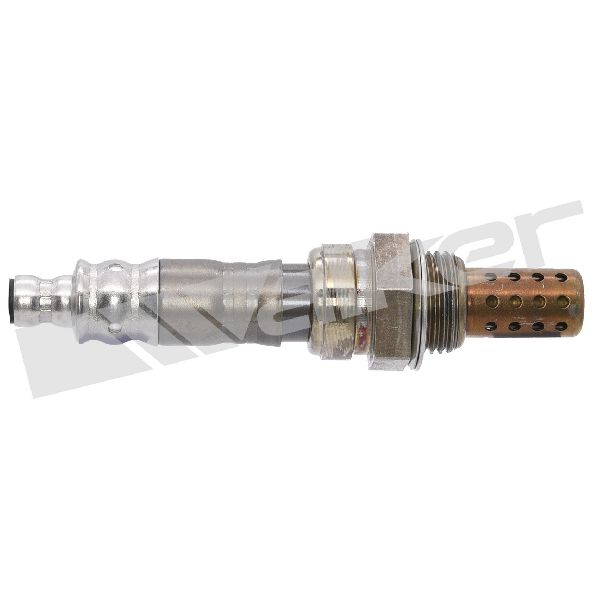
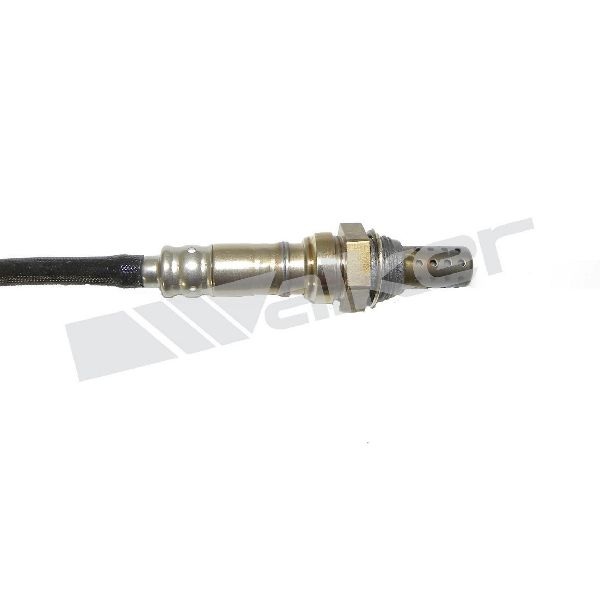
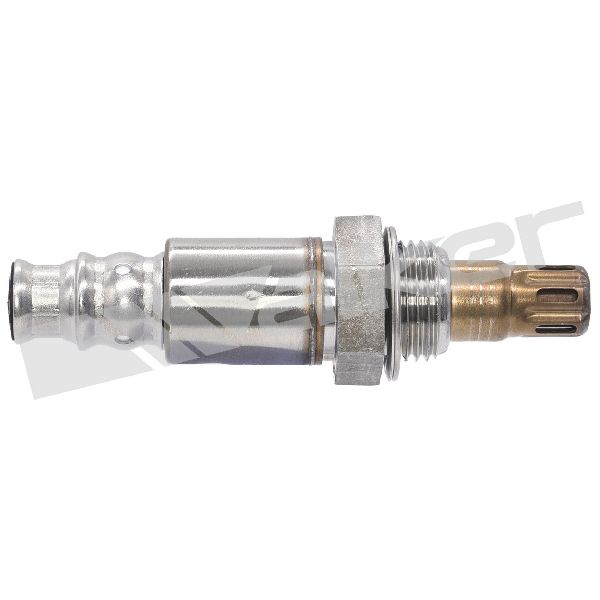
- Air/Fuel Ratio Sensor (Bank 1, Sensor 1)
(OEM #89467-06160, 89467-33180)— The internal heater element fails from age and heat cycles, which is the direct cause of the P0031 code in most cases.
Trusted brands: Denso (OEM)
OEM price range: $180-$260
Aftermarket price range: $80-$150
Related Codes That Often Appear With This One
- P0051 — This code is for 'HO2S Heater Control Circuit Low (Bank 2, Sensor 1)'. If you have a V6 engine and see both P0031 and P0051, the problem is almost certainly a shared power source, like a blown A/F heater fuse or a bad relay, not two failed sensors.
- P2195 — As noted in NHTSA ODI #10573840, this code can appear alongside P0031 when the A/F sensor on the exhaust manifold is failing.
Mechanic-Grade Diagnostic Values
- A/F Sensor Heater Circuit Resistance — expected: 0.8 - 1.4 ohms at 20°C (68°F). Failure: A reading of OL (infinite resistance) or near zero ohms indicates a failed heater element.
- A/F Sensor Heater Current Draw — expected: Above 0.8 Amps. Failure: If the heater current is less than 0.8 A, the ECM interprets this as a malfunction and sets DTC P0031.
- Harness Connector Voltage (Key On, Engine Off) — expected: Approximately 12V (battery voltage) between the power wire (typically black) and chassis ground.. Failure: No voltage indicates a problem with the EFI relay, A/F HTR fuse, or the wiring from the fuse block.
- ECM Connector Pin Voltages (Key On, Engine Off) — expected: Pin 1: ~12V, Pin 2: ~5.8V, Pin 3: ~2.9V, Pin 4: ~3.3V (Note: these values are from a user's diagnostic video and may vary slightly).. Failure: Significant deviation from these voltages after confirming the sensor and wiring are good could point towards an ECM issue.
Scan Tool Commands That Help
- Toyota Techstream: Active Test: 'A/F Control' — This function allows a technician to command the fuel mixture rich or lean (e.g., -12.5% to +25%) and observe the A/F sensor's voltage response in live data. A healthy sensor should respond almost instantly (within 1.1 seconds). While not a direct test of the P0031 heater circuit, a non-responsive sensor during this test would further condemn the sensor assembly as a whole.
Wiring & Ground Locations
- Engine Ground (2AR-FE) — On the 2.5L 4-cylinder, a primary ground point for the engine harness is located on the cylinder head, often near the intake manifold. Another is a strap from the valve cover to the chassis near the strut tower.. A poor engine ground can cause a variety of spurious sensor codes, including P0031, due to incorrect voltage references. While not a common cause, it should be checked if wiring and the sensor test good.
- Engine Ground (2GR-FE) — On the 3.5L V6, there are two main grounding points from the engine harness to the chassis, located on top of each valve cover, which then attach to the body near the strut towers.. Similar to the 4-cylinder, a corroded or loose ground on the V6 can create electrical issues that might manifest as a sensor circuit fault. These are critical to check, especially on the firewall-side bank (Bank 1).
- A/F Sensor Connector (A8 / B7) — This is the 4-pin connector that attaches the A/F sensor to the main engine harness. On the 2AR-FE, it is easily visible near the front of the engine.. This is where all diagnostic electrical tests are performed. The heater circuit pins are typically the two wires of the same color (e.g., two black wires). Technicians test for 12V power on the harness side and resistance on the sensor side at this connector.
Real Owner Repair Stories
- YouTube channel 'DIY with Steven' (2004 Toyota Camry (similar 2AZ-FE engine and diagnostics)) — Check Engine Light with code P0031.
❌ Tried (didn't work) The previous owner had replaced the A/F sensor, but the code remained. The video creator initially tried replacing the sensor with a used OEM Denso sensor from a junkyard, which only kept the code off for a few hours before it returned, this time as P0032 (Heater Circuit High).
✅ What actually fixed it The sensor that the previous owner had installed was an incorrect aftermarket part with the wrong heater resistance (testing way too high). Replacing it with the correct OEM-spec Denso sensor resolved the code. - CamryForums.com user 'ML32413' (2003 Toyota Camry LE 2.4L (2AZ-FE)) — Persistent P0031 code since acquiring the vehicle. The light would come on in 15 seconds from a cold start, but take 15-20 miles to reappear if reset when warm.
❌ Tried (didn't work) Replaced the Bank 1 Sensor 1 with the correct Denso part (234-9041).
✅ What actually fixed it The user did not post a final resolution, but the thread highlights a critical diagnostic step: checking for specific voltages at the sensor plug with the key on (12V on black wire, 3.3V between orange/brown, 3.0V between white/brown), which points towards diagnosing a wiring or ECM issue when a new sensor doesn't fix the problem. - NHTSA ODI #10901973 — An owner of a similar Toyota model reported that the engine light with error P0031 would not go out even after the O2 sensor had been replaced 7 to 10 times and the system was reset, indicating a deep-seated electrical or compatibility issue.
OEM Part Supersession History
89467-06160→This part number is cross-referenced and directly replaced by Denso 234-9128.— Standard part lifecycle and supplier branding.
Heads up: While Denso is the OEM, be wary of counterfeit Denso sensors sold on platforms like eBay or Amazon. Fake sensors often have high out-of-box failure rates or fail prematurely. Purchase from reputable auto parts retailers. All genuine Toyota A/F sensor part numbers begin with the prefix '89467'.Denso 234-9128→N/A— This is the current, widely available direct-fit OEM replacement part.
Heads up: This part number is listed as a replacement for multiple Toyota OEM numbers, including 89467-06160, 89467-33220, 89467-33230, and others, making it a versatile fit for many vehicles in this generation.
Diagnostic Flowchart
Used vs. New Parts: Buying Guide for This Vehicle
When a used part is the smart pick: For this repair, buying a used Air/Fuel Ratio sensor is generally NOT recommended. These sensors are wear-and-tear items with a finite lifespan determined by heat cycles and mileage. A used sensor from a junkyard carries a high risk of being near the end of its life or failing shortly after installation, as seen in some repair stories. The cost savings are minimal compared to the labor and frustration of having to do the job twice.
Donor-vehicle mileage cap: roughly under 50000 miles for the part to have meaningful remaining life.
What to inspect on the donor part:
- If buying used is the only option, source it from a vehicle with the lowest possible mileage.
- Inspect the connector for any signs of corrosion, melted plastic, or damaged pins.
- Check the sensor's metal body for extreme rust or physical damage.
- If possible, test the heater circuit resistance with a multimeter before purchase; it should be within the 0.8-1.4 ohm range.
OEM-only on this vehicle (don't cheap out):
- Air/Fuel Ratio Sensor
Aftermarket brands forum-validated for this vehicle:
- Denso (This is the Original Equipment Manufacturer, so a Denso-branded part is equivalent to the Toyota-boxed part).
Brands owners have reported issues with on this vehicle:
- Bosch (for this specific application)
- Universal sensors (that require splicing wires)
- Unbranded or suspiciously cheap sensors from online marketplaces (high risk of being counterfeit or having incorrect resistance).
Real Owner Stories
Aggregated from forums and TSBs cited above. Mileages and costs reflect what owners reported in those sources.
2005 Toyota Camry
Symptoms: The check engine light was on and the P0031 code persisted even after an initial repair attempt.
What fixed it: The problem continued after installing a Bosch universal sensor. The issue is resolved by using the correct OEM Denso part.
Source hint: CamryForums.com - Thread 'replaced o2 sensor and still check engine'
2003 Toyota Camry
Symptoms: Check engine light on with a P0031 code.
What fixed it: After troubleshooting by checking voltages, the owner fixed the issue by replacing the sensor with a new Denso part.
Source hint: CamryForums.com - Thread 'Frustrated with P0031 code!'
Toyota Avalon (Shared Platform)
Symptoms: After owning a certified pre-owned vehicle for one month, the check engine light illuminated.
What fixed it: NHTSA ODI #10573840 notes that the P0031 code was present on one of the AF sensors located on the RH exhaust manifold.
Related OBD-II Codes
Frequently Asked Questions
Where is the Bank 1, Sensor 1 Air/Fuel sensor located on my 2014 Toyota Camry?
I need to replace the A/F sensor for P0031 on my Camry. Can I use a cheaper aftermarket brand?
My 2015 Camry has a P0031 code. What is the very first thing I should check before buying parts?
How can I test the old Air/Fuel sensor on my Camry to confirm it's bad before I buy a new one?
To save money, can I install a used A/F sensor from a junkyard on my 2012 Camry?
Does this P0031 issue also affect other Toyota or Lexus models?
Helpful Videos
We Have This Part in Stock


The information in this article is provided for general reference and educational purposes only. Vehicle specifications, procedures, and part compatibility can vary by production date, trim level, and region. Always consult your vehicle's factory service manual and verify part numbers before purchasing or performing repairs. Safety-critical components such as airbags, seat belts, and braking systems should be installed by a qualified professional.
- Toyota Camry:
- 🧭 Diagnostic Flowchart
- 🎬 Helpful Videos
- 🛍️ Shop This Part
- What's Unique About the 2012-2017 Toyota Camry
- Symptoms You May Notice
- Most Likely Causes
- Rare But Worth Checking
- Diagnosis Steps
- Parts You'll Likely Need
- Related Codes That Often Appear With This One
- Mechanic-Grade Diagnostic Values
- Scan Tool Commands That Help
- Wiring & Ground Locations
- Real Owner Repair Stories
- OEM Part Supersession History
- Used vs. New Parts: Buying Guide for This Vehicle
- Real Owner Stories
- 2005 Toyota Camry
- 2003 Toyota Camry
- Toyota Avalon (Shared Platform)
- Related OBD-II Codes
- Frequently Asked Questions
- 🎟️ Get 5% Off