
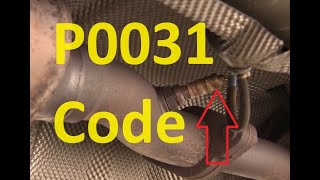
P0031 on 2004-2009 Toyota Prius: Heater Circuit Causes and Fixes for Bank 1 Sensor 1
On a 2004-2009 Prius, code P0031 almost always means the internal heater in the upstream Air/Fuel Ratio (A/F) sensor has failed. The most reliable fix is to replace the sensor with an OEM-quality part like Denso 234-9056. Expect to pay ~$120-$180 for the part, with a DIY difficulty of 3/5, as access can be tight.
- P0031 on a Gen 2 Prius points directly to a problem with the heater circuit for the front Air/Fuel Ratio sensor.
- The most likely cause, by a wide margin, is a failed heater element inside the sensor itself.
- Confirm the failure by measuring the sensor's heater resistance; it should be between 1.8 and 3.4 ohms. An open circuit (OL) means it's bad.
- Replacement with a Denso (234-9056) or genuine Toyota (89467-47010) sensor is the most reliable fix.
- While the sensor is the common failure, always check the A/F HEATER fuse and EFI M relay before replacing parts.
- Access is tight; removing the windshield cowl assembly is a common trick to make the job much easier.
What's Unique About the 2004-2009 Toyota Prius
The 2004-2009 second-generation Prius uses a wideband Air/Fuel (A/F) ratio sensor instead of a conventional oxygen sensor in the upstream position. These sensors are critical for the efficiency of the hybrid system but their internal heaters are a very common failure point. While the code is generic, on this specific Prius, it almost always points directly to the A/F sensor itself 🎬 Watch: Understanding the causes and fixes for code P0031 having failed, rather than more complex wiring or computer issues. Owners on forums like PriusChat widely report this as a straightforward, albeit common, repair, with many successful DIY stories.
Symptoms You May Notice
- Check Engine Light is on
- Slightly reduced fuel economy, especially on short trips
- Vehicle may remain in 'open loop' fuel control for longer after a cold start
- Failure to pass an emissions test
- Replacing the downstream (rear) oxygen sensor. P0031 specifically refers to Bank 1 Sensor 1, which is the upstream Air/Fuel Ratio sensor on the exhaust manifold.
- Using a cheap, non-OEM sensor. Prius models are known to be sensitive to the quality of their A/F sensors, and using a generic part can lead to the code returning or other performance issues.
Most Likely Causes
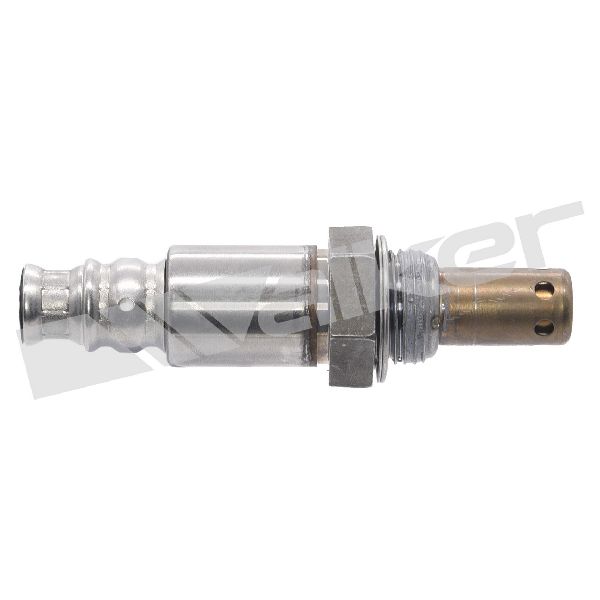
- Failed Air/Fuel Ratio Sensor Heater Element 🔴 High Probability → Shop Oxygen Sensor The internal heater element is a known wear item and is subjected to thousands of heat cycles, causing it to eventually burn out and create an open circuit, similar to a light bulb filament failing.
How to confirm: Disconnect the sensor and measure the resistance between the two heater terminals (+B and HT). The factory specification is 1.8 to 3.4 Ohms at 68°F (20°C). A reading of infinite resistance (OL on a multimeter) confirms the heater has failed. These are typically the two wires of the same color on the sensor's pigtail.
Typical fix: Replace the upstream Air/Fuel Ratio sensor. The recommended replacement is the Denso 234-9056, which is the OEM equivalent.
Est. part cost: $120-$180 - Blown Fuse or Faulty Relay ⚪ Low Probability
How to confirm: Check the 'EFI M' relay and the 'A/F HEATER' fuse in the engine compartment fuse/relay box. Test the relay for proper function and check the fuse for continuity.
Typical fix: Replace the blown fuse or faulty relay.
Est. part cost: $5-$25 - Damaged Wiring or Connector ⚪ Low Probability The wiring harness is close to the hot exhaust manifold and can become brittle or damaged over time. It can also be damaged by road debris or during unrelated service.
How to confirm: Visually inspect the wiring harness leading to the A/F sensor for any signs of melting, chafing, or corrosion at the connector. With the sensor disconnected and ignition on, check for battery voltage (approx. 12V) at the harness-side connector's power wire.
Typical fix: Repair the damaged section of the wiring harness or clean/replace the connector.
Est. part cost: $10-$50
Rare But Worth Checking
- Faulty Engine Control Module (ECM): This is extremely rare. The ECM is the last component to suspect. All other possibilities, especially the sensor itself, its wiring, and fuses/relays, should be exhaustively ruled out before considering the ECM as the cause.
Diagnosis Steps
- Read the code with an OBD-II scanner to confirm P0031 is the only code present.
- Inspect the A/F HEATER fuse and the EFI M relay in the main fuse box located in the engine compartment. Replace if blown or faulty.
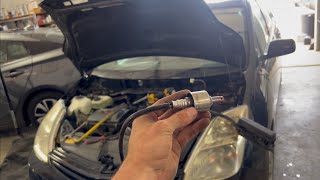
- Locate the upstream A/F sensor on the front of the exhaust manifold. It is accessible from the top of the engine bay, though removing the plastic cowl panel may provide 🎬 See this easy walkthrough for accessing and replacing the sensor better access.
- Visually inspect the sensor's connector and wiring harness for obvious damage, such as melting, fraying, or corrosion.
- Disconnect the sensor's electrical connector (Connector A5).
- Using a multimeter set to Ohms (Ω), measure the resistance between the heater terminals on the SENSOR side of the connector (terminals +B and HT).
- Compare the reading to the factory specification of 1.8 - 3.4 Ohms at 68°F (20°C). If the reading is infinite (OL), the sensor's internal heater is broken and the sensor must be replaced. This is the most common outcome.
- If the resistance is within spec, the sensor heater is likely good. Turn the vehicle's power switch to ON (IG) and carefully measure the voltage on the HARNESS side of the connector between the heater power wire (+B) and a known good ground. It should be approximately 12 volts (battery voltage).
- If there is no voltage, there is a wiring or fuse/relay issue between the fuse box and the sensor. If voltage is present and the sensor resistance is good, the issue may be in the control wire (HT) to the ECM or the ECM itself, which is very rare.
Parts You'll Likely Need
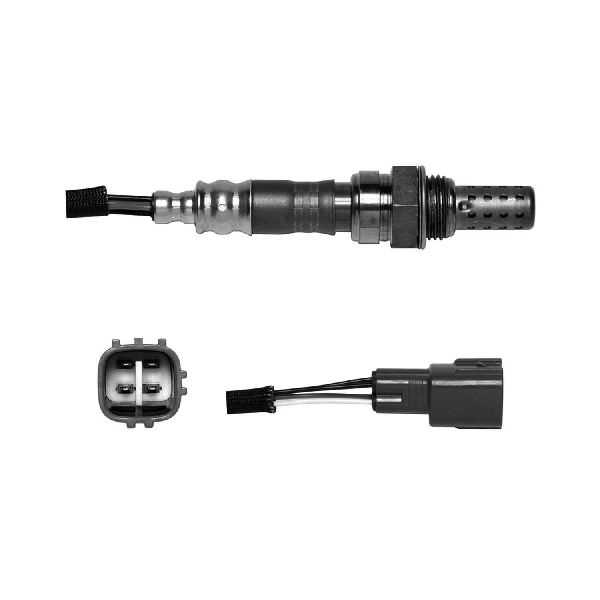
- Air/Fuel Ratio Sensor (Bank 1, Sensor 1)
(OEM #89467-47010)— This is the upstream sensor located before the catalytic converter. Its internal heater element is the most common failure point for code P0031.
Trusted brands: Denso (OEM)
OEM price range: $160-$220
Aftermarket price range: $120-$180 - Oxygen Sensor Socket Set — A special slotted socket is often required to remove and install the sensor without damaging its wire.
Trusted brands: Lisle, OEMTOOLS
Aftermarket price range: $15-$30
Platform-Specific Known Issues
- Accessing the Sensor: While the sensor is visible from the top of the engine bay, access for tools can be tight. Some owners and mechanics recommend removing the plastic windshield cowl and wiper 🎬 Watch: How to remove the upstream sensor on a Gen 2 assembly for much easier access to the sensor on the exhaust manifold.
- Owner Repair Story: A user on PriusChat with an '08 Prius received code P0031. After confirming the sensor was the issue, they replaced the front air/fuel ratio sensor with an OEM part from an online Toyota parts dealer, which permanently resolved the check engine light.
Mechanic-Grade Diagnostic Values
- A/F Sensor Heater Resistance — expected: 1.8 to 3.4 Ω at 20°C (68°F). Failure: Infinite resistance (Open Line) or a value significantly outside the specified range.
- ECM Voltage to Heater Circuit — expected: 9 to 14 V (Battery Voltage). Failure: 0V or significantly low voltage, indicating a problem with the EFI M relay or wiring from the relay.
- A/F Sensor Heater Current (Live Data) — expected: 1.8 to 3.4 A (at 20°C [68°F]) during initial warmup. Failure: Less than 0.8 A (triggers P0031)
Hidden / Shadow Codes Worth Checking
- Mode $06, TID $07, CID $81: This refers to the onboard diagnostic monitor for the 'Maximum A/F sensor heater current'. Advanced scan tools can read this data to see the raw test values the ECM is using to determine if the heater circuit is failing, even before a code is set. (see via An OBD-II scan tool that supports Mode 06 data display.)
Scan Tool Commands That Help
- Toyota Techstream / Intelligent Tester II: Active Test for A/F Sensor Heater — While not explicitly detailed for P0031 diagnosis in all manuals, Techstream's 'Active Test' menu allows technicians to command specific components on and off. This could be used to command the A/F heater circuit on while monitoring voltage or current to verify the ECM driver, relay, and wiring are functioning correctly.
- Toyota Techstream / Intelligent Tester II: Read Freeze Frame Data — This is a critical first step for a professional. It shows the exact engine conditions (temperature, speed, etc.) when the P0031 code was first triggered, which can provide clues about the nature of the fault (e.g., if it only happens on a cold start).
Wiring & Ground Locations
- A5 / A6 Connector — The electrical connector for the upstream A/F sensor itself, located on a bracket on the side of the engine block, below the intake manifold.. This is the primary connection point to test the sensor's heater resistance (pins +B and HT) and to check for voltage from the harness side.
- E5 / E4 Connector — One of the main electrical connectors at the Engine Control Module (ECM).. This is where a technician would perform advanced diagnostics, such as checking for voltage at pin HA1A (E5-7) to confirm the ECM is sending the control signal for the heater.
- EFI M Relay — Located within the main engine compartment fuse/relay box (sometimes called the 'integration relay'). It is not a standalone relay but part of a larger block.. This relay supplies the 12V power to the A/F sensor's heater circuit. A failure of this relay will cut power to the heater and cause a P0031, even if the sensor and fuse are good.
- A/F HEATER Fuse — Located in the engine compartment fuse/relay box.. This fuse protects the heater circuit. A blown fuse is an uncommon but possible cause for the code and should be checked early in the diagnosis.
Real Owner Repair Stories
- YouTube user 'Fix it Angel' (2nd Generation Toyota Prius (specific year not mentioned, but applies to the range)) — Check Engine Light with P0031.
❌ Tried (didn't work) Attempting to use a standard O2 sensor socket that would not fit due to clearance issues.
✅ What actually fixed it The owner cut the wire on the old sensor to remove it with a standard wrench. For the new sensor, they carefully de-pinned the electrical connector, passed the wires through a box-end wrench or O2 sensor socket, threaded the sensor in, and then re-pinned the connector. This clever workaround avoided the need for a specialized, slim-profile O2 sensor socket. - PriusChat forum members (2004-2009 Toyota Prius) — Check Engine Light with P0031.
❌ Tried (didn't work) Attempting to access the sensor from underneath the car with limited success and difficulty., Following the official service manual suggestion to remove the hybrid inverter, which is extremely time-consuming.
✅ What actually fixed it The widely recommended method by experienced owners is to remove the plastic windshield cowl and the entire wiper motor assembly. This provides clear, direct access to the A/F sensor from the top of the engine bay, making removal and replacement significantly easier.
Documented NHTSA Reports
- Persistent Light Issues: In a report for a similar Toyota model, NHTSA ODI #10901973 describes a situation where the check engine light remained on with a P0031 reading even after the O2 sensor was replaced multiple times and the system was reset.
- Related System Warnings: NHTSA ODI #10531943 notes a case where a P0031 code for the A/F sensor (Bank 1, Sensor 1) appeared alongside VSC and TRAC OFF warning lights, requiring sensor replacement.
- Specific Sensor Location: A manufacturer-related report (NHTSA ODI #10573840) clarifies that the P0031 code specifically targets the Air/Fuel sensor on the exhaust manifold, rather than both sensors simultaneously.
OEM Part Supersession History
89467-47010→89467-47010— No supersession.
Heads up: According to Toyota parts catalogs and forum research, this part number is specific to the 2004-2009 Prius. Using A/F sensors from other Toyota models (e.g., Camry, Corolla, or other Prius generations) is not advised, as they are not interchangeable and will likely cause persistent codes or performance issues.
Model Year Variations Within This Range
- 2004-2005: Some owner reports suggest that on the earliest Gen 2 models, accessing the A/F sensor from underneath the vehicle may be slightly more feasible than on later 2006-2009 models. However, for all years in this generation, the most recommended and reliable access method is from the top after removing the wiper cowl assembly.
Diagnostic Flowchart
Other Known Issues on This Vehicle
Issues unrelated to this code that are worth knowing about as an owner of this generation:
- Combination Meter Failure 🟠 Medium — Common at higher mileage (>100k miles), especially in colder climates. The digital dashboard fails to illuminate intermittently or completely. (Ref: Toyota TSB T-SB-0172-09 Rev2 addresses this issue and Toyota later offered a Warranty Enhancement Program (ZEP).)
- Inverter Coolant Pump Failure 🔴 High — A very common failure point across all model years of this generation. The electric pump fails, causing the hybrid system to overheat and shut down, illuminating the master warning light. (Ref: Subject of Safety Recall C0U and Limited Service Campaign 90K.)
- Brake Actuator Assembly Failure 🔴 High — Internal malfunctions in the brake actuator assembly can cause warning lights (ABS, VSC, Brake) and changes in brake feel or noise. (Ref: Toyota issued a Warranty Enhancement Program (ZG1) to extend coverage for this component.)
- Excessive Oil Consumption 🟠 Medium — Becomes noticeable at higher mileage (often over 100k-150k miles). Caused by carbon buildup on low-tension piston rings. Consumption can be as high as 1 quart per 1,000 miles or more. (Ref: No official recall, but widely acknowledged by Toyota as possible (up to 1.1 qt per 600 miles is considered 'normal' in the manual). A stuck PCV valve can also contribute.)
- HID Headlight Failure (if equipped) 🟡 Low — The wiring and ballasts for the optional HID headlights are prone to failure, causing intermittent or total loss of one or both headlights.
Used vs. New Parts: Buying Guide for This Vehicle
When a used part is the smart pick: A used Air/Fuel ratio sensor is almost never a smart choice, as the internal heater is a known wear item. It should only be considered as a last resort if the part is from a verified, very low-mileage donor vehicle (e.g., under 50,000 miles) and the cost is negligible.
Donor-vehicle mileage cap: roughly under 50000 miles for the part to have meaningful remaining life.
What to inspect on the donor part:
- Verify the donor vehicle's mileage.
- Inspect the part for any physical damage, heavy corrosion, or cracks in the ceramic.
- Check that the wiring pigtail is not brittle, melted, or frayed.
- Ensure the electrical connector pins are clean and free of corrosion.
OEM-only on this vehicle (don't cheap out):
- Air/Fuel Ratio Sensor
Aftermarket brands forum-validated for this vehicle:
- Denso (is the Original Equipment Manufacturer)
Brands owners have reported issues with on this vehicle:
- Bosch (often reported as problematic for this specific application)
- Unbranded or generic 'eBay/Amazon' sensors
Real Owner Stories
Aggregated from forums and TSBs cited above. Mileages and costs reflect what owners reported in those sources.
2008 Prius 1.5L — 9000 miles
Symptoms: Check Engine Light (CEL) came on.
What fixed it: Replacement of the front air/fuel ratio sensor with a Toyota OEM part.
Source hint: PriusChat: Thread 'Trouble Code - P0000 P0031' (2009)
2005 Prius 1.5L
Symptoms: Check Engine Light and a knocking sound from the engine; dealer quoted $932 for repair.
What fixed it: DIY replacement of the A/F sensor using an O2 sensor socket and removing the inverter for access.
Source hint: PriusChat: Thread 'P0031 code on '05 Prius. Also knocking sound from the engine' (2018)
2004-2009 Prius 1.5L
Symptoms: The P0031 code persisted even after replacing both O2 sensors.
What fixed it: The community advised replacing the non-OEM sensors with genuine OEM or Denso sensors to resolve the code.
Source hint: Reddit (r/prius): Thread 'Replaced O2 Sensors, still get the P0031 code. Now what?' (2018)
Related OBD-II Codes
Frequently Asked Questions
Which specific replacement sensor is recommended for the 2004-2009 Prius to fix P0031?
Where is the A/F heater fuse located on my Prius?
Is there a trick to accessing the upstream A/F sensor on the 1NZ-FXE engine?
What are the factory resistance specifications for the sensor heater circuit?
Can a P0031 code cause my Prius to fail an emissions test?
Are there any TSBs or warranty enhancements for other common Prius issues like the dashboard or brakes?
Helpful Videos


We Have This Part in Stock


The information in this article is provided for general reference and educational purposes only. Vehicle specifications, procedures, and part compatibility can vary by production date, trim level, and region. Always consult your vehicle's factory service manual and verify part numbers before purchasing or performing repairs. Safety-critical components such as airbags, seat belts, and braking systems should be installed by a qualified professional.
- Toyota Prius:
- 🧭 Diagnostic Flowchart
- 🎬 Helpful Videos
- 🛍️ Shop This Part
- What's Unique About the 2004-2009 Toyota Prius
- Symptoms You May Notice
- Most Likely Causes
- Rare But Worth Checking
- Diagnosis Steps
- Parts You'll Likely Need
- Platform-Specific Known Issues
- Mechanic-Grade Diagnostic Values
- Hidden / Shadow Codes Worth Checking
- Scan Tool Commands That Help
- Wiring & Ground Locations
- Real Owner Repair Stories
- Documented NHTSA Reports
- OEM Part Supersession History
- Model Year Variations Within This Range
- Other Known Issues on This Vehicle
- Used vs. New Parts: Buying Guide for This Vehicle
- Real Owner Stories
- 2008 Prius 1.5L — 9000 miles
- 2005 Prius 1.5L
- 2004-2009 Prius 1.5L
- Related OBD-II Codes
- Frequently Asked Questions
- 🎟️ Get 5% Off