
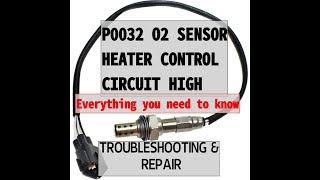
P0032 on 2007-2017 Toyota Camry: Heater Circuit High Causes and Fixes
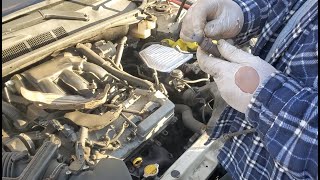
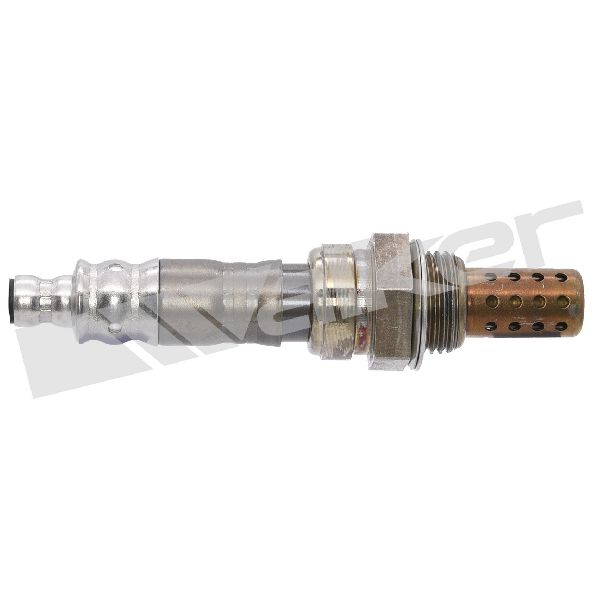
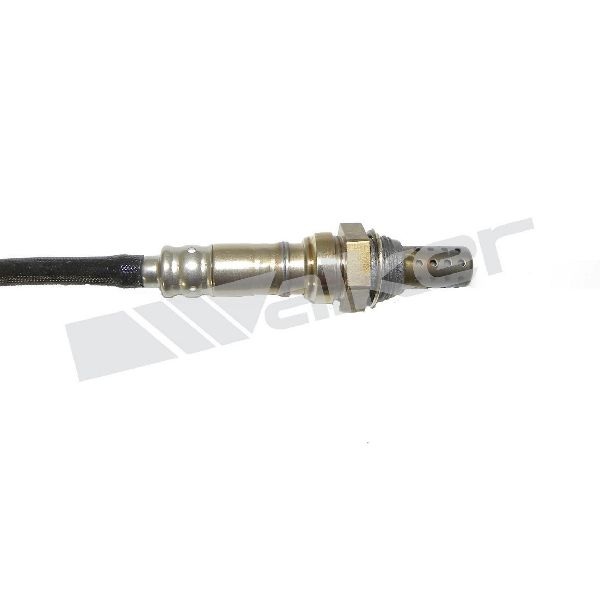
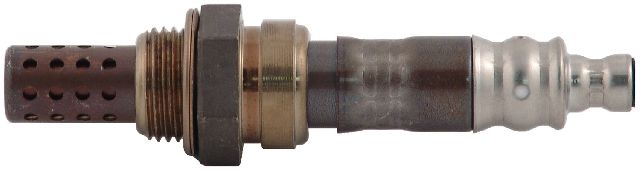
P0032 on a Toyota Camry almost always means the Bank 1, Sensor 1 Air/Fuel Ratio sensor has failed. This is the upstream sensor in the exhaust manifold. On 4-cylinder engines it's easy to access; on the V6 it's on the firewall side and difficult. Replacing the sensor with an OEM Denso part is the most common fix, costing around $120-$200 for the part. Ensure you have the correct sensor for your specific emissions type (PZEV vs. Federal), as they are not interchangeable.
- P0032 on your Camry means the heater in your front Air/Fuel sensor (Bank 1, Sensor 1) has likely failed.
- For 4-cylinder engines, the sensor is easy to replace. For the V6, it's a difficult job due to its location on the rear of the engine.
- You MUST use an OEM brand sensor (like Denso or NTK). Cheaper aftermarket sensors will likely cause the Check Engine Light to come back on.
- Before buying a part, confirm your engine (4-cyl vs V6) and for 2007-2011 models, check if you have a California (PZEV) emissions vehicle, as the part may be different.
What's Unique About the 2007-2017 Toyota Camry
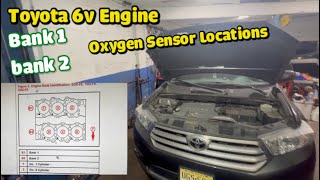
On the Toyota Camry, this code is an extremely common maintenance issue, especially on vehicles over 100,000 miles, due to the finite lifespan of the A/F sensor's internal heater. The key platform difference is the location of Bank 1 Sensor 1 based on the engine. 🎬 Watch: See exactly where Bank 1 and Bank 2 are located. On 4-cylinder models (2AZ-FE, 2AR-FE), it's easily accessible on the front exhaust manifold. On the 3.5L V6 (2GR-FE), 'Bank 1' is the rear cylinder bank against the firewall, making the sensor notoriously difficult to replace. 🎬 Watch: How to replace the Bank 1 sensor on V6 models. Using the correct OEM (Denso) sensor is critical, as these cars are known to reject aftermarket sensors and cause the code to return. Furthermore, for the XV40 generation (2007-2011), there are different sensors for California (PZEV) and Federal (ULEV) emissions vehicles which have different internal resistances and are not interchangeable.
Generation note: This guide covers the XV40 (2007-2011) and XV50 (2012-2017) Camry generations. The meaning of the code is the same for both. The primary differences are the specific engines (2.4L 2AZ-FE vs. 2.5L 2AR-FE) and the corresponding A/F sensor part numbers. For the 3.5L 2GR-FE V6, the difficult location of the Bank 1 sensor is consistent across both generations. The XV40 generation has a critical distinction between PZEV (California) and ULEV (Federal) emissions sensors that must be correctly identified.
Symptoms You May Notice
- Check Engine Light is on
- Decreased fuel economy
- Rough idle or engine hesitation, especially when cold
- Failed emissions test
- Vehicle may enter a default or 'limp' mode with reduced performance.
- Replacing the sensor with a cheap, off-brand aftermarket part. Toyota's ECM is very sensitive to the resistance and signal of the A/F sensor, and non-OEM parts frequently fail to work correctly, causing the P0032 code to return immediately.
- Installing the wrong emissions-type sensor on a 2007-2011 Camry. A PZEV (California emissions) vehicle requires a sensor with a different resistance value than a ULEV (Federal emissions) vehicle. Installing the wrong one will cause the code to persist even with a new part.
Most Likely Causes
- Failed Bank 1, Sensor 1 Air/Fuel Ratio Sensor 🔴 High Probability → Shop Oxygen Sensor The internal heater element in the Denso sensor has a finite lifespan and commonly fails after 80,000-110,000 miles, creating an open circuit that triggers the P0032 code. 🎬 Watch: A complete guide to troubleshooting and repairing the heater circuit.
How to confirm: Unplug the sensor and measure the resistance across the two heater circuit wires (usually the two same-colored wires, e.g., two black wires). A very high or infinite resistance reading (OL on a multimeter) indicates a failed heater element. The correct resistance is very low, typically between 1.8 and 3.4 ohms when cold (around 68°F/20°C) for a PZEV sensor. A Federal (non-California) sensor will have a lower resistance, around 0.9 to 1.2 ohms.
Typical fix: Replace the Bank 1, Sensor 1 Air/Fuel Ratio sensor. It is strongly recommended to use an OEM Denso or NTK part to ensure compatibility. Be sure to purchase the correct sensor for your vehicle's emissions type (PZEV or Federal).
Est. part cost: $120-$220 - Damaged Wiring or Corroded Connector 🟡 Medium Probability The sensor wiring is close to the hot exhaust manifold, making it susceptible to melting, chafing, or physical damage over time. The connector itself can also become brittle and fail.
How to confirm: Visually inspect the entire wiring harness from the sensor to the main engine harness. Look for melted insulation, frayed wires, or breaks. Unplug the connector and check for green or white corrosion on the pins. Check for 12V power at the harness-side connector with the ignition on.
Typical fix: Repair the damaged section of wire with a new connector pigtail or by soldering and heat-shrinking the break. Clean corroded connectors with an electrical contact cleaner.
Est. part cost: $10-$40 - Blown A/F Heater Fuse or Faulty Relay ⚪ Low Probability
How to confirm: Locate the fuse box in the engine compartment. On some models, this may be labeled as the 'EFI' fuse or a 20A-25A 'A/F' or 'A/F HEATER' fuse. Check the A/F HTR relay, which is often in the same under-hood fuse/relay box. Visually inspect the fuse or test for continuity with a multimeter. The relay can be tested by checking for resistance or swapping with a known-good relay.
Typical fix: Replace the blown fuse with a new one of the same amperage. If the new fuse blows immediately, it indicates a short circuit in the wiring that must be found and repaired. Replace the relay if it fails testing. This is more commonly associated with a P0031 (low circuit) code but can happen.
Est. part cost: $1-$30
Rare But Worth Checking
- Faulty Engine Control Module (ECM): → Shop Engine Control Module (ECM) This is very rare. Before suspecting the ECM, all other possibilities (sensor, wiring, fuses, relay) must be exhaustively ruled out. An ECM failure might also be accompanied by other unrelated trouble codes. In some extreme cases, a shorted sensor has been known to damage the ECM driver circuit.
Diagnosis Steps
- Read the code with an OBD-II scanner to confirm P0032 is the primary code.
- Identify your engine (4-cylinder or V6) to locate Bank 1, Sensor 1. For 4-cylinders, it's on the front manifold. For the V6, it's on the rear manifold against the firewall.
- For 2007-2011 models, determine if your vehicle is PZEV (California) or ULEV (Federal) emissions. A PZEV vehicle may have a sticker under the hood, and the sensor is typically mounted directly on top of the manifold, whereas the ULEV sensor is on the side.
- Visually inspect the sensor's wiring harness and connector for any signs of melting, chafing, or corrosion.
- Check the 'A/F HEATER' or 'EFI' fuse and the 'A/F HTR' relay in the engine compartment fuse box.
- If the wiring and fuse are okay, unplug the sensor connector. Use a multimeter to check for battery voltage (approx. 12V) on one of the heater pins in the harness-side connector (with the ignition on).
- With the sensor still unplugged, set the multimeter to Ohms (Ω) and measure the resistance between the two heater pins on the SENSOR side. A reading of 'OL' or infinite resistance means the heater is broken and the sensor must be replaced. A good PZEV sensor will have a resistance of 1.8 - 3.4 ohms, while a Federal sensor will be lower.
- If the sensor's resistance is good but the code persists, the problem lies in the wiring (specifically the ground circuit controlled by the ECM) or, rarely, the ECM itself.
Parts You'll Likely Need
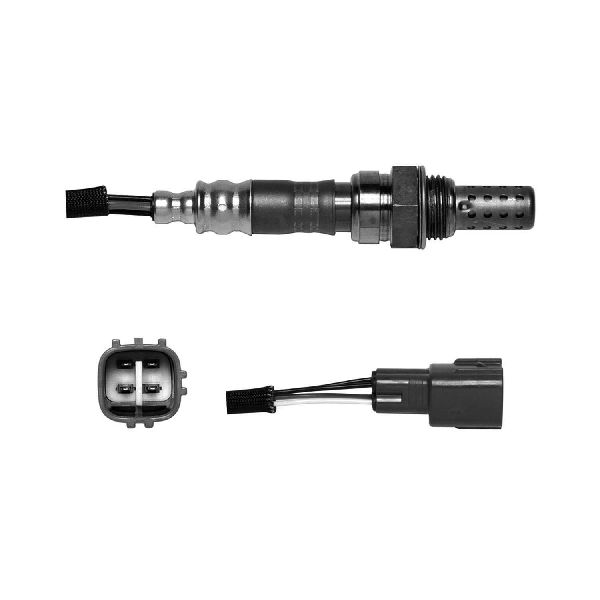
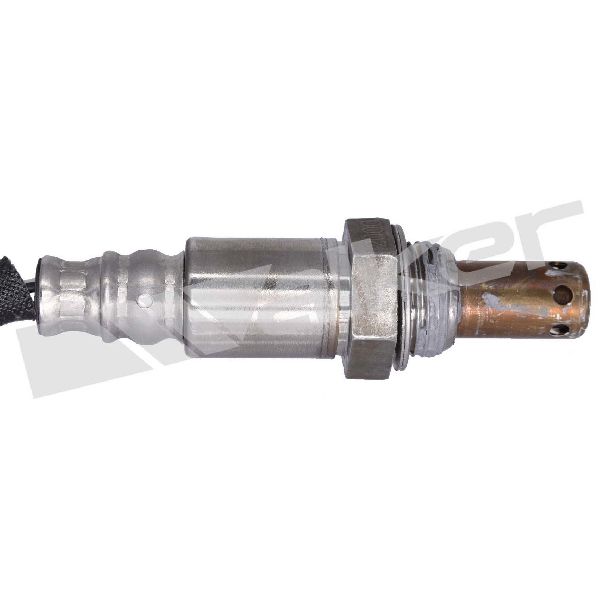
- Air/Fuel Ratio Sensor (Bank 1, Sensor 1)
(OEM #Denso 234-9049 (PZEV, 2.4L 2AZ-FE), Denso 234-9041 (Federal, 2.4L 2AZ-FE), Denso 234-9050 (V6 2GR-FE), Denso 234-9128 / Toyota 89467-06160 (2.5L 2AR-FE))— This is the most common failure point for code P0032. The internal heater element burns out, causing a high resistance/open circuit condition.
Trusted brands: Denso, NTK
OEM price range: $150-$220
Aftermarket price range: $80-$150
Related Codes That Often Appear With This One
- P0031 — This is the opposite code, for 'Heater Control Circuit Low.' Seeing this code instead, or having it appear after a faulty repair attempt, points to a short-to-ground instead of an open circuit.
- P0052 — On V6 models, this is the identical 'Heater Control Circuit High' code but for Bank 2 (front bank). If both codes appear together, it strongly suggests a common power supply issue, like a blown A/F heater fuse or a bad relay that serves both banks.
- P0137, P0138 — These codes relate to the downstream oxygen sensor (Bank 1 Sensor 2). While not directly related to the heater circuit of Sensor 1, they can sometimes appear if the primary A/F sensor failure has caused an excessively rich or lean condition for a prolonged period, affecting the catalytic converter's efficiency readings.
Platform-Specific Known Issues
- On the 3.5L V6 engine, the Bank 1 Sensor 1 is extremely difficult to access, requiring the removal of the air intake assembly and work in a tight space against the firewall. Some owners recommend using a crow's foot O2 sensor socket and multiple extensions to reach it from the side.
- Some XV40 (2007-2011) models have different A/F sensors depending on whether they are California (PZEV) or Federal (ULEV) emissions vehicles. Installing the wrong one will cause the code to persist. The PZEV sensor (e.g., Denso 234-9049) has a higher resistance (1.8-3.4 ohms) than the Federal sensor (e.g., Denso 234-9041, ~0.9-1.2 ohms).
- A DIY repair video series highlighted a real-world case where a mechanic was chasing a P0031/P0032 code on a Camry, only to discover they had been sold the wrong emissions-type sensor, which had the incorrect internal resistance.
Mechanic-Grade Diagnostic Values
- A/F Sensor Heater Element Resistance (PZEV / California Emissions) — expected: 1.8 to 3.4 Ω at 20°C (68°F). Failure: Infinite resistance (OL) indicates an open/failed heater element.
- A/F Sensor Heater Element Resistance (ULEV / Federal Emissions) — expected: 0.9 to 1.2 Ω at 20°C (68°F). Failure: Infinite resistance (OL) indicates an open/failed heater element. Using a PZEV sensor will also set a code.
- A/F Sensor Harness Connector Voltage (Heater Power) — expected: 9 to 14 V (Battery Voltage) with ignition ON. Failure: 0V indicates a problem with the fuse, relay, or power supply wiring.
- A/F Sensor Harness Connector Voltage (Signal Wires, KOEO) — expected: 3.0V on AF+ wire and 3.3V on AF- wire (disconnected, measured to ground). Failure: Incorrect or missing voltage points to a wiring issue or a faulty ECM.
Scan Tool Commands That Help
- Toyota Techstream: Active Test: 'Control the A/F Sensor Heater' — This command allows a technician to manually turn the A/F sensor heater circuit on and off. It's used to verify the integrity of the entire circuit, including the A/F heater relay, wiring, and the ECM's ability to control the ground side of the circuit. If the heater can be activated with the scan tool, it suggests the sensor itself is the likely culprit.
- Toyota Techstream: Active Test: 'A/F Control' — This test allows you to command a rich or lean mixture (+25% or -12.5%). While not directly for the heater circuit, observing the A/F sensor voltage PID respond quickly (e.g., below 3.0V for rich, above 3.35V for lean) confirms the sensor's signal portion is working, helping to isolate the fault to the heater circuit.
Wiring & Ground Locations
- A/F Heater Relay — Located in the under-hood fuse/relay box, often labeled 'Engine Room R/B' on the driver's side of the engine compartment.. This relay provides power to the A/F sensor's heater element. A failed relay will cut power to the heater, preventing it from warming up, though this would typically set a P0031 (low) code. However, intermittent failure or chattering contacts could potentially cause voltage spikes.
- A/F Heater Fuse — Located in the under-hood fuse/relay box. May be labeled 'A/F HEATER' (25A), 'A/F' (20A), or be part of the 'EFI' circuit fuse system.. This is the primary fuse protecting the heater circuit. A blown fuse means no power, which would cause a heater fault code.
- Engine Harness Ground (2GR-FE V6) — A key ground point for the engine harness is located on the side of the front cylinder head, underneath the throttle body area. Another ground strap runs from the valve cover to the frame near the strut tower.. The ECM controls the heater circuit by modulating the ground side. A poor or corroded engine ground can create high resistance in the circuit, potentially contributing to heater circuit codes and other sensor reading issues.
- A/F Sensor Connector (B7 or A5) — This is the 4-pin connector attached to the sensor itself. On a 2.4L, it's near the top rear of the engine. On a 3.5L, it's near the top right rear of the engine for Bank 1.. This is the primary point for testing. Pin 1 (HT) and Pin 2 (+B) are for the heater circuit. Checking for voltage and resistance at this connector is the main diagnostic step.
Real Owner Repair Stories
- YouTube channel 'Steven's DIY Auto Repair' (Toyota Camry (XV40, likely 2007-2009 2.4L 2AZ-FE), California Emissions (PZEV)) — Persistent P0031 code (Heater Circuit Low), but the diagnostic principle is identical for P0032.
❌ Tried (didn't work) Replacing the A/F sensor with a new one that was supposedly correct for the vehicle., Inspecting wiring for faults.
✅ What actually fixed it The root cause was being sold the wrong emissions-type sensor. The vehicle was a California (PZEV) model, but was sold a Federal (ULEV) sensor. The Federal sensor had the wrong internal resistance (~1.0 ohm) for what the ECM expected. Installing the correct Denso PZEV sensor (Part No. 234-9049) with the proper resistance (~2.4 ohms) immediately fixed the problem. - YouTube channel 'GT Flips' (2007 Toyota Camry V6 (3.5L 2GR-FE)) — P0031 code (Heater Circuit Low), but the repair process is identical for P0032.
✅ What actually fixed it Replacement of the Bank 1 Sensor 1 A/F sensor. The video details the difficult access, requiring removal of the airbox and intake manifold components to reach the sensor on the firewall side. They successfully used a 7/8" (22mm) open-end wrench instead of a special socket.
When the Usual Fixes Don't Work
- While a failed A/F sensor is the cause over 90% of the time, there are documented cases where the code persisted after replacement. The most common reason for this is the installation of an incorrect part, specifically the wrong emissions-type (PZEV vs. Federal) sensor on 2007-2011 models. One owner chased the fault for days, only to find the new sensor they installed had a resistance of 1.0 ohm (Federal spec) when their California-spec car required a sensor with ~2.4 ohms of resistance. Before condemning wiring or the ECM, it is critical to verify the installed part number and measure its heater resistance to confirm it matches the vehicle's requirements.
Model Year Variations Within This Range
- 2007-2011 (XV40 Generation): There is a critical difference between sensors for California Emissions (PZEV) and Federal Emissions (ULEV) vehicles. They have different internal heater resistances and are not interchangeable. The PZEV sensor (e.g., Denso 234-9049) has a resistance of 1.8-3.4 ohms, while the Federal sensor (e.g., Denso 234-9041) is lower. Using the wrong one will cause the code to persist.
- 2012-2017 (XV50 Generation): The 2.5L 2AR-FE engine became standard. While the PZEV/Federal distinction is less commonly an issue for these years, it's still crucial to verify the correct part number (e.g., Denso 234-9128) for the specific vehicle's VIN. The fuse for the circuit may be labeled 'EFI' instead of 'A/F Heater'.
Diagnostic Flowchart
Other Known Issues on This Vehicle
Issues unrelated to this code that are worth knowing about as an owner of this generation:
- Excessive Oil Consumption (2.4L 2AZ-FE Engine) 🔴 High — Very common on 2007-2009 models with the 2AZ-FE engine. Can start as early as 60,000 miles. Caused by faulty piston ring design. (Ref: Warranty Enhancement Program ZE7; TSB SB-0030-15R1. Toyota extended the warranty to cover piston and ring replacement for vehicles that failed an oil consumption test.)
- Melting/Sticky Dashboard 🟠 Medium — Common on 2007-2011 models, especially in hot climates. The dashboard material degrades, becoming shiny, sticky, and prone to cracking. (Ref: Warranty Enhancement Program ZE6. Toyota offered coverage for dashboard replacement for an extended period (until May 31, 2017, for primary coverage).)
- Torque Converter Shudder (XV50) 🟠 Medium — Affects some 2012-2014 models, causing a brief shudder or vibration under light acceleration between 25-50 mph. (Ref: LSC E03 (software update) and Warranty Enhancement CSP ZE5 (torque converter replacement). TSBs T-SB-0034-14 and T-SB-0312-17 describe the repair.)
- Sun Visor Drooping/Falling 🟡 Low — Extremely common across both generations. The internal plastic clip in the visor pivot breaks, causing the visor to not stay in the stowed position.
Used vs. New Parts: Buying Guide for This Vehicle
When a used part is the smart pick: For this specific repair, a used part is almost never a good choice for the sensor itself. However, obtaining a used wiring harness connector pigtail from a junkyard is a smart and cost-effective way to repair a melted or corroded connector.
Donor-vehicle mileage cap: roughly under 80000 miles for the part to have meaningful remaining life.
What to inspect on the donor part:
- For a connector pigtail, inspect for any signs of melting, brittleness, or corrosion on the pins.
- Ensure you cut a generous length of wire (4-6 inches) from the donor vehicle to make splicing easier.
- Verify the donor vehicle has the same engine and year range to ensure connector compatibility.
OEM-only on this vehicle (don't cheap out):
- Air/Fuel Ratio Sensor
Aftermarket brands forum-validated for this vehicle:
- Denso
- NTK
Brands owners have reported issues with on this vehicle:
- Unbranded, 'white-box' sensors from online marketplaces. These frequently have incorrect heater resistance values or slow response times that are incompatible with the Toyota ECM, causing the code to return.
Real Owner Stories
Aggregated from forums and TSBs cited above. Mileages and costs reflect what owners reported in those sources.
2010 Toyota Camry V6
Symptoms: Check Engine Light on with code P0032.
What fixed it: Replacing the Bank 1, Sensor 1 with a Denso 234-9050 part fixed the code instantly. The owner described it as a 'miserable job' that took 3 hours and required a 22mm crow's foot wrench, a universal joint, and about 2 feet of extensions.
Source hint: Reddit r/MechanicAdvice: A thread titled 'P0032 on 2010 Camry V6'
Toyota Camry
Symptoms: A persistent P0031/P0032 code that would not clear even after a new sensor was installed.
What fixed it: The root cause was an incorrect part. The mechanic had been sold the wrong emissions-type sensor which had an incorrect internal resistance. Installing the correct PZEV or Federal sensor for that specific vehicle resolved the issue.
Source hint: A DIY repair video series highlighted in vehicle_specific_issues
Toyota Camry V6
Symptoms: Check Engine Light on for P0032, with the original sensor being frozen in the exhaust manifold during the repair attempt.
What fixed it: The owner stressed that successfully removing the frozen sensor required using the correct combination of a specialized socket and extensions to get enough leverage in the very tight space.
Source hint: Camry Forums (camryforums.com)
2007-2017 Toyota Camry — ~95000 miles
Symptoms: Check Engine Light on and a noticeable decrease in fuel economy.
What fixed it: The issue was a failed internal heater element in the original Bank 1, Sensor 1. Replacing the sensor with a new OEM Denso part resolved the code. This failure is common between 80,000 and 110,000 miles.
Source hint: Common failure pattern described in common_causes
Related OBD-II Codes
Frequently Asked Questions
I have a 2010 Camry V6 and got code P0032. Where is the Bank 1, Sensor 1 located?
What tools are recommended for replacing the Bank 1 sensor on the V6 Camry?
I'm replacing the A/F sensor on my 2009 Camry. Does it matter which part I buy?
How can I test the old sensor to confirm it's the cause of my P0032 code?
I replaced the sensor but the Check Engine Light with P0032 came back. What should I check next?
What brand of replacement Air/Fuel Ratio sensor is recommended for a Toyota Camry?
Helpful Videos
We Have This Part in Stock


The information in this article is provided for general reference and educational purposes only. Vehicle specifications, procedures, and part compatibility can vary by production date, trim level, and region. Always consult your vehicle's factory service manual and verify part numbers before purchasing or performing repairs. Safety-critical components such as airbags, seat belts, and braking systems should be installed by a qualified professional.
- Toyota Camry:
- 🧭 Diagnostic Flowchart
- 🎬 Helpful Videos
- 🛍️ Shop This Part
- What's Unique About the 2007-2017 Toyota Camry
- Symptoms You May Notice
- Most Likely Causes
- Rare But Worth Checking
- Diagnosis Steps
- Parts You'll Likely Need
- Related Codes That Often Appear With This One
- Platform-Specific Known Issues
- Mechanic-Grade Diagnostic Values
- Scan Tool Commands That Help
- Wiring & Ground Locations
- Real Owner Repair Stories
- When the Usual Fixes Don't Work
- Model Year Variations Within This Range
- Other Known Issues on This Vehicle
- Used vs. New Parts: Buying Guide for This Vehicle
- Real Owner Stories
- 2010 Toyota Camry V6
- Toyota Camry
- Toyota Camry V6
- 2007-2017 Toyota Camry — ~95000 miles
- Related OBD-II Codes
- Frequently Asked Questions
- 🎟️ Get 5% Off