
P0036 on 2012-2017 Kia Rio: O2 Sensor Heater Circuit Causes and Fixes
On a 2012-2017 Kia Rio, code P0036 almost always means the internal heater in the downstream (post-catalytic converter) oxygen sensor has failed. The fix is to replace the sensor, which is a DIY-friendly job costing between $50 for an aftermarket part and $140 for an OEM sensor. Before replacing, check the 'SENSOR 1' 15A fuse in the engine bay fuse box.
- P0036 on a 2012-2017 Kia Rio almost certainly means the downstream O2 sensor (Bank 1 Sensor 2) needs to be replaced.
- This is a minor issue that won't stop you from driving, but it will cause you to fail an emissions test.
- Before replacing the sensor, perform a quick 2-minute check of the 'SENSOR 1' 15A fuse in the engine bay fuse box.
- The replacement is a beginner-friendly DIY job that requires an O2 sensor socket and access to the underside of the car.
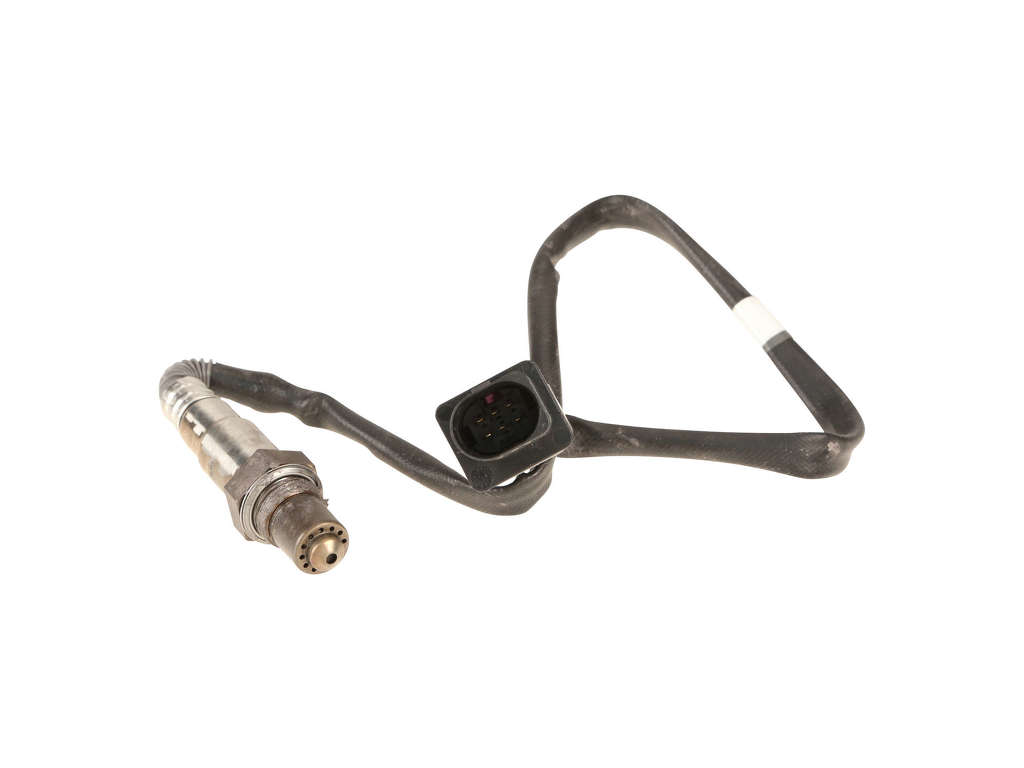
- Ensure you are buying the downstream (Sensor 2) sensor; its electrical connector is typically gray, while the upstream sensor's connector is black.
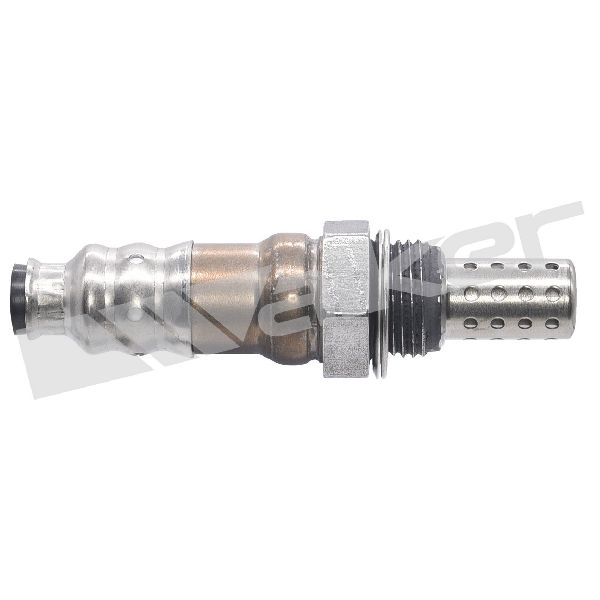
- The correct OEM part number is 39210-2B220, which is shared with the Hyundai Accent, Veloster, and Kia Soul.
What's Unique About the 2012-2017 Kia Rio
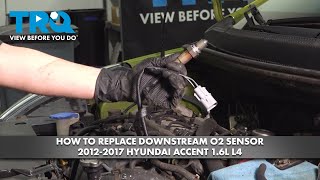
For the third-generation Kia Rio and its platform-mates (Hyundai Accent, Veloster), this code is a very common and straightforward issue. The 1.6L Gamma GDI engine's layout makes accessing the sensor's connector in the engine bay relatively easy, while the sensor itself is under the car. Unlike some complex diagnostic codes, P0036 on this platform points almost exclusively to the failure of the O2 sensor's internal heater element due to age and heat cycles. There are no widespread reports of complex wiring or ECU issues causing this specific code, making it a high-confidence diagnosis.
Symptoms You May Notice
- Illuminated Check Engine Light is the most common and often only symptom.
- Automatic failure of an emissions/smog test.
- Slight decrease in fuel economy, though it is rarely noticeable by the driver.
- Replacing the upstream (Bank 1 Sensor 1) oxygen sensor. This code specifically refers to Sensor 2, which is the downstream sensor after the catalytic converter.
- Replacing the catalytic converter. This code relates to the sensor's heater circuit, not the efficiency of the converter itself.
Most Likely Causes
- Failed Downstream Oxygen Sensor 🔴 High Probability → Shop Oxygen Sensor The internal heating element of the sensor is a common failure point over time due to constant, extreme heat cycles. This is a known wear item on many vehicles, including the Rio and its platform mates.
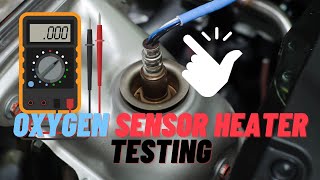
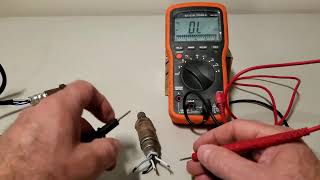
How to confirm: Disconnect the sensor and measure the resistance between the two same-colored wires (the heater circuit). A good heater on this platform should have a resistance between 8.0 and 14.0 ohms. Some service documents cite a wider range of 3-20 ohms, but an open circuit (infinite resistance or 'OL' on the multimeter) definitively confirms a failed heater.
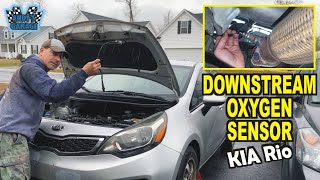
Typical fix: Replace the Bank 1 Sensor 2 (downstream) oxygen sensor. The connector is typically gray. Using penetrating oil on the threads and a specialized 22mm (7/8") O2 sensor socket is highly recommended. Torque the new sensor to approximately 29-36 lb-ft. 🎬 Watch: Step-by-step downstream O2 sensor replacement on a Kia Rio
Est. part cost: $50-$140 - Blown Fuse ⚪ Low Probability An electrical short in the sensor or its wiring can cause the fuse to blow as a protective measure.
How to confirm: Check the fuse box in the engine compartment. On the 2012-2017 Rio, this is often a 15A fuse labeled 'SENSOR 1'. Visually inspect if the fuse is blown.
Typical fix: Replace the blown fuse. If it blows again immediately, it indicates a short circuit in the wiring or the new sensor that must be diagnosed.
Est. part cost: $1-$5 - Damaged Wiring or Connector ⚪ Low Probability The wiring harness runs underneath the vehicle and is exposed to heat from the exhaust, moisture, and road debris, which can cause corrosion or physical damage over time. On some related Hyundai/Kia models, the harness is known to chafe against metal brackets.
How to confirm: Visually inspect the entire wiring harness from the sensor to the connector in the engine bay. Look for melted plastic, frayed wires, or corrosion on the connector pins. Check for stable 12V power at the harness connector with the key on.
Typical fix: Repair the damaged section of the wire or clean/replace the connector. Apply dielectric grease to the connector pins to prevent future corrosion.
Est. part cost: $10-$50
Rare But Worth Checking
- Faulty Powertrain Control Module (PCM): → Shop Engine Control Module (ECM) This is extremely rare. All other possibilities, including the fuse, wiring, and the sensor itself, must be exhaustively tested and ruled out before considering the PCM as the cause.
Diagnosis Steps
- Read the code with an OBD-II scanner to confirm P0036 is present.
- Visually inspect the downstream oxygen sensor's wiring harness and connector for any signs of melting, chafing, or corrosion. The sensor is located on the exhaust pipe after the catalytic converter.
- Locate the fuse box in the engine compartment and check the fuse for the oxygen sensor heater circuit (often a 15A fuse labeled 'SENSOR 1'). Replace it if it's blown.
- If the fuse and wiring are intact, disconnect the downstream O2 sensor connector (it's usually gray and located in the engine bay).
- Using a multimeter set to Ohms, test the resistance across the two heater pins on the sensor side of the connector (they are typically the two same-colored wires). A good heater should have a resistance between 8.0 and 14.0 Ohms. An infinite resistance reading (OL) means the heater circuit is open and the sensor must be replaced.
- If the sensor's resistance is good, check for 12V power at the corresponding pins on the vehicle's harness connector with the ignition key in the 'On' position. Lack of voltage points to a wiring or fuse issue upstream.
- If power is present and the sensor's heater circuit is good, the issue is likely a problem in the ground control wire leading back to the PCM, which may require more advanced diagnostics.
Parts You'll Likely Need
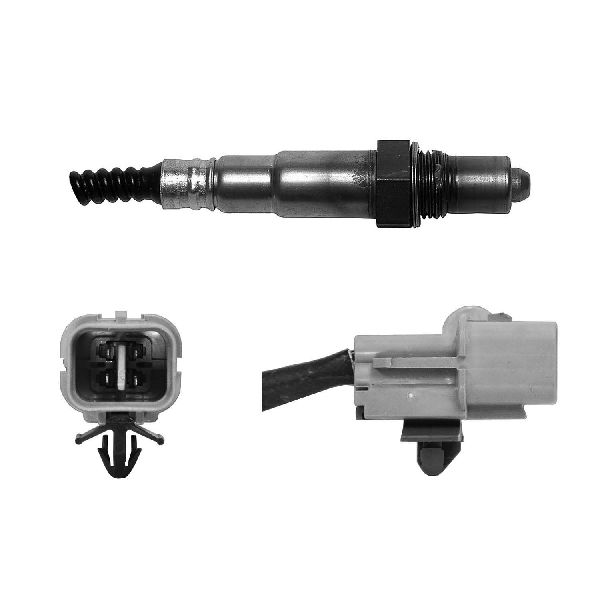
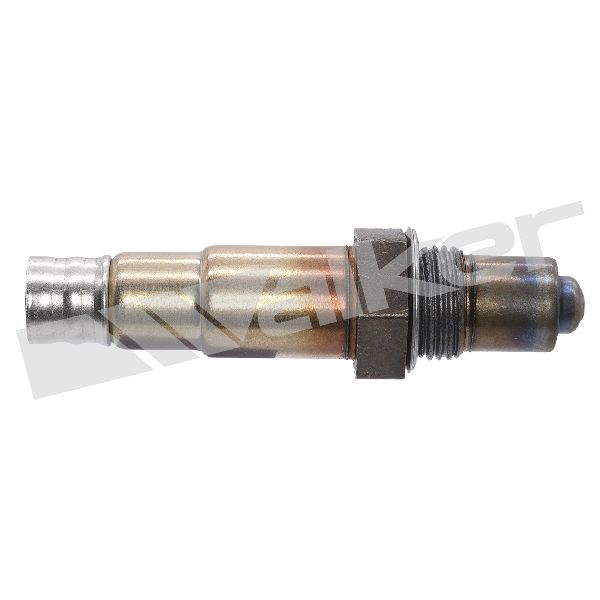
- Downstream Oxygen Sensor (Bank 1 Sensor 2)
(OEM #39210-2B220)— This is the most common cause of code P0036, as the internal heating element fails from heat and age.
Trusted brands: Kia/Hyundai (Genuine OEM), Denso, NGK/NTK, Bosch, Delphi
OEM price range: $130-$170
Aftermarket price range: $50-$90
Related Codes That Often Appear With This One
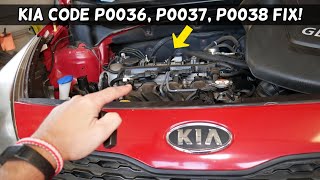
- P0037 — This code indicates 'HO2S Heater Control Circuit Low', which is a more specific version of the general circuit fault indicated by P0036. The cause and fix are identical. 🎬 See: Common causes and fixes for the P0036 code
- P0038 — This code indicates 'HO2S Heater Control Circuit High', pointing to a short circuit. The cause is often a wiring issue or an internal short in the sensor, but the diagnostic process is the same.
- P0054 — This code for 'HO2S Heater Resistance (Bank 1, Sensor 2)' directly points to a problem with the resistance of the heater element, which is the root cause of P0036.
Platform-Specific Known Issues
- Real Owner Experience: An owner of a 2015 Kia Rio with the 1.6L GDI engine reported experiencing a Check Engine Light with codes P0036, P0141, and P0136 all appearing at once. The fix was replacing the downstream oxygen sensor, confirming that multiple related codes often point to the single sensor component failure.
Mechanic-Grade Diagnostic Values
- Downstream O2 Sensor Heater Resistance — expected: 8.0 - 14.0 Ohms (ideal); 3 - 20 Ohms (acceptable range). Failure: Open circuit ('OL' on multimeter) or near zero Ohms (short circuit).
- Heater Circuit Power Supply Voltage — expected: ~12V (Battery Voltage) at the harness connector power pin with Key On, Engine Off.. Failure: Voltage below 9V or 0V indicates a problem with the fuse, relay, or supply wiring.
- Heater Circuit Control Signal — expected: The PCM provides a Pulse-Width Modulated (PWM) ground. When the heater is commanded on, the voltage on the control wire should drop to near 0V.. Failure: Voltage does not drop, indicating a potential open in the control wire or a faulty PCM driver.
- Heater Circuit Current Draw — expected: Approximately 0.5A - 2.0A when active.. Failure: Current significantly below this range triggers the P0036 code.
Hidden / Shadow Codes Worth Checking
- Mode 06, Test ID $81, Component ID $11: Corresponds to the O2 Sensor Heater Monitor for Bank 1, Sensor 2 on some generic OBD-II systems. It allows viewing of the raw test values and limits set by the ECU. (see via An advanced OBD-II scan tool capable of displaying Mode 06 test data.)
Scan Tool Commands That Help
- Kia GDS (Global Diagnostic System): Actuation Test / Vehicle S/W Management — Use this function to manually command the O2 sensor heater circuit on and off. This is useful for confirming the integrity of the wiring and the PCM's driver circuit after the sensor and fuse have been verified as good.
Wiring & Ground Locations
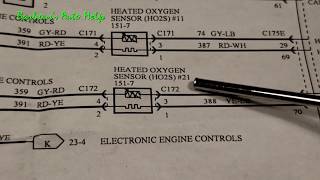
- ECM Connector Pin 25 — At the main Engine Control Module (ECM) connector.. Based on wiring diagrams for the G4FD engine, this pin (Gray wire) is the control for the downstream oxygen sensor heater. Probing here can confirm if the PCM is sending the control signal, isolating a wiring break from a PCM failure.
- Main Engine Ground — A primary ground strap connecting the engine/transmission assembly to the vehicle chassis.. While not a direct cause, a corroded or loose main engine ground can create electrical noise and resistance issues, potentially leading to intermittent or incorrect sensor faults. Ensuring this is clean and tight is a key step in any electrical diagnosis.
- Chassis Ground Point (Heater Circuit) — Some wiring diagrams show the heater circuit ground path connecting to a chassis bolt near the fuel tank mounting area.. Corrosion at this specific ground point can cause high resistance in the heater circuit, triggering P0036 even with a good sensor.
Real Owner Repair Stories
- YouTube user comment on a Hyundai i20 (platform mate) (Hyundai i20 with similar engine architecture) — Persistent P0036 code.
❌ Tried (didn't work) Replacing the downstream oxygen sensor.
✅ What actually fixed it The root cause was found to be rodent damage to the O2 sensor wiring harness. The chewed wires created an open circuit. Repairing the damaged section of the harness resolved the code. - AliExpress user review/guide for a Kia Sportage (Kia Sportage (similar platform)) — Consistent P0036 code, even after clearing.
❌ Tried (didn't work) Initial assumption was a failed sensor.
✅ What actually fixed it The problem was severe green/white corrosion on the copper terminals inside the main harness connector, located under the passenger-side floor panel. Moisture had wicked into the connector over time. The fix was to thoroughly clean the male and female pins with an electronics cleaner and a brass brush, then apply dielectric grease.
Documented NHTSA Reports
- NHTSA ODI #11581569: An owner of a vehicle from the same manufacturer reported a P0036 code for Bank 1 Sensor 2 appearing alongside P0138 and fuel system codes. The report notes that frequent fuel pump and injector services were required due to system defects, which can lead to major damage.
OEM Part Supersession History
39210-2B220→39210-2B220— This part number appears to be consistent for the entire 2012-2017 generation with the 1.6L engine.
Model Year Variations Within This Range
- 2015-2017: The Kia Rio received a mid-cycle refresh for the 2015 model year, which included cosmetic updates to the front and rear bumpers, grille, and new wheel designs. Interior changes included new trim and an updated audio/navigation system. However, these changes did not affect the 1.6L GDI engine, emissions components, or wiring related to the P0036 code. The diagnosis and repair remain identical across the 2012-2017 range.
Diagnostic Flowchart
Other Known Issues on This Vehicle
Issues unrelated to this code that are worth knowing about as an owner of this generation:
- Engine Knocking / Potential Rod Bearing Failure 🔴 High — A known issue with some Gamma GDI engines, though less widespread than on the larger Theta II engines. Can manifest as a rhythmic knocking sound that increases with RPM. (Ref: While major recalls targeted Theta II engines, owners of 1.6L GDI engines have reported similar issues. Diagnosis often involves isolating noise from accessories first.)
- Failing Crankshaft Position Sensor 🟠 Medium — The crankshaft position sensor (part # 39180-2B000) has a high failure rate on the 1.6L Gamma GDI engine, often due to heat soak. Symptoms include stalling when hot and a tachometer that drops to zero.
- Worn MDPS Steering Coupler 🟡 Low — A very common issue across many Hyundai/Kia models of this era. A small, rubber flexible coupling in the electronic power steering column wears out, causing a clicking or knocking sound in the steering wheel when turning, and a loose or rattling feeling over bumps. (Ref: Kia issued a warranty extension (10 years/unlimited miles) for this part on many models. (e.g., Customer Satisfaction Program CS1604))
- Premature Suspension Wear 🟡 Low — Owners report premature wear of shocks, struts, and bushings, especially on vehicles driven on rough roads, leading to clunking noises and a harsh ride.
- Radiator Fan Motor Failure 🟠 Medium — The radiator fan motor is prone to premature failure, which can lead to engine overheating, especially in traffic or hot weather. Typically occurs between 60,000 and 100,000 miles.
- HECU Electrical Short Fire Risk 🔴 High — Affects a very wide range of Kia models, including the 2012-2017 Rio. An electrical short in the Hydraulic Electronic Control Unit (HECU) can cause an engine compartment fire while parked or driving. (Ref: NHTSA Recall 23V594000)
Used vs. New Parts: Buying Guide for This Vehicle
When a used part is the smart pick: For this repair, a used part is only recommended for the wiring harness connector (pigtail). If your original connector is melted or corroded, sourcing a clean pigtail from a junkyard vehicle is a cost-effective repair.
Donor-vehicle mileage cap: roughly under 100000 miles for the part to have meaningful remaining life.
What to inspect on the donor part:
- For a connector pigtail, ensure the plastic is not brittle or cracked.
- Check that the locking tab is intact.
- Inspect the pins to ensure they are straight and free of any corrosion.
- Ensure you get at least 6 inches of wire to make splicing easy.
OEM-only on this vehicle (don't cheap out):
- While not strictly required, using an OEM oxygen sensor (Kia/Hyundai P/N: 39210-2B220) is often recommended for best fitment and longevity, though top-tier aftermarket brands are generally reliable.
Aftermarket brands forum-validated for this vehicle:
- Denso
- NGK / NTK
- Bosch
Brands owners have reported issues with on this vehicle:
- Unnamed, no-brand 'white box' parts from online marketplaces should be avoided, as their internal heater elements and sensor cells may not meet OEM specifications, leading to premature failure or other codes.
Real Owner Stories
Aggregated from forums and TSBs cited above. Mileages and costs reflect what owners reported in those sources.
2015 Kia Rio 1.6L GDI
Symptoms: Check Engine Light illuminated with codes P0036, P0141, and P0136 all appearing at the same time.
What fixed it: Replacement of the downstream oxygen sensor.
Source hint: vehicle_specific_issues - Real Owner Experience
2014 Kia Rio
Symptoms: Just purchased used and needs a few repairs including the Check Engine Light.
What fixed it: The context mentions this vehicle 'needs a few' repairs but the specific resolution for this owner is not detailed beyond the general fix of replacing the downstream sensor.
Source hint: owner_reports - r/MechanicAdvice
Related OBD-II Codes
Frequently Asked Questions
What is the specific resistance range for a good heater circuit on a 2012-2017 Kia Rio downstream O2 sensor?
Where is the fuse for the oxygen sensor heater located on my Rio, and what is it labeled?
Is there a specific part number for the downstream oxygen sensor on the 1.6L Gamma GDI engine?
Does the 2012-2017 Kia Rio have any major fire-related recalls I should be aware of while checking my wiring?
My steering is clicking while I drive to get my O2 sensor fixed; is this related to P0036?
What color is the connector for the Bank 1 Sensor 2 oxygen sensor on this vehicle?
Helpful Videos

We Have This Part in Stock


The information in this article is provided for general reference and educational purposes only. Vehicle specifications, procedures, and part compatibility can vary by production date, trim level, and region. Always consult your vehicle's factory service manual and verify part numbers before purchasing or performing repairs. Safety-critical components such as airbags, seat belts, and braking systems should be installed by a qualified professional.
- Kia Rio:
- 🧭 Diagnostic Flowchart
- 🎬 Helpful Videos
- 🛍️ Shop This Part
- What's Unique About the 2012-2017 Kia Rio
- Symptoms You May Notice
- Most Likely Causes
- Rare But Worth Checking
- Diagnosis Steps
- Parts You'll Likely Need
- Related Codes That Often Appear With This One
- Platform-Specific Known Issues
- Mechanic-Grade Diagnostic Values
- Hidden / Shadow Codes Worth Checking
- Scan Tool Commands That Help
- Wiring & Ground Locations
- Real Owner Repair Stories
- Documented NHTSA Reports
- OEM Part Supersession History
- Model Year Variations Within This Range
- Other Known Issues on This Vehicle
- Used vs. New Parts: Buying Guide for This Vehicle
- Real Owner Stories
- 2015 Kia Rio 1.6L GDI
- 2014 Kia Rio
- Related OBD-II Codes
- Frequently Asked Questions
- 🎟️ Get 5% Off