
P0036 on 2007-2013 Mitsubishi Outlander: O2 Sensor Heater Circuit Causes and Fixes
This code indicates a problem with the heater circuit in the downstream oxygen sensor (Bank 1, Sensor 2). The most common fix is replacing the sensor itself. On the 3.0L V6, this sensor is on the rear (firewall side) of the engine, after the catalytic converter. On the 2.4L I4, it is the only downstream sensor. Expect to pay $40-$90 for an aftermarket sensor and $120-$200 for an OEM part.
- P0036 almost always points to a failed downstream oxygen sensor (Bank 1, Sensor 2) or its wiring.
- On the 3.0L V6, Bank 1 is the rear bank near the firewall. Ensure you are diagnosing the correct sensor.
- Before replacing the sensor, always perform a quick visual inspection of the wiring for melting/damage and check the related fuse (typically 15A).
What's Unique About the 2007-2013 Mitsubishi Outlander
For the 2007-2013 Outlander, the key difference is identifying the correct sensor location based on your engine. On the 4B12 2.4L I4 engine, 'Bank 1' is the only bank of cylinders, so Sensor 2 is the single downstream sensor located after the catalytic converter. On the 6B31 3.0L V6 engine, 'Bank 1' is the rear bank, located near the firewall, which can make accessing the sensor slightly more challenging. Mistaking Bank 1 for the more accessible front bank (Bank 2) is a common diagnostic error on the V6 model.
Symptoms You May Notice
- Check Engine Light is illuminated.
- Possible slight decrease in fuel economy over time, though often not noticeable.
- Vehicle will fail an emissions inspection.
- Replacing the wrong oxygen sensor (e.g., replacing the front Bank 2 sensor on a V6 instead of the rear Bank 1 sensor).
- Replacing the sensor without checking for a blown fuse or damaged wiring first.
Most Likely Causes
- Failed Bank 1, Sensor 2 Oxygen Sensor 🔴 High Probability → Shop Oxygen Sensor The internal heater element within the oxygen sensor is a common failure point due to constant heat cycles and exposure to exhaust gases. This is the most frequent cause of P0036.
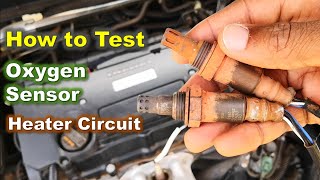
How to confirm: Disconnect the sensor and measure the resistance across the two heater circuit pins using a multimeter. An open circuit 🎬 Watch: How to test a bad O2 sensor heater element (infinite resistance) or a value far outside the manufacturer's specification indicates a failed heater. A typical resistance is between 4 and 30 ohms, but check the service manual for exact specs.
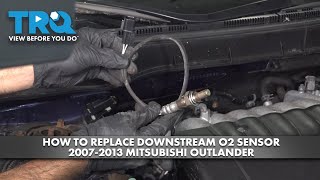
Typical fix: Replace the Bank 1, Sensor 2 oxygen sensor. Using an O2 sensor socket (22mm or 7/8&q 🎬 See this step-by-step downstream O2 sensor replacement walkthroughuot;) is highly recommended. Applying penetrating oil to the threads before removal can prevent damage.
Est. part cost: $40-$200 - Damaged Wiring or Connector 🟡 Medium Probability The sensor wiring is routed near hot exhaust components and is exposed to road debris, which can cause wires to melt, break, or corrode over time. The connector itself can also become contaminated or damaged.
How to confirm: Visually inspect the entire wiring harness from the O2 sensor connector to where it joins the main engine harness. Look for any signs of melting, chafing, corrosion in the connector pins, or breaks. Check for 12V power and ground at the connector with the key on.
Typical fix: Repair the damaged section of wire or replace the connector pigtail.
Est. part cost: $10-$30 - Blown Fuse ⚪ Low Probability A short circuit in the wiring or the sensor itself can cause the associated fuse to blow.
How to confirm: Check the fuse boxes, one located in the engine bay and one in the driver's side footwell. Consult your owner's manual or the fuse box lid diagram for a fuse labeled 'O2 Heater', 'HO2S', 'A/F Sensor', or a related engine control fuse. The fuse is typically 15A. Visually inspect the fuse or test it for continuity.
Typical fix: Replace the blown fuse with one of the same amperage. If the new fuse blows immediately, a short circuit is present that must be diagnosed.
Est. part cost: $1-$5
Rare But Worth Checking
- Faulty Engine Control Module (ECM): → Shop Engine Control Module (ECM) This is very rare. The ECM's internal driver for the heater circuit can fail. All other possibilities, especially the sensor and its wiring, should be exhaustively ruled out before considering ECM replacement.
Diagnosis Steps
- Scan for any other DTCs that may be present.
- Visually inspect the Bank 1, Sensor 2 oxygen sensor's wiring harness and connector for any obvious signs of damage, such as melting, corrosion, or loose connections.
- Locate and check the fuse for the oxygen sensor heater circuit. It will be in either the engine bay or interior fuse panel, often labeled 'O2 Heater' or similar and typically rated at 15A.
- If the wiring and fuse are okay, disconnect the O2 sensor connector.
- Use a multimeter to measure the resistance of the heater circuit on the sensor side of the connector. A reading of infinite resistance (open) or near-zero resistance (short) confirms a bad sensor. A good sensor usually reads between 4-30 ohms.
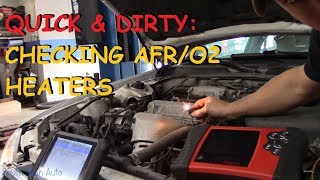
- With the key on and engine off, check for 12V 🎬 Watch: How to test an O2 heater circuit power and a good ground on the vehicle harness side of the connector. If either is missing, the wiring is the problem.
- If power and ground are present and the sensor's resistance is bad, replace the oxygen sensor.
- If power or ground is missing, trace the wiring back to the ECM or power source to find the break or short.
- After any repair, clear the code and perform a drive cycle to ensure the fix was successful.
Parts You'll Likely Need
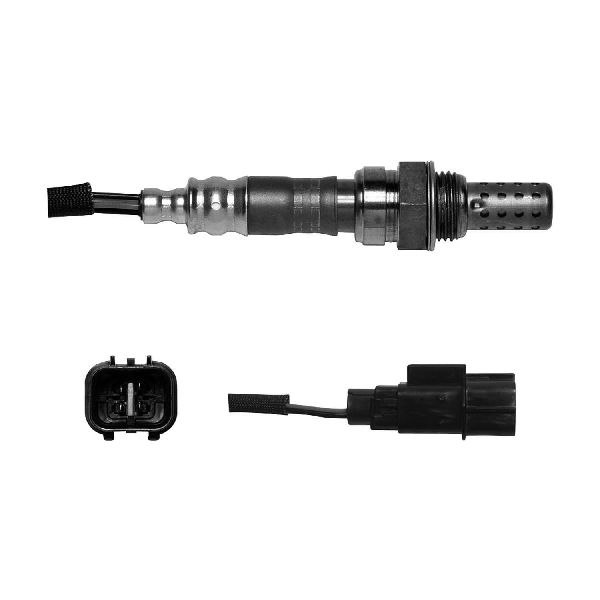
- Downstream Oxygen Sensor (Bank 1, Sensor 2)
(OEM #6B31 V6: 1588A165. 4B12 I4: 1588A228 or 1588A144 (Verify with VIN).)— This is the component that contains the heater element reported as faulty by the P0036 code. The internal heater is the most common failure point.
Trusted brands: Denso (e.g., 234-4656 for V6), NGK/NTK, Bosch
OEM price range: $120-$200
Aftermarket price range: $40-$90
Technical Service Bulletins (TSBs) & Recalls
- TSB-18-54-003: While not directly for P0036, this TSB addresses reprogramming the ETACS (body control module) on 2007-2013 Outlanders for electrical issues like flickering dome lights. It highlights that the ETACS controls many vehicle functions and can be a source of unusual electrical faults.
Platform-Specific Known Issues
- On the 3.0L V6, access to the Bank 1 (rear) sensor is tight. It is often best reached from underneath the vehicle after soaking the sensor threads with penetrating oil.
- Some owners have reported chasing this code after replacing the sensor, only to find the issue was a bad connection or a faulty, non-OEM replacement part. Using a direct-fit sensor from Denso or NTK is strongly advised.
Mechanic-Grade Diagnostic Values
- O2 Sensor Heater Element Resistance — expected: 4.5 - 8.0 Ω at 20°C (68°F). Failure: A reading of infinite resistance (Open Loop) or a value outside this specific range indicates a failed heater element.
- O2 Sensor Heater Circuit Current Draw — expected: Greater than 0.17 Amps. Failure: If the ECM detects a current draw of less than 0.17 A for 2 seconds, it will trigger a fault. This indicates an open circuit or a failed heater.
- Voltage at O2 Sensor Connector (Harness Side) — expected: Approximately 12V (Battery Voltage) at the power pin with Key On, Engine Off.. Failure: No voltage indicates a blown fuse or a break in the power supply wire from the MFI relay.
Scan Tool Commands That Help
- Professional Scan Tool (e.g., MUT-III, high-end Autel/Launch): O2 Heater Actuation Test / Bidirectional Control — After confirming the sensor and wiring appear intact, a technician can use this function to command the ECM to turn the O2 heater on and off. This allows for monitoring the circuit's current draw and voltage in real-time to see if the ECM driver and the circuit are functioning correctly, helping to isolate a faulty ECM from a wiring or sensor issue.
Wiring & Ground Locations
- G12 / G14 / G15 — Various points in the left side and left front of the engine compartment.. The O2 sensor heater circuit relies on a solid ground connection to function. Corrosion or a loose connection at these main engine compartment grounds can cause high resistance in the circuit, tricking the ECM into setting a P0036 code even if the sensor itself is good.
- C-20 — A 4-pin black connector located under the instrument panel, part of the pass-through harness from the engine bay.. Wiring diagrams label this as the connector for the 'Oxygen sensor (rear)'. A fault here is an edge case, but water intrusion or pin corrosion inside the cabin at this connector could cause an intermittent open or short in the heater circuit, leading to a P0036 that is difficult to diagnose by only inspecting under the vehicle.
- MFI Relay — Located in the engine room relay box.. The Main Fuel Injection (MFI) relay supplies power to the O2 sensor heater circuit. While a failure of this relay would likely cause other more severe running issues and codes, a corroded terminal or partially failed contact specific to the O2 heater feed could theoretically cause this code.
Real Owner Repair Stories
- Synthesized from multiple forum threads (e.g., North American Motoring, BobIsTheOilGuy) (Various Japanese vehicles, including Mitsubishi, experiencing O2 heater codes like P0036.) — Check Engine Light with P0036 comes on. No other drivability issues.
❌ Tried (didn't work) Replacing the O2 sensor with a cheap, universal, or non-recommended brand (often Bosch is mentioned in this context for Japanese cars) aftermarket sensor.
✅ What actually fixed it The code returned shortly after the initial replacement. The problem was only resolved after replacing the sensor a second time with a direct-fit, OEM-equivalent brand like Denso or NTK.
Model Year Variations Within This Range
- 2010+: For the 2.4L 4-cylinder engine, models with California Emissions (PZEV) may have a different downstream sensor location or part number compared to Federal emissions models. Part listings specify 'Located After Secondary Catalyst; Calif. Emissions' for some sensors, indicating a different exhaust configuration. It is critical to verify the correct part using the vehicle's VIN, especially for 2010 and newer 2.4L models.
Diagnostic Flowchart
Other Known Issues on This Vehicle
Issues unrelated to this code that are worth knowing about as an owner of this generation:
- Premature CVT Transmission Failure/Whining (4-cylinder models) 🔴 High — Common issue, particularly on models where fluid changes are neglected. Whining noises may appear that increase with acceleration. (Ref: TSB-20-23-001RV4 addresses shudder/surge conditions.)
- Failing ETACS Module (Body Control Module) 🟠 Medium — Can cause erratic behavior of electrical components like wipers, lights, or door locks. Replacement can be costly as it often requires dealer programming. (Ref: TSB-18-54-003 was issued to reprogram the ETACS for flickering dome lights on 2007-2013 Outlanders.)
- Worn Front Lower Control Arm Bushings 🟠 Medium — A common source of squeaking or rattling noises from the front suspension, especially when going over bumps. Can lead to alignment issues and premature tire wear.
- Leaking Water Pump (V6 models) 🔴 High — The water pump on the 6B31 V6 is driven by the timing belt. A leak can cause overheating and, if it fails, can damage the timing belt, leading to catastrophic engine failure. It is recommended to replace the water pump whenever the timing belt is serviced.
- Faulty Crankshaft Position Sensor 🟠 Medium — Can cause intermittent no-start or stalling conditions. It is noted as being difficult to access on the V6 engine.
- Thin Paint / Clear Coat Flaking 🟡 Low — Owners have reported issues with paint chipping or flaking more easily than expected. TSB-20-42A-005 addresses stains under the transport film but not widespread flaking. (Ref: TSB-20-42A-005)
Used vs. New Parts: Buying Guide for This Vehicle
When a used part is the smart pick: For this repair, a used part is almost never a smart choice for the sensor itself. However, sourcing a used wiring connector pigtail or a section of the engine harness from a junkyard is a perfectly acceptable and cost-effective repair for damaged wiring, provided the donor part is in excellent condition.
Donor-vehicle mileage cap: roughly under 100000 miles for the part to have meaningful remaining life.
What to inspect on the donor part:
- For wiring: Check for flexible, non-brittle insulation. Ensure there is no melting, chafing, or previous repair attempts (e.g., tape, butt connectors).
- For connectors: The locking tab must be intact. Look inside for clean, non-corroded pins. The weather seal should be pliable and not cracked.
OEM-only on this vehicle (don't cheap out):
- While not strictly 'OEM-only', the strong consensus from professional mechanics and forum users is to use either the genuine Mitsubishi part or a direct-fit sensor from the original equipment manufacturers, Denso or NTK.
Aftermarket brands forum-validated for this vehicle:
- Denso
- NGK / NTK
Brands owners have reported issues with on this vehicle:
- Universal sensors (that require splicing wires)
- Cheaper, off-brand sensors have a high rate of premature failure or incompatibility, often causing the same code to return. While Bosch is a quality brand, some mechanics report issues when using their aftermarket sensors on Japanese vehicles that were originally equipped with Denso/NTK.
Real Owner Stories
Aggregated from forums and TSBs cited above. Mileages and costs reflect what owners reported in those sources.
2007 Mitsubishi Outlander LS 4WD
Symptoms: Check Engine Light illuminated with code P0036.
What fixed it: The owner was in the process of diagnosing the code after it appeared on their LS 4WD model.
Source hint: mitsubishi-forums.com quote from owner of a 2007 Outlander LS 4WD
2014 Mitsubishi Outlander
Symptoms: Wipers stopped working due to a module failure; illustrates the complexity of the electrical system controlling various circuits.
What fixed it: Diagnosis and replacement of the ETACS module.
Source hint: Mitsubishi Forum thread 'ETACS Outlander 2014'
Related OBD-II Codes
Frequently Asked Questions
I have a 3.0L V6 Outlander; is the Bank 1 Sensor 2 oxygen sensor easy to reach?
Can I use any universal oxygen sensor to fix P0036 on my Outlander?
Could my flickering dome lights and P0036 be related to the same electrical part?
Where should I look for the fuse for the O2 heater circuit on a 2007-2013 model?
Is it safe to keep driving my Outlander with the P0036 code active?
Helpful Videos

We Have This Part in Stock


The information in this article is provided for general reference and educational purposes only. Vehicle specifications, procedures, and part compatibility can vary by production date, trim level, and region. Always consult your vehicle's factory service manual and verify part numbers before purchasing or performing repairs. Safety-critical components such as airbags, seat belts, and braking systems should be installed by a qualified professional.
- Mitsubishi Outlander:
- 🧭 Diagnostic Flowchart
- 🎬 Helpful Videos
- 🛍️ Shop This Part
- What's Unique About the 2007-2013 Mitsubishi Outlander
- Symptoms You May Notice
- Most Likely Causes
- Rare But Worth Checking
- Diagnosis Steps
- Parts You'll Likely Need
- Technical Service Bulletins (TSBs) & Recalls
- Platform-Specific Known Issues
- Mechanic-Grade Diagnostic Values
- Scan Tool Commands That Help
- Wiring & Ground Locations
- Real Owner Repair Stories
- Model Year Variations Within This Range
- Other Known Issues on This Vehicle
- Used vs. New Parts: Buying Guide for This Vehicle
- Real Owner Stories
- 2007 Mitsubishi Outlander LS 4WD
- 2014 Mitsubishi Outlander
- Related OBD-II Codes
- Frequently Asked Questions
- 🎟️ Get 5% Off