
P0037 on 2011-2016 Scion tC: O2 Sensor Heater Circuit Causes and Fixes
On a 2011-2016 Scion tC, code P0037 almost always means the downstream oxygen sensor (Bank 1, Sensor 2) has failed. Replacing the sensor with a Denso-branded part is the most common and recommended fix. Expect to pay around $60-$90 for an aftermarket Denso sensor or $120-$170 for a genuine Toyota part. This is a straightforward DIY repair requiring an O2 sensor socket.
- P0037 on your Scion tC points directly to the heater circuit for the downstream O2 sensor (after the catalytic converter).
- The most likely fix is to replace the downstream O2 sensor itself. It's a common failure item.
- Before buying parts, perform a quick visual check of the sensor's wiring for obvious damage and check the 'A/F HEATER' fuse in the engine bay.
- This is a DIY-friendly repair for those comfortable working under their car. You will need a special O2 sensor socket and a torque wrench.
- For best results and to avoid the code returning, use a Denso (part #234-4624) or genuine Toyota replacement sensor.
What's Unique About the 2011-2016 Scion tC
The 2011-2016 Scion tC uses the reliable Toyota 2AR-FE engine, which has a straightforward emissions system. Since it's an inline 4-cylinder, there is only one exhaust bank, making component location simple. For Toyota-family vehicles like Scion, using an OEM or a reputable OEM-supplier brand like Denso for replacement sensors is highly recommended to ensure compatibility and avoid recurring issues, a point frequently emphasized by owners in forums.
Symptoms You May Notice
- Check Engine Light is on
- Failure to pass an emissions inspection
- Slightly reduced fuel economy
- Rough idle or hesitation (less common)
- Replacing the upstream oxygen sensor (Air/Fuel Ratio Sensor) instead of the downstream one. P0037 specifically refers to Sensor 2, which is downstream (after the catalytic converter).
- Replacing the sensor with a non-Denso or cheap aftermarket brand, which may cause the code to return.
Most Likely Causes
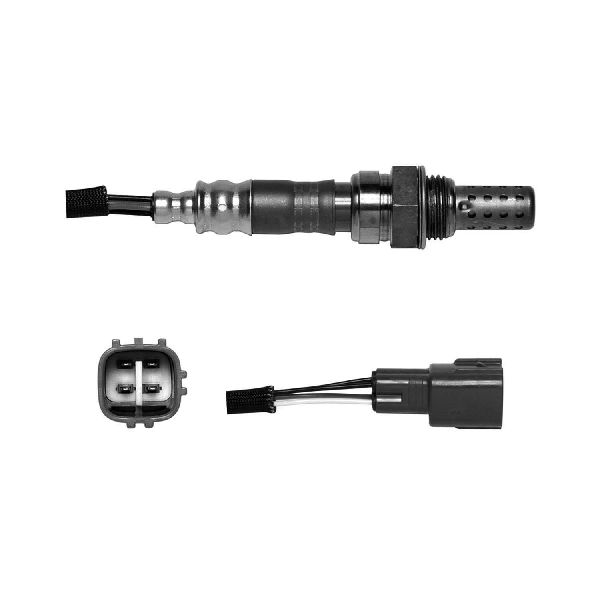
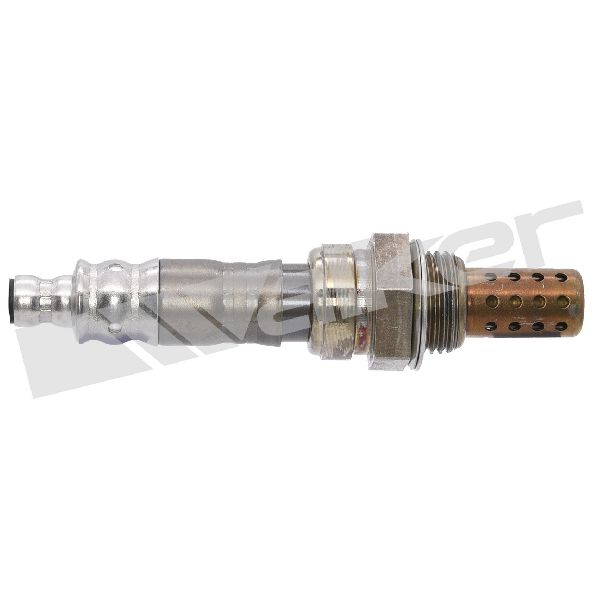
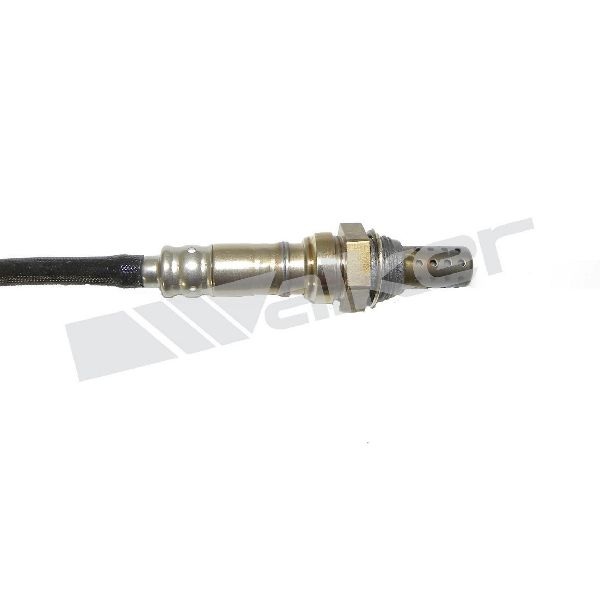
- Failed Downstream Oxygen Sensor (Bank 1, Sensor 2) 🔴 High Probability → Shop Oxygen Sensor The internal heater element of the sensor is a common failure point over time due to constant heat cycles. This is the most frequent cause for P0037 on this platform.
How to confirm: Using a multimeter, measure the resistance between the two heater circuit pins on the sensor's connector (often two black or two white wires). A good sensor should have a specific resistance, typically between 5 and 15 ohms when cold. An open circuit (infinite resistance or 'OL') or a reading far from spec confirms the heater has failed.
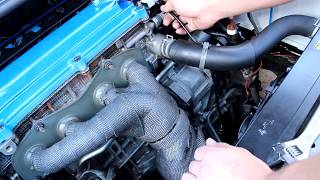
Typical fix: Replace the downstream oxygen sensor. 🎬 Watch: This walkthrough shows how to replace the sensor. This sensor is located on the exhaust pipe after the catalytic converter. Torque the new sensor to approximately 22 ft-lbs (30 Nm).
Est. part cost: $60 - $170 - Damaged Wiring or Connector 🟡 Medium Probability The wiring harness is located under the vehicle and near the hot exhaust, making it susceptible to heat damage, corrosion, or physical damage from road debris. Water intrusion into the connector after an engine wash has also been reported as a cause.
How to confirm: Visually inspect the wiring harness and connector leading to the sensor for any signs of melting, chafing, corrosion, or broken wires. Check for 12V power at the harness-side connector with the ignition on.
Typical fix: Repair the damaged section of the wiring harness or replace the connector pigtail.
Est. part cost: $10 - $40 - Blown Fuse ⚪ Low Probability
How to confirm: Check the fuse box in the engine bay for a blown fuse. It is often a 15A or 20A fuse labeled 'A/F HEATER' or 'EFI NO. 1'. If the fuse is blown, it may indicate a short in the circuit that needs to be found.
Typical fix: Replace the blown fuse. If it blows again, a short circuit exists in the wiring or the sensor itself and must be diagnosed.
Est. part cost: $1 - $5
Rare But Worth Checking
- Faulty Engine Control Module (ECM): → Shop Engine Control Module (ECM) This is extremely rare. The ECM's internal driver for the heater circuit can fail. All other possibilities, especially the sensor and wiring, should be exhaustively ruled out before considering the ECM as the cause.
Diagnosis Steps
- Read the code with an OBD-II scanner to confirm P0037 is the only code present.
- Locate the fuse box in the engine compartment and inspect the fuse for the oxygen sensor heater circuit (often labeled 'A/F HEATER'). Replace if blown.
- Safely raise and support the vehicle to access the exhaust system.
- Locate the downstream oxygen sensor (Bank 1, Sensor 2) on the exhaust pipe, following the catalytic converter.
- Visually inspect the sensor's connector and wiring harness for any signs of melting, fraying, water intrusion, or physical damage.
- Disconnect the sensor. With the ignition on (engine off), use a multimeter to test for 12-volt power on the harness side of the connector.
- Test the sensor itself. Measure the resistance across the two heater pins on the sensor's connector (typically the two same-colored wires). A reading of 'OL' (open circuit) confirms a failed heater. A good sensor should read between 5-15 ohms at ambient temperature.
- If wiring and fuses are good, but the sensor's heater resistance is out of spec, the sensor is faulty and needs replacement.
- When installing the new sensor, apply anti-seize to the threads if not pre-applied and torque to approximately 22 ft-lbs (30 Nm).
Parts You'll Likely Need
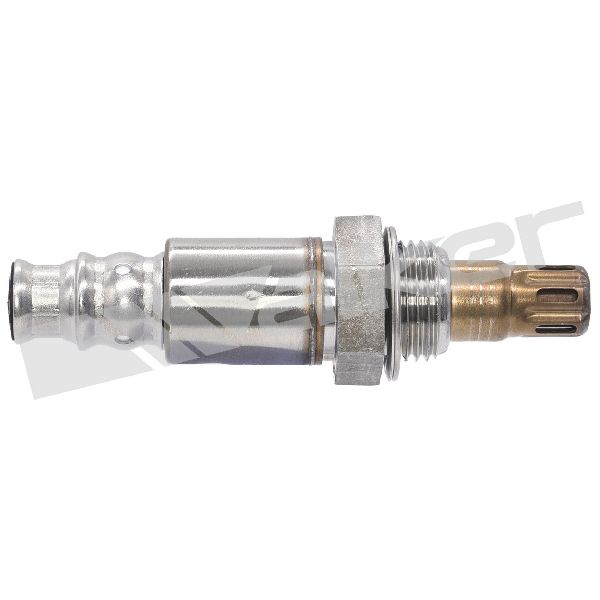
- Downstream Oxygen Sensor (Bank 1, Sensor 2)
(OEM #89465-21060 (for 2011-2014 models))— This is the component that contains the heater element reported as faulty by the P0037 code. Its internal heater is the most common failure point.
Trusted brands: Denso (OEM Supplier), NGK, Bosch
OEM price range: $120-$170
Aftermarket price range: $60-$90
Platform-Specific Known Issues
- Sensitivity to Aftermarket Sensors: Owners on forums strongly advise using a genuine Toyota or Denso-branded replacement sensor. Using other brands, even reputable ones like Bosch, has been reported to cause the P0037 code to return shortly after replacement. Sticking with the OEM supplier (Denso) is the safest bet for a one-time fix.
Mechanic-Grade Diagnostic Values
- Downstream O2 Sensor (B1S2) Heater Resistance — expected: 5.0 to 15.0 Ohms at ambient temperature.. Failure: A reading of OL (Open Loop/infinite resistance) or a value significantly outside the specified range indicates a failed heater element.
- ECM Heater Circuit Current Draw — expected: Greater than 0.3 Amps.. Failure: If the ECM detects the heater current is less than 0.3 Amps, it will set DTC P0037.
- Voltage at Harness Connector (Heater Power Pin) — expected: Approximately 12V (Battery Voltage) with ignition ON, engine OFF.. Failure: Significantly lower or no voltage suggests a problem with the fuse or wiring leading to the sensor.
Scan Tool Commands That Help
- Toyota Techstream: Active Test: "Control the A/F Sensor Heater" or similar function. — This allows a technician to manually command the O2 sensor heater circuit ON and OFF. By observing live data for heater voltage and current during the test, a technician can confirm if the ECM driver is functioning and if the circuit responds as expected, helping to differentiate between a sensor, wiring, or ECM fault.
Wiring & Ground Locations
- B1, B2 — Front of the engine.. These are primary ground points for the engine harness. A corroded or loose ground at these locations can cause various electrical issues, including erratic sensor readings or faults in the O2 sensor heater circuit.
- Heated Oxygen Sensor (Bank 1 Sensor 2) Connector — Under the vehicle, on the exhaust pipe after the catalytic converter, connecting the sensor to the main engine harness.. This is the primary point of failure for wiring issues due to its exposure to heat, moisture, and road debris. The heater circuit wires are typically the two same-colored wires (e.g., two black or two white) in the 4-wire connector.
OEM Part Supersession History
89465-21060→89465-21061— Standard part revision by the manufacturer.
Heads up: Part 89465-21060 is specified for models up to 05/2013 or 2014, while later models may use a different part number. Always verify the part number with the vehicle's VIN.
Model Year Variations Within This Range
- 2014-2016: The Scion tC received a facelift for the 2014 model year. While the core engine (2AR-FE) and exhaust layout remained the same, there were minor changes to suspension and automatic transmission logic. The O2 sensor part number may differ for post-facelift models, with the original part 89465-21060 listed for 2011-2014 models. It is critical to verify the correct part number via VIN for 2014-2016 vehicles.
Diagnostic Flowchart
Used vs. New Parts: Buying Guide for This Vehicle
When a used part is the smart pick: For this repair, buying a used part is generally not recommended. The primary failure is the O2 sensor itself, which is a wear-and-tear item. A used sensor has unknown remaining life and may fail soon after installation. A used wiring harness pigtail from a junkyard could be a cost-effective option if only the connector is damaged.
Donor-vehicle mileage cap: roughly under 50000 miles for the part to have meaningful remaining life.
What to inspect on the donor part:
- For a connector pigtail, inspect for any signs of melting, brittleness, or corrosion on the pins.
- Ensure the locking tab on the connector is intact.
- Check that the wires have sufficient length for splicing and show no signs of fraying or heat damage.
OEM-only on this vehicle (don't cheap out):
- Oxygen Sensor
Aftermarket brands forum-validated for this vehicle:
- Denso (OEM supplier)
- NGK/NTK
Brands owners have reported issues with on this vehicle:
- Generic, unbranded, or 'white-box' sensors from online marketplaces are frequently reported to be incompatible or fail prematurely, causing the code to return.
Real Owner Stories
Aggregated from forums and TSBs cited above. Mileages and costs reflect what owners reported in those sources.
Scion tC First Gen
Symptoms: Check Engine Light was on. Initially showed P0606 and high/low voltage O2 sensor codes. After clearing, only code P0037 for the heater circuit returned. The car was reported to 'drive perfect still'.
What fixed it: The owner ordered a replacement Denso downstream O2 sensor, implying this was the intended fix.
Source hint: Reddit thread titled 'First CEL'
2011 Scion tC
Symptoms: The Check Engine Light with code P0037 appeared immediately after installing an aftermarket header and an O2 sensor spacer.
What fixed it: No specific solution was reported in the source thread.
Source hint: Reddit thread titled 'P0037 code after installing header'
2011 tC
Symptoms: The P0037 code kept coming back even after replacing the downstream oxygen sensor with a new Bosch-branded part.
What fixed it: The issue was permanently resolved by replacing the sensor with a DENSO-branded one, which is the OEM supplier.
Source hint: Reddit r/SciontC - Thread on O2 sensor codes
2005 Scion xB
Symptoms: Code P0037 appeared right after the owner washed their engine bay.
What fixed it: The cause was determined to be water getting into the sensor's electrical connector, causing a short or fault. The implied fix is to dry and secure the connection.
Source hint: ScionLife - Code P0037 -2005 Scion xB
Related OBD-II Codes
Frequently Asked Questions
What brand of oxygen sensor is best for my 2011-2016 Scion tC to fix P0037?
Where is the oxygen sensor for code P0037 located on my Scion tC?
I just washed my engine and now the Check Engine Light is on with P0037. What could have happened?
What is the correct torque specification when installing a new downstream O2 sensor on my tC?
I installed an aftermarket header on my tC and now I have a P0037 code. Is this related?
Which fuse should I check first when diagnosing P0037 on this vehicle?
What resistance should a good downstream oxygen sensor have for my Scion tC?
Helpful Videos
We Have This Part in Stock


The information in this article is provided for general reference and educational purposes only. Vehicle specifications, procedures, and part compatibility can vary by production date, trim level, and region. Always consult your vehicle's factory service manual and verify part numbers before purchasing or performing repairs. Safety-critical components such as airbags, seat belts, and braking systems should be installed by a qualified professional.
- Scion tC:
- 🧭 Diagnostic Flowchart
- 🎬 Helpful Videos
- 🛍️ Shop This Part
- What's Unique About the 2011-2016 Scion tC
- Symptoms You May Notice
- Most Likely Causes
- Rare But Worth Checking
- Diagnosis Steps
- Parts You'll Likely Need
- Platform-Specific Known Issues
- Mechanic-Grade Diagnostic Values
- Scan Tool Commands That Help
- Wiring & Ground Locations
- OEM Part Supersession History
- Model Year Variations Within This Range
- Used vs. New Parts: Buying Guide for This Vehicle
- Real Owner Stories
- Scion tC First Gen
- 2011 Scion tC
- 2011 tC
- 2005 Scion xB
- Related OBD-II Codes
- Frequently Asked Questions
- 🎟️ Get 5% Off