
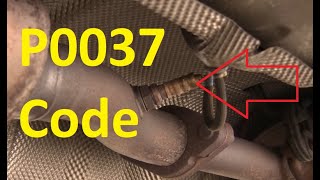
P0037 on 2006-2012 Toyota RAV4 3.5L V6: Causes and Fixes for the O2 Sensor Heater Circuit
This code almost always means the downstream oxygen sensor on the rear cylinder bank (Bank 1, Sensor 2) has failed. The fix is to replace the sensor, which costs about $60-$120 for an aftermarket Denso part or $150+ for an OEM part. It's a DIY-friendly job for most, with a difficulty of 2/5, though accessing the connector requires removing interior trim.
- P0037 points directly to a problem with the heater in the rear downstream oxygen sensor (Bank 1, Sensor 2).
- The most common cause by far is simply a failed sensor, which requires replacement. Use a Denso (234-4501) or OEM part for best results.
- The electrical connector for this specific sensor is located inside the cabin, requiring removal of interior trim for access.
- Fixing this code will also resolve the illuminated Check Engine, VSC, and TRC lights, and re-enable cruise control.
What's Unique About the 2006-2012 Toyota RAV4
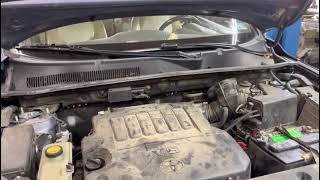
On the 3.5L V6 RAV4, the Bank 1 Sensor 2 is located on the rear exhaust pipe, which is tucked up near the firewall. While the sensor itself is a standard component, its electrical connector is routed through a grommet in the floor and is located inside the cabin. Accessing this connector requires removing the driver's side center console trim panels and pulling back the carpet near the driver's right foot area. This makes the job more involved than on vehicles where the connector is under the car.
Symptoms You May Notice
- Check Engine Light is on.
- Vehicle will automatically fail an emissions test.
- Traction control light may illuminate.
- Cruise control may be disabled.
- Slightly reduced fuel economy may be noticed.
- Replacing the wrong oxygen sensor. The 2GR-FE V6 has four sensors in total. P0037 specifically refers to the downstream (post-catalytic converter) sensor on the rear bank (Bank 1).
- Using a cheap, non-Denso sensor. Some owners report the P0037 code returning shortly after replacing the sensor with a generic or off-brand part, suggesting potential compatibility issues. Sticking with OEM or Denso is highly recommended.
Most Likely Causes
- Failed Oxygen Sensor (Bank 1, Sensor 2) 🔴 High Probability → Shop Oxygen Sensor The internal heater element of oxygen sensors is a common failure point over time due to constant heat cycles. This is the most frequent cause of P0037.
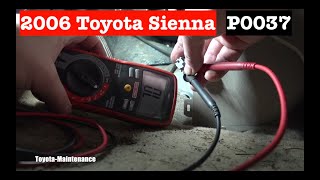
How to confirm: Disconnect the sensor and measure the resistance between the two heater circuit pins (often two wires of the same color, e.g., black or white) with a multimeter. A healthy sensor should have a specific resistance, often between 11 and 16 Ohms at room temperature for this application. An open circuit (infinite resistance or 'OL') confirms the heater has failed.
Typical fix: Replace the Bank 1, Sensor 2 oxygen sensor.
Est. part cost: $60-$180 - Damaged Wiring or Connector 🟡 Medium Probability The sensor is located under the vehicle, where its wiring is exposed to road debris, moisture, and potential physical damage. The connector is inside the cabin but can be damaged during unrelated interior work or by moisture if the floor grommet fails.
How to confirm: Visually inspect the wiring harness from the sensor to the firewall grommet for any signs of melting, chafing, or breaks. Inspect the connector pins inside the cabin for corrosion, moisture, or damage.
Typical fix: Repair the damaged section of wire or replace the connector pigtail.
Est. part cost: $10-$50 - Blown Fuse ⚪ Low Probability
How to confirm: Check the vehicle's fuse box for a blown fuse related to the 'A/F Heater' or 'EFI' system. Consult the owner's manual or fuse box diagram for the specific fuse location.
Typical fix: Replace the blown fuse. If the fuse blows again immediately, it indicates a short circuit in the wiring or the sensor itself that must be diagnosed.
Est. part cost: $1-$5
Rare But Worth Checking
- Faulty Engine Control Module (ECM): → Shop Engine Control Module (ECM) This is very rare. Before suspecting the ECM, all other possibilities (sensor, wiring, fuses) must be exhaustively ruled out. An ECM fault can sometimes occur after events like a catalytic converter theft where wiring is violently torn or shorted.
Diagnosis Steps
- Confirm the code P0037 is present using an OBD-II scanner.
- Identify the correct sensor: Bank 1, Sensor 2. On the 3.5L V6, this is the rear, downstream sensor (after the catalytic converter, closer to the firewall).
- Perform a visual inspection of the sensor's wiring harness underneath the vehicle. Look for any signs of physical damage, melting on the exhaust, or corrosion.
- Locate the sensor's electrical connector inside the vehicle. This requires removing the driver's side center console trim panels and pulling back the carpet to expose the connector.
- Disconnect the sensor. Inspect the connector for corrosion or damage.
- With the key in the 'On' position (engine off), use a multimeter to check for 12V power at the connector's heater power wire (check service manual for correct pin).
- Using the multimeter set to Ohms, test the resistance of the heater circuit on the sensor itself. A reading of 'OL' (over-limit) or near zero ohms indicates a failed heater element. A good sensor should read around 11-16 Ohms. If the sensor tests bad, it must be replaced.
- If wiring has power and the old sensor tests bad, install the new sensor. Apply anti-seize compound to the threads if not pre-applied.
- Route the new sensor wire through the floor grommet and connect it inside the cabin.
- Reassemble the interior trim.
- Clear the trouble code with the OBD-II scanner and perform a test drive to ensure the code does not return.
Parts You'll Likely Need
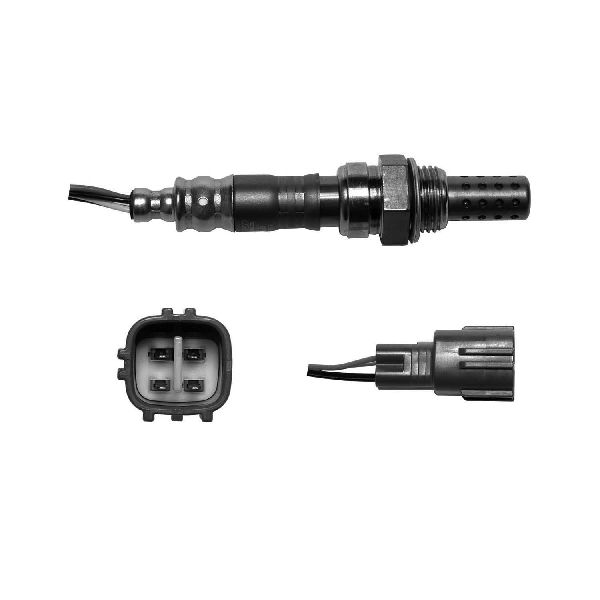
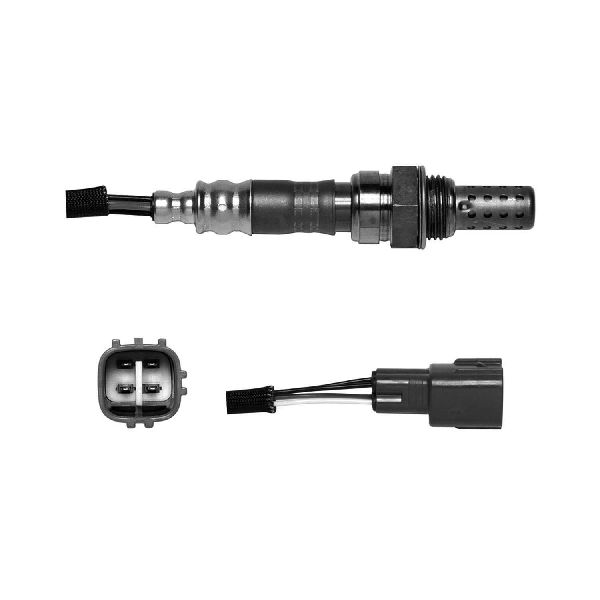
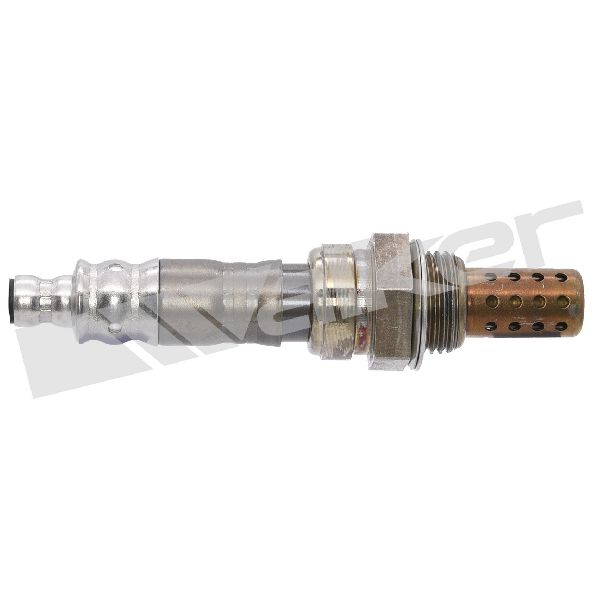
- Oxygen Sensor (Bank 1, Sensor 2)
(OEM #89465-0R030 (may also cross-reference to 89465-42160))— This is the component whose internal heater circuit failure is the direct cause of the P0037 code in the vast majority of cases.
Trusted brands: Denso (OEM Manufacturer), NTK, Bosch
OEM price range: $150-$200
Aftermarket price range: $60-$120
Related Codes That Often Appear With This One
- P0141 — P0141 is a similar code for 'O2 Sensor Heater Circuit Malfunction (Bank 1 Sensor 2)'. They often appear together as they both point to a failure in the same sensor's heater circuit, just detected through a different monitoring strategy by the ECM.
Technical Service Bulletins (TSBs) & Recalls
- While not directly for P0037, owners of this vehicle should be aware of TSB T-SB-0318-08 for a clunking noise from the steering intermediate shaft.
Platform-Specific Known Issues
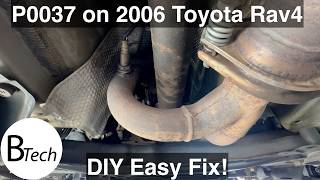
- Real-world experience confirms the connector is inside. A YouTube video by 'BTE' titled 'P0037 on 2006 Gen 3 Toyota Rav4 - Easy fix' clearly shows the process of removing the center console side panel and pulling up the carpet to access the connector, corroborating forum posts.
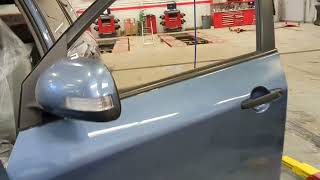
- Another video by 'beownerofcar' titled '2010 Toyota Rav 4 o2 sensor heater circuit p0037' also confirms the Bank 1 rear location and the interior connector, and mentions that the traction control light and cruise control disablement are direct symptoms.
Mechanic-Grade Diagnostic Values
- O2 Sensor Heater Resistance — expected: 11 to 16 Ω at 68°F (20°C). Failure: Open circuit (OL) or infinite resistance
- ECM Fault Trigger Threshold (Current) — expected: Greater than 0.3 Amps. Failure: Current drops below 0.3 A for at least 2 seconds, triggering P0037.
- Heater Circuit Voltage at Connector — expected: Battery Voltage (~12V) with key on, engine off.. Failure: Significantly less than 12V or 0V, indicating a wiring or fuse issue upstream.
- Techstream Live Data - Heater Current — expected: Approximately 1.0 A or higher when active.. Failure: A value near zero (e.g., 0.380 A) compared to a healthy sensor on the other bank (~1.0 A+).
Scan Tool Commands That Help
- Toyota Techstream: Active Test: 'Control the O2 Sensor Heater (Bank 1 Sensor 2)' — This command allows a technician to manually activate the heater circuit. It's used to verify if the ECM, fuse, and wiring are capable of delivering power. If the heater can be commanded on but the code returns, it isolates the fault to the sensor itself.
Wiring & Ground Locations
- Heater Power (+B) — Pin 1 of the sensor connector. Receives power from the EFI MAIN relay.. This is the power supply for the heater element. A voltage check here confirms if the fuse, relay, and power-side wiring are intact.
- Heater Control (HT1B) — Pin 2 of the sensor connector. This wire goes directly to the ECM.. The ECM controls and monitors the ground side of the heater circuit via this wire. An open or short on this wire will cause the code.
- EFI MAIN Relay — Located in the engine room relay block.. This relay supplies battery voltage to the +B pin of the oxygen sensor heater circuit. A failure of this relay would cut power to the heater.
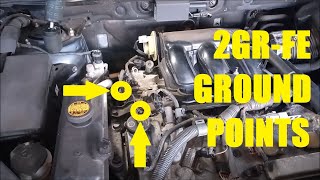
- Engine Ground Points — Multiple points on the 2GR-FE, including one on the side of the cylinder head under the throttle body and another on the valve cover.. While not directly for the sensor circuit, poor engine or chassis grounds can cause a variety of electrical issues and spurious codes. Ensuring main grounds are clean and tight is a good practice during any electrical diagnosis.
Real Owner Repair Stories
- YouTube channel 'Pinoy Auto Vlogs' (2009 Toyota RAV4 V6 (2GR-FE)) — Check Engine Light with codes P0037 and P0141.
❌ Tried (didn't work) The technician noted that sometimes just replacing the O2 sensor (Sensor 2) can lead to a new code for the Air/Fuel Ratio sensor (Sensor 1) on the same bank.
✅ What actually fixed it Replaced both the downstream oxygen sensor (Bank 1 Sensor 2) and the upstream Air/Fuel Ratio sensor (Bank 1 Sensor 1) at the same time to resolve the issue completely. Live data showed the heater current for B1S2 was only 0.380A before the fix, while B2S2 was over 1A. After replacement, both sensor heater currents were nearly identical.
OEM Part Supersession History
89465-42160→89465-0R030— Standard part number update/revision.
Heads up: The parts are interchangeable for the 2006-2012 RAV4 V6. 89465-0R030 is the current correct part number.
Diagnostic Flowchart
Other Known Issues on This Vehicle
Issues unrelated to this code that are worth knowing about as an owner of this generation:
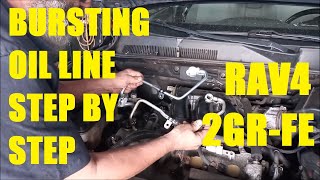
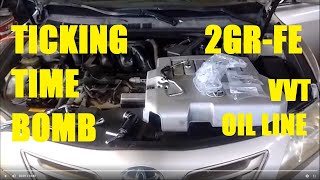
- VVT-i Oil Line Rupture 🔴 High — Common on earlier models (2006-2009) that were originally equipped with a rubber hose section. Failure can lead to rapid oil loss and catastrophic engine failure. (Ref: A Limited Service Campaign (LSC) was issued by Toyota to replace the rubber/metal line with an all-metal version (Part No. 15772-31030).)
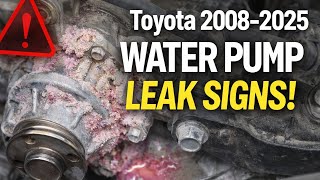
- Water Pump Failure 🟠 Medium — A known weak point on the 2GR-FE engine. Leaks, identified by pink, crusty residue from dried Toyota Super Long Life coolant, are common. Failure can lead to overheating. (Ref: Toyota TSB T-SB-0103-20 Rev1 provides guidance on distinguishing between minor seepage and an active leak requiring replacement.)
- Steering Intermediate Shaft Noise 🟡 Low — A clunking or popping noise when turning the steering wheel at low speeds is a widely reported issue. It is caused by a worn intermediate steering shaft. (Ref: Toyota issued TSB T-SB-0318-08 (superseding ST001-08) with a procedure to replace the faulty shaft with an improved part.)
- Excessive Oil Consumption 🟠 Medium — Some reports exist for the 2006-2008 V6 models consuming oil, though it is more widely documented on the 4-cylinder (2AZ-FE) engine of the same era.
Used vs. New Parts: Buying Guide for This Vehicle
When a used part is the smart pick: For this specific repair, buying a used oxygen sensor is almost never a smart choice. O2 sensors are wear-and-tear items with a finite lifespan, determined by heat cycles and exposure to exhaust contaminants. A used sensor from a junkyard has unknown remaining life and could fail shortly after installation, wasting time and money.
Donor-vehicle mileage cap: roughly under 50000 miles for the part to have meaningful remaining life.
What to inspect on the donor part:
- If forced to buy used, source from the lowest-mileage, accident-totaled vehicle possible.
- Inspect the sensor tip for heavy white, black, or green deposits, which indicate contamination or engine problems in the donor car.
- Ensure the wiring and connector are completely intact with no cuts, melting, or brittle sections.
OEM-only on this vehicle (don't cheap out):
- While not strictly OEM-only, it is highly recommended to use either the genuine Toyota part or the OEM manufacturer, Denso. Other brands have a documented history of compatibility issues or premature failure on Toyota vehicles.
Aftermarket brands forum-validated for this vehicle:
- Denso (OEM manufacturer, part #234-4501)
- NTK (also a reputable OEM supplier)
Brands owners have reported issues with on this vehicle:
- Generic, unbranded, or 'white-box' parts from online marketplaces are frequently reported to fail quickly or not resolve the code at all.
Real Owner Stories
Aggregated from forums and TSBs cited above. Mileages and costs reflect what owners reported in those sources.
2006 Toyota RAV4 3.5L V6
Symptoms: Check engine light on; confirmed P0037. Process required removing the center console side panel and pulling up the carpet to reach the plug.
What fixed it: Replaced the Bank 1 Sensor 2 oxygen sensor (downstream).
Source hint: YouTube video by 'BTE' titled 'P0037 on 2006 Gen 3 Toyota Rav4 - Easy fix'
2010 Toyota RAV4 3.5L V6
Symptoms: Traction control light illuminated and cruise control was disabled.
What fixed it: Replaced the Bank 1 rear downstream O2 sensor.
Source hint: YouTube video by 'beownerofcar' titled '2010 Toyota Rav 4 o2 sensor heater circuit p0037'
2006-2012 Toyota RAV4 3.5L V6
Symptoms: P0037 and P0141 codes present; cruise control functionality lost.
What fixed it: Replacing the sensor with a Denso 234-4501 unit.
Source hint: toyotanation.com thread regarding P0037 and P0141
Related OBD-II Codes
Frequently Asked Questions
Where is the Bank 1 Sensor 2 connector located on my 2006-2012 RAV4 V6?
Why did my Traction Control and Cruise Control lights come on with P0037?
What specific replacement part is recommended for the 2GR-FE engine?
How can I test if the sensor itself is actually bad?
Does TSB T-SB-0318-08 relate to my P0037 code?
Is there a fuse I should check before replacing the sensor?
Helpful Videos


We Have This Part in Stock


The information in this article is provided for general reference and educational purposes only. Vehicle specifications, procedures, and part compatibility can vary by production date, trim level, and region. Always consult your vehicle's factory service manual and verify part numbers before purchasing or performing repairs. Safety-critical components such as airbags, seat belts, and braking systems should be installed by a qualified professional.
- Toyota RAV4:
- 🧭 Diagnostic Flowchart
- 🎬 Helpful Videos
- 🛍️ Shop This Part
- What's Unique About the 2006-2012 Toyota RAV4
- Symptoms You May Notice
- Most Likely Causes
- Rare But Worth Checking
- Diagnosis Steps
- Parts You'll Likely Need
- Related Codes That Often Appear With This One
- Technical Service Bulletins (TSBs) & Recalls
- Platform-Specific Known Issues
- Mechanic-Grade Diagnostic Values
- Scan Tool Commands That Help
- Wiring & Ground Locations
- Real Owner Repair Stories
- OEM Part Supersession History
- Other Known Issues on This Vehicle
- Used vs. New Parts: Buying Guide for This Vehicle
- Real Owner Stories
- 2006 Toyota RAV4 3.5L V6
- 2010 Toyota RAV4 3.5L V6
- 2006-2012 Toyota RAV4 3.5L V6
- Related OBD-II Codes
- Frequently Asked Questions
- 🎟️ Get 5% Off