
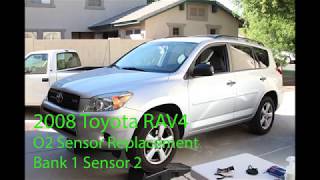
P0037 on 2013-2018 Toyota RAV4 2.5L: Heater Circuit Causes and Fixes for Bank 1 Sensor 2
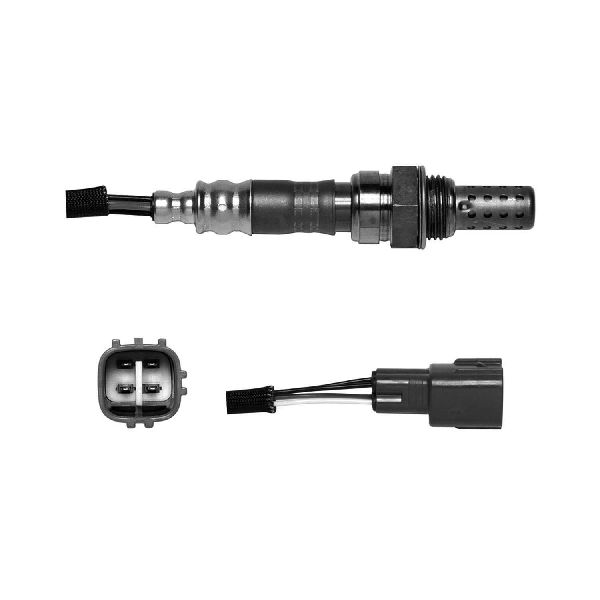
On a 2013-2018 RAV4, code P0037 almost always means the downstream oxygen sensor (Bank 1, Sensor 2) has failed. The internal heater element burns out. Replacing it with a Denso-branded sensor (Part No. 234-4622) is the most common and recommended fix. Expect to pay $50-$90 for this aftermarket part or $150-$250 for the OEM part (89465-0R040). It's a DIY-friendly job if the old sensor isn't seized, but be aware the electrical connector is inside the car by the driver's foot.
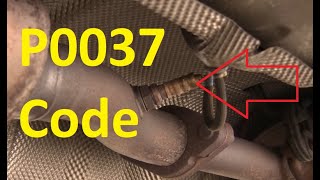
- P0037 on your RAV4 points directly to the heater circuit for the rear (downstream) oxygen sensor.
- The most likely fix is to replace the sensor itself. Using an OEM-quality brand like Denso (part 234-4622) is highly recommended and cost-effective.
- Before buying parts, perform a quick visual check of the wiring for damage and test the 'EFI' or 'A/F HEATER' fuse.
- Be prepared to remove the driver's side interior door sill trim panel to access the sensor's electrical connector.
- An oxygen sensor socket (22mm or 7/8") is required, and the old sensor may be seized, potentially requiring penetrating oil or heat to remove.
What's Unique About the 2013-2018 Toyota RAV4
For the fourth-generation RAV4 (XA40), the P0037 code is a very common and straightforward issue. The most notable platform-specific detail is the location of the electrical connector for the downstream O2 sensor. Unlike many vehicles where the connector is under the car, on the RAV4 it is routed through the floor pan via a grommet and plugs in inside the cabin, near the driver's right foot. This requires removing the driver-side door sill trim and pulling back the carpet to access, which is an important and sometimes tricky step for a DIY repair.
Symptoms You May Notice
- Check Engine Light is on
- Vehicle will fail an emissions test
- Cruise control system is disabled and the 'Check Cruise Control System' message may appear.
- Traction Control (VSC) light may also illuminate on the dashboard as a secondary warning.
- Replacing the upstream oxygen sensor (Bank 1, Sensor 1). This code specifically points to the downstream sensor (Sensor 2), which is located after the catalytic converter. 🎬 Watch: A quick breakdown of common causes for code P0037.
Most Likely Causes
- Failed Downstream Oxygen Sensor 🔴 High Probability → Shop Oxygen Sensor The internal heater element is a common failure point over many years and thousands of heat cycles. This is considered a normal wear-and-tear item.
How to confirm: Disconnect the sensor and measure the resistance across the two heater wires (usually the two wires of the same color, often black). A good sensor will have a low resistance, typically between 3 and 14 Ohms when cold. An open circuit (infinite resistance) confirms the heater has failed and the sensor must be replaced.
Typical fix: Replace the Bank 1, Sensor 2 oxygen sensor. It is located in the exhaust pipe after the catalytic converter. Using a Denso brand replacement is highly recommended as they are the Original Equipment Manufacturer (OEM).
Est. part cost: $50-$250 - Damaged Wiring or Connector 🟡 Medium Probability The sensor and its wiring are located under the vehicle, making them susceptible to damage from road debris, corrosion, or melting from contact with the hot exhaust pipe.
How to confirm: Visually inspect the entire wiring harness from the sensor body to the grommet where it enters the cabin floor. Look for any breaks, chafing, melting, or corrosion on the connector pins inside the cabin.
Typical fix: Repair the damaged section of the wire or replace the connector pigtail. If damage is severe, the entire sensor with its harness must be replaced.
Est. part cost: $10-$50 - Blown Fuse ⚪ Low Probability
How to confirm: Check the fuses related to the emissions or fuel injection system. In the engine bay fuse box, inspect the 'EFI MAIN' and 'EFI NO. 1' fuses. A fuse labeled 'A/F HEATER' may also be present.
Typical fix: Replace the blown fuse. If the fuse blows again immediately, it indicates a short circuit in the wiring or the sensor itself that must be diagnosed before replacing the fuse again.
Est. part cost: $1-$5
Rare But Worth Checking
- Faulty Engine Control Module (ECM): → Shop Engine Control Module (ECM) This is extremely rare. The ECM's internal driver for the heater circuit can fail. This should only be considered after all other possibilities (sensor, wiring, fuses) have been definitively ruled out by a professional.
Diagnosis Steps
- Read the code with an OBD-II scanner to confirm P0037 is the primary code.
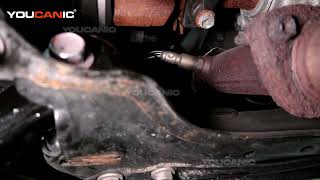
- Visually inspect the downstream oxygen sensor under the vehicle, after the catalytic converter. Check for physical damage to the sensor or its wiring harness leading up to the floor pan.
- Check the relevant fuses in the engine bay fuse box, typically labeled 'EFI' or 'A/F HEATER'.
- Access the sensor's electrical connector. This requires removing the driver-side plastic door sill trim and pulling back the carpet to find the connector and grommet.
- Disconnect the sensor and inspect the connector pins for corrosion or damage.
- Using a multimeter set to Ohms, measure the resistance between the two heater pins on the sensor side of the connector (usually two black wires). 🎬 See how to test the heater circuit with a multimeter. A good sensor should read a low resistance (e.g., 3-14 Ohms). An infinite reading (OL) confirms the heater element is broken and the sensor must be replaced.
- To confirm power is reaching the sensor, turn the ignition to the 'ON' position (engine off). Use a multimeter set to DC Volts to check for battery voltage (approx. 12V) at one of the heater pins on the vehicle-side of the connector.
- If all wiring and fuses are good but the sensor's heater circuit is open, replace the Bank 1 Sensor 2 oxygen sensor. A 22mm (or 7/8") slotted oxygen sensor socket is required. 🎬 Watch: This step-by-step walkthrough shows the full replacement process. Be prepared to use penetrating oil or heat if the sensor is seized in the exhaust pipe.
Parts You'll Likely Need
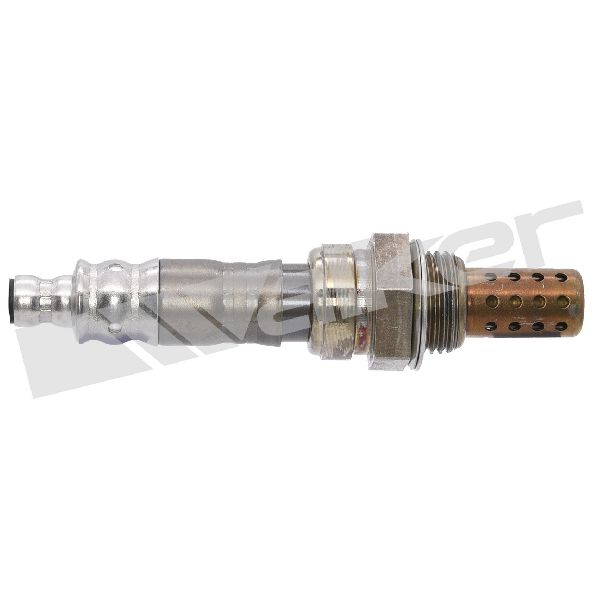
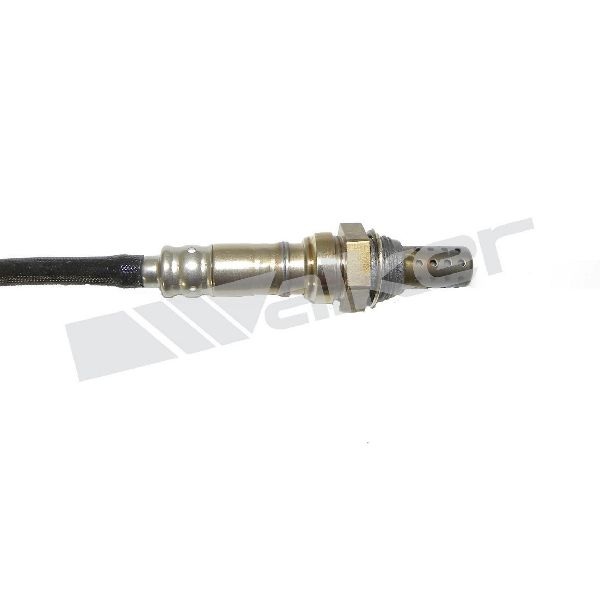
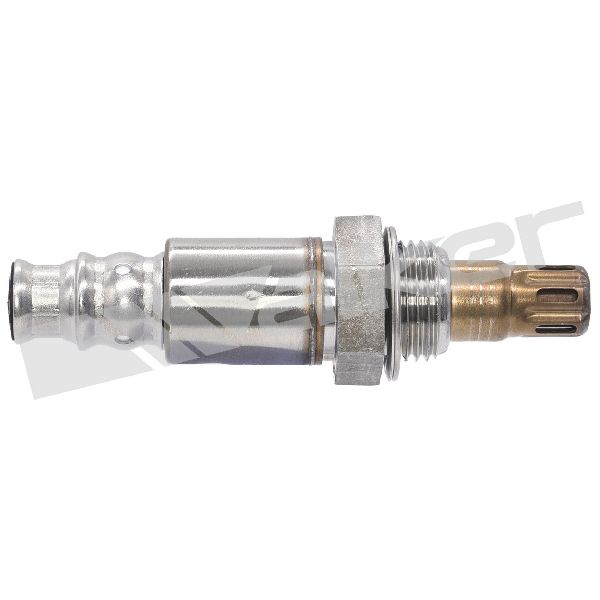
- Downstream Oxygen Sensor (Bank 1, Sensor 2)
(OEM #89465-0R040)— This is the component that contains the heater element reported as faulty by the P0037 code. The internal heater failing from age is the most frequent cause.
Trusted brands: Denso (OEM Manufacturer), Bosch, NGK/NTK
OEM price range: $150-$250
Aftermarket price range: $50-$90
Platform-Specific Known Issues
- The electrical connector for the downstream O2 sensor is located inside the cabin, requiring the removal of the driver-side kick panel or sill plate to access it.
- The Check Engine Light from code P0037 will typically disable the cruise control and VSC systems as a default safety precaution by the ECM.
Mechanic-Grade Diagnostic Values
- O2 Sensor Heater Resistance (Cold) — expected: 3 to 14 Ohms. Failure: Infinite resistance (Open Loop / OL) indicates a burned-out heater element.
- ECM Heater Circuit Current Threshold — expected: Greater than 0.3 Amps. Failure: The ECM will set code P0037 if the measured current is less than 0.3 Amps when the heater is commanded on.
- Heater Circuit Power Supply (Key On, Engine Off) — expected: Approximately 12V (Battery Voltage). Failure: 0V indicates a blown fuse (e.g., EFI MAIN), a bad relay, or a break in the power wire.
Scan Tool Commands That Help
- Toyota Techstream: Active Test: 'Control the O2 Sensor Heater' — After confirming the sensor's resistance is good, this command manually activates the heater circuit. It helps verify the integrity of the wiring and the ECM's driver circuit. If the heater can be commanded on, the fault may be intermittent.
Wiring & Ground Locations
- Engine Harness Ground — On the side of the cylinder head, directly underneath the throttle body.. The ECM and its sensor circuits rely on a stable ground reference. A corroded or loose ground at this primary point can cause erratic sensor behavior and trigger various electrical fault codes, including P0037.
- B/1 S/2 O2 Sensor Connector — Inside the cabin, near the driver's right foot. The harness passes through a grommet in the floor pan. Requires removing the driver-side door sill trim and pulling back the carpet to access.. This is the main connection point for testing and replacing the sensor. Unlike many vehicles, it is not exposed under the car, protecting it from the elements but requiring interior disassembly to access.
Real Owner Repair Stories
- YouTube - BTech LLC (2006 Toyota RAV4 (V6, Gen 3 - procedure is nearly identical for Gen 4)) — Check Engine Light on, code P0037 would return immediately after resetting.
❌ Tried (didn't work) Resetting the code with a scanner.
✅ What actually fixed it The problem was resolved by replacing the Bank 1, Sensor 2 (downstream) oxygen sensor with a new Denso unit. The owner reported driving 1,000 miles after the repair with no recurrence of the code.
OEM Part Supersession History
89465-42230→89465-0R040— Standard part number update/revision by Toyota.
Model Year Variations Within This Range
- 2016-2018: The 2016 model year received a facelift that included more cabin insulation for a quieter ride and reworked suspension for better compliance. However, the engine, emissions system, and the root cause/fix for P0037 remained the same as the 2013-2015 models.
Diagnostic Flowchart
Other Known Issues on This Vehicle
Issues unrelated to this code that are worth knowing about as an owner of this generation:
- Torque Converter Shudder 🟠 Medium — Commonly reported as a brief shudder or vibration under light throttle between 25-50 mph. Affects 2013-2015 models most. (Ref: T-SB-0023-15 (later revised) and Warranty Enhancement Program ZH1.)
- Clunking/Popping from Steering 🟡 Low — A clunking or popping noise is often heard when turning the wheel at low speeds. It is frequently attributed to the intermediate steering shaft. (Ref: While a TSB (T-SB-0318-08) existed for a similar issue on the previous generation, this problem is well-documented in forums for the 2013-2018 models.)
- Replacement 12V Battery Fire Risk 🔴 High — A recall was issued because certain replacement 12-volt batteries may not fit correctly, allowing the battery to contact the hold-down bracket and cause a short circuit. (Ref: NHTSA Campaign Number: 23V-723.)
- Loud Brakes 🟡 Low — Some owners report squeaking or grinding noises from the front brakes. Toyota issued a TSB to address this. (Ref: A TSB was issued in 2016 for dealers to replace pads and resurface rotors under warranty.)
Used vs. New Parts: Buying Guide for This Vehicle
When a used part is the smart pick: For this repair, a used part is generally not recommended. The primary failure is the sensor itself, which is a wear-and-tear item with a finite lifespan. A used wiring harness pigtail from a junkyard could be a viable option if only the connector or a section of wire is damaged, but not the sensor.
Donor-vehicle mileage cap: roughly under 50000 miles for the part to have meaningful remaining life.
What to inspect on the donor part:
- For a wiring pigtail, ensure the connector is not cracked, brittle, or corroded.
- Check that the wires are flexible and the insulation is not chafed or melted.
- Avoid parts from vehicles with obvious signs of flood or fire damage.
OEM-only on this vehicle (don't cheap out):
- While not strictly 'OEM-only', using the OEM manufacturer (Denso) for the oxygen sensor is highly recommended to avoid compatibility issues.
Aftermarket brands forum-validated for this vehicle:
- Denso (OEM for Toyota)
- NGK / NTK
Brands owners have reported issues with on this vehicle:
- Generic, unbranded sensors from online marketplaces have a high failure rate.
- Some forum users report issues when mixing brands (e.g., one Bosch and one Denso), as they can have different warm-up characteristics, potentially confusing the ECM.
Real Owner Stories
Aggregated from forums and TSBs cited above. Mileages and costs reflect what owners reported in those sources.
2014 Toyota RAV4 2.5L
Symptoms: The owner experienced code P0037 and P0138 appearing at the same time.
What fixed it: Replacing the downstream O2 sensor resolved both codes.
Source hint: rav4world.com/threads/p0037-and-p0138-at-the-same-time.309929/
2010 Toyota RAV4 2.5L
Symptoms: The Check Engine Light was on, the cruise control was disabled, and the traction control light was illuminated.
What fixed it: Replacing the downstream O2 sensor and accessing the connector located inside the car.
Source hint: YouTube - Transmissions America (2010 Toyota Rav 4 o2 sensor heater circuit p0037)
2006 Toyota RAV4 2.5L (Gen 3)
Symptoms: P0037 code triggered; owner needed to access the interior connector.
What fixed it: Replacing the sensor by removing the center console and trim to reach the interior electrical plug.
Source hint: YouTube - BTech LLC (P0037 on 2006 Gen 3 Toyota Rav4 - Easy fix)
Related OBD-II Codes
Frequently Asked Questions
Why did my cruise control and Traction Control (VSC) light come on at the same time as the Check Engine Light for P0037?
Where is the downstream oxygen sensor connector located on my RAV4? I can't find it under the car.
Which brand of oxygen sensor should I use for my 2AR-FE 2.5L engine?
Is there a specific fuse I should check for the P0037 heater circuit code?
Can I use a used oxygen sensor from a junkyard to fix this?
What size tool do I need to remove the sensor from the exhaust pipe?
Helpful Videos
We Have This Part in Stock


The information in this article is provided for general reference and educational purposes only. Vehicle specifications, procedures, and part compatibility can vary by production date, trim level, and region. Always consult your vehicle's factory service manual and verify part numbers before purchasing or performing repairs. Safety-critical components such as airbags, seat belts, and braking systems should be installed by a qualified professional.
- Toyota RAV4:
- 🧭 Diagnostic Flowchart
- 🎬 Helpful Videos
- 🛍️ Shop This Part
- What's Unique About the 2013-2018 Toyota RAV4
- Symptoms You May Notice
- Most Likely Causes
- Rare But Worth Checking
- Diagnosis Steps
- Parts You'll Likely Need
- Platform-Specific Known Issues
- Mechanic-Grade Diagnostic Values
- Scan Tool Commands That Help
- Wiring & Ground Locations
- Real Owner Repair Stories
- OEM Part Supersession History
- Model Year Variations Within This Range
- Other Known Issues on This Vehicle
- Used vs. New Parts: Buying Guide for This Vehicle
- Real Owner Stories
- 2014 Toyota RAV4 2.5L
- 2010 Toyota RAV4 2.5L
- 2006 Toyota RAV4 2.5L (Gen 3)
- Related OBD-II Codes
- Frequently Asked Questions
- 🎟️ Get 5% Off