
P0042 on 2014-2016 Land Rover LR4: HO2S Heater Circuit Fault Causes and Fixes
P0042 on a 2014-2016 Land Rover LR4 indicates a fault with the heater circuit in the Bank 1, Sensor 3 oxygen sensor. This sensor is on the passenger side, furthest down the exhaust. The most common cause is a failed sensor, a known issue addressed in Land Rover TSBs like SSM63157 which cites a 'manufacturing fault'. Expect to pay $80-$250 for a replacement sensor. Before replacing, check fuses F11 (15A) and F14 (20A) in the engine bay fuse box.
- P0042 specifically points to a problem with the heater in the rearmost oxygen sensor on the passenger side exhaust.
- The sensor itself is the most likely failure point due to documented manufacturing flaws and susceptibility to thermal shock, as noted in Land Rover TSBs.
- Before replacing the sensor, it is prudent to check the O2 sensor heater fuses (F11 and F14 in the engine bay) and visually inspect the wiring for obvious damage.
- The repair is considered DIY-friendly, requiring a 22mm (7/8") oxygen sensor socket and basic hand tools.
What's Unique About the 2014-2016 Land Rover LR4
For this generation of Land Rover with the 3.0L Supercharged V6, P0042 is frequently tied to known issues with the oxygen sensors themselves. Manufacturer Technical Service Bulletins (TSBs) like SSM63157 directly cite a "manufacturing fault at the supplier – misalignment within the sensor" as a primary cause. Other TSBs mention problems like "thermal shock" when water contacts the hot sensor (LTB00671NAS3) and potential software errors requiring a PCM update (JTB00508NAS1). Another TSB, SSM72448, notes that this and many other O2 sensor codes can be set with "NO FAULT FOUND" upon diagnosis, which strongly suggests intermittent wiring or connector issues are also a common problem on this platform.
Diagnostic Flowchart
Tap your situation to follow the diagnostic path that matches what you're seeing on this vehicle.
Symptoms You May Notice
- Check Engine Light (Malfunction Indicator Lamp) is illuminated.
- Failure to pass an emissions inspection.
- Slightly reduced fuel economy (may not be noticeable to the driver).
- Rough idle or engine hesitation (less common).
- Strong smell of fuel or 'rotten eggs' from the exhaust (rare).
- Replacing the wrong oxygen sensor. It is critical to correctly identify Bank 1 (passenger side) and Sensor 3 (the rearmost sensor on that bank) before replacement.
- Replacing the sensor without checking the wiring first. Given the TSBs mentioning intermittent faults, a simple wiring issue could be the root cause.
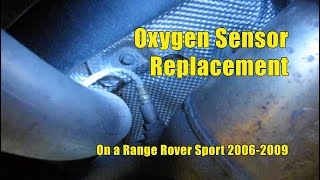
- Using a cheap, universal oxygen sensor. Owners and mechanics often report that these vehicles are sensitive and that using an OEM-spec sensor 🎬 See a professional replacement on a Supercharged Range Rover model. (like Bosch) is crucial for a lasting repair.
Most Likely Causes
- Failed Bank 1, Sensor 3 Oxygen Sensor 🔴 High Probability → Shop Oxygen Sensor Land Rover has issued TSBs (e.g., LTB00671NAS3 and SSM63157) indicating these sensors are susceptible to 'thermal shock' from water contact and known 'manufacturing faults', leading to premature failure of the internal heater element. Land Rover also issued an extended warranty for these sensors on many affected vehicles due to the high failure rate.
How to confirm: Disconnect the sensor's electrical connector. Use a multimeter to test the resistance between the two heater circuit pins (often the two same-colored wires). A value outside the typical 4-10 Ohm range, or an open circuit (infinite resistance), indicates a failed heater.
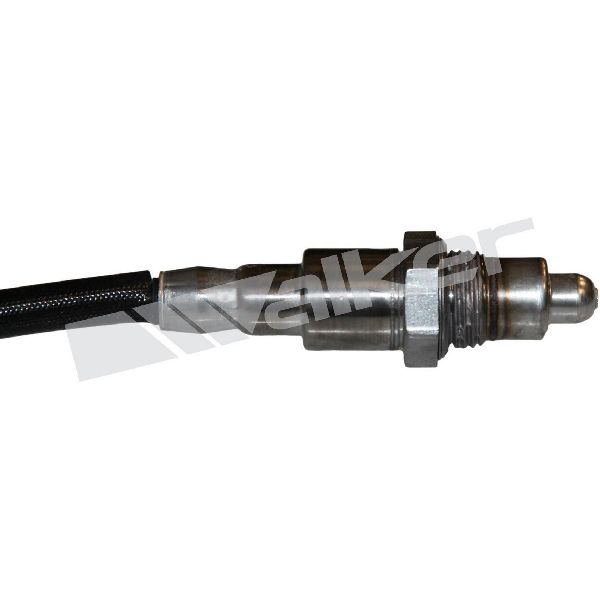
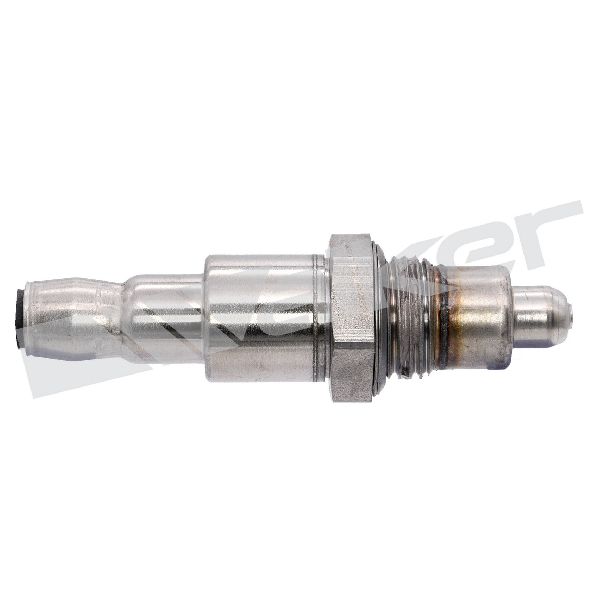
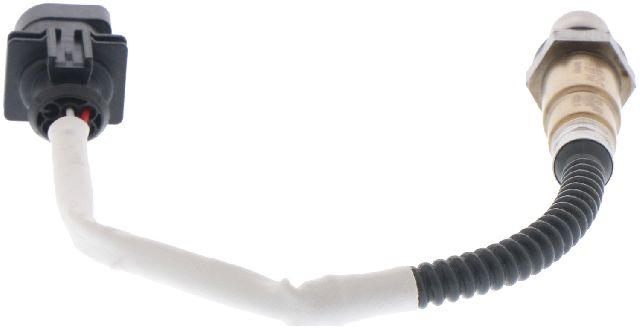
Typical fix: Replace the Bank 1, Sensor 3 oxygen sensor. This is the sensor on the passenger side, located furthest downstream in the exhaust system, near the transfer case. A 22mm (or 7/8") offset O2 sensor socket is recommended for removal.
Est. part cost: $80-$275 - Damaged Wiring or Corroded Connector 🟡 Medium Probability The sensor and its wiring are located underneath the vehicle, exposed to road debris, moisture, and heat. The harness runs near the transfer case and can chafe. TSB SSM72448 notes that codes can be set with no hard fault found, pointing to intermittent connection problems.
How to confirm: Visually inspect the wiring harness and connector for the Bank 1, Sensor 3 O2 sensor. Look for chafing, melting on the exhaust, corrosion on the pins, or breaks in the wire. Check for 12V power and a ground signal at the connector with the ignition on.
Typical fix: Repair the damaged section of the wiring harness or clean/replace the corroded connector. Applying dielectric grease to the new connector can help prevent future corrosion.
Est. part cost: $10-$50 - Blown Fuse ⚪ Low Probability
How to confirm: Check the fuses for the O2 sensor heater circuit in the engine compartment fuse box. For a 2014 model, this specifically includes fuse F11 (15A) and F14 (20A), both labeled for Heated oxygen sensors (HO2S). Consult the owner's manual for the specific fuse locations.
Typical fix: Replace the blown fuse. If it blows again, a short circuit exists in the heater circuit that must be diagnosed.
Est. part cost: $1-$5
Rare But Worth Checking
- Powertrain Control Module (PCM) Fault or Software Error: → Shop Engine Control Module (ECM) This is extremely rare. TSBs LTB00671NAS3 and JTB00508NAS1 do mention that updated ECM/PCM software was released to address O2 sensor operation and prevent erroneous codes. This should only be considered after the sensor, wiring, and fuses have been definitively ruled out.
Diagnosis Steps
- Retrieve all stored fault codes with an OBD-II scanner.
- For better access, raise the vehicle safely using jack stands. Setting the air suspension to 'Off-Road Height' can provide additional initial clearance.
- Visually inspect the wiring and electrical connector for the Bank 1, Sensor 3 oxygen sensor. It is located on the passenger-side exhaust pipe, downstream of the catalytic converter, often near the transfer case. Look for any signs of melting, corrosion, or physical damage.
- Check the O2 sensor heater fuses in the engine bay fuse box (specifically F11 and F14 on some models). Replace if blown.
- If the wiring and fuse are intact, disconnect the sensor. Use a multimeter to measure the resistance of the heater element across the two designated pins on the sensor side 🎬 Watch this guide to diagnosing the P0042 heater circuit fault. of the connector. A reading of infinite resistance (open loop) or a value outside the 4-10 Ohm spec confirms the sensor has failed.
- With the key on and engine off, check for 12-volt power and a ground signal on the vehicle harness side of the connector to ensure the PCM is commanding the heater on. The ground signal is typically pulse-width modulated (PWM) by the PCM when the engine is running.
- If the sensor's resistance is within spec and power/ground are present at the harness, the issue is likely an intermittent wiring problem that needs to be traced.
Parts You'll Likely Need
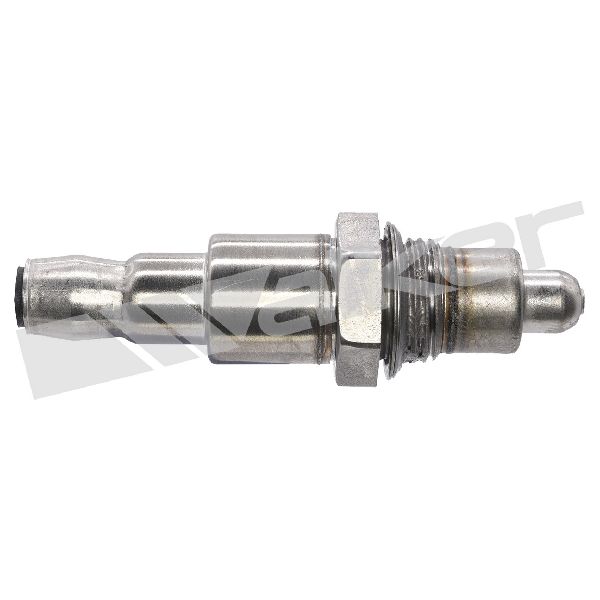
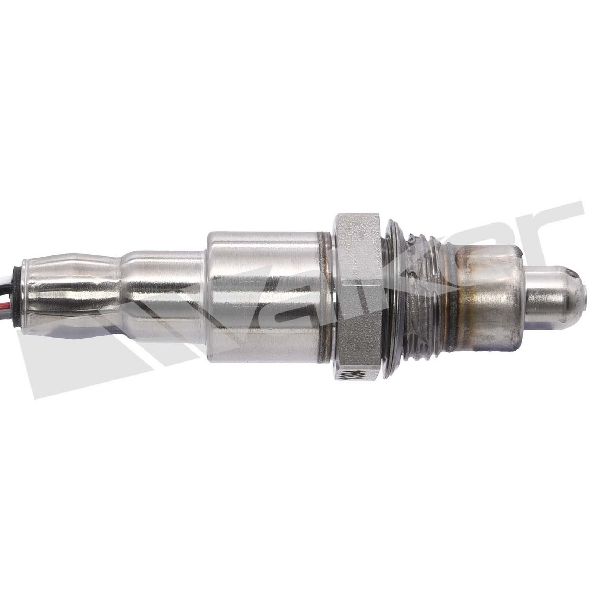
- Bank 1, Sensor 3 Oxygen Sensor
(OEM #LR035747 (superseded by LR057398, LR098291, LR140079))— The internal heater element fails, which is the most common cause for P0042. This is a well-documented issue on this platform due to manufacturing faults and thermal shock.
Trusted brands: Bosch (OEM), Denso, NTK/NGK, Walker
OEM price range: $160-$275
Aftermarket price range: $80-$160
Related Codes That Often Appear With This One
- P0062 — This is the identical heater circuit fault but for Bank 2, Sensor 3. It's common for both sensors to fail around the same time due to age or exposure, and owners often replace them in pairs.
- P0142 — This is a general circuit fault for the same sensor (Bank 1, Sensor 3). It can appear alongside P0042 as the PCM tries to diagnose the issue. TSBs group these codes together as having the same root cause.
- P0043 / P0044 — These codes also relate to the Bank 1, Sensor 3 heater circuit, specifically indicating low voltage (P0043) or high voltage (P0044), pointing to a short or open in the circuit. They are often listed in the same TSBs as P0042.
Technical Service Bulletins (TSBs) & Recalls
- SSM72556: Defines P0042 as 'HO2S HEATER CONTROL CIRCUIT (BANK 1, SENSOR 3)'.
- LTB00671NAS3: Cites P0042 as relevant to post-catalyst heated oxygen sensors and mentions thermal shock as a potential cause.
- SSM72448: Groups P0042 with other O2 sensor codes where diagnosis may find no fault, indicating intermittent issues.
- SSM63157: Directly blames a manufacturing fault for P0042 and related codes on the same engine platform.
Platform-Specific Known Issues
- TSB LTB00671NAS3 mentions that the Malfunction Indicator Lamp (MIL) can illuminate with various heated oxygen sensor codes, including P0042, due to 'thermal shock when water contacts the heated sensing element'.
- TSB SSM72448 lists P0042 among a large group of O2 sensor codes that may be logged, but upon diagnosis, 'NO FAULT FOUND', suggesting a known issue with intermittent wiring or connection problems that are difficult to replicate in a workshop.
- TSB SSM63157 for the related Range Rover Sport explicitly cites a 'manufacturing fault at the supplier – misalignment with in the sensor' as a direct cause for P0042, making sensor failure highly probable.
Mechanic-Grade Diagnostic Values
- O2 Sensor Heater Element Resistance — expected: 4-10 Ohms (when sensor is cold). Failure: An open circuit (OL or infinite resistance on a multimeter) or a value significantly outside the expected range.
- Voltage at Heater Circuit Power Pin (Key On, Engine Off) — expected: ~12V (Battery Voltage). Failure: 0V or significantly low voltage, indicating a problem with the fuse (F11/F14) or power supply wiring.
- Heater Control Circuit Voltage (Sensor Unplugged, KOEO) — expected: Approximately 2.9 Volts. Failure: A reading of 0 volts could indicate the circuit is shorted to ground. This is a bias voltage the PCM uses to self-diagnose an open circuit.
- Heater Control Circuit Ground Signal (Engine Running) — expected: Pulse Width Modulated (PWM) ground signal from PCM, visible as a square wave on an oscilloscope.. Failure: No signal or a steady ground/voltage, indicating a PCM driver or wiring fault.
Scan Tool Commands That Help
- JLR SDD (Symptom Driven Diagnostics) or Pathfinder: Configure existing module – Powertrain control module — This function is used to apply a software update to the PCM. Per TSBs like LTB00757v2 (for a related code), this may be required on 3.0L V6 models to resolve erroneous O2 sensor codes, even after sensor replacement.
Wiring & Ground Locations
- Engine Bay Fuse Box — Located in the left-hand side of the engine compartment, under a cover.. Contains fuses F11 (15A) and F14 (20A) which supply power to the heated oxygen sensor circuits on 2014 models.
- Driver's Side Engine Bay Ground Point — Under the air filter box on the driver's side (US models), where multiple ground wires connect to a chassis stud.. This is a primary ground point for various engine sensors. Corrosion or a loose connection here can cause a wide range of intermittent electrical faults, including sensor heater circuit codes.
- Bank 1 Sensor 3 Connector — On the passenger side exhaust pipe, downstream of the catalytic converter, often near the transfer case.. This is the direct connection point for the faulty sensor. All electrical tests (resistance, voltage) are performed at this connector.
Real Owner Repair Stories
- landroverforums.com user 'gmfain' (2015 Land Rover LR4) — Check Engine Light with only code P0042 stored.
❌ Tried (didn't work) Initial diagnosis and information gathering.
✅ What actually fixed it The user was advised by other forum members that the cause was the Bank 1, Sensor 3 oxygen sensor. The location was confirmed as 'right side (passenger) exhaust, furthest one back'. The implied fix was the replacement of this specific sensor.
OEM Part Supersession History
LR035747→LR057398, LR098291, LR140079— Part has been updated multiple times by the manufacturer, likely to address the high failure rate mentioned in TSBs.
Heads up: Part LR035747 is specified for vehicles up to VIN HA343439, indicating a potential part change for vehicles manufactured after this VIN. Always verify the correct part number with the vehicle's VIN. The OEM supplier is Bosch.
Model Year Variations Within This Range
- 2014-2015: Land Rover issued Service Action N346NAS for a range of vehicles, including some 2014-2015 models, for O2 sensor performance-related DTCs. The fix is to update the Powertrain Control Module (PCM) software, suggesting some faults in these years may be software-related.
Helpful Videos


We Have This Part in Stock


The information in this article is provided for general reference and educational purposes only. Vehicle specifications, procedures, and part compatibility can vary by production date, trim level, and region. Always consult your vehicle's factory service manual and verify part numbers before purchasing or performing repairs. Safety-critical components such as airbags, seat belts, and braking systems should be installed by a qualified professional.
- Land Rover LR4:
- 🧭 Diagnostic Flowchart
- 🎬 Helpful Videos
- 🛍️ Shop This Part
- What's Unique About the 2014-2016 Land Rover LR4
- Symptoms You May Notice
- Most Likely Causes
- Rare But Worth Checking
- Diagnosis Steps
- Parts You'll Likely Need
- Related Codes That Often Appear With This One
- Technical Service Bulletins (TSBs) & Recalls
- Platform-Specific Known Issues
- Mechanic-Grade Diagnostic Values
- Scan Tool Commands That Help
- Wiring & Ground Locations
- Real Owner Repair Stories
- OEM Part Supersession History
- Model Year Variations Within This Range
- 🎟️ Get 5% Off