
P0072 on 2014-2021 Dodge Durango: Ambient Temp Sensor Causes and Fixes
P0072 on a Dodge Durango almost always means the ambient air temperature sensor has failed or its wiring is damaged. It's an inexpensive part, typically under $70 for an OEM sensor, and is a simple DIY fix for most owners. The sensor is located behind the front grille, making it vulnerable to road debris and front-end impacts.
- P0072 on a 2014-2021 Durango points to a problem with the outside air temperature sensor or its wiring.
- The most common symptoms are a Check Engine Light and an incorrect outside temperature reading on the dash, which can disable the auto A/C system.
- The most likely fix is replacing the sensor itself, which is located behind the front grille and is an easy, low-cost DIY job.
- Always inspect the wiring and connector for damage before replacing the sensor, as breaks or corrosion are also common causes, especially after minor front-end impacts.
- Don't be surprised if you find a shorted circuit but the scanner shows a P0073; a known BCM glitch can cause this mix-up, which may require a dealer software update.
What's Unique About the 2014-2021 Dodge DURANGO
On the 2014-2021 Dodge Durango, the ambient air temperature sensor is mounted in a vulnerable position behind the front grille, making it susceptible to damage from road debris, car washes, and minor front-end impacts. Additionally, Dodge issued a Technical Service Bulletin (TSB #08-007-22, which supersedes 0800822) indicating a software issue where the Body Control Module (BCM) might incorrectly set a P0073 (Circuit High) code when a P0072 (Circuit Low) condition actually exists. This platform shares its chassis and many components with the 2011-2021 Jeep Grand Cherokee (WK2), which experiences identical P0072 issues.
Diagnostic Flowchart
Tap your situation to follow the diagnostic path that matches what you're seeing on this vehicle.
Symptoms You May Notice
- Check Engine Light is on.
- Incorrect or missing outside temperature reading on the dashboard or infotainment screen (may show '--' or a fixed low value like -40°F).
- Automatic climate control system does not work correctly or blows air at the wrong temperature.
- A/C compressor may not engage, resulting in no cold air.
- In some cases, a rough idle or slight hesitation on a cold start.
- Replacing the AAT sensor without first checking the wiring and connector. The issue is often a broken wire or corroded connector, not the sensor itself.
- Replacing other A/C components when the root cause is the AAT sensor providing an incorrect reading, which prevents the climate control system from engaging the compressor.
Most Likely Causes
- Failed Ambient Air Temperature (AAT) Sensor 🔴 High Probability → Shop Ambient Air Temperature Sensor The sensor is located in the front of the vehicle, exposed to weather, road debris, and potential impact damage. Over time, the internal electronics can fail.
How to confirm: With a scan tool, check the live data for the AAT sensor. A reading of -40°F or another impossibly low, fixed value indicates a failed sensor or circuit short. You can also test the sensor's internal resistance with a multimeter; the resistance should change with temperature. A reading of 0 ohms or OL (open loop) indicates a bad sensor.
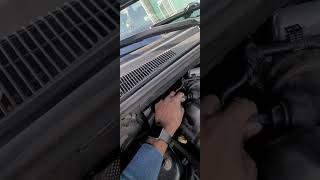
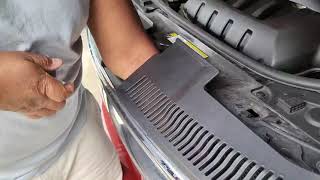
Typical fix: Replace the ambient air temperature sensor. This is a simple plug-and-play part accessible from the top of the grille area. 🎬 Watch: How to replace the sensor on a 3.6L Durango
Est. part cost: $25-$70 - Damaged Wiring or Connector 🟡 Medium Probability The wiring harness leading to the sensor is in an exposed location and can be damaged by road debris, impact, or corrosion from water and road salt. Wires can break inside the insulation right at the connector due to vibration or impact.
How to confirm: Visually inspect the wiring harness and connector for any signs of fraying, breaks, corrosion, or pushed-out pins. A YouTube video on a 2015 Durango showed this exact issue after a minor front-end impact. Check for 5V reference and a good ground at the connector with the sensor unplugged. Wiggle the harness while checking for continuity to find intermittent breaks.
Typical fix: Repair the damaged section of the wiring harness or replace the connector pigtail. Connector pigtails are readily available from aftermarket suppliers like Standard Motor Products (p/n S-820) or Dorman.
Est. part cost: $15-$40 for a new connector pigtail and wiring repair supplies.
Rare But Worth Checking
- Faulty Powertrain Control Module (PCM) or Body Control Module (BCM): This is extremely rare. Before condemning the computer, all other possibilities (sensor, wiring, connections) must be exhaustively ruled out. TSB #08-007-22 notes a logic fault in the BCM, but this is a software issue fixed by a reflash, not a hardware failure.
Diagnosis Steps
- Verify the complaint: Check if the Check Engine Light is on and if the outside temperature display is incorrect (e.g., showing dashes or a very low number like -40°F).
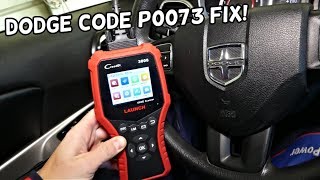
- Scan for codes: Use an OBD-II scanner to confirm P0072 is the active code. Note if P0073 is present instead, keeping the TSB in mind. 🎬 See this walkthrough for diagnosing and repairing the P0073 code
- Visual Inspection: Locate the AAT sensor. On the Durango, it is typically mounted to a bracket on the vertical support behind the front grille, on the passenger side. It is accessible after removing the upper radiator cover (the plastic shield held by push pins). 🎬 Watch: Locating the sensor on Durango HEMI models Inspect the sensor and its two-wire connector for any obvious damage, corrosion, or loose connections.
- Check Live Data: Use a scan tool to view the live data from the AAT sensor. A reading of -40°F or a similar fixed low value strongly suggests a circuit low/short condition.
- Test the Circuit: Disconnect the sensor. Turn the ignition to the 'On' position (engine off). Use a multimeter to check for approximately 5 volts at the reference wire in the connector. If voltage is missing, there is an issue upstream in the harness or with the control module. Check the other wire for a good ground.
- Test the Sensor: If voltage and ground are present at the connector, the sensor is the most likely culprit. You can test its resistance, which should change with temperature, but given the low cost, replacement is often the most efficient step.
- Inspect the Connector Pigtail: Closely examine the two wires where they enter the back of the connector. This is a common failure point where wires can break internally. Gently tug on each wire to see if it stretches or pulls out.
- Clear Codes and Test Drive: After replacing the sensor or repairing the wiring, clear the trouble codes and perform a test drive to ensure the code does not return and the temperature display and A/C functions correctly.
Parts You'll Likely Need
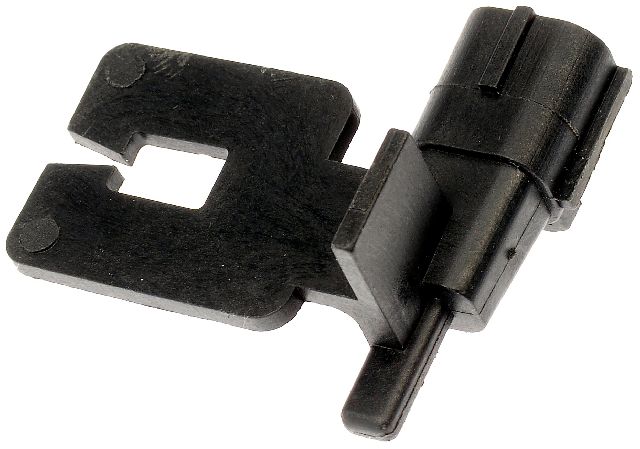
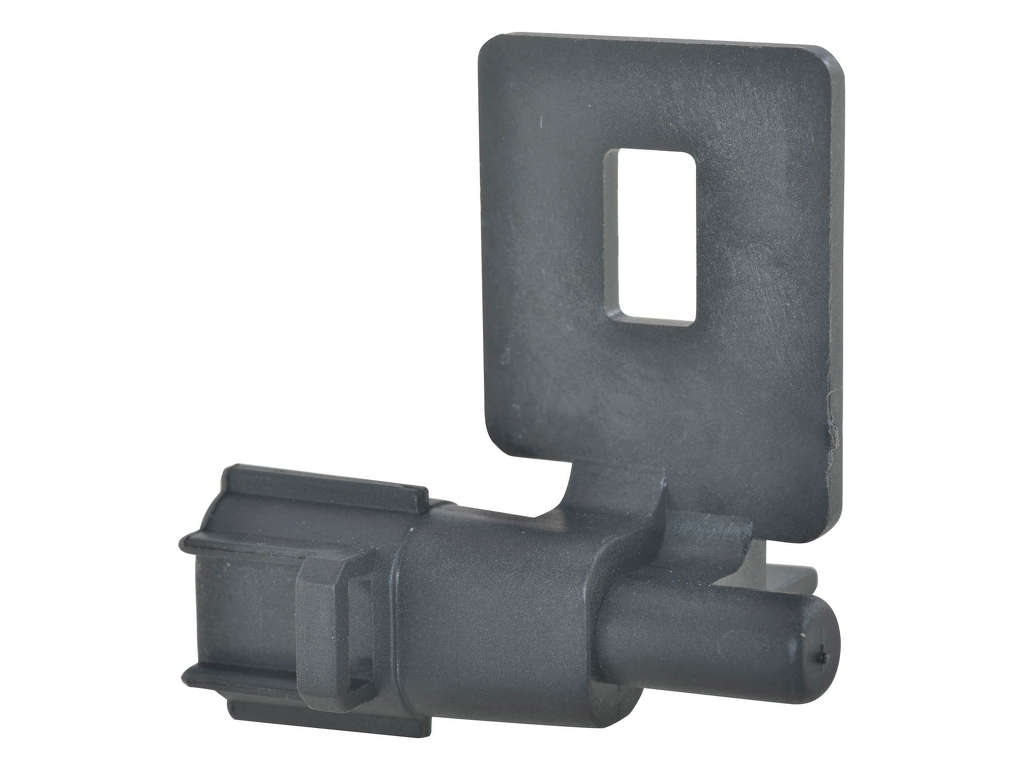
- Ambient Air Temperature Sensor
(OEM #68518243AA)— This is the most common failure point for code P0072 due to its exposed location and electronic nature.
Trusted brands: Mopar, Dorman, NTK, Standard Motor Products
OEM price range: $45-$70
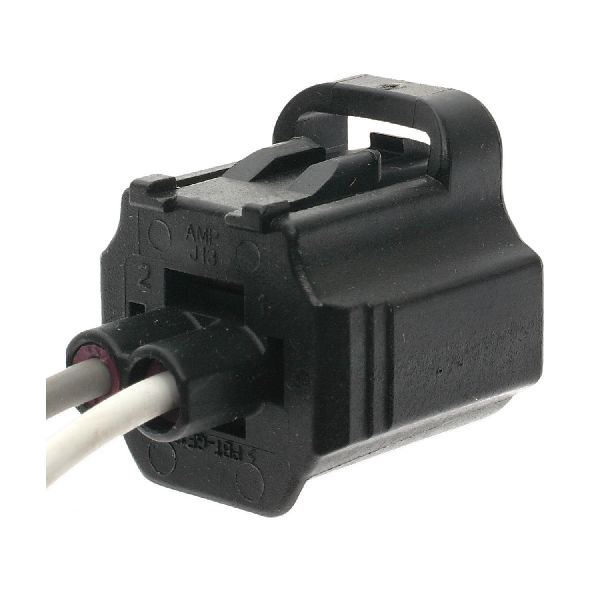
Aftermarket price range: $25-$50 - Ambient Air Temperature Sensor Connector Pigtail — The connector or its wiring is the second most common failure point, often breaking from impact or corroding from moisture.
Trusted brands: Standard Motor Products (p/n S-820), Dorman, Wells (p/n 1P1311)
OEM price range: N/A (typically not sold by OEM)
Aftermarket price range: $15-$40
Related Codes That Often Appear With This One
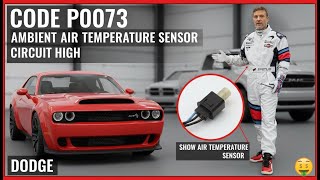
- P0073 — According to Dodge TSB #08-007-22, a 'Circuit Low' condition that should trigger P0072 can sometimes be misidentified by the BCM, causing it to set a P0073 'Circuit High' code instead. This is a known software glitch that can be fixed with a BCM update.
Technical Service Bulletins (TSBs) & Recalls
- 08-007-22: BCM may set P0073 instead of P0072 for a short to ground condition. This bulletin involves reprogramming the BCM with the latest software.
- 18-044-26: Lists P0072-00 as a relevant diagnostic trouble code for the vehicle.
Platform-Specific Known Issues
- TSB #08-007-22: Notes a BCM software issue where a short to ground (which should set P0072) may incorrectly set a P0073 code. This is important for diagnosis if you see P0073 but find a shorted circuit. The fix is a BCM software update.
- TSB #18-044-26: Lists P0072-00 as a relevant diagnostic trouble code for the vehicle.
- Front-End Vulnerability: Many owners report this code appears after minor front-end impacts, car washes with high-pressure wands, or driving through deep snow, all of which can damage the exposed sensor or wiring.
Mechanic-Grade Diagnostic Values
- Ambient Air Temperature Sensor Resistance — expected: Approximately 32.6 kΩ at 32°F (0°C), 12.5 kΩ at 68°F (20°C), and 6.5 kΩ at 95°F (35°C). The resistance is inversely proportional to temperature.. Failure: A reading of 0 ohms (short circuit) or infinite/OL (open circuit) indicates a failed sensor. A reading that does not correspond to the ambient temperature suggests the sensor is inaccurate.
- AAT Sensor Connector Voltage (Key On, Engine Off) — expected: One pin should have a 5-volt reference signal from the PCM/BCM, and the other pin should be a good ground (near 0 volts).. Failure: Absence of the 5V reference suggests a problem with the wiring harness or the control module. Absence of a good ground indicates a break in the ground circuit.
Scan Tool Commands That Help
- wiTECH (or capable professional scanner): Jumpering Connector and Observing Live Data — To test the integrity of the wiring harness. After disconnecting the sensor, use a jumper wire to connect the two terminals in the harness-side connector. A scan tool's live data for the AAT should swing to an extreme high temperature. If it does, the wiring and control module are likely good, pointing to a failed sensor. If the reading remains at -40°F, it confirms a short to ground in the signal wire.
- wiTECH: BCM/PCM Flash Reprogramming — This is used to resolve the software glitch described in TSB #08-007-22, where the BCM incorrectly sets a P0073 code for a P0072 fault condition. It is also used if the module's calibration data is suspected to be corrupt.
Wiring & Ground Locations
- AAT Sensor Connector — Behind the front grille, mounted on a vertical support, typically on the passenger side.. This is the primary point of failure for wiring issues. The two pins are the AAT Sensor Signal and the Sensor Ground. On some Chrysler/Dodge vehicles, the signal wire goes to the Totally Integrated Power Module (TIPM) or BCM.
- AAT Sensor Connector Pinout (Typical) — At the sensor connector.. Pin 1: Sensor Ground. Pin 2: (G31) AAT Signal (to TIPM/BCM). Knowing the pinout is essential for correctly testing for 5V reference and ground, and for performing a jumper wire test.
Real Owner Repair Stories
- YouTube video by 'Repairs and Reviews' (2015 Dodge Durango) — Check Engine Light with code P0073 (related to P0072 per TSB).
❌ Tried (didn't work) The vehicle had been in a front-end accident and the bumper was replaced, but the code persisted.
✅ What actually fixed it The wire for the ambient temperature sensor had broken inside the harness during the accident. The technician repaired the broken wire, which resolved the trouble code. - DodgeForum.com user (Unknown year Dodge) — Overhead console displayed -40°F.
❌ Tried (didn't work) Testing the sensor itself, which showed resistance values within the manufacturer's specified range.
✅ What actually fixed it The user performed a continuity test by jumpering the sensor connector and found an open circuit. The final diagnosis was a broken wire or bad connection between the sensor and the overhead console, not a faulty sensor.
OEM Part Supersession History
56042395, 5149025AA, 5149265AB→68518243AA— Standard part evolution and consolidation by the manufacturer.
Heads up: The latest part number, 68518243AA, is the correct service replacement for the entire 2014-2021 Dodge Durango range and is backward compatible with the older numbers.
Helpful Videos
We Have This Part in Stock


The information in this article is provided for general reference and educational purposes only. Vehicle specifications, procedures, and part compatibility can vary by production date, trim level, and region. Always consult your vehicle's factory service manual and verify part numbers before purchasing or performing repairs. Safety-critical components such as airbags, seat belts, and braking systems should be installed by a qualified professional.
- Dodge DURANGO:
- 🧭 Diagnostic Flowchart
- 🎬 Helpful Videos
- 🛍️ Shop This Part
- What's Unique About the 2014-2021 Dodge DURANGO
- Symptoms You May Notice
- Most Likely Causes
- Rare But Worth Checking
- Diagnosis Steps
- Parts You'll Likely Need
- Related Codes That Often Appear With This One
- Technical Service Bulletins (TSBs) & Recalls
- Platform-Specific Known Issues
- Mechanic-Grade Diagnostic Values
- Scan Tool Commands That Help
- Wiring & Ground Locations
- Real Owner Repair Stories
- OEM Part Supersession History
- 🎟️ Get 5% Off