
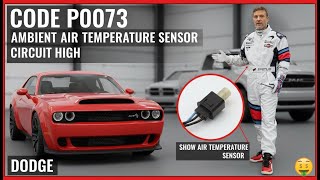
P0073 on 2014-2021 Dodge Durango: Ambient Air Temperature Sensor Causes and Fixes
P0073 on a 2014-2021 Dodge Durango most often indicates a failed ambient air temperature sensor or damaged wiring. This sensor is located in the lower part of the front grille and is a simple, inexpensive fix, with replacement parts costing between $15 and $50. Before replacing, check for damaged wires, as its location makes it vulnerable.
- P0073 on your Durango means there's a problem with the outside air temperature sensor circuit, usually an open circuit.
- The most common cause is a failed sensor, which is inexpensive and relatively easy to replace yourself.
- Before buying parts, always check the sensor's wiring and connector for visible damage, as this is also a frequent cause, especially after any front-end impact.
- This code does not affect vehicle safety or drivability, but it will impact your automatic A/C's performance and may disable remote start.
- Be aware of a specific TSB for 2020 models that indicates the BCM can set this code incorrectly for a different type of fault (a short circuit), which requires a dealer software update.
What's Unique About the 2014-2021 Dodge DURANGO
For this generation of Dodge Durango, there is a known issue documented in a Technical Service Bulletin (TSB 08-008-22) specifically for 2020 models where the Body Control Module (BCM) may incorrectly set the P0073 (Circuit High) code when a short-to-ground condition occurs, which should normally trigger a P0072 (Circuit Low) code. This means that while the problem could be a typical open circuit or bad sensor, it could also be a short in the wiring that is being misinterpreted by the control module, a unique diagnostic challenge for this vehicle that may require a software reflash to fix.
Diagnostic Flowchart
Tap your situation to follow the diagnostic path that matches what you're seeing on this vehicle.
Symptoms You May Notice
- Check Engine Light is on.
- Inaccurate or blank outside temperature reading on the dashboard or infotainment screen (may be stuck on a default value like -40°F).
- Automatic climate control system does not work correctly or blows air at the wrong temperature, 🎬 Watch: Testing the ambient sensor to fix your A/C issues as it relies on the outside temperature reading.
- A/C compressor may not engage because the system believes the outside temperature is too cold.
- Remote start may be disabled.
- Replacing the A/C evaporator temperature sensor. This is a different sensor located inside the dashboard and will not fix a P0073 code, which relates to the *outside* air temperature.
Most Likely Causes
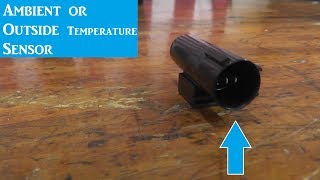
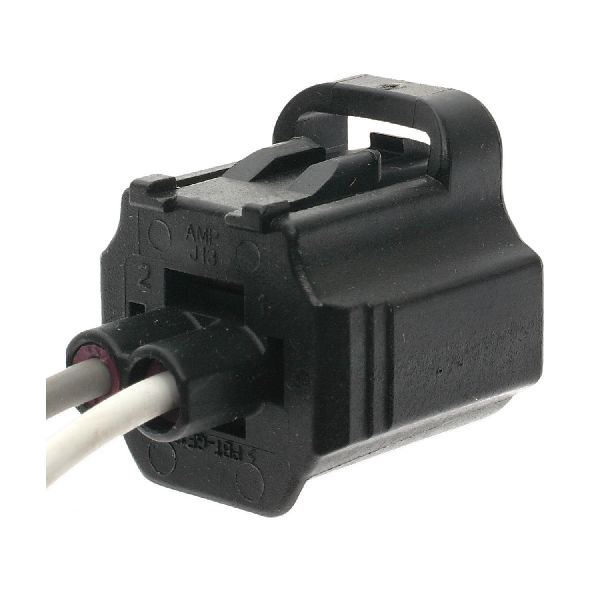
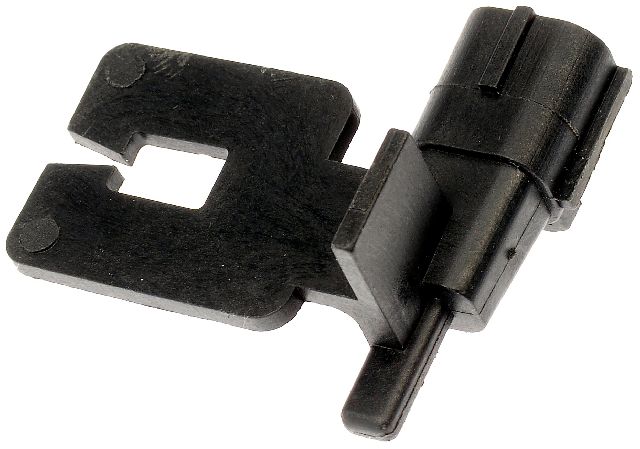
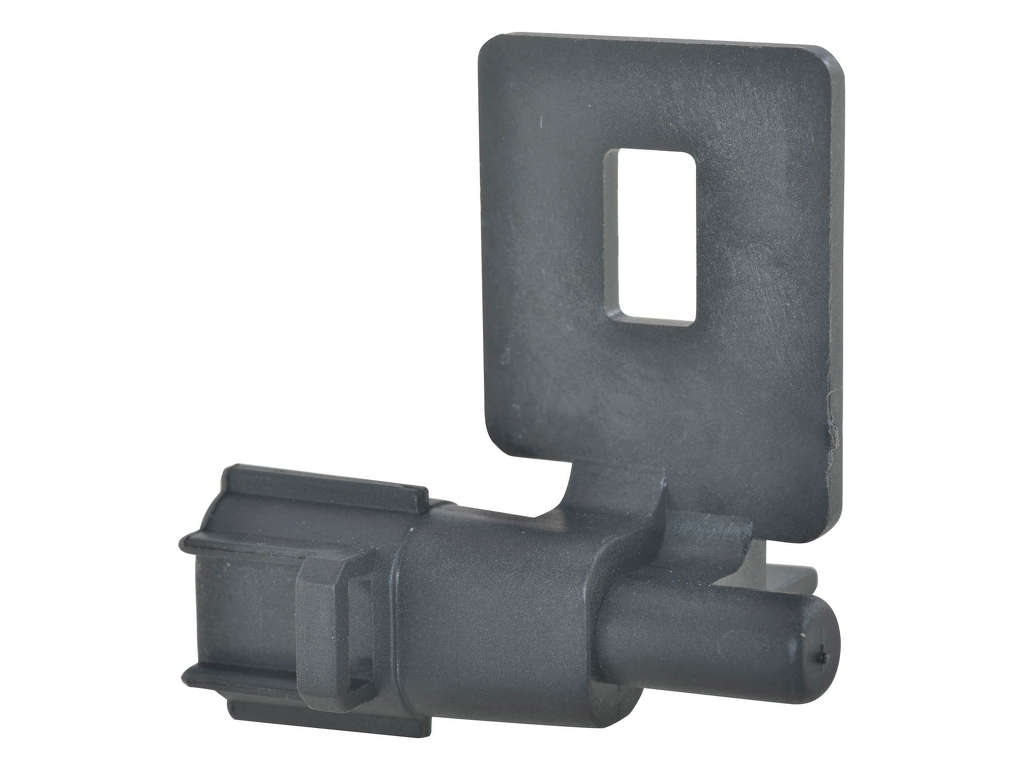
- Faulty Ambient Air Temperature (AAT) Sensor 🔴 High Probability → Shop Ambient Air Temperature Sensor The sensor is located in a vulnerable position behind the lower front grille, where it is exposed to road debris, moisture, car washes, and potential damage from minor front-end impacts or even parking blocks.
How to confirm: Disconnect the sensor and test its internal resistance with a multimeter; it should not be an open circuit (infinite resistance). A scan tool showing a fixed, irrational temperature (like -40°F) often points to a failed sensor or open circuit. Resistance should be around 10,000 Ohms at 77°F (25°C).
Typical fix: Replace the ambient air temperature sensor.
Est. part cost: $15 - $50 - Damaged Wiring or Connector 🟡 Medium Probability As with the sensor itself, the wiring harness is located in the front of the vehicle and can be damaged by road debris, corrosion, or impact. A wire can break, creating an open circuit that triggers the P0073 code. A YouTube video shows a 2015 Durango where the code was caused by a broken wire from a previous front-end accident. 🎬 See this walkthrough for diagnosing and repairing the P0073 code
How to confirm: Visually inspect the wiring leading to the AAT sensor for any breaks, corrosion, or loose pins in the connector. Use a multimeter to check for a 5V reference voltage and a good ground at the connector with the key on. If either is missing, the problem is in the wiring or the control module.
Typical fix: Repair the broken wire(s) or replace the damaged connector pigtail.
Est. part cost: $5 - $25 - Body Control Module (BCM) Logic Error ⚪ Low Probability A manufacturer TSB (08-008-22) confirms that the BCM on 2020 models can misinterpret a short-to-ground as a circuit high condition, setting P0073 instead of P0072.
How to confirm: This is a diagnosis of exclusion. If the sensor and wiring are confirmed to be good, but the code persists, the BCM is the likely cause. This diagnosis is best performed by a dealer who can check the current software version against the TSB.
Typical fix: A dealership will need to reprogram or 'flash' the BCM with updated software. In rare cases, the BCM itself may need replacement.
Est. part cost: $100 - $800+
Diagnosis Steps
- Check the outside temperature display on your dashboard. If it reads an illogical value (e.g., -40°F) or is blank, this confirms the data is not being received correctly.
- Locate the ambient air temperature sensor. It is mounted in front of the radiator/condenser, typically clipped into the lower part of the front grille or the support beam behind it.
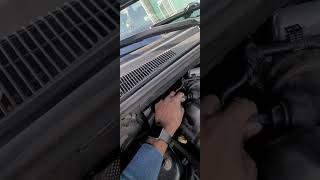
- To access the sensor, you may not need to remove the entire bumper. Often, you can remove the upper plastic radiator shield/cover and then carefully pop out the upper grille trim piece to reach down from the top. 🎬 Watch: How to replace the sensor on a 2014 Durango
- Visually inspect the sensor and its electrical connector for any signs of physical damage, corrosion, or loose connections. The red locking tab on the connector should be secure.
- Inspect the wiring harness leading to the sensor as far as you can see for any cuts, breaks, or chafing. This area is prone to damage from road debris.
- If a visual inspection reveals no issues, use a scan tool to clear the code. If it returns immediately, the fault is active.
- With the ignition on and the sensor unplugged, use a multimeter to test the connector. One pin should have approximately 5 volts (reference), and the other should have continuity to ground. If either is missing, the problem is in the wiring or the control module.
- If the wiring provides proper voltage and ground, the sensor itself is the most likely cause of the failure. Replacing it is the next logical step.
Parts You'll Likely Need
- Ambient Air Temperature Sensor
(OEM #68518243AA)— This sensor is the most common failure point for the P0073 code due to its exposed location and electronic nature. This part number is a wide-ranging Mopar part used across many Dodge, Jeep, and Chrysler vehicles. It supersedes older part numbers 5149025AA, 5149265AB, and 56042395.
Trusted brands: Mopar, Dorman, NTK, Standard Motor Products
OEM price range: $45 - $70
Aftermarket price range: $15 - $40
Related Codes That Often Appear With This One
- P0072 — P0072 (Ambient Air Temperature Sensor Circuit Low) is the companion code. Given TSB 08-008-22 for the Durango, it's possible for a short-to-ground (which should trigger P0072) to be incorrectly reported by the BCM as P0073.
Technical Service Bulletins (TSBs) & Recalls
- Bulletin #08-008-22: Specifically for 2020 Durango models, notes a BCM logic error where a short circuit (P0072 condition) can cause a P0073 code to be set. The fix is a BCM software update.
- Bulletin #18-044-26: Lists P0073-00 - Ambient Air Temperature Sensor Circuit "A" High as a possible diagnostic trouble code for the vehicle.
Platform-Specific Known Issues
- TSB #08-008-22 notes that the BCM on 2020 models may set P0073 for a short-to-ground condition, which should correctly be a P0072. This is a known software/logic issue requiring a dealer reflash.
- The sensor's location in the lower front fascia makes it highly susceptible to being damaged or having its wiring torn from minor impacts with curbs, snowbanks, or road debris.
Mechanic-Grade Diagnostic Values
- AAT Sensor Signal Voltage (Live Data) — expected: 0.5V (hot) to 4.5V (cold). Failure: Voltage is stuck above 4.5V, often reading 4.9V or 5.0V, which corresponds to a reading of -40°F/C.
- AAT Sensor Internal Resistance — expected: Varies with temperature. A real-world test on a Dodge showed ~17,000 Ohms (17 kΩ) at 45-50°F.. Failure: Infinite resistance (Open Line), indicating an internally broken sensor.
- AAT Sensor Connector Voltage (Key On, Sensor Unplugged) — expected: One pin should have ~5V (reference from BCM/PCM), the other should have near 0V (ground).. Failure: Voltage above 5.2V indicates a short to voltage in the harness; missing 5V or ground indicates an open wire back to the control module.
- AAT Sensor Wiring Harness Continuity — expected: Less than 3.0 Ohms. Failure: Resistance higher than 3.0 Ohms on either the signal or ground wire indicates high resistance or an open circuit in the harness.
Hidden / Shadow Codes Worth Checking
- P0073-00: This is the full code format often seen on dealer-level scan tools like wiTECH. The '-00' suffix typically specifies the fault type or status, confirming it as a primary circuit fault. (see via Chrysler/Dodge wiTECH dealer scan tool.)
Scan Tool Commands That Help
- wiTECH: Reprogram the BCM — Used to apply the software update specified in TSB #08-008-22 for 2020 models where the BCM incorrectly sets P0073 for a short circuit. This is the official fix for the logic error.
- wiTECH: Proxi Configuration Alignment — This procedure is often required after replacing or reprogramming modules like the BCM to ensure all vehicle modules recognize each other and are configured correctly. Failure to perform this can lead to persistent or new communication errors.
Wiring & Ground Locations
- AAT Signal Circuit (e.g., G31) — This wire runs from a pin on the AAT sensor connector to a specific pin on the Body Control Module (BCM) or Totally Integrated Power Module (TIPM) connector.. An open or high resistance on this circuit is the direct cause of a P0073 code. A diagnostic procedure involves checking for continuity from end to end (resistance < 3.0 Ohms).
- AAT Sensor Ground Circuit (e.g., G931) — This wire runs from the second pin on the AAT sensor connector to a ground pin on the BCM or TIPM. It is a 'sensor ground', not a direct chassis ground.. An open in the sensor ground circuit will also cause the signal voltage to float high, triggering a P0073 code. The module cannot get a valid reading without this reference ground.
Real Owner Repair Stories
- YouTube - s-gYh_SgL-0 (2015 Dodge Durango) — P0073 code was active. The vehicle had been in a previous front-end accident.
❌ Tried (didn't work) Not specified, but the diagnosis pointed directly to the wiring.
✅ What actually fixed it The wire harness going to the ambient air temperature sensor was broken. The final fix was repairing the broken wire.
"I Checked Everything" — The Actual Cause
- While a smoke test is not applicable, a similar pattern exists: If the sensor tests good (correct resistance) and the wiring shows good continuity with proper voltage and ground at the connector, the cause may be the BCM logic error detailed in TSB #08-008-22 for 2020 models. In this case, the BCM is misinterpreting a short circuit as an open circuit, so standard 'open circuit' diagnostics will lead nowhere. The fix is a software reflash at the dealership.
When the Usual Fixes Don't Work
- While replacing the sensor is the most common fix, it often fails to resolve the issue. A significant number of P0073 codes on the Durango are caused by damage to the wiring harness due to its exposed location in the front grille area. A broken wire from a minor impact can create an open circuit, which mimics a failed sensor. Furthermore, for 2020 models, the root cause can be a software error in the BCM that misreports a short circuit as an open circuit, making sensor or wiring replacement ineffective until the module is reprogrammed per TSB #08-008-22.
OEM Part Supersession History
5149025AA, 5149265AB, 56042395→68518243AA— Part consolidation and potential design revision by the manufacturer.
Heads up: No known incompatibilities. The latest part number, 68518243AA, is the correct service replacement for the entire 2014-2021 model range.
Model Year Variations Within This Range
- 2020: A specific software logic flaw exists in the Body Control Module (BCM) for this model year. It can cause the BCM to set a P0073 (Circuit High) code when the actual fault is a short-to-ground, which should trigger a P0072 (Circuit Low) code. The fix is a dealer-installed software update as per TSB #08-008-22.
Helpful Videos
We Have This Part in Stock


The information in this article is provided for general reference and educational purposes only. Vehicle specifications, procedures, and part compatibility can vary by production date, trim level, and region. Always consult your vehicle's factory service manual and verify part numbers before purchasing or performing repairs. Safety-critical components such as airbags, seat belts, and braking systems should be installed by a qualified professional.
- Dodge DURANGO:
- 🧭 Diagnostic Flowchart
- 🎬 Helpful Videos
- 🛍️ Shop This Part
- What's Unique About the 2014-2021 Dodge DURANGO
- Symptoms You May Notice
- Most Likely Causes
- Diagnosis Steps
- Parts You'll Likely Need
- Related Codes That Often Appear With This One
- Technical Service Bulletins (TSBs) & Recalls
- Platform-Specific Known Issues
- Mechanic-Grade Diagnostic Values
- Hidden / Shadow Codes Worth Checking
- Scan Tool Commands That Help
- Wiring & Ground Locations
- Real Owner Repair Stories
- "I Checked Everything" — The Actual Cause
- When the Usual Fixes Don't Work
- OEM Part Supersession History
- Model Year Variations Within This Range
- 🎟️ Get 5% Off