
OBD-II Code P0074: Ambient Air Temperature Sensor Circuit Intermittent/Erratic
The Ultimate P0074 Guide: What It Means, Why It Triggers, and Exactly How to Fix It
- Code P0074 disables your automatic A/C compressor and displays an erratic outside temperature (often defaulting to -40°F) due to an unstable sensor signal.
- Do not immediately replace the $30 sensor; over 50% of P0074 codes stem from a corroded connector or frayed wiring behind the front grille.
- Diagnose the exact fault location by performing a 60-second 'wiggle test' on the sensor's wiring harness while monitoring live temperature data on an OBD-II scanner.
- A professional repair averages $150 to $250, but cleaning the connector pins with a $10 can of electronics cleaner and applying dielectric grease often permanently resolves the issue.
What Does P0074 Mean?
Code P0074 means your vehicle's Powertrain Control Module (PCM) detects an unstable, fluctuating, or inconsistent signal from the Ambient Air Temperature (AAT) sensor. This sensor is a simple thermistor that measures outside air temperature. The PCM uses this data to manage the automatic climate control system, display the outside temperature on the dashboard, and serve as a reference point for cold-start fuel calculations and engine cooling fan operation.
Technical definition: The official SAE/OBD-II definition for P0074 is "Ambient Air Temperature Sensor Circuit 'A' Intermittent/Erratic". This specifies that the electrical signal from the AAT sensor is unstable—dropping out, jumping to unrealistic values, or behaving unpredictably. The 'intermittent' nature of this code means the fault is not constant, making it a classic wiring or connector issue 🎬 Watch: Step-by-step guide to fixing the P0074 intermittent circuit code. rather than a hard component failure.
Can I Drive With P0074?
Yes, But With Caution. Yes, you can drive with code P0074. It does not cause immediate engine damage. The primary consequences are an inoperative automatic climate control system (no A/C) and an inaccurate outside temperature display. Prolonged driving with this fault slightly reduces fuel economy and forces engine cooling fans to run erratically. Repair the issue promptly to restore A/C functionality and prevent premature cooling fan wear.
Common Causes
- Damaged or Corroded Connector (Very Common) — Located behind the front grille, the AAT sensor's connector is highly exposed to water, road salt, and debris. Corrosion on the pins, frayed wires, or water intrusion are the most frequent culprits behind an intermittent signal.
- Faulty Ambient Air Temperature (AAT) Sensor (Common) — The sensor itself fails internally due to age, thermal stress from extreme temperature swings, or internal solder joint fractures caused by constant road vibration.
- Physical Damage or Obstruction (Uncommon) — Front-end impacts, deep puddles, or the improper installation of aftermarket grilles physically break the sensor, trap heat, or stress its wiring harness.
- Poor Ground or Intermittent Power Supply (Less Common) — A corroded ground connection or a failing 5-volt reference circuit from the PCM causes the sensor's voltage to fluctuate, triggering the erratic code.
- Faulty Powertrain Control Module (PCM) (Rare) — The PCM itself has an internal fault preventing it from correctly processing the AAT signal. Rule out all wiring and sensor issues definitively before considering this expensive repair.
Symptoms
- Check Engine Light is On — The Malfunction Indicator Lamp (MIL) illuminates on your dashboard.
- Incorrect or Fluctuating Outside Temperature Display — The dashboard temperature display is wildly inaccurate, stuck on a default number (like -40°F), or jumps between random values. 🎬 See this breakdown of bad sensor symptoms and testing methods.
- Automatic Climate Control Malfunction — The automatic A/C blows warm air or the compressor refuses to engage because the PCM incorrectly believes the outside temperature is freezing.
- Engine Cooling Fans Run Erratically — The AAT reading dictates engine cooling fan logic on many vehicles. An erratic signal forces the cooling fans to run at high speed unnecessarily.
- Slightly Reduced Fuel Economy — Engine management systems use AAT data for minor adjustments to fuel calculations. An erratic signal leads to a small, measurable decrease in fuel efficiency.
Diagnostic Flowchart
Tap your situation to follow the diagnostic path that matches what you're seeing on this code.
Common Fixes & Costs
- Repairing Damaged Wiring or Replacing Connector Pigtail — Parts: $15-$50, Labor: $120-$180, ~1 hr book time (Intermediate)
- Replacing the Ambient Air Temperature Sensor — Parts: $20-$80, Labor: $60-$150, ~0.8 hr book time (DIY)
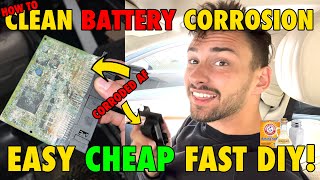
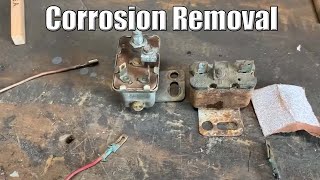
- Cleaning Corrosion and Applying Dielectric Grease — Parts: $10-$15, Labor: $0, ~0.2 hr book time (DIY)
- Securing Loose Sensor or Wiring Harness — Parts: $5, Labor: $0-$50, ~0.1 hr book time (DIY)
- Replacing the Powertrain Control Module (PCM) — Parts: $600-$1500, Labor: $150-$300, ~1.5 hr book time (Professional)
Used vs. New Parts: Buying Guide
When a used part is worth it: Buying used only makes sense if the sensor is integrated into a larger, expensive assembly (like a Ram truck side mirror). For standalone sensors, always buy new.
Donor-vehicle mileage cap: roughly under 100000 miles for the part to have meaningful remaining life.
Donor quality checklist:
- Verify the donor vehicle was not in a front-end collision.
- Visually inspect the used sensor's connector pins for any signs of green or white corrosion.
- Match the part number exactly; sensors look identical but have different resistance curves.
Decision logic:
- If The new OEM or quality aftermarket sensor costs less than $50 → Buy new. The small cost saving of a used part is not worth the risk of immediate failure.
- If The sensor is integrated into a side mirror assembly → A used assembly from a low-mileage vehicle is a highly cost-effective option compared to dealer prices.
- If The vehicle is over 15 years old and the budget is strictly limited → A used sensor is acceptable, but expect zero warranty.
Warranty tradeoff: Used parts offer a 30-day exchange warranty at best. New aftermarket parts include a 1-year to limited lifetime warranty. New OEM parts carry a 1-2 year warranty.
Worst-case if a used part fails: 150
What Happens If You Wait — Timeline
- 0-4 weeks: Code P0074 sets, Check Engine Light illuminates. The outside temperature display is erratic, and the automatic climate control refuses to engage the A/C compressor. (MPG impact: 0-1%% · Added cost: 0)
- 1-3 months: Inconvenience from lack of A/C continues. Engine cooling fans begin running constantly as a fail-safe, causing audible noise. A minor fuel economy drop occurs. (MPG impact: 1-2%% · Added cost: 25)
- 3-12 months: Constant operation of cooling fans leads to premature wear on the fan motors. Connector corrosion worsens, destroying the pins beyond cleaning. (MPG impact: 1-2%% · Added cost: 150)
- 12+ months: The eventual repair requires a more expensive wiring pigtail replacement rather than a simple sensor swap or cleaning. Cooling fan assemblies may require replacement. (MPG impact: 1-2%% · Added cost: 400)
Cost of Not Fixing It
- 0-3 months: Inoperative A/C system and incorrect outside temperature display. A minor decrease in fuel economy occurs in some vehicles. (Added cost: 0)
- 3-12 months: Cooling fans run excessively as a fail-safe, causing premature wear on the fan motors. Connector corrosion worsens, destroying the pins. (Added cost: 150)
- 12+ months: The connector is destroyed by corrosion, requiring a more expensive wiring pigtail replacement rather than a simple cleaning. Cooling fan motors may fail. (Added cost: 400)
Diagnosis Steps
- Verify the Code and Review Freeze Frame Data
Use an OBD-II scanner to confirm P0074 is the active code. Access the 'Freeze Frame' data to view the exact AAT reading when the code triggered. An illogical value (e.g., -40°F on a 90°F day) confirms a circuit dropout.
Tools: OBD-II Scanner (Beginner) - Observe Live Data
Navigate to the live data stream on your scanner and monitor the Ambient Air Temperature PID. A healthy sensor shows a stable temperature. An intermittent fault reveals itself as the reading jumping erratically between normal and extreme values.
Tools: OBD-II Scanner with Live Data (Beginner) - Perform a 'Wiggle Test'
With the ignition on and live AAT data displayed, gently wiggle the sensor's electrical connector and the wiring harness. If the temperature reading jumps or drops out when you move the wires, you have pinpointed the exact location of the intermittent short or open circuit.
Tools: OBD-II Scanner with Live Data (Intermediate) - Perform a Thorough Visual Inspection
Locate the AAT sensor behind the front grille or under the bumper. Disconnect it and inspect the pins for green/white corrosion, melted plastic, or water intrusion. Check the wiring harness for chafed insulation.
Tools: Flashlight, Inspection Mirror (Beginner) - Test the Circuit at the Connector
With the sensor disconnected and ignition on (engine off), use a multimeter to test the harness. One pin must have a 5-volt reference voltage. The other must show a solid ground (less than 100mV). If either is missing, the wiring leading back to the PCM is compromised.
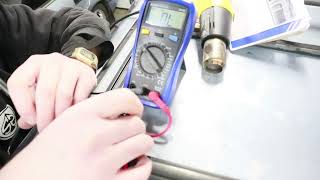
Tools: Digital Multimeter (Intermediate) - Test the Sensor's Resistance
Set your multimeter to Ohms (Ω) and measure resistance across the disconnected sensor's terminals. Compare this to the manufacturer's temperature-to-resistance chart (e.g., ~10,000 Ohms at 77°F). Warm the sensor gently with a hairdryer; the resistance must change smoothly. If it jumps or reads infinite (open), replace the sensor.
Tools: Digital Multimeter, Vehicle Service Manual, Hairdryer (Intermediate) - [PRO-TIP] Graphing/Scope Analysis of the Signal
For elusive intermittent faults, use a graphing multimeter or oscilloscope to monitor the sensor's signal wire. A faulty circuit shows sharp, vertical dropouts to 0 volts (short to ground) or spikes to 5 volts (open circuit) corresponding to the exact moments the fault occurs.
Tools: Graphing Multimeter or Oscilloscope, Back-probe Kit (Advanced) - [ADVANCED] Voltage Drop Test
Test for high resistance in the ground circuit. With the sensor connected and ignition on, place the positive multimeter lead on the negative battery terminal and the negative lead on the back-probed ground pin of the AAT connector. A reading above 0.1 volts (100mV) indicates excessive ground resistance.
Tools: Digital Multimeter, Back-probe Kit (Advanced) - [ADVANCED] Load Testing the Circuit
A wire can have continuity but fail to carry a load. Connect a small 12V bulb between the 5V reference wire and the ground wire at the sensor connector. A bright light confirms load capacity. A dim or unlit bulb indicates high resistance hidden in the circuit.
Tools: 12V Test Light or Small Bulb with Wires (Advanced)
When This Code Triggers (Freeze-Frame Conditions)
- Engine Coolant Temp: Varies (The fault occurs at any engine temperature, hot or cold, as it is independent of engine heat.)
- RPM: Any (The intermittent fault is triggered by vibration, occurring at idle (low vibration) or highway speeds (high-frequency vibration).)
- Engine Load: Any (Engine load does not influence this fault. The code logs during steady-state driving when the system has time to detect the erratic signal.)
- Vehicle Speed: 35-65 mph (Often logged at cruise speeds, where consistent road vibrations expose a loose connection or chafed wire.)
Related Codes
- P0070 — Indicates a general malfunction in the AAT sensor circuit. P0074 is more specific, pointing directly to an intermittent or erratic signal rather than a constant failure.
- P0071 — Indicates a 'Range/Performance' problem. The PCM compares the AAT reading to the Intake Air Temp and Engine Coolant Temp sensors at startup. If the AAT reading is illogical compared to the others, it sets P0071.
- P0072 — Indicates the AAT sensor circuit input is consistently 'Low', caused by a hard short to ground. Live data shows a steady, impossibly low temperature (like -40°F), whereas P0074 fluctuates.
- P0073 — Indicates the AAT sensor circuit input is consistently 'High', caused by a hard open circuit (broken wire or unplugged sensor). Live data shows a steady, impossibly high temperature.
Climate & Environmental Factors
- Road Salt and Freezing Slush: Sodium chloride mixed with water creates a highly corrosive slush that sprays directly onto the front-mounted AAT sensor. This rapidly accelerates corrosion of connector pins and degrades wiring insulation.
- Direct Water Intrusion: Heavy rain, driving through deep puddles, or high-pressure car washes force water past aged connector seals, injecting moisture directly into the electrical connection and causing immediate short circuits.
- Extreme Temperature Cycles: Frequent swings between freezing winters and hot summers cause the plastic in connectors and wiring insulation to become brittle and crack, exposing wires to the elements.
How to Talk to a Mechanic About This Code
Say this: "I have a check engine light and my scanner shows code P0074 for an intermittent ambient air temp sensor circuit. My temperature display is fluctuating and the A/C isn't working. I need a diagnostic appointment to confirm if the issue is the sensor, the connector, or the wiring harness."
This proves you understand the code and its common causes. It forces the technician to properly diagnose an intermittent electrical fault rather than blindly replacing the sensor.
Avoid saying:
- 'My check engine light is on, can you just fix it?'
- 'My A/C isn't working, it probably needs a recharge.'
- 'Just replace the outside temperature sensor.'
Questions to ask before authorizing the repair:
- Did you perform a 'wiggle test' on the wiring and connector while watching live data to confirm the fault location?
- Did you test the sensor's resistance and check for 5-volt reference and good ground at the connector?
- Is the recommended repair to clean the connector, replace the pigtail, or replace the sensor itself?
Where to Take It: Dealer vs Independent vs Chain
- Dealer:
Best for: Vehicles still under warranty, Known manufacturer-specific issues covered by a TSB (e.g., Ford Transit Connect), Complex cases where the sensor is integrated into a larger assembly (e.g., Ram truck mirrors)
Downsides: Labor rates are 50% to 100% higher than independent shops., Dealers prefer replacing entire assemblies rather than attempting cost-effective wiring repairs. (Typical cost: +50% vs. baseline) - Independent Shop:
Best fit. P0074 is a routine electrical fault that any competent independent shop diagnoses and repairs effectively at a lower cost than a dealer.
Best for: Most out-of-warranty vehicles, Diagnosing and repairing common wiring and connector issues, Cost-conscious owners who want a reliable repair
Downsides: Diagnostic skill varies; look for shops with ASE-certified technicians specializing in electrical work. (Typical cost: +0% vs. baseline) - Chain Shop:
Avoid for initial diagnosis. Acceptable only for a straightforward sensor swap if you know the exact problem.
Best for: Simple sensor replacement if you have already diagnosed the sensor itself as the definitive cause.
Downsides: Lacks the diagnostic expertise to trace an intermittent wiring fault, leading to incorrect repairs (e.g., replacing a good sensor)., High pressure to upsell unnecessary services. (Typical cost: -10% vs. baseline)
When to Walk Away From the Repair
If the estimated repair cost exceeds 40% of the car's private-party value, evaluate whether to fix it, sell it as-is, or trade it in.
- Car worth $8000, fix is $200: Fix it. The repair cost is a tiny fraction of the car's value and restores A/C.
- Car worth $2000, fix is $200: Fix it. It is a low-cost repair that restores key functionality and makes the car significantly easier to sell.
- Car worth $1500, fix is $1000: Walk away. A $1,000 estimate implies P0074 is just one of many severe electrical problems. The repair cost is too high relative to the vehicle's value.
What Scan Tool You Need for This Code
Minimum: A scanner that reads codes and displays a live data stream of the Ambient Air Temperature sensor PID.
A basic $20 code reader only gives you the 'P0074' number. It cannot show the live, fluctuating temperature reading required to perform a 'wiggle test' and confirm an intermittent wiring fault.
Budget: BlueDriver Pro (~$90) — Connects to your smartphone and provides excellent live data graphing. This allows you to visually see the temperature signal drop out as you wiggle the wiring.
Mid-range: Innova 5610 (~$150) — Offers robust live data, freeze frame data, and OEM-specific data points. A great step up for the serious DIYer.
Professional: Autel MaxiCOM MK808BT (~$500) — Offers full-system diagnostics, fast live data graphing, and bidirectional controls. An entry-level professional tool suitable for advanced DIYers.
Rent vs buy: Rent a scanner for free from auto parts stores like AutoZone. You pay a deposit equal to the tool's cost and get a full refund upon return. This is the most cost-effective option for a one-time diagnosis.
How to Clear the Code After You Fix It
- Use an OBD-II scan tool to clear the P0074 code.
- Reconnect the battery if it was disconnected for the repair.
- Perform a complete OBD-II drive cycle to allow readiness monitors to run.
Drive cycle (~20 minutes): Start the engine from a cold start and let it idle for 3 minutes. Drive for 15 minutes with mixed city/highway speeds, including a period of steady cruising between 55-65 mph. Allow the vehicle to cool down completely to let the computer verify the repair.
Readiness monitors affected: Comprehensive Component Monitor (CCM)
Before emissions retest: drive at least 50 miles to fully set monitors.
Watch out for:
- Clearing the code does not fix the underlying electrical issue; the code returns immediately if the repair failed.
- Disconnecting the battery resets all readiness monitors to 'not ready', causing an automatic emissions test failure.
- Failing to drive the vehicle through varied conditions prevents the necessary readiness monitors from setting.
Will This Fail Emissions / State Inspection?
Yes — this code typically fails an OBD-II emissions inspection.
- California: An active P0074 code causes an automatic smog check failure. If the code was recently cleared, the vehicle fails because readiness monitors are 'not ready'. You must complete a 50-mile drive cycle before retesting.
- New York: A vehicle fails the NYS inspection if the Check Engine Light is illuminated. P0074 triggers the light, resulting in a failed OBD-II emissions inspection.
- Texas: In emissions-testing counties, an illuminated Check Engine Light from P0074 is an automatic failure. The test also fails if the OBD readiness monitors are not set to 'ready'.
Most Commonly Affected Vehicles
- Ford F-150, Transit Connect (2009-2016) — Ford issued TSB 16-0054 for 2014-2016 Transit Connects for this code causing A/C failure, requiring a new sensor (DY1160) and connector pigtail (WPT-1283). On F-150s, the sensor is located below the battery near the frame rail and is highly prone to damage.
- Dodge/Ram 1500, 2500 (2009-2018) — The AAT sensor is integrated into the driver-side mirror assembly. Damage to the mirror from a side-swipe is the most common cause. Replacement often requires a completely new mirror assembly.
- Chevrolet / GMC Silverado, Sierra, Equinox (2007-2014) — On trucks, the sensor sits directly behind the grille, making its wiring susceptible to chafing. On the Equinox, front-end collision damage frequently smashes the sensor or connector.
- Jeep Grand Cherokee, Wrangler (2011-2017) — Highly susceptible to water intrusion in the sensor connector after off-roading or driving in heavy rain. The connector seal fails, allowing moisture to corrode the pins.
- Subaru Outback, Legacy (2010-2012) — Subaru's electrical architecture is highly sensitive to voltage drops. A failing battery can interrupt sensor learning and trigger intermittent circuit codes mimicking a bad sensor.
- BMW 3-Series (E90), X5 (E70) (2006-2013) — The sensor is located in the lower front bumper area (driver's side wheel well liner) and is frequently torn off by road debris, parking curbs, or snow buildup.
- Hyundai Elantra, Tucson (2011-2016) — Failures are most often related to the wiring pigtail becoming brittle from heat and age, causing the insulation to crack and wires to break near the connector.
- Honda Accord, CR-V (2008-2015) — Issues are typically a straightforward internal sensor failure after high mileage. Wiring issues are significantly less common than on domestic makes.
Manufacturer-Specific Notes
- Ford: TSB 16-0054 for 2014-2016 Transit Connects explicitly addresses P0074 causing A/C inoperation. The mandated fix replaces both the sensor and the connector pigtail, proving the factory connector is a known failure point.
- Dodge/Chrysler/Jeep/Ram: On many trucks and SUVs, the AAT sensor is integrated into the driver-side exterior mirror. Installing aftermarket tow mirrors that lack the sensor immediately triggers this code. The fix requires an OEM mirror or a special jumper harness.
- General Motors (Chevy/GMC): GM vehicles are exceptionally prone to water intrusion at the AAT connector behind the grille. The standard professional repair involves replacing the connector pigtail and packing the new connector with dielectric grease.
- Subaru: Subaru has issued TSBs for related DTCs triggered by low battery voltage. On Subarus, seemingly unrelated electrical issues cause sensor circuit codes, making battery health checks a mandatory first diagnostic step.
Real Owner Stories
2015 Ford Transit Connect - A/C Inoperative
The A/C stopped working, the outside temperature dash display was inaccurate, and the check engine light showed code P0074.
Outcome: The owner found Ford TSB 16-0054. The fix required replacing both the AAT sensor and its electrical connector pigtail (part WPT-1283). After the repair, the A/C worked perfectly.
Lesson: Always check for manufacturer TSBs. For this Ford, replacing only the sensor fails to fix the problem because the connector itself is the primary failure point.
2016 Ram 1500 - Code After Mirror Damage
Code P0074 appeared after the driver-side mirror was hit in a parking lot. The temperature display stuck at -40°F.
Outcome: The intermittent connection was inside the damaged mirror's wiring harness. Replacing the entire driver-side mirror assembly resolved the code and restored A/C function.
Lesson: On many Dodge/Ram/Jeep models, the AAT sensor is not behind the grille. Verify the sensor's location, as external damage to a mirror is a frequent root cause.
2020 Chevy Equinox - Tricky Post-Collision Fix
After repairing front-end collision damage, the owner had a P0073/P0074 code. The original sensor was smashed.
Outcome: The fault was in the wiring harness deeper in the vehicle, which was also damaged during the collision. The correct dash display was a red herring, as the infotainment system used a different sensor.
Lesson: If a circuit code returns instantly after replacing a sensor, the problem is in the wiring harness. Do not assume a correct dash display means the PCM's circuit is intact.
How to Prevent This Code From Triggering
- Apply Dielectric Grease to the Connector (Anytime the sensor is disconnected for service.) — Dielectric grease is a non-conductive silicone compound that seals electrical connectors from moisture and road salt, preventing the corrosion that causes P0074.
- Gentle Cleaning of Front Grille Area (During regular car washes.) — Avoid spraying high-pressure water directly at the AAT sensor. High pressure forces water past aged seals and causes immediate electrical faults.
- Install Protective Wiring Loom (Once, as a proactive upgrade.) — Adding plastic split-loom tubing over exposed sensor wiring provides a physical barrier against road debris, chafing, and moisture.
Frequently Asked Questions
What is the most common mistake when diagnosing P0074?
The biggest mistake is replacing the sensor without testing the circuit. Because P0074 is an intermittent fault, the problem is usually in the wiring or connector. Always perform a wiggle test while watching live data before buying parts.
Can I fix P0074 myself?
Yes, this is a highly DIY-friendly repair. The sensor is easily accessible behind the front grille and requires only basic hand tools to replace. Cleaning the connector or swapping the sensor takes less than an hour.
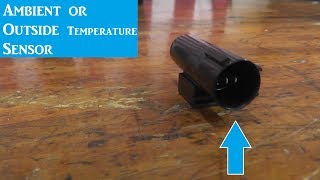
Where is the ambient air temperature sensor located?
The sensor mounts at the front of the vehicle to read outside air. Look behind the front grille, in the lower bumper opening, or near the central radiator support. On some Dodge and Ram vehicles, it is located inside the driver's side mirror assembly.
Will clearing the code fix the problem?
No, clearing the code only turns off the Check Engine Light temporarily. Because P0074 signals a physical electrical problem, the light returns as soon as the intermittent fault occurs again. You must repair the underlying wiring or sensor issue.
What's the difference between the Ambient Air Temp (AAT) and Intake Air Temp (IAT) sensor?
The AAT sensor measures outside air temperature primarily for the climate control system. The Intake Air Temperature (IAT) sensor sits in the engine's air intake and measures air entering the engine for fuel calculations. They are separate sensors with entirely different functions.
How much does it cost to fix code P0074?
A DIY sensor or connector replacement costs between $15 and $80 for parts. If you hire a repair shop, expect to pay a $100 to $150 diagnostic fee plus parts and labor. A typical professional repair totals $150 to $250.
Can a bad battery cause code P0074?
A failing battery creates low voltage conditions and electrical noise that disrupts sensor readings. On sensitive vehicles like certain Subarus, this triggers intermittent circuit codes. Test your battery and alternator if you experience multiple electrical symptoms simultaneously.
Key Takeaways
- Code P0074 disables your automatic A/C compressor and displays an erratic outside temperature (often defaulting to -40°F) due to an unstable sensor signal.
- Do not immediately replace the $30 sensor; over 50% of P0074 codes stem from a corroded connector or frayed wiring behind the front grille.
- Diagnose the exact fault location by performing a 60-second 'wiggle test' on the sensor's wiring harness while monitoring live temperature data on an OBD-II scanner.
- A professional repair averages $150 to $250, but cleaning the connector pins with a $10 can of electronics cleaner and applying dielectric grease often permanently resolves the issue.
Helpful Videos


Shop the Parts Behind P0074
Below are the parts most often responsible for code P0074, ranked by how frequently each one is the actual culprit (per the diagnosis above). Tap any to see what we have for your vehicle.


The information in this article is provided for general reference and educational purposes only. Vehicle specifications, procedures, and part compatibility can vary by production date, trim level, and region. Always consult your vehicle's factory service manual and verify part numbers before purchasing or performing repairs. Safety-critical components such as airbags, seat belts, and braking systems should be installed by a qualified professional.
- 🧭 Diagnostic Flowchart
- 🎬 Helpful Videos
- 🛍️ Shop This Part
- What Does P0074 Mean?
- Can I Drive With P0074?
- Common Causes
- Symptoms
- Common Fixes & Costs
- Used vs. New Parts: Buying Guide
- What Happens If You Wait — Timeline
- Cost of Not Fixing It
- Diagnosis Steps
- When This Code Triggers (Freeze-Frame Conditions)
- Related Codes
- Climate & Environmental Factors
- How to Talk to a Mechanic About This Code
- Where to Take It: Dealer vs Independent vs Chain
- When to Walk Away From the Repair
- What Scan Tool You Need for This Code
- How to Clear the Code After You Fix It
- Will This Fail Emissions / State Inspection?
- Most Commonly Affected Vehicles
- Manufacturer-Specific Notes
- Real Owner Stories
- 2015 Ford Transit Connect - A/C Inoperative
- 2016 Ram 1500 - Code After Mirror Damage
- 2020 Chevy Equinox - Tricky Post-Collision Fix
- How to Prevent This Code From Triggering
- Frequently Asked Questions
- What is the most common mistake when diagnosing P0074?
- Can I fix P0074 myself?
- Where is the ambient air temperature sensor located?
- Will clearing the code fix the problem?
- What's the difference between the Ambient Air Temp (AAT) and Intake Air Temp (IAT) sensor?
- How much does it cost to fix code P0074?
- Can a bad battery cause code P0074?
- Key Takeaways
- 🎟️ Get 5% Off