
P0106 on 2014-2017 Buick Regal: Causes for MAP Sensor Code and Fixes
On 2.0L Turbo Regals, P0106 is frequently caused by loose intake manifold bolts, a fix covered by GM Technical Service Bulletin #PIP5529B. For the 2.4L engine, the cause is more likely a faulty MAP sensor. A sensor replacement costs about $80-$100, while re-torquing the manifold bolts is a low-cost DIY.
- For a 2014-2017 Regal with the 2.0L Turbo engine, P0106 is very likely caused by loose intake manifold bolts. Check this before buying any parts.
- The official GM fix for the 2.0L Turbo issue is to re-torque the bolts with threadlocker, a low-cost repair.
- For the 2.4L engine, the most probable cause is a faulty MAP sensor, which is inexpensive and easy for a DIYer to replace.
- Do not immediately replace the MAP sensor without first checking for vacuum leaks, especially the specific issue identified in TSB PIP5529B for turbo models.
What's Unique About the 2014-2017 Buick REGAL
For the 2014-2017 Regal equipped with the 2.0L LTG Turbo engine, this code has a very specific and well-documented cause beyond a simple bad sensor. A General Motors Technical Service Bulletin (TSB #PIP5529B) points directly to loose intake manifold bolts creating a vacuum leak. This leak causes the MAP sensor to give faulty readings and often triggers a cascade of other seemingly unrelated engine codes. For the 2.4L engine, the causes are more conventional and typically point to the sensor itself, which is easily accessible on top of the intake manifold.
Diagnostic Flowchart
Tap your situation to follow the diagnostic path that matches what you're seeing on this vehicle.
Symptoms You May Notice
- Check Engine Light is on
- Rough or erratic idle
- Hesitation or stumbling during acceleration
- Reduced engine power or sluggish throttle response
- Poor fuel economy
- Engine may stall, especially at idle
- Black smoke from the exhaust in some cases
- Hard starting
- Replacing the MAP sensor on a 2.0L Turbo model without first checking the intake manifold bolt torque. The new sensor will not fix the underlying vacuum leak.
- Replacing the throttle body or Mass Airflow (MAF) sensor when the issue is a simple vacuum leak.
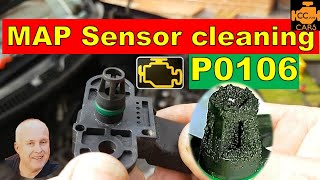
- Cleaning the MAP sensor. It is generally not recommended as the delicate internal element can be easily damaged by cleaning sprays. 🎬 Watch: Why cleaning a dirty MAP sensor is often risky
Most Likely Causes
- Loose Intake Manifold Bolts (2.0L Turbo Engine) 🔴 High Probability → Shop Engine Intake Manifold As documented in GM TSB #PIP5529B, the intake manifold bolts on the 2.0L LTG engine can loosen over time, creating a significant unmetered air (vacuum) leak that confuses the MAP sensor. This is a widely known issue across multiple GM vehicles using this engine.
How to confirm: Check for other codes listed in TSB PIP5529B (P0068, P0101, P0171, etc.). Physically inspect and test the torque on the intake manifold bolts. A smoke test will also quickly reveal a leak around the manifold gasket.
Typical fix: Remove, apply medium-strength threadlocker to, and re-torque the intake manifold bolts to the factory specification of 18 ft-lbs (25 N·m). The TSB notes the gasket usually does not need replacement.
Est. part cost: $5-$15 for threadlocker - Faulty Manifold Absolute Pressure (MAP) Sensor 🔴 High Probability → Shop Manifold Absolute Pressure Sensor This is the most common cause on the 2.4L engine and still a possibility on the 2.0L Turbo if the intake bolts are tight. The sensor's internal components can fail from heat and age, leading to incorrect voltage signals.
How to confirm: With a scan tool, observe the MAP sensor reading (in kPa or volts) with the key on, engine off. It should match the BARO reading. At idle, it should drop significantly (e.g., to around 30-40 kPa). If the reading is stuck, shows zero, or doesn't change with engine load, the sensor is likely bad.
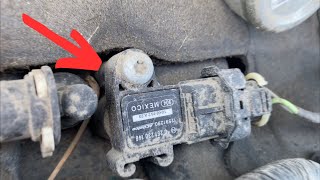
Typical fix: Replace the MAP sensor. On the 2.4L engine, it is easily accessible on top of the intake manifold and held by a single Torx bolt. 🎬 Watch: 2.4L MAP sensor location and replacement walkthrough On the 2.0L engine, it is located on the back of the intake manifold.
Est. part cost: $40-$90 - Vacuum Leak (Other than Intake Manifold) 🟡 Medium Probability Rubber and plastic vacuum lines, such as the PCV hose or brake booster hose, can crack or become disconnected, allowing unmetered air to enter the intake manifold and causing symptoms identical to a bad MAP sensor.
How to confirm: Visually inspect all vacuum hoses connected to the intake manifold for cracks, brittleness, or disconnection. A smoke test is the most effective way to find hidden leaks. Spraying brake cleaner near suspected areas and listening for a change in engine RPM can also pinpoint a leak.
Typical fix: Replace the cracked or broken vacuum hose.
Est. part cost: $10-$50 - Damaged Wiring or Poor Connection ⚪ Low Probability
How to confirm: Inspect the MAP sensor's electrical connector for corrosion, pushed-out pins, or damage. Check the wiring harness for any signs of fraying or breaks. Use a multimeter to test for 5V reference, ground, and a changing signal voltage at the connector pigtail.
Typical fix: Repair the damaged wiring or clean/replace the connector pigtail.
Est. part cost: $15-$30
Rare But Worth Checking
- Clogged Catalytic Converter: A severely clogged catalytic converter can create backpressure that affects manifold pressure, potentially triggering a P0106 code. This is usually accompanied by other codes and a more severe loss of power.
- Faulty Powertrain Control Module (PCM): This is extremely rare. The PCM should only be considered after all other possibilities, including sensors, wiring, and mechanical issues, have been exhaustively ruled out.
- Cracked Piston (2.0L LTG Engine): A known, though less common, issue on the 2.0L LTG engine is a cracked piston, particularly between the ring lands. This causes low compression and can lead to a variety of codes, including P0106, alongside misfire codes like P0300. Key indicators are excessive oil consumption, blue-gray smoke from the exhaust, and significant blow-by (smoke/pressure escaping from the oil filler cap).
Diagnosis Steps
- Scan for Codes: Use an OBD-II scanner to confirm P0106 and check for any other codes. If you have a 2.0L Turbo and see codes like P0068, P0101, P0171, P0131, or P0506, immediately suspect loose intake manifold bolts per TSB PIP5529B.
- (2.0L Turbo) Inspect Intake Manifold Bolts: Check the torque of the intake manifold bolts. The correct specification is 18 ft-lbs (25 N·m). If they are loose, this is the most likely cause.
- Visual Inspection: Check all vacuum lines (PCV, brake booster, etc.) and the air intake tube for obvious cracks, disconnections, or damage.
- Check Live Data: Use a scan tool to monitor the MAP sensor's live data. With the Key On, Engine Off (KOEO), the MAP reading should be close to the Barometric Pressure (BARO) reading (approx. 95-101 kPa at sea level). Start the engine; the reading should drop significantly at idle (e.g., to around 30-40 kPa). Rev the engine; the reading should respond instantly.
- Perform a Smoke Test: If a vacuum leak is suspected but not visible, introduce smoke into the intake system. Smoke will escape from any leak points, such as a loose manifold gasket or cracked hose.
- Inspect Sensor and Connector: Unplug the MAP sensor and inspect the connector pins for corrosion or damage. Ensure the wiring harness is secure and the red locking tab is engaged.
- Test the Sensor Circuit: If you suspect a wiring issue, use a multimeter to check for the correct voltage (typically a 5V reference wire), a good ground, and a signal wire that changes voltage as vacuum is applied with a hand pump.
- Replace the MAP Sensor: If all other tests pass and the sensor's live data is incorrect or unresponsive, replace the MAP sensor. It is held by a single T25 or T30 Torx bolt.
Parts You'll Likely Need
- Intake Manifold Absolute Pressure Sensor (2.0L Turbo)
(OEM #25203477 (supersedes 12644228, 12643955))— This is the primary sensor that gives incorrect readings due to the loose intake manifold issue on the 2.0L LTG engine. It is a 4-bar sensor.
Trusted brands: ACDelco, Bosch, Delphi
OEM price range: $40-$70
Aftermarket price range: $25-$50 - Manifold Absolute Pressure Sensor (2.4L)
(OEM #12644228 (also listed as ACDelco 213-4681))— On the non-turbo engine, a faulty sensor is the most common cause of P0106. It is an easy and straightforward replacement located on top of the intake manifold.
Trusted brands: ACDelco, NTK, Bosch
OEM price range: $50-$90
Aftermarket price range: $30-$60 - Medium Strength Threadlocker — Required for the TSB-specified repair on the 2.0L Turbo to prevent the intake manifold bolts from loosening again.
Trusted brands: Loctite, Permatex
OEM price range: $10-$15
Aftermarket price range: $5-$10
Related Codes That Often Appear With This One
- P0068 — MAP/MAF - Throttle Position Correlation
- P0101 — Mass Air Flow (MAF) Sensor Performance
- P0171 — System Too Lean (Bank 1)
- P0131 — O2 Sensor Circuit Low Voltage (Bank 1, Sensor 1)
- P0506 — Idle Air Control System RPM Lower Than Expected
- P1101 — MAF Sensor Out of Self-Test Range (often indicates a vacuum leak)
Technical Service Bulletins (TSBs) & Recalls
- PIP5529B: Addresses a combination of codes, including P0106, on 2.0L LTG engines caused by loose intake manifold bolts. The fix is to re-torque the bolts with threadlocker.
Platform-Specific Known Issues
- TSB PIP5529B documents that on 2.0L LTG engines, a combination of codes including P0106 can be caused by loose intake manifold bolts. The official fix is to re-torque the bolts to 18 ft-lbs (25 N·m) with threadlocker, which often resolves the issue without needing a new gasket or sensor.
- On the 2.4L LUK/LEA engines, the cause is more straightforward and usually points to a failed MAP sensor, which is very easy to access and replace on top of the intake manifold.
Mechanic-Grade Diagnostic Values
- MAP Sensor Signal Voltage (General) — expected: 1.0V to 4.5V, varying with engine load. At idle (high vacuum), voltage should be low (~1.0-1.5V). At Wide-Open Throttle (low vacuum), voltage should be high (~4.5V).. Failure: Voltage is stuck, does not change with throttle input, or is outside the 1.0-4.5V range.
- MAP Sensor Connector Voltage Test (3-Pin Sensor) — expected: With key on, engine off: Pin C (Orange wire) to Ground should be ~5V (Reference Voltage). Pin A (Black/White wire) to Battery Positive should be ~12V (Verifies Ground). Pin B (Signal wire) should show a variable voltage.. Failure: Missing 5V reference or a bad ground indicates a wiring or ECM issue, not a sensor failure.
- Scan Tool Live Data: MAP vs. BARO — expected: With Key On, Engine Off (KOEO), the MAP sensor reading should be nearly identical to the Barometric Pressure (BARO) sensor reading.. Failure: A significant difference between MAP and BARO readings at KOEO points to a faulty MAP sensor.
Scan Tool Commands That Help
- GDS2 / Advanced Scan Tool: Monitor 'MAP Performance Test 1' and 'MAP Performance Test 2' parameters. — These are ECM-calculated models of expected MAP pressure. Comparing the actual MAP sensor reading to these calculated values helps determine if the sensor is performing irrationally, which is the core of a P0106 fault.
- GDS2 / Advanced Scan Tool: Monitor 'MAF Performance Test' and 'TP Performance Test' parameters. — The ECM uses a system of models to cross-check the MAP, MAF, and Throttle Position sensors against each other. An issue with one can flag a performance code in another. Observing these helps see the full diagnostic picture the ECM is using.
Wiring & Ground Locations
- MAP Sensor Connector (2.0L LTG) — On the MAP sensor, typically on the back of the intake manifold. It is a 3-pin connector.. The connector provides the sensor with power, ground, and a path for the signal to the ECM. The pins are typically: Pin A - Ground, Pin B - Signal, Pin C - 5V Reference.
- G101 / G106 Engine Grounds — G101 is often at the front of the engine on the lower block. G106 is often on the frame cross rail under the crank pulley. These grounds can be jumpered together.. These are primary ground points for the Engine Control Module (ECM) and multiple sensors, including the Mass Air Flow sensor. A poor connection here can cause erratic behavior from any sensor grounded through the ECM, including the MAP sensor.
- Cylinder Head / Bellhousing Grounds — Ring terminals attached to bolts on the rear of the passenger-side cylinder head or the top transmission bellhousing bolts.. These are critical ground points for the main engine wiring harness, providing grounds for the ECM and various engine sensors. They are susceptible to corrosion and becoming loose, leading to multiple, hard-to-diagnose sensor codes.
Real Owner Repair Stories
- Reddit user, r/cruze (2014 Chevy Cruze 1.4L Turbo (similar GM engine technology)) — P0106, P1101, P0172 codes with rough, surging idle.
❌ Tried (didn't work) Initially replacing just the MAP sensor did not resolve the issue.
✅ What actually fixed it The user noted significant suction from the oil dipstick tube, a classic sign of a failed PCV system. Replacing the entire intake manifold (which on that engine contains a non-serviceable PCV check valve) and the valve cover (which contains the PCV diaphragm) resolved the suction issue, which was the root cause of the pressure imbalance triggering P0106.
"I Checked Everything" — The Actual Cause
- If a smoke test reveals no vacuum leaks and the intake manifold bolts are confirmed to be tight, the cause may be internal to the engine. A cracked piston, particularly on the 2.0L LTG engine, will not present as a vacuum leak but can alter crankcase and manifold pressures enough to set a P0106 code, often accompanied by misfires (P0300) and signs of burning oil.
When the Usual Fixes Don't Work
- While the most common fix for P0106 on the 2.0L Turbo is tightening the intake manifold bolts per TSB PIP5529B, this will not work if the root cause is more severe. If the bolts are tight and a new MAP sensor does not resolve the code, technicians must look for less obvious causes. These include internal engine damage like a cracked piston (indicated by oil consumption and blow-by) or a missing oil filter bypass valve after a recent service, both of which can create pressure imbalances that the ECM interprets as a MAP sensor performance issue.
OEM Part Supersession History
12643955, 12612110, 12635044, 25202498, 25203005→25203477— Part consolidation and design updates.
Heads up: The connector for P/N 25203477 can be adapted for use in other applications (like Holley EFI swaps) by trimming two small slots off a common LS-style pigtail connector.
Model Year Variations Within This Range
- 2014-2017: No significant variations affecting the diagnosis of P0106 were found within this model year range. The primary difference remains between the 2.0L LTG Turbo engine (prone to loose intake bolts per TSB PIP5529B) and the 2.4L engine (more prone to simple sensor failure).
Helpful Videos
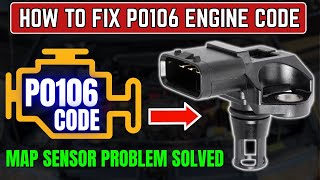
![How to Fix P0106 Engine Code in 2 Minutes [1 DIY Method / Only $11.78]](https://img.youtube.com/vi/p7cjbS5B6OI/mqdefault.jpg)
We Have This Part in Stock


The information in this article is provided for general reference and educational purposes only. Vehicle specifications, procedures, and part compatibility can vary by production date, trim level, and region. Always consult your vehicle's factory service manual and verify part numbers before purchasing or performing repairs. Safety-critical components such as airbags, seat belts, and braking systems should be installed by a qualified professional.
- Buick REGAL:
- 🧭 Diagnostic Flowchart
- 🎬 Helpful Videos
- 🛍️ Shop This Part
- What's Unique About the 2014-2017 Buick REGAL
- Symptoms You May Notice
- Most Likely Causes
- Rare But Worth Checking
- Diagnosis Steps
- Parts You'll Likely Need
- Related Codes That Often Appear With This One
- Technical Service Bulletins (TSBs) & Recalls
- Platform-Specific Known Issues
- Mechanic-Grade Diagnostic Values
- Scan Tool Commands That Help
- Wiring & Ground Locations
- Real Owner Repair Stories
- "I Checked Everything" — The Actual Cause
- When the Usual Fixes Don't Work
- OEM Part Supersession History
- Model Year Variations Within This Range
- 🎟️ Get 5% Off