
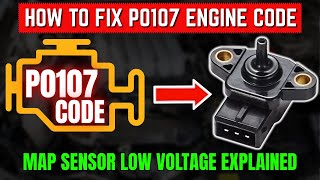
P0107 on 1996-2000 Honda Civic: MAP Sensor Circuit Low Voltage Causes and Fixes
On a 1996-2000 Honda Civic, code P0107 most often means the Manifold Absolute Pressure (MAP) sensor has failed. It's a simple replacement located on the a throttle body. Before replacing, verify the 5V reference and ground at the connector. An OEM Denso sensor is strongly recommended as cheap aftermarket units are known to fail quickly or be dead-on-arrival.
- P0107 on a 96-00 Civic almost always points to a bad MAP sensor.
- The sensor is located directly on the throttle body and is very easy to replace with just a Phillips screwdriver.
- Always check for a steady 5V power and good ground at the connector before replacing the sensor to rule out a simple wiring issue.
- Spend the extra money on an OEM (Denso) or reputable aftermarket (NGK, Delphi) sensor; cheap parts are known to fail quickly and cause more headaches.
- If a new, quality sensor doesn't fix the code, investigate vacuum leaks (including the PCV system) and wiring continuity before suspecting the rare case of a bad ECM.
What's Unique About the 1996-2000 Honda Civic
For the sixth-generation Honda Civic (96-00), the MAP sensor is a very common failure point. The sensor is mounted directly on top of the throttle body with two Phillips screws, making it exceptionally easy to access and replace. While the issue is straightforward, owners on forums like Honda-Tech and Reddit frequently report that cheap aftermarket MAP sensors fail within weeks or months, sometimes causing additional codes like P0108 (High Voltage) to appear. Therefore, using an OEM part from Denso is highly recommended for a lasting repair on these D-series and B-series engines.
Symptoms You May Notice
- Check Engine Light is on
- Rough or unstable idle, may hunt for idle
- Engine hesitation or stumbling during acceleration
- Noticeable lack of engine power, may feel like 'limp mode'
- Poor fuel economy
- Engine may stall, especially when coming to a stop or at idle
- Black smoke from the exhaust due to a rich fuel mixture.
- Hard starting, may require long cranking times.
- Engine may bog down when the throttle is pressed quickly
- Replacing the throttle position sensor (TPS), as its symptoms can sometimes be similar.
- Replacing spark plugs or ignition components without first diagnosing the P0107 code.
- Replacing the MAP sensor repeatedly with cheap aftermarket parts without testing the wiring, leading to the assumption the problem is elsewhere.
Most Likely Causes
- Faulty MAP Sensor 🔴 High Probability → Shop Manifold Absolute Pressure Sensor The sensor is a known high-failure item on this generation of Civic due to age and heat cycles. Aftermarket sensors are particularly prone to premature failure, with many owner reports of them being bad out of the box or failing within a short period.
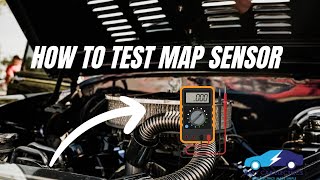
How to confirm: Test the sensor's voltage. With the Key On, Engine Off (KOEO), backprobe the signal wire; it should read ~2.9V at sea level (this reflects atmospheric pressure). With the engine warm and idling, voltage should drop to around 0.8V-1.5V. If the signal voltage is stuck below 0.5V and power/ground are confirmed good, the sensor is bad.
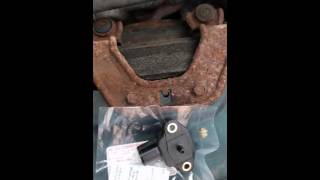
Typical fix: Replace the MAP sensor. It is held onto the throttle body by two Phillips head screws. 🎬 Watch: This quick walkthrough shows how to replace the sensor. Use a Denso (OEM) or other high-quality brand.
Est. part cost: $20-$140 - Damaged Wiring or Connector 🟡 Medium Probability The 3-wire connector and harness are exposed to engine bay heat and vibration, which can cause wires to become brittle and break internally or the connector pins to corrode or lose tension over 20+ years.
How to confirm: Visually inspect the MAP sensor's connector and harness for cracking, melting, or corrosion. With the key on and connector unplugged, use a multimeter to confirm ~5V reference power on one wire (Yellow/Red) and a good ground on another (Green/White). Wiggle the harness with the engine running to see if it causes a change in idle, indicating an intermittent connection.
Typical fix: Repair the broken wire(s) or replace the damaged 3-pin connector pigtail.
Est. part cost: $5-$25 - Vacuum Leak ⚪ Low Probability The numerous rubber vacuum hoses on the D-series and B-series intake manifolds can crack and dry-rot with age, causing unmetered air to enter the engine. The small port on the throttle body that the MAP sensor reads from can also become clogged.
How to confirm: With the engine running, listen for hissing sounds around the intake manifold. You can carefully spray brake cleaner or unlit propane around vacuum lines and gasket surfaces; a change in engine idle indicates a leak. A professional can use a smoke machine for a more precise diagnosis. Also, remove the MAP sensor and ensure its small port into the throttle body is not blocked with carbon.
Typical fix: Replace the cracked or disconnected vacuum hose. Clean the MAP sensor port.
Est. part cost: $1-$15
Rare But Worth Checking
- Faulty Engine Control Module (ECM): → Shop Engine Control Module (ECM) This is very uncommon. The ECM should only be considered after the MAP sensor, its wiring (including continuity back to the ECM), and all vacuum lines have been thoroughly tested and confirmed to be good.
- Stuck Open PCV Valve: A Positive Crankcase Ventilation (PCV) valve that is stuck open can create an internal vacuum leak, sometimes causing oil to be sucked into the intake manifold. This can foul the MAP sensor and cause erratic readings, potentially triggering P0107 and/or P0108.
- Clogged Catalytic Converter: A severely restricted exhaust can increase pressure in the intake manifold under certain conditions, leading to implausible readings from the MAP sensor. This would typically be accompanied by a major loss of power at higher RPMs.
Diagnosis Steps
- Read the trouble codes with an OBD-II scanner to confirm P0107 is present. 🎬 See this video for a deep dive into P0107 causes.
- Visually inspect the MAP sensor on top of the throttle body. Check its 3-pin electrical connector for a secure fit, corrosion, or damage. Inspect the wiring harness for any signs of cracking, melting, or chafing.
- Inspect all vacuum hoses connected to the intake manifold for cracks, brittleness, or loose connections.
- Test the MAP sensor circuit. Disconnect the connector. With the Ignition ON (Engine OFF), use a multimeter to verify one pin has ~5 volts (reference power) and another has good ground (less than 0.1V or good continuity to the negative battery terminal).
- If power and ground are good, reconnect the connector. Backprobe the signal wire (usually the middle wire). With Ignition ON (Engine OFF), the voltage should be steady, around 2.9V at sea level. With the engine idling, the voltage should drop to between 0.8V and 1.5V.
- If the signal voltage is stuck below 0.5V, and the power and ground are good, the MAP sensor is faulty and needs to be replaced.
- If the wiring shows no 5V power or a bad ground, the wiring harness between the sensor and the ECM must be repaired. Check for a blown fuse if applicable.
- If all tests pass but the code persists, perform a vacuum leak test using a smoke machine. As a final step, consider a potential (but rare) ECM issue.
Parts You'll Likely Need
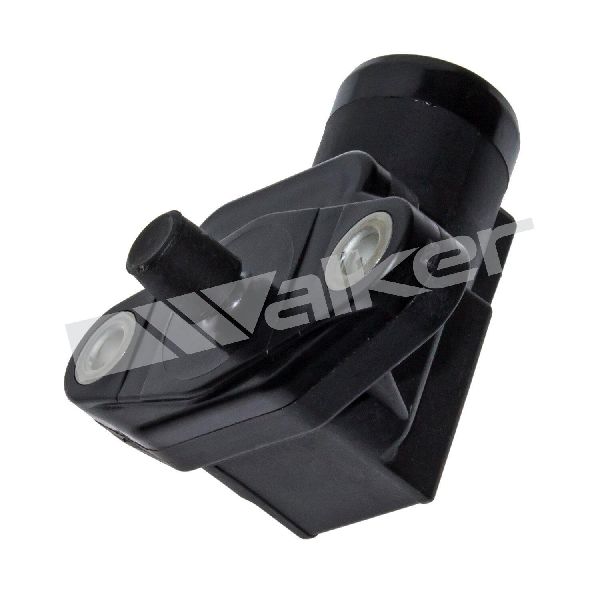
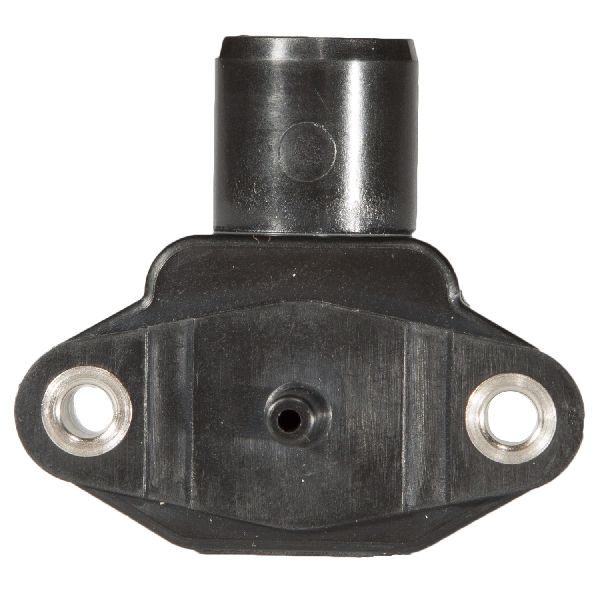
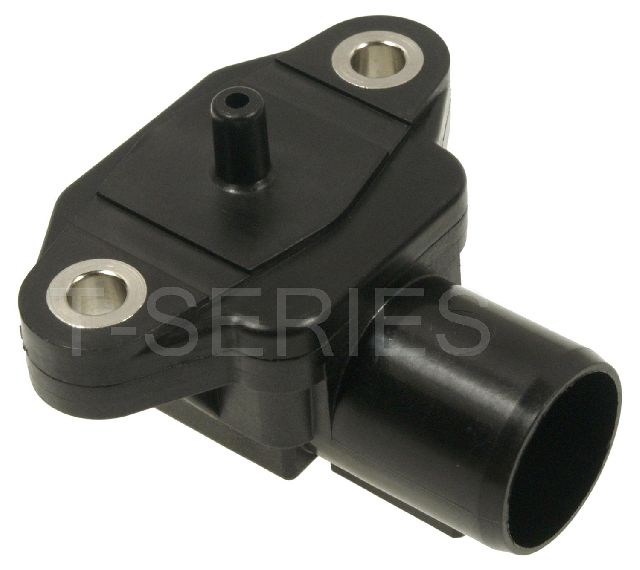
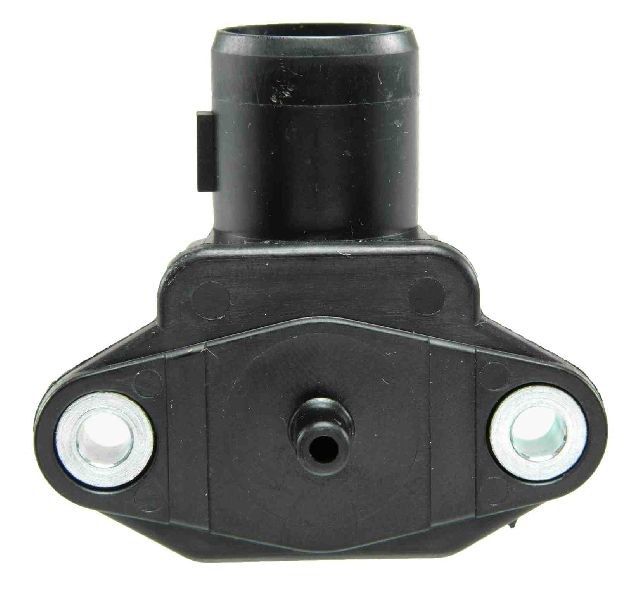
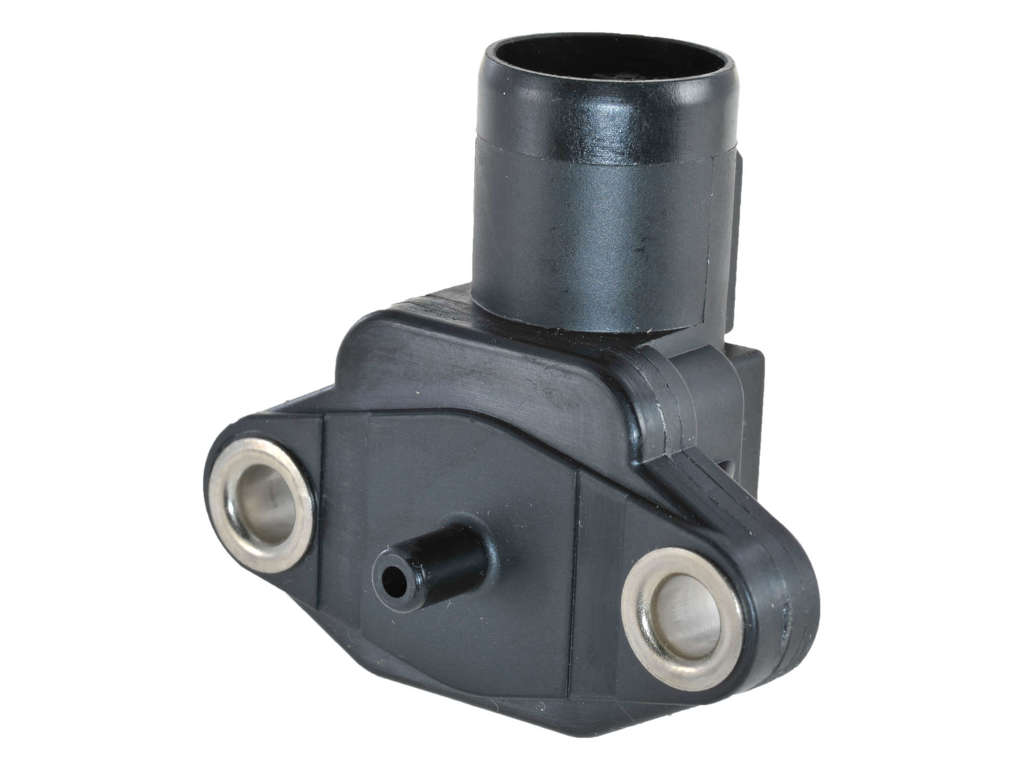
- Manifold Absolute Pressure (MAP) Sensor
(OEM #37830-PAA-S00 (supersedes 37830-P0G-S00))— This is the most frequent cause of code P0107 on this vehicle due to electronic failure of the sensor itself.
Trusted brands: Denso (OEM Manufacturer), NGK/NTK, Standard Motor Products (SMP), Delphi
OEM price range: $110-$140
Aftermarket price range: $20-$60
Related Codes That Often Appear With This One
- P0108 — MAP Sensor Circuit High Input. This can sometimes appear along with P0107, especially when using a faulty aftermarket sensor that is failing erratically or if there is an intermittent wiring problem.
- P0106 — MAP Sensor Circuit Range/Performance. This indicates the sensor's output is not correlating correctly with other sensors like the TPS, which can happen if the sensor is failing or there's an intermittent wiring or vacuum issue.
Platform-Specific Known Issues
- A common owner experience is chasing the P0107 code by replacing the MAP sensor multiple times with low-quality aftermarket parts, only to have the code return. The fix is often to finally install an OEM Denso sensor which resolves the problem permanently. This is a recurring theme in owner forums.
- The two Phillips head screws holding the sensor to the throttle body can be soft and easily stripped. Using the correct size screwdriver (PH2) and applying firm pressure is recommended to avoid having to drill them out.
Mechanic-Grade Diagnostic Values
- MAP Sensor Signal Voltage (KOEO) — expected: ~2.9V at sea level (approx. 101 kPa). Failure: Voltage significantly lower than 2.9V, or stuck below 0.5V.
- MAP Sensor Signal Voltage (Warm Idle) — expected: 1.0V to 1.5V. Failure: Voltage outside this range, especially if stuck low (<0.5V).
- MAP Sensor Signal Voltage vs. Vacuum — expected: KOEO: ~4.5-5.0V (0 in.Hg). With vacuum applied: voltage should drop. 🎬 Watch: A step-by-step guide to testing any MAP sensor. At ~20 in.Hg, voltage should be ~1.0V.. Failure: Voltage does not respond smoothly to applied vacuum, or is stuck at a fixed value.
- MAP Sensor Ground Circuit Resistance — expected: Less than 10 Ω between the sensor's ground wire and the chassis/negative battery terminal.. Failure: Resistance above 10 Ω indicates a poor ground connection.
- ECU Pin Voltage (1999-2000 OBD2B) — expected: At ECU connector C, pin C17 should show MAP sensor signal. Voltage varies with pressure: 0.32V @ -13.9 PSI to 4.84V @ 10.94 PSI.. Failure: Voltage at the ECU pin does not match sensor output or is fixed at a low value.
Wiring & Ground Locations
- G101 — Bolted to the thermostat housing on the engine block.. This is the main ECU and sensor ground point. Corrosion or a loose connection here can cause a floating ground, leading to low or erratic voltage readings for multiple sensors, including the MAP sensor, directly causing a P0107 code.
- MAP Sensor Connector (OBD2A/B) — 3-pin connector on the MAP sensor, top of the throttle body.. Pin 1: YEL/RED (5V Reference), Pin 2: RED/GRN (Signal), Pin 3: GRN/WHT (Sensor Ground). Verifying power, ground, and signal at these specific wires is the primary diagnostic step.
- ECU Pin D17 (OBD2A, 96-98) — Pin D17 on the ECU connectors, located behind the passenger side kick panel.. This is the MAP sensor signal input pin for 1996-1998 models. A continuity test between this pin and the signal wire at the sensor connector can rule out a broken wire in the harness.
- ECU Pin C17 (OBD2B, 99-00) — Pin C17 on the ECU connectors, located behind the passenger side kick panel.. This is the MAP sensor signal input pin for 1999-2000 models. A continuity test between this pin and the signal wire at the sensor connector confirms harness integrity.
Real Owner Repair Stories
- Honda-Tech forum user (2000 Honda Civic Si) — No Check Engine Light, no fuel pump prime, crank no start.
❌ Tried (didn't work) Replacing main relay (new and old tested), Checking all fuses, Cleaning the G101 ground bolt on the thermostat housing
✅ What actually fixed it The wire bundle going from the G101 ground point to the main relay/ECU had failed internally. The user discovered this by testing for continuity from the main relay ground pin to the G101 bolt, which failed. The ultimate fix was to repair the broken ground wire within the harness. - Reddit r/MechanicAdvice user (2004 Honda Civic (Similar architecture)) — P0107 and P0108 codes, rough running.
❌ Tried (didn't work) Replacing the MAP sensor with an aftermarket part., Replacing the MAP sensor a second time with another aftermarket part.
✅ What actually fixed it The advice given was to perform a voltage drop test on the ground circuit by probing the sensor's ground wire and the battery negative terminal. A reading of more than 0.1V indicates a bad ground. The likely culprit identified was a corroded or loose engine ground strap, not the sensor itself.
OEM Part Supersession History
37830-P0G-S00→37830-PAA-S00— Standard part number update by Honda. The parts are interchangeable.Denso 079800-3000→Denso 079800-4250— This is the OEM manufacturer's part number, which cross-references to the Honda PNs. Denso is the original equipment supplier.
Model Year Variations Within This Range
- 1996-1998: These models use an OBD2A ECU. The MAP sensor signal wire terminates at pin D17. The ECU connectors have a different layout (plug, blank, plug, plug) than later models.
- 1999-2000: These models use an OBD2B ECU. The MAP sensor signal wire terminates at pin C17. The ECU connectors have a different layout (plug, plug, plug, blank) than earlier models.
Diagnostic Flowchart
Real Owner Stories
Aggregated from forums and TSBs cited above. Mileages and costs reflect what owners reported in those sources.
1996-2000 Honda Civic
Symptoms: Check engine light (P0107), bucking/jaloneo, extended cranking/long start time, excessive fuel consumption, black smoke. A visual inspection revealed a sulfated/corroded pin inside the MAP sensor connector.
What fixed it: The owner first cleaned the sulfated pin, which resolved the issue for about two months. When the fault returned, the ultimate fix was to replace the MAP sensor.
Source hint: YouTube comment by Martín lomas tirado on 'Honda Civic fault code p0107 loss of power excessive gas consumption - YouTube'
2000 Honda Civic LX/DX (D16Y7 engine)
Symptoms: Threw a code requiring a MAP sensor replacement.
What fixed it: Replaced the MAP sensor on the throttle body.
Source hint: YouTube comment by bryschopper
2004 Honda Civic
Symptoms: Getting P0108 and P0107 codes, already replaced the sensor twice without success.
What fixed it: Highlighted the necessity of checking wiring and grounds before condemning a third sensor due to frustration with faulty aftermarket parts.
Source hint: Reddit r/MechanicAdvice - Thread titled 'I'm getting a p0108 and p0107 codes on a 2004 Honda civic and I've already replaced the sensor twice.'
2010 Honda Civic — 205000 miles
Symptoms: P0107 and P0108 codes present.
What fixed it: Replaced a stuck PCV valve that was creating an internal vacuum leak and fouling the sensor.
Source hint: Reddit r/MechanicAdvice - Thread titled '2010, 205K miles, P0107/P0108 Codes Fixed'
Related OBD-II Codes
Frequently Asked Questions
Why does my 1996-2000 Civic keep throwing P0107 even after I replaced the MAP sensor?
How do I test the MAP sensor voltage on my D-series or B-series engine?
What should the power and ground wires read on the Civic's MAP sensor connector?
What tools do I need to remove the MAP sensor from the throttle body?
Can a vacuum leak cause a P0107 on my Civic?
Are there other Honda models that share this exact P0107 MAP sensor issue?
Helpful Videos
We Have This Part in Stock


The information in this article is provided for general reference and educational purposes only. Vehicle specifications, procedures, and part compatibility can vary by production date, trim level, and region. Always consult your vehicle's factory service manual and verify part numbers before purchasing or performing repairs. Safety-critical components such as airbags, seat belts, and braking systems should be installed by a qualified professional.
- Honda Civic:
- 🧭 Diagnostic Flowchart
- 🎬 Helpful Videos
- 🛍️ Shop This Part
- What's Unique About the 1996-2000 Honda Civic
- Symptoms You May Notice
- Most Likely Causes
- Rare But Worth Checking
- Diagnosis Steps
- Parts You'll Likely Need
- Related Codes That Often Appear With This One
- Platform-Specific Known Issues
- Mechanic-Grade Diagnostic Values
- Wiring & Ground Locations
- Real Owner Repair Stories
- OEM Part Supersession History
- Model Year Variations Within This Range
- Real Owner Stories
- 1996-2000 Honda Civic
- 2000 Honda Civic LX/DX (D16Y7 engine)
- 2004 Honda Civic
- 2010 Honda Civic — 205000 miles
- Related OBD-II Codes
- Frequently Asked Questions
- 🎟️ Get 5% Off