
P0107 on 2006-2011 Honda Civic: MAP Sensor Circuit Low Causes and Fixes
For a 2006-2011 Honda Civic, code P0107 almost always points to a faulty Manifold Absolute Pressure (MAP) sensor. It's a common failure point, but the fix is an easy, 15-minute DIY job. The part costs around $25-$70 for a quality aftermarket sensor (Denso is a trusted OEM supplier) or $70-$135 for a genuine Honda replacement. Before replacing, always check the wiring connector and vacuum lines for obvious damage.
- P0107 on your Civic almost certainly means you need a new MAP sensor.
- Symptoms include rough idle, poor acceleration, stalling, and bad gas mileage.
- This is a great DIY repair. The sensor is on top of the engine, easy to access, and takes about 15 minutes to replace with basic tools.
- A quality aftermarket sensor from a brand like Denso (an OEM supplier) is a cost-effective and reliable choice.
- Before replacing the sensor, perform a quick 'wiggle test' on the wiring connector and visually inspect nearby vacuum hoses for any obvious damage.
What's Unique About the 2006-2011 Honda Civic
On the 8th generation Honda Civic (R18 and K20 engines), the MAP sensor is a very common and well-documented failure point among owners. While wiring issues or vacuum leaks can trigger this code, the sensor itself is the most frequent culprit due to age and heat cycles. A key feature of this platform is the sensor's location on top of the intake manifold, making it exceptionally easy to access and replace with a single bolt, which is why many owners perform this repair themselves.
Symptoms You May Notice
- Check Engine Light is on
- Rough, erratic, or hunting idle
- Engine stalling, especially at stops or low speeds
- Hesitation, sluggish acceleration, or lack of power
- Noticeably reduced fuel economy (10-20% drop is possible)
- Black smoke from the exhaust (indicating a rich fuel mixture)
- Hard starting or a "crank, no start" condition
- Engine pinging or detonation sounds during acceleration
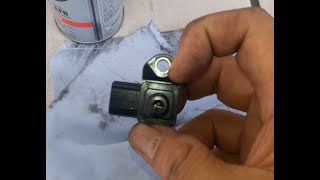
- Strong gasoline smell from the exhaust 🎬 Watch: See these symptoms and where the sensor is located.
- Replacing the throttle position sensor (TPS) due to similar symptoms like rough idle and hesitation.
- Replacing spark plugs or ignition coils, assuming the rough idle is a misfire without checking codes first.
- Replacing the MAP sensor multiple times without checking the wiring harness for hidden breaks or shorts.
Most Likely Causes
- Faulty MAP Sensor 🔴 High Probability → Shop Manifold Absolute Pressure Sensor The sensor is a common failure item on this platform due to age and constant heat cycles in the engine bay, leading to internal electronic failure.
How to confirm: With the key on and engine off (KOEO), backprobe the sensor's signal wire. A reading below ~0.5V when it should be around 4.5-5.0V points to a bad sensor or circuit issue. Given the high failure rate and low part cost, many owners replace it based on the code and symptoms alone after a quick visual check of the wiring.
Typical fix: Replace the MAP sensor. It is held in by a single 8mm or Phillips head screw 🎬 Watch: A step-by-step guide to testing and replacing the sensor. on the intake manifold.
Est. part cost: $25-$135 - Damaged Wiring or Connector 🟡 Medium Probability Engine vibration and heat can cause wires to become brittle, frayed, or shorted over time, especially within the harness loom. The connector's locking tab can also break, leading to a poor connection.
How to confirm: Visually inspect the wiring harness leading to the MAP sensor for chafing, melting, or corrosion. Wiggle the connector with the engine running to see if it affects the idle (a "wiggle test"). Use a multimeter to confirm 5V reference and a good ground at the connector pigtail. A user on YouTube found a broken wire hidden inside the loom after the code persisted with a new sensor.
Typical fix: Repair the damaged section of wiring or replace the pigtail connector. Pigtails are available as aftermarket parts.
Est. part cost: $10-$30 - Vacuum Leak ⚪ Low Probability Rubber and plastic vacuum hoses connected to the intake manifold can crack, become brittle, and leak with age. A stuck-open PCV valve can also act as an internal vacuum leak.
How to confirm: Visually inspect all vacuum hoses for cracks or loose fittings. A common DIY method is to spray starter fluid or brake cleaner near suspected leak points with the engine running; a change in idle indicates a leak. A professional mechanic will use a smoke machine for a definitive diagnosis. A Reddit user fixed P0107/P0108 codes by replacing a stuck PCV valve.
Typical fix: Replace the cracked vacuum hose or faulty PCV valve.
Est. part cost: $5-$30
Rare But Worth Checking
- Faulty Powertrain Control Module (PCM): → Shop Engine Control Module (ECM) This is extremely rare and should only be considered after all other possibilities (sensor, wiring, vacuum leaks) have been definitively ruled out. The PCM is the last thing to suspect.
- Clogged Air Filter or Restricted Exhaust: A severely clogged engine air filter or a blocked catalytic converter can alter intake manifold pressure enough to confuse the sensor, though this will usually be accompanied by other codes and severe performance loss.
Diagnosis Steps
- Read the code with an OBD-II scanner to confirm P0107 is present and check for any other related codes.
- Visually inspect the MAP sensor on top of the intake manifold. Ensure it's securely plugged in and the connector isn't damaged.
- Inspect the wiring harness leading to the sensor. Look for obvious signs of damage, such as frayed wires, melting, or corrosion. Perform a 'wiggle test' on the harness and connector with the engine running to see if the idle changes.
- Check for vacuum leaks. Visually inspect all rubber hoses connected to the intake manifold for cracks or loose connections. Also check the PCV valve and its hose.
- If visual checks are clear, test the circuit with a multimeter. With the Key On, Engine Off (KOEO):
- a. Check for 5V reference on the specified wire at the connector.
- b. Check for a good ground (less than 0.1V or 100 millivolts).
- c. Backprobe the signal wire. It should read approximately 4.5-5.0V at KOEO (matching atmospheric pressure). A reading below 0.5V indicates a fault in the circuit or sensor. 🎬 Watch: How to diagnose MAP sensor codes using a multimeter.
- With the engine running at idle, the signal wire voltage should drop to around 1.0-1.8V, depending on engine vacuum. If the voltage doesn't respond correctly, the sensor is likely bad.
- Given the high failure rate, low cost, and ease of replacement, many DIYers will replace the sensor if the initial visual and wiggle tests show no obvious wiring or vacuum issues.
- After replacing the part, clear the code with the scanner and perform an ECM idle learn procedure. Take the vehicle for a test drive to ensure the problem is resolved.
Parts You'll Likely Need
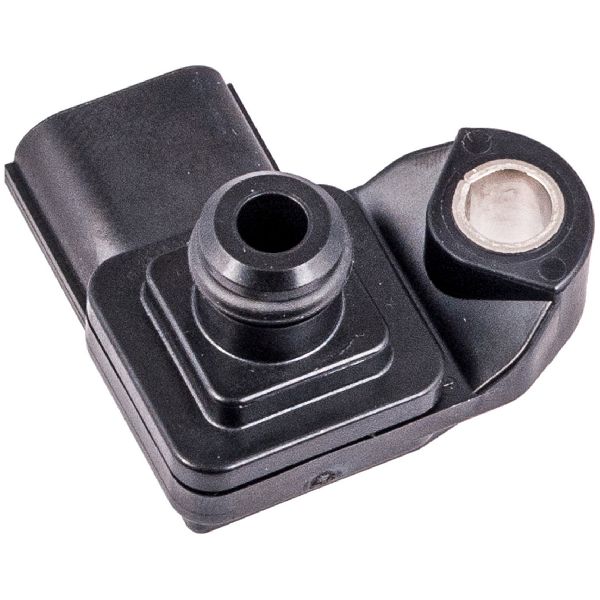
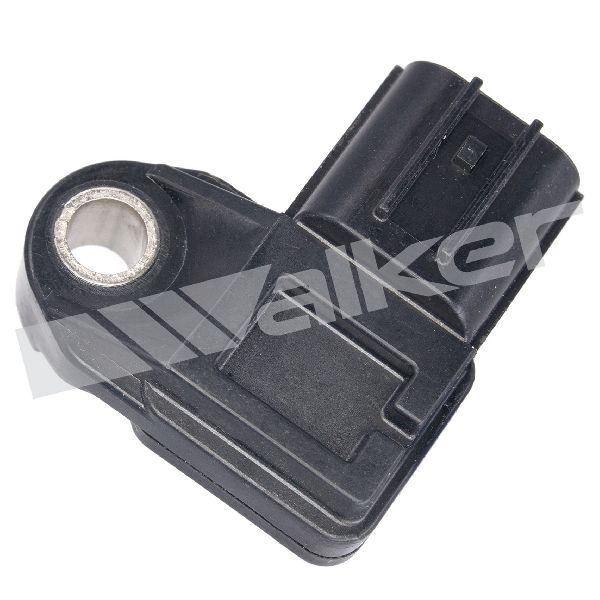
- Manifold Absolute Pressure (MAP) Sensor
(OEM #37830-RNA-A01)— This is the most common failure part for code P0107 on this vehicle. The internal electronics fail over time.
Trusted brands: Honda (Genuine), Denso (OEM Supplier), NGK/NTK, Standard Motor Products (SMP)
OEM price range: $70-$135
Aftermarket price range: $25-$70
Related Codes That Often Appear With This One
- P0108 — P0108 is 'MAP Sensor Circuit High Input'. Seeing both P0107 and P0108 intermittently strongly suggests a wiring short, a loose connector, or a completely failed sensor sending erratic signals.
- P0171 — P0171 is 'System Too Lean'. A significant vacuum leak can cause both a lean condition and an incorrect MAP sensor reading, triggering both codes.
- P1129 — P1129 is a Honda-specific code for 'MAP Sensor Signal Higher Than Expected'. While different from P0107, it points to the same system and can appear in conjunction with MAP sensor issues.
Platform-Specific Known Issues
- Stuck PCV Valve: In some cases, particularly on the R18 engine, a PCV valve that is stuck open can create an internal vacuum leak sufficient to trigger P0107 and/or P0108 codes. An owner on Reddit reported this as the ultimate fix after cleaning the MAP sensor didn't work.
Mechanic-Grade Diagnostic Values
- MAP Sensor 5V Reference — expected: ~5.0 Volts. Failure: No voltage or significantly lower voltage indicates a problem with the PCM or the wiring.
- MAP Sensor Signal Voltage (KOEO) — expected: ~2.9 V to 4.9 V (depending on atmospheric pressure). Failure: A reading below 0.5V triggers P0107.
- MAP Sensor Signal Voltage (Hot Idle) — expected: 1.0V to 1.8V. Failure: Voltage that does not drop from the KOEO reading, or is stuck low, indicates a failed sensor or vacuum issue.
- MAP Sensor Ground Circuit Resistance — expected: Less than 10 Ω. Failure: Resistance above 10 Ω indicates a poor ground path, which can cause low voltage readings.
Scan Tool Commands That Help
- Honda HDS (or compatible): ECM/PCM Reset — Used to clear learned values from the computer before performing the idle learn procedure after replacing a MAP sensor or cleaning the throttle body.
- Generic OBD-II Scanner: Clear Fault Codes — Required after any repair to turn off the Check Engine Light. This should be followed by an idle learn procedure.
- Manual Procedure: ECM/PCM Idle Learn Procedure — Must be performed after replacing the MAP sensor, disconnecting the battery, or cleaning the throttle body to allow the ECU to relearn idle characteristics with the new sensor's parameters. The procedure involves running the engine at 3,000 RPM until the cooling fan cycles, then idling for 5 minutes.
Wiring & Ground Locations
- MAP Sensor Connector — On top of the intake manifold, plugged into the MAP sensor.. This is the primary point for testing. Pin 1 is the 5V reference, Pin 2 is the signal wire, and Pin 3 is the ground. Wire colors can vary, but on many models, the signal wire is Green/Red.
- G101 — On the thermostat housing, connecting to the engine wiring harness.. This is a critical ground point for the ECU and its sensors. A corroded or loose G101 ground is a known cause of erratic sensor readings and multiple, difficult-to-diagnose engine codes. A frayed wire in the loom near this ground can also be a culprit.
- ECM/PCM Connectors A, C, D — Behind the glove box or in the passenger-side kick panel area.. These connectors are the termination point for the MAP sensor wiring. For example, on some models, the MAP signal wire goes to pin D17. Checking for continuity and voltage at these pins can rule out a wiring break between the sensor and the computer.
Real Owner Repair Stories
- YouTube - Pine Hollow Auto Diagnostics (Chevrolet Malibu (similar 3-wire MAP sensor design)) — P0107 code present.
❌ Tried (didn't work) Initial assumption was a bad MAP sensor.
✅ What actually fixed it After confirming 5V reference and good ground at the connector, the technician discovered a broken signal wire hidden inside the protective wire loom a few inches back from the connector. The fix was to cut out the bad section of wire and splice in a new piece using a non-insulated butt connector and marine-grade heat shrink.
OEM Part Supersession History
37830-RNA-A01→N/A - Still the primary part number.
Heads up: This part number is widely cross-referenced with 37860-RNA-A01 and 37830-RWC-A01. While they may fit, it is critical to use the exact OEM part number for the vehicle's VIN to ensure correct calibration. Aftermarket sensors from brands like Denso (an OEM supplier) are generally reliable alternatives.
Diagnostic Flowchart
Real Owner Stories
Aggregated from forums and TSBs cited above. Mileages and costs reflect what owners reported in those sources.
2010 Honda Civic — 205000 miles
Symptoms: Vehicle threw P0107 and P0108 codes. Cleaning the MAP sensor did not resolve the issue.
What fixed it: Replaced a stuck-open PCV valve that was causing an internal vacuum leak.
Source hint: Reddit r/MechanicAdvice
2004 Honda Civic
Symptoms: Getting P0108 and P0107 codes persistently.
What fixed it: Replaced the MAP sensor multiple times without success; ultimately suspected a wiring issue was the true root cause.
Source hint: Reddit r/cartalk
2006-2015 Honda Civic
Symptoms: P0107 code accompanied by drivability issues like rough idle and hesitation.
What fixed it: Direct replacement of the MAP sensor.
Source hint: Honda-Tech.com
Honda Civic (General 8th Gen)
Symptoms: P0107 code persisted even after installing a brand new MAP sensor.
What fixed it: Found and repaired a broken wire hidden inside the wiring harness loom.
Source hint: YouTube user (cited in Common Causes)
Related OBD-II Codes
Frequently Asked Questions
Is the MAP sensor a common failure point on the 2006-2011 Honda Civic?
Where is the MAP sensor located on my 8th generation Civic?
I replaced the MAP sensor on my Civic but the P0107 code came back. What else could it be?
Can a bad PCV valve cause a P0107 code on the Civic's R18 engine?
Do I need to do anything special after replacing the MAP sensor on my 2006-2011 Civic?
How do I test the MAP sensor wiring on my Civic?
Helpful Videos

We Have This Part in Stock


The information in this article is provided for general reference and educational purposes only. Vehicle specifications, procedures, and part compatibility can vary by production date, trim level, and region. Always consult your vehicle's factory service manual and verify part numbers before purchasing or performing repairs. Safety-critical components such as airbags, seat belts, and braking systems should be installed by a qualified professional.
- Honda Civic:
- 🧭 Diagnostic Flowchart
- 🎬 Helpful Videos
- 🛍️ Shop This Part
- What's Unique About the 2006-2011 Honda Civic
- Symptoms You May Notice
- Most Likely Causes
- Rare But Worth Checking
- Diagnosis Steps
- Parts You'll Likely Need
- Related Codes That Often Appear With This One
- Platform-Specific Known Issues
- Mechanic-Grade Diagnostic Values
- Scan Tool Commands That Help
- Wiring & Ground Locations
- Real Owner Repair Stories
- OEM Part Supersession History
- Real Owner Stories
- 2010 Honda Civic — 205000 miles
- 2004 Honda Civic
- 2006-2015 Honda Civic
- Honda Civic (General 8th Gen)
- Related OBD-II Codes
- Frequently Asked Questions
- 🎟️ Get 5% Off