
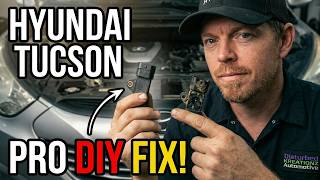
P0107 on 2010-2015 Hyundai Tucson: MAP Sensor Circuit Low Causes and Fixes
On a 2010-2015 Tucson, code P0107 almost always points to a failed Manifold Absolute Pressure (MAP) sensor. It's an easy, 15-minute DIY fix with a part costing between $35 and $100. Before replacing, check the wiring connector for damage and consider if a major vacuum leak is present.
- P0107 on a 2010-2015 Tucson is most often caused by a bad MAP sensor.
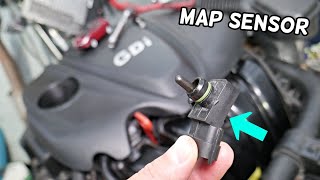
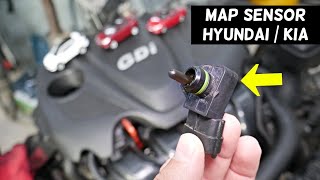
- The MAP sensor is located on the intake manifold next to the throttle body and is very easy to replace with a single 10mm bolt.
- Before replacing the sensor, quickly check its electrical connector for corrosion or damage and perform a 'wiggle test' on the wiring.
- This vehicle does not use a MAF sensor, so diagnosis should focus solely on the MAP sensor circuit and potential vacuum leaks.
- Driving with this code can lead to stalling and poor performance, so it should be addressed promptly.
- Consider using an OEM Hyundai MAP sensor for the replacement, as some owners report issues with aftermarket parts.
What's Unique About the 2010-2015 Hyundai Tucson
The second-generation Hyundai Tucson (2010-2015) with the common 2.0L and 2.4L Theta II engines uses a MAP sensor-based system for engine load calculation and does not have a Mass Airflow (MAF) sensor. This simplifies diagnosis, as you don't have to worry about a faulty MAF sensor causing similar symptoms. The MAP sensor is conveniently located directly on the top of the plastic intake manifold, making it one of the easier sensors to access and replace on this vehicle, typically held in by a single 10mm bolt.
Symptoms You May Notice
- Check Engine Light is on
- Rough or erratic idle, sometimes wavering between 600-900 RPM
- Engine hesitation or stumbling during acceleration
- Reduced engine power and sluggish performance
- Poor fuel economy
- Engine may stall, especially at idle or when coming to a stop
- Black smoke from the exhaust (due to a rich fuel mixture)
- Hard to start engine
- Replacing the throttle body when the issue is the MAP sensor mounted next to it.
- Replacing fuel injectors or spark plugs to fix a rough idle before properly diagnosing the MAP sensor circuit.
- Repeatedly replacing the MAP sensor without checking for wiring issues or using non-OEM sensors that fail prematurely.
Most Likely Causes
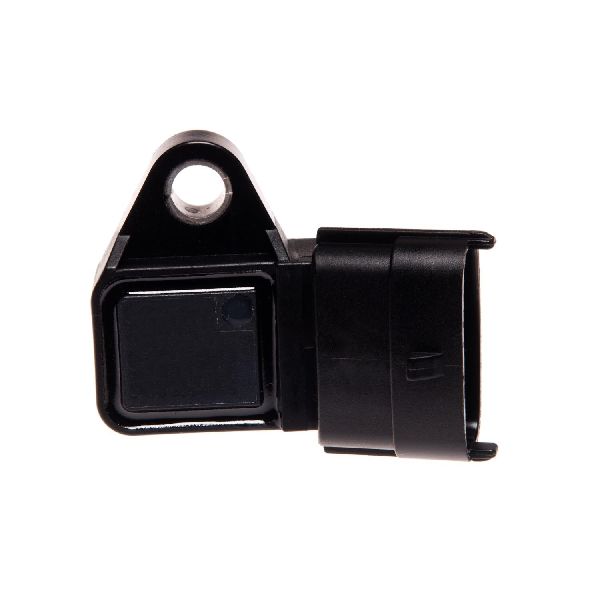
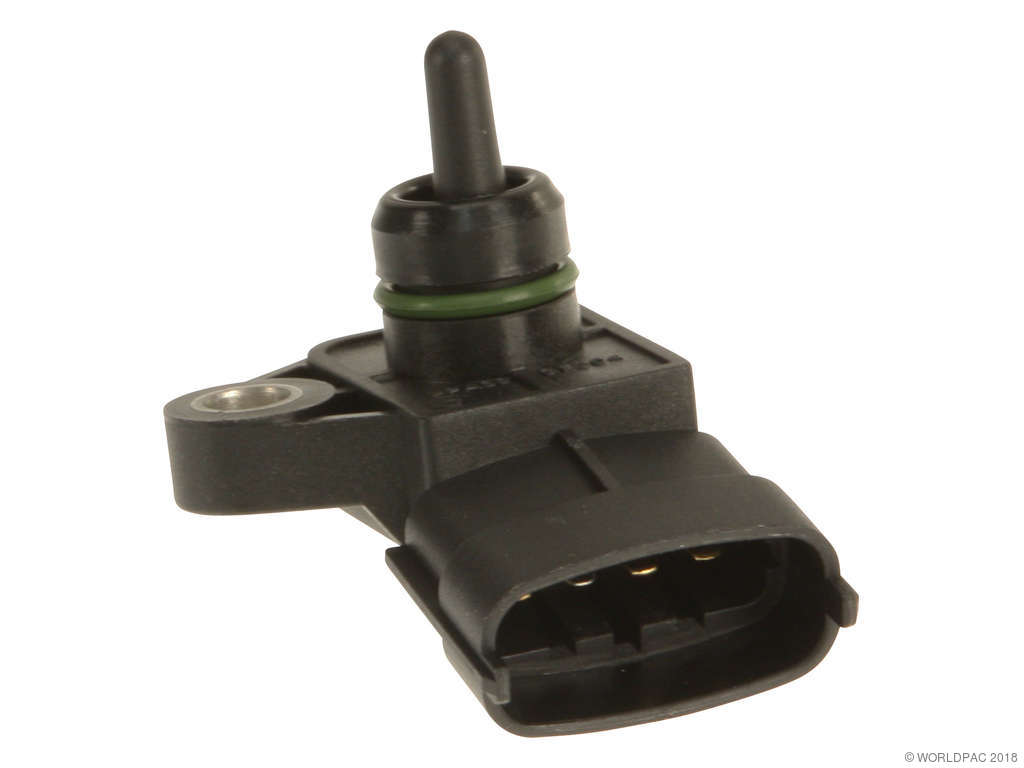
- Faulty MAP Sensor 🔴 High Probability → Shop Manifold Absolute Pressure Sensor The sensor can become contaminated with oil or carbon over time, or simply fail electronically from heat cycles and vibration. It is the most common point of failure for this code.
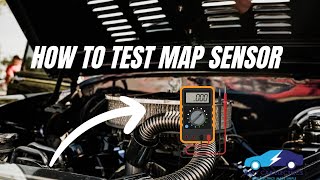
How to confirm: With the key on and engine off, a scan tool should show MAP sensor voltage near 4.5V (at sea level). At idle, it should drop to 1.0-1.8V. If the voltage is stuck below 0.5V regardless of engine state, the sensor has likely failed. You can also test by applying vacuum with a hand pump; voltage should decrease steadily as vacuum increases. 🎬 Watch: Step-by-step guide on how to test any MAP sensor.
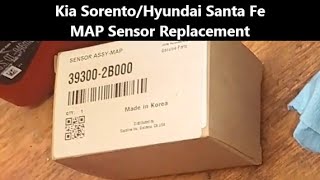
Typical fix: Replace the MAP sensor. It is held to the intake manifold by a single 10mm bolt. 🎬 See this walkthrough for MAP sensor location and removal.
Est. part cost: $35-$100 - Wiring or Connector Issue 🟡 Medium Probability The wiring harness in the engine bay is exposed to heat and vibration, which can lead to chafed wires, a loose or corroded connector at the sensor, or an internal wire break within the loom.
How to confirm: Visually inspect the MAP sensor connector and its wiring for any signs of damage, corrosion, or loose pins. With the connector unplugged and key on, use a multimeter to verify a 5V reference signal and a good ground at the appropriate pins. Perform a 'wiggle test' on the harness while monitoring voltage to see if the reading fluctuates, which indicates a bad connection.
Typical fix: Repair the damaged section of wiring or clean/replace the connector pigtail. Using heat-shrink butt connectors with glue inside is a reliable repair method.
Est. part cost: $5-$30 - Major Vacuum Leak ⚪ Low Probability Vacuum hoses, especially the PCV hose, brake booster line, and intake manifold gaskets, can become brittle and crack over time from engine heat. As a cross-manufacturer reference, NHTSA ODI #11143359 describes a similar situation where a P0107 was triggered by an EGR pipe separating from its flange, causing an unmetered air leak.
How to confirm: Listen for a hissing sound around the intake manifold with the engine running. A smoke test is the most effective way to pinpoint the source of a vacuum leak. Common leak points on the 2.4L GDI engine include the PCV hose, brake booster line, and the intake manifold gaskets themselves.
Typical fix: Replace the cracked or disconnected vacuum hose or replace the faulty gasket.
Est. part cost: $10-$50 - Clogged Air Filter ⚪ Low Probability If the engine air filter is severely clogged, it can create a significant restriction, leading to an unusual vacuum in the intake manifold that might trigger the code.
How to confirm: Visually inspect the engine air filter. If it is black, filled with debris, or has not been changed in a long time, it is suspect.
Typical fix: Replace the engine air filter.
Est. part cost: $15-$30
Rare But Worth Checking
- Faulty Powertrain Control Module (PCM): → Shop Engine Control Module (ECM) This is extremely rare. The PCM should only be considered after all other possibilities (sensor, wiring, vacuum leaks) have been definitively ruled out.
- Stuck or Faulty PCV Valve: A PCV valve that is stuck open can create a vacuum leak, while a clogged one can affect crankcase pressure and potentially contaminate the MAP sensor. In some cases, owners have reported that replacing a faulty PCV valve resolved recurring MAP sensor codes.
Diagnosis Steps
- Connect an OBD-II scanner to confirm P0107 and check for any other related codes. Record the freeze frame data.
- Observe the live data for the MAP sensor with the Key On, Engine Off (KOEO). The reading should correspond to barometric pressure (around 4.5-5.0V at sea level).
- Start the engine and observe the MAP sensor reading at idle. The voltage should drop to around 1.0-1.8V. If the voltage remains stuck low (e.g., <0.5V), it points towards a circuit or sensor fault.
- Visually inspect the MAP sensor connector and wiring harness for any obvious damage, corrosion, or loose connections. Perform a 'wiggle test' on the harness while watching live data.
- Inspect all vacuum lines connected to the intake manifold for cracks, breaks, or disconnections. Listen for audible hissing sounds. Pay close attention to the PCV and brake booster hoses.
- If the sensor signal is stuck low, disconnect the sensor. Use a multimeter to test the connector for a 5-volt reference signal and a good ground connection from the PCM. The center pin is typically the signal, with 5V and ground on the outer pins.
- If the 5V reference and ground are present, the MAP sensor itself is the most likely culprit. You can confirm by jumping the 5V reference wire to the signal wire; the scan tool should now read ~5V.
- If the reference voltage or ground is missing, the problem lies in the wiring between the sensor and the PCM, or a fault in the PCM itself (rare).
Parts You'll Likely Need
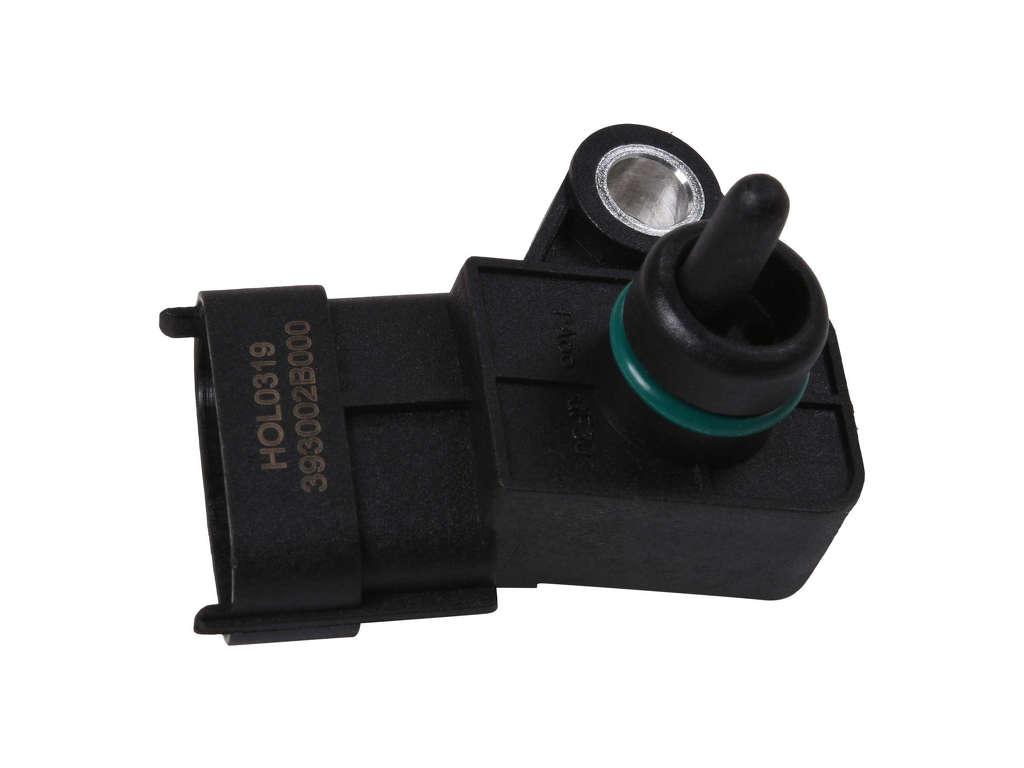
- Manifold Absolute Pressure (MAP) Sensor
(OEM #39300-2B000)— This is the most common failure point for a P0107 code. It's a sensor that directly measures intake manifold pressure and fails from age, heat, and contamination. Some owners report that Hyundai vehicles are sensitive to aftermarket sensors and recommend using an OEM part to avoid repeat failures.
Trusted brands: Hyundai (OEM), Bosch, Delphi, Standard Motor Products (SMP), NGK/NTK
OEM price range: $70-$100
Aftermarket price range: $35-$75
Related Codes That Often Appear With This One
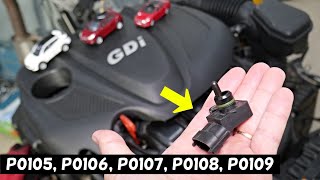
- P0106 — This code indicates a 'Range/Performance' problem with the MAP sensor circuit. It often appears alongside P0107 if the sensor's signal is erratic before failing completely low.
- P2188 — This code for 'System Too Rich at Idle' can be caused by a faulty MAP sensor providing incorrect pressure readings, leading the PCM to inject the wrong amount of fuel.
- P0171 — If a massive vacuum leak is the root cause of the abnormal MAP reading, a 'System Too Lean' code may also be present.
Platform-Specific Known Issues
- On the 2.4L GDI engine, vacuum leaks from the PCV hose, brake booster hose, and intake runner control solenoid vacuum lines are common areas to inspect. 🎬 Watch: Diagnosing P0107 codes on the 2.4L GDI engine.
- Some owners on forums have reported chasing P0107 by replacing multiple aftermarket MAP sensors, only to find the issue was resolved by using a genuine Hyundai OEM sensor, suggesting a sensitivity to sensor quality.
Mechanic-Grade Diagnostic Values
- PCM DTC Trigger Condition — expected: N/A. Failure: Sensor signal voltage is < 0.1V for 0.1 seconds.
- MAP Sensor Voltage (Key On, Engine Off) — expected: ~4.5V at sea level, decreases with altitude.. Failure: Voltage significantly lower than expected barometric pressure reading, or stuck below 0.5V.
- MAP Sensor Voltage (Engine at Idle) — expected: 1.0V to 1.8V. Failure: Voltage is stuck low (<0.6V) or does not respond to engine RPM changes.
- MAP Sensor Ground Circuit Resistance — expected: < 10 Ω. Failure: Resistance greater than 10 Ω between the sensor's ground wire and a good chassis ground indicates a poor ground path.
- Wiring Harness Continuity — expected: < 0.5 Ω. Failure: A reading of O.L. (Open Loop) or resistance > 0.5 Ω on an isolated wire indicates a break or high resistance in the harness.
Wiring & Ground Locations
- Engine-to-Chassis Ground Strap — A primary ground cable connecting the engine block to the vehicle's body/frame, typically near the battery or on a strut tower.. A corroded or loose main engine ground can cause floating or incorrect ground references for all engine sensors, including the MAP sensor. This can lead to erratic voltage readings and trigger a P0107 code even if the sensor and its dedicated wiring are good.
OEM Part Supersession History
39300-2B000→39300-2B100— Part revision or update by the manufacturer.
Heads up: For the 2.0L engine, part number 39300-2B100 is specified for vehicles produced from 11/26/2014 onwards. While the parts may be physically similar, using the incorrect revision could cause performance issues.
Model Year Variations Within This Range
- 2015 (from 11/26/2014): The MAP sensor part number for the 2.0L engine changed to 39300-2B100. Earlier models in the 2010-2014 range typically use 39300-2B000.
Diagnostic Flowchart
Real Owner Stories
Aggregated from forums and TSBs cited above. Mileages and costs reflect what owners reported in those sources.
2016 Hyundai Elantra
Symptoms: The MAP sensor code kept returning even after replacing the sensor three times with an aftermarket part.
What fixed it: Replacing a faulty PCV valve, which was the underlying cause of the recurring MAP sensor code.
Source hint: Reddit r/Hyundai thread titled 'MAP sensor keeps going bad.'
Hyundai 2.4L GDI Engine
Symptoms: Chasing the P0107 code by replacing multiple aftermarket MAP sensors without the issue resolving.
What fixed it: Replacing the aftermarket sensor with a genuine Hyundai OEM MAP sensor.
Source hint: Hyundai forum reports cited in vehicle-specific issues regarding aftermarket sensor sensitivity
Hyundai Sonata Hybrid
Symptoms: An owner reported that warning lights came on and diagnostic scans showed codes P0105 and P0107.
What fixed it: A dealer inspection revealed that the EGR pipe had separated from the flange, causing an unmetered air leak (NHTSA ODI #11143359).
Related OBD-II Codes
Frequently Asked Questions
Why does my 2010-2015 Hyundai Tucson keep throwing the P0107 code even after replacing the MAP sensor?
Where are the most common vacuum leaks located on the 2.4L GDI engine in my Tucson?
How do I test the MAP sensor wiring on my Tucson?
What should the MAP sensor voltage read on my Tucson at idle?
Can a dirty engine air filter cause a P0107 code on my Tucson?
Are there other Hyundai or Kia models that share this exact P0107 issue?
Helpful Videos

We Have This Part in Stock


The information in this article is provided for general reference and educational purposes only. Vehicle specifications, procedures, and part compatibility can vary by production date, trim level, and region. Always consult your vehicle's factory service manual and verify part numbers before purchasing or performing repairs. Safety-critical components such as airbags, seat belts, and braking systems should be installed by a qualified professional.
- Hyundai Tucson:
- 🧭 Diagnostic Flowchart
- 🎬 Helpful Videos
- 🛍️ Shop This Part
- What's Unique About the 2010-2015 Hyundai Tucson
- Symptoms You May Notice
- Most Likely Causes
- Rare But Worth Checking
- Diagnosis Steps
- Parts You'll Likely Need
- Related Codes That Often Appear With This One
- Platform-Specific Known Issues
- Mechanic-Grade Diagnostic Values
- Wiring & Ground Locations
- OEM Part Supersession History
- Model Year Variations Within This Range
- Real Owner Stories
- 2016 Hyundai Elantra
- Hyundai 2.4L GDI Engine
- Hyundai Sonata Hybrid
- Related OBD-II Codes
- Frequently Asked Questions
- 🎟️ Get 5% Off