
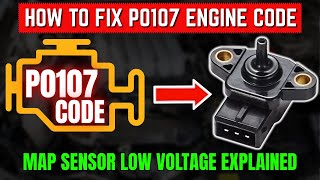
P0107 on 2014-2019 Toyota Corolla: MAP Sensor Circuit Low Causes and Fixes
On a 2014-2019 Corolla, code P0107 is most often caused by a faulty Manifold Absolute Pressure (MAP) sensor. The ECM has detected a sensor voltage below the specified 0.5V threshold. Replacing the sensor is a simple, 15-minute DIY job with the correct OEM-quality part (Denso) costing between $60-$100.
- P0107 on a 2014-2019 Corolla means the MAP sensor signal is too low (stuck below 0.5V).
- The most likely cause is a failed MAP sensor. Replacing it with an OEM Denso part is the most reliable fix.
- Before replacing the sensor, use a multimeter to confirm you have a 5V reference and a good ground at the connector.
- The correct OEM part number is likely 89421-26030, but always verify with your VIN.
- Do not confuse the MAP sensor (on the intake manifold) with the MAF sensor (on the air intake tube).
What's Unique About the 2014-2019 Toyota Corolla
For the 11th generation Toyota Corolla (2014-2019), the P0107 code is a straightforward diagnostic issue. Unlike some vehicles where this code is triggered by complex software glitches, on this Corolla it almost always points to a fundamental problem like the sensor, its wiring, or a vacuum leak. The 1.8L 2ZR-FE engine uses a MAP sensor for load calculation, which is easily accessible on the intake manifold, making diagnosis and repair relatively simple for a DIYer.
Symptoms You May Notice
- Check Engine Light is on
- Rough or uneven idle, sometimes wavering between 600-900 rpm
- Engine hesitation or stumbling during acceleration
- Noticeable decrease in fuel economy
- Engine stalling, especially at stops or low speeds
- Poor engine power and sluggish performance
- Black smoke from the exhaust in some cases, due to incorrect fuel mixture calculations
- Replacing the Mass Air Flow (MAF) sensor. The 2ZR-FE engine has both a MAF and a MAP sensor; P0107 specifically refers to the MAP sensor circuit. 🎬 See this video for a clear explanation of the P0107 code.
- Replacing the throttle body or other sensors without performing basic circuit tests first.
Most Likely Causes
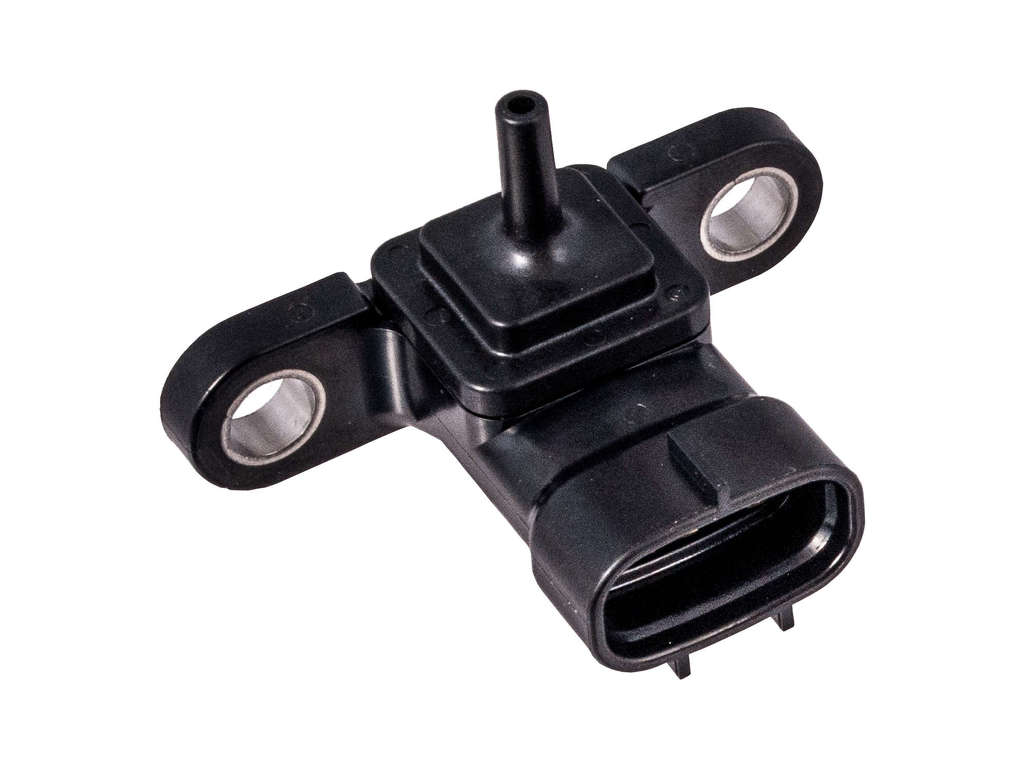
- Faulty Manifold Absolute Pressure (MAP) Sensor 🔴 High Probability → Shop Manifold Absolute Pressure Sensor Sensors can fail over time due to heat cycles and internal electronic failure. Denso, the OEM supplier, makes reliable parts, but after many years and miles, failure is the most common reason for P0107.
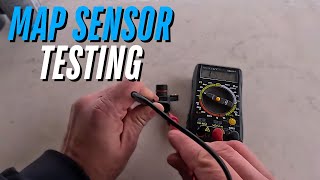
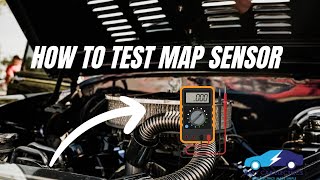
How to confirm: With the key on and engine off, use a scan tool to check the MAP sensor reading; it should match the Barometric Pressure (BARO) reading and show a voltage of around 4.5V. With the engine idling, the voltage should be around 1.0V-1.8V. If the reading is stuck below 0.5V, the sensor is almost certainly faulty. 🎬 Watch: How to test a MAP sensor with a multimeter or scanner.
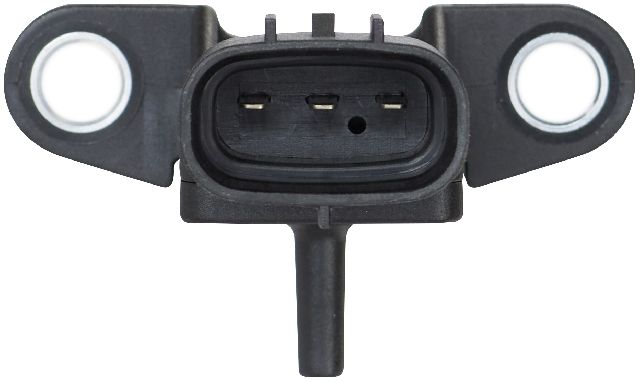
Typical fix: Replace the MAP sensor. It is located on the intake manifold and held by one 10mm bolt.
Est. part cost: $25-$120 - Wiring or Connector Issue ⚪ Low Probability While Toyota wiring is generally robust, damage can occur from previous repairs, rodent damage, or corrosion in harsh climates. A loose ground connection is a known possibility.
How to confirm: Visually inspect the MAP sensor connector and wiring for any signs of damage, corrosion, or loose pins. Disconnect the sensor and use a multimeter to test the connector pins with the key on: one pin should have 5V reference power, one should be ground (0V and has continuity to the battery negative terminal), and the third is the signal wire. Wiggle the harness while testing to check for intermittent breaks.
Typical fix: Repair the broken wire or clean/replace the connector. Ensure all engine ground straps are clean and tight.
Est. part cost: $10-$30 - Vacuum Leak ⚪ Low Probability While less common for this code than a bad sensor, a significant vacuum leak can alter manifold pressure enough to cause issues. On this engine, this would likely be from a deteriorated MAP sensor O-ring or a leaking intake manifold gasket, not a separate vacuum hose.
How to confirm: Visually inspect all vacuum hoses connected to the intake manifold for cracks or disconnections. Listen for a hissing sound at idle. A smoke test is the most effective way to definitively find a leak.
Typical fix: Replace the cracked vacuum hose, MAP sensor O-ring, or leaking intake gasket.
Est. part cost: $5-$50
Rare But Worth Checking
- Faulty Powertrain Control Module (ECM): → Shop Engine Control Module (ECM) This is extremely rare. The ECM should only be considered after all other possibilities (sensor, wiring, vacuum leaks) have been exhaustively tested and ruled out.
- Blocked MAP Sensor Port: → Shop Manifold Absolute Pressure Sensor Carbon buildup can sometimes clog the small port on the intake manifold where the sensor measures pressure. If a new sensor doesn't fix the issue, check that the port is clear by gently probing it with a small pick or wire.
Diagnosis Steps
- Check for any other stored trouble codes. Address those first if they are present.
- Visually inspect the MAP sensor, its electrical connector, and the surrounding area for any obvious damage, cracks, or loose connections.
- With a scan tool, observe the MAP sensor voltage with the Key On, Engine Off (KOEO). The reading should be high (around 4.5V, corresponding to atmospheric pressure).
- Start the engine and let it settle to a warm idle. The MAP sensor voltage should drop to approximately 1.0V to 1.8V. If the voltage remains stuck low (under 0.5V), it strongly points towards a faulty sensor or a wiring issue.
- If the sensor reading is stuck low, disconnect the sensor. Use a multimeter to test the connector pins to identify the 5V reference wire and the ground wire (check for 0V and continuity to chassis ground).
- If 5V power and a good ground are present at the connector, the sensor itself is the most likely culprit. If power or ground is missing, the wiring harness between the ECM and the sensor needs to be inspected 🎬 Follow this step-by-step guide to testing any MAP sensor circuit. and repaired.
- If the sensor and wiring test good, check for a significant vacuum leak using a smoke machine, paying close attention to the MAP sensor O-ring and intake manifold gaskets.
- If all else fails, replace the MAP sensor with a high-quality OEM (Denso) or equivalent part. This is the most common fix.
Parts You'll Likely Need
- Manifold Absolute Pressure (MAP) Sensor
(OEM #89421-26030)— This is the most common cause of a P0107 code, resulting from internal failure of the sensor's electronics. Note: Part numbers can vary by specific model and production date; always confirm fitment with a VIN.
Trusted brands: Denso (OEM supplier), Standard Motor Products, Hitachi, Delphi
OEM price range: $80-$120
Aftermarket price range: $25-$70
Platform-Specific Known Issues
- The MAP sensor on the 2ZR-FE engine is mounted directly to the intake manifold with an O-ring seal. This design eliminates a common failure point of older systems (cracked vacuum hoses leading to the sensor). Therefore, if a leak is suspected, it is more likely to be the sensor's O-ring itself or a larger intake manifold gasket leak rather than a dedicated sensor hose.
Mechanic-Grade Diagnostic Values
- MAP Sensor Ground Circuit Resistance — expected: < 10 Ω. Failure: A reading greater than 10 Ω indicates a poor ground connection, which can cause a low voltage signal.
- MAP Sensor Harness Wire Continuity — expected: < 0.5 Ω. Failure: A reading of O.L. (Over Limit or infinite resistance) indicates a complete break (open circuit) in the wire being tested.
- MAP Sensor Signal Voltage (KOEO) — expected: ~4.5 - 5.0 V. Failure: A reading stuck below 0.5V indicates a circuit low fault.
- MAP Sensor Signal Voltage (Warm Idle) — expected: 1.0 V - 1.8 V. Failure: Voltage remaining below 0.5V or not responding to changes in engine vacuum points to a faulty sensor or circuit.
- Jumping 5V Reference to Signal Wire (at connector) — expected: Scan tool MAP voltage reading should jump to ~5.0 V. Failure: If the voltage on the scan tool does not jump to 5.0V, it indicates an open or short in the signal wire between the connector and the ECM.
Wiring & Ground Locations
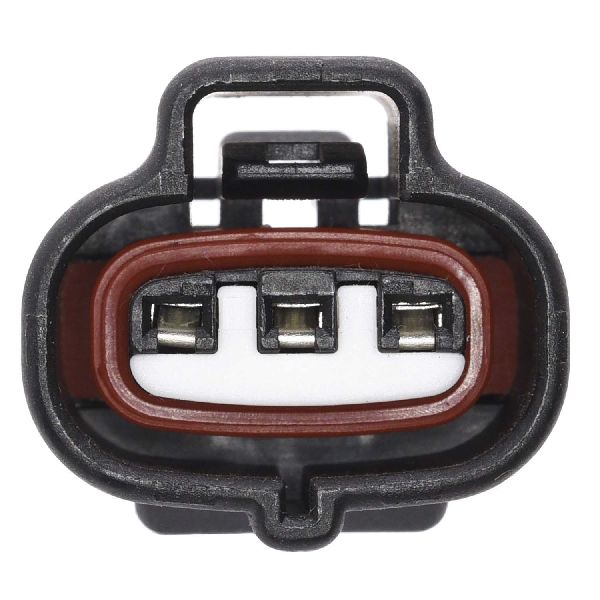
- MAP Sensor Connector Pin 1 (example, check diagram) — At the MAP sensor connector on the intake manifold.. This pin provides the 5-volt reference power from the ECM. A reading of 0V here indicates an open wire or an issue with the ECM's 5V supply.
- MAP Sensor Connector Pin 2 (example, check diagram) — At the MAP sensor connector on the intake manifold.. This is the ground pin. A resistance test from this pin to the battery negative terminal should be less than 10 ohms. High resistance indicates a bad ground, a common cause for low voltage codes.
- MAP Sensor Connector Pin 3 (example, check diagram) — At the MAP sensor connector on the intake manifold.. This is the signal return wire to the ECM. With the sensor connected and engine running, voltage here should vary with engine load (1.0-1.8V at idle). If it's stuck low despite good power and ground, the sensor is faulty.
Model Year Variations Within This Range
- 2017: Some sources indicate a potential for an ECM software glitch on 2017 models that could cause a false P0107 code. The fix is a firmware update performed by a Toyota dealership.
Diagnostic Flowchart
Real Owner Stories
Aggregated from forums and TSBs cited above. Mileages and costs reflect what owners reported in those sources.
Toyota Corolla (2ZR-FE)
Symptoms: A P0107 code appeared immediately after a head gasket replacement.
What fixed it: Traced the issue to loose ground wires on the valve cover and tightened them.
Source hint: Reddit - r/MechanicAdvice - 'P0107 Likely Causes?'
Toyota Corolla
Symptoms: Experienced poor gas mileage and engine stuttering.
What fixed it: Replaced the failing MAP sensor.
Source hint: Reddit - r/Cartalk - 'P0107 Map sensor circuit low'
Related OBD-II Codes
Frequently Asked Questions
Is there a vacuum hose for the MAP sensor on my 2014-2019 Corolla that could be causing P0107?
What brand of MAP sensor should I buy for my Corolla to fix P0107?
I just had major engine work done on my Corolla and now have a P0107 code. What should I check?
How can I test the MAP sensor wiring on my 1.8L 2ZR-FE engine?
What should the MAP sensor voltage read on my Corolla when it's idling normally?
Can a P0107 code cause my Corolla to blow black smoke?
Helpful Videos
We Have This Part in Stock


The information in this article is provided for general reference and educational purposes only. Vehicle specifications, procedures, and part compatibility can vary by production date, trim level, and region. Always consult your vehicle's factory service manual and verify part numbers before purchasing or performing repairs. Safety-critical components such as airbags, seat belts, and braking systems should be installed by a qualified professional.
- Toyota Corolla:
- 🧭 Diagnostic Flowchart
- 🎬 Helpful Videos
- 🛍️ Shop This Part
- What's Unique About the 2014-2019 Toyota Corolla
- Symptoms You May Notice
- Most Likely Causes
- Rare But Worth Checking
- Diagnosis Steps
- Parts You'll Likely Need
- Platform-Specific Known Issues
- Mechanic-Grade Diagnostic Values
- Wiring & Ground Locations
- Model Year Variations Within This Range
- Real Owner Stories
- Toyota Corolla (2ZR-FE)
- Toyota Corolla
- Related OBD-II Codes
- Frequently Asked Questions
- 🎟️ Get 5% Off