
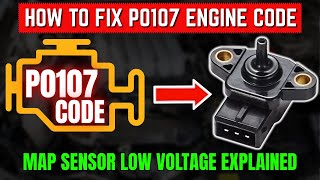
P0107 on 2010-2015 Toyota Prius: MAP Sensor Circuit Low Causes and Fixes
On a 2010-2015 Prius, code P0107 almost always points to a failed Manifold Absolute Pressure (MAP) sensor or a wiring issue. The engine's computer is seeing a voltage from the sensor that is below the specified threshold, typically 0.5V, for more than half a second. A new OEM-quality Denso sensor is the most common fix, costing around $60-$120 for the part. Always check the wiring first, especially if recent engine work like an EGR cleaning has been performed.
- P0107 on your Prius means the MAP sensor circuit has a low voltage fault, indicating an electrical issue.
- The most likely cause is a bad MAP sensor, which is a DIY-friendly replacement located under the air filter box.
- Before buying a new sensor, use a multimeter to check for 5V power, good ground, and signal voltage at the connector to rule out a simple wiring problem.
- Always consider recent repairs (like EGR cleaning) as a potential cause for a damaged or disconnected harness.
What's Unique About the 2010-2015 Toyota Prius
For the third-generation Prius (XW30), the 2ZR-FXE engine is highly reliable, and a P0107 code is a relatively straightforward issue. Unlike some vehicles where this code can be triggered by complex software glitches, on the Prius it almost always points to a hard failure of the sensor itself or a problem in its electrical circuit. The MAP sensor is mounted directly on the plastic intake manifold, making it susceptible to engine heat and vibration over time, but also fairly easy to access for diagnosis and replacement once the air filter housing is removed.
Symptoms You May Notice
- Check Engine Light is on
- Rough or unstable idle
- Engine hesitates or stumbles during acceleration
- Reduced engine power
- Decreased fuel economy
- Engine may stall, especially at idle
- Hard starting condition
- Replacing the Mass Air Flow (MAF) sensor. The MAF and MAP sensors both measure air, but are different parts. The MAF sensor is on the air filter box intake tube, while the MAP sensor is on the intake manifold.
- Replacing the throttle body. While near the MAP sensor, the throttle body is not a cause for a P0107 circuit code.
Most Likely Causes
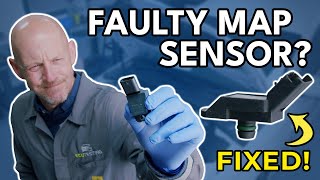
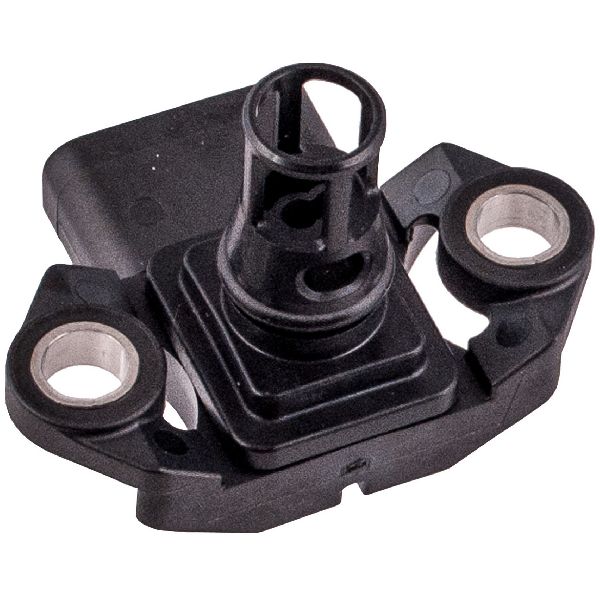
- Faulty Manifold Absolute Pressure (MAP) Sensor 🔴 High Probability → Shop Manifold Absolute Pressure Sensor The sensor is a common failure point due to age, heat cycles, and vibration. Denso is the original equipment manufacturer, and while reliable, these sensors can fail electronically after many years of service, causing the signal voltage to drop out.
How to confirm: With the engine off, use a scan tool to check if the MAP reading is plausible for your altitude (it should match barometric pressure). With the engine idling, check the sensor's voltage; if it's stuck below 0.5V or reads 0, the sensor has likely failed internally. You can also test by applying vacuum with a hand pump and watching for a smooth voltage decrease 🎬 Watch: How to test the sensor using a multimeter and vacuum. on a multimeter; no change indicates a bad sensor.
Typical fix: Replace the MAP sensor and its O-ring. The Denso aftermarket part (198-1002) is a reliable and cost-effective option.
Est. part cost: $60-$120 - Wiring or Connector Issue 🟡 Medium Probability The wiring harness in the engine bay is exposed to heat and vibration. The code frequently appears after other maintenance (like a head gasket, spark plug change, or EGR cleaning) if the harness was disturbed, a connector wasn't fully seated, or a wire was stretched or broken.
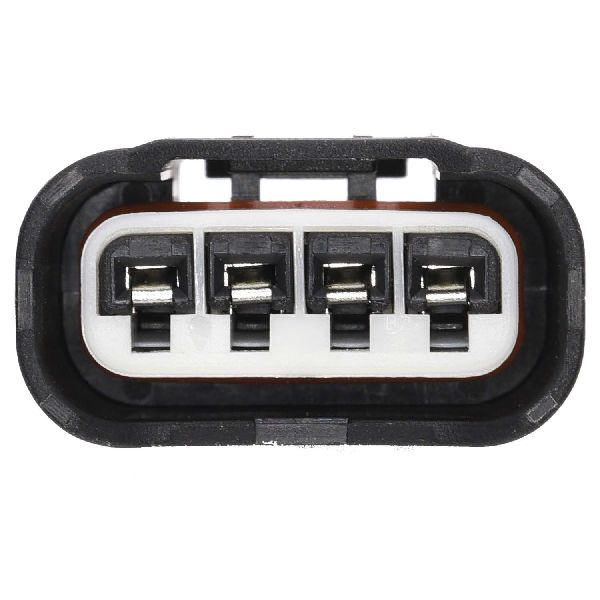
How to confirm: Visually inspect the MAP sensor connector and wiring for damage, corrosion, or loose pins. With the key on and sensor unplugged, use a multimeter to verify you have a 5-volt reference on one pin, a good ground on another, and 4-5 volts on the signal wire pin (which is fed from the ECM). A 'wiggle test' on the harness while monitoring voltage can reveal intermittent breaks.
Typical fix: Repair the damaged section of the wiring harness or clean/replace the connector pins. Ensure the connector is fully seated with a click.
Est. part cost: $5-$50 - Major Vacuum Leak ⚪ Low Probability While possible, a vacuum leak (from a cracked hose or bad intake manifold gasket) is less likely to cause a 'circuit low' code than an electrical fault. A circuit low code points specifically to an electrical problem (open or short to ground), not an implausible reading from a physical leak. However, a massive leak could theoretically cause the ECM to flag a fault under certain conditions.
How to confirm: Perform a smoke test on the intake system. With the engine running, listen for hissing sounds. You can also carefully spray carb cleaner around the intake manifold gaskets and vacuum hoses; if the engine idle changes, you've found a leak.
Typical fix: Replace the leaking vacuum hose or intake manifold gasket.
Est. part cost: $10-$100
Rare But Worth Checking
- Faulty Powertrain Control Module (PCM/ECM): → Shop Engine Control Module (ECM) This is extremely rare. Before condemning the ECM, all other possibilities, especially wiring and sensor faults, must be exhaustively ruled out. An ECM failure can cause this code if its internal 5V reference circuit or the sensor input circuit fails. This should be the absolute last item to consider.
Diagnosis Steps
- Read the code with an OBD-II scanner and note any other codes present. Freeze frame data can show the engine conditions when the fault occurred.
- Visually inspect the MAP sensor, its electrical connector, and the surrounding wiring for any obvious damage, corrosion, or loose connections. Pay close attention to the harness area if an EGR cleaning or other recent work was performed.
- With the Key On, Engine Off (KOEO), use a scan tool to view the live MAP sensor data. The reading should be close to your local atmospheric (barometric) pressure (approx. 14.7 psi / 101 kPa at sea level). A reading of 0 or near 0 points to a circuit fault.
- Start the engine. The MAP reading should drop significantly at idle (indicating high vacuum, around 9-12 inHg or 30-40 kPa). If the reading is stuck low or doesn't change, the sensor or its circuit is faulty.
- Disconnect the MAP sensor. With the key on, use a multimeter to test the connector pins. You should find: ~5V (reference), a good ground (near 0V), and a signal wire (~4-5V). If the reference or ground is missing, trace the wiring back to the ECM.
- If the wiring tests good (power, ground, and signal integrity are confirmed), the MAP sensor itself is the primary suspect. Replace the sensor with a quality part.
- If the problem persists after replacing the sensor, there may be an intermittent open/short in the harness that was missed. Re-check wiring continuity between the sensor connector and the ECM connector.
- After any repair, clear the codes and perform a test drive, including varied throttle inputs, to ensure the fix was successful.
Parts You'll Likely Need
- Manifold Absolute Pressure (MAP) Sensor
(OEM #89421-47010)— This is the most common failure point for a P0107 code. The internal electronics fail, causing the output voltage to drop 🎬 See this explanation of why low voltage triggers the P0107 code. below the acceptable range.
Trusted brands: Denso (OEM Supplier, Part No. 198-1002), Standard Motor Products, Genuine Toyota
OEM price range: $240-$350
Aftermarket price range: $60-$120 - MAP Sensor O-Ring/Gasket — The small rubber o-ring that seals the sensor to the intake manifold should always be replaced with the sensor to prevent a vacuum leak. Most new sensors include one.
OEM price range: $3-$8
Aftermarket price range: $1-$5
Related Codes That Often Appear With This One
- P0108 — If there is an intermittent short or a failing sensor, you might see P0108 (MAP Circuit High Input) along with P0107 as the sensor's voltage fluctuates wildly.
- P0171 — A P0171 (System Too Lean) code can accompany P0107 because the faulty low MAP reading causes the ECM to deliver too little fuel, creating a lean air-fuel mixture.
- P0105 — This code indicates a general malfunction in the MAP sensor circuit and can sometimes appear alongside the more specific P0107 or P0108 codes.
Platform-Specific Known Issues
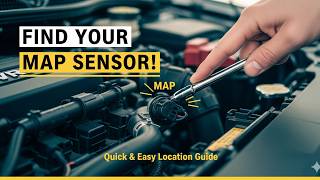
- On the 2ZR-FXE engine, the MAP sensor is located on the top-front of the plastic intake manifold, underneath the main air filter housing 🎬 Watch: A quick guide to finding the MAP sensor on your engine. assembly. The housing must be held by 10mm bolts and clips to be removed to gain access.
- Owners on forums like PriusChat frequently report this code appearing after major engine work, especially EGR cooler/pipe cleaning. This is often traced back to a forgotten connector, a damaged wire in the nearby harness, or a poor ground connection. Always check recent repair work first.
- A PriusChat user with a 2014 Prius V reported a persistent P0107 after a head gasket change. After extensive diagnosis, a dealership traced the fault to a fuel pressure line issue, highlighting that while rare, other system faults can sometimes be misdiagnosed or related. (Source: PriusChat, Thread: 'P0107 2014 Prius V', URL: https://priuschat.com/threads/p0107-2014-prius-v.234698/)
Mechanic-Grade Diagnostic Values
- MAP Sensor Signal Voltage at Idle — expected: 1.4V - 1.8V. Failure: A voltage reading at or below 0.5V - 0.6V indicates a 'Circuit Low' condition and will trigger P0107.
- MAP Sensor Connector - 5V Reference — expected: ~5V. Failure: No voltage or significantly less than 5V indicates a problem with the ECM or the wiring between the ECM and the sensor.
- MAP Sensor Connector - Ground Circuit Resistance — expected: < 10 Ohms. Failure: Resistance values above 10 Ohms suggest a poor ground connection, which can cause incorrect sensor readings.
- MAP Sensor Reading at Idle (Pressure) — expected: ~30-40 kPa (true idle). Failure: A reading of 60-70 kPa at what appears to be idle may indicate the engine is actually under load (e.g., charging the hybrid battery) and not at a true, no-load idle.
Scan Tool Commands That Help
- Toyota Techstream: Active Test: Control the EGR Valve Step — While not a direct MAP sensor test, this can help validate MAP sensor function. A user on PriusChat noted that commanding the EGR valve open should cause a corresponding increase of at least 10 kPa in the MAP sensor reading. If the value doesn't change, it can help confirm a faulty sensor or circuit.
Wiring & Ground Locations
- Engine Harness Ground Cluster 1 — On the engine itself, near the top. A cluster of ground wires comes to a single bolt-down point.. A poor ground connection at this main engine point can affect multiple sensors, including the MAP sensor, leading to erratic or low voltage readings.
- Engine Harness Ground Cluster 2 — A second cluster of ground wires bolts to the engine, featuring a small 'V' shape on the connector to prevent it from spinning during tightening.. This is another critical ground point for the engine management system. Verifying it is clean and tight is a key step when diagnosing electrical fault codes like P0107.
- Inverter Case Bolt — A bolt holding the inverter cover on, right next to the main fuse box in the engine bay.. This is considered an excellent and easily accessible ground point for testing purposes (e.g., when using a multimeter) because the DC/DC converter, the source of the 12V system, is located inside the inverter.
Real Owner Repair Stories
- PriusChat user 'Bookkeepper' (2010 Prius, 125k miles) — Check Engine Light with code P0108 (Circuit High), the counterpart to P0107.
❌ Tried (didn't work) Replacing the MAP sensor with a new one did not fix the problem.
✅ What actually fixed it The user eventually found a break in the wiring harness leading to the MAP sensor. The final post implies the break was in a hard-to-reach spot and the repair was deferred, but the diagnosis was confirmed to be the wiring, not the sensor itself. - eBay review by user 'roastr_26' (Toyota Prius (year not specified)) — Check Engine Light, likely for P0107/P0108.
❌ Tried (didn't work) A dealership quoted $1008 to replace the MAP sensor, claiming the sensor was bad after checking the wiring.
✅ What actually fixed it The owner replaced the sensor themselves, but the issue persisted. The actual cause was a loose wire on the connector, which the owner found and fixed. This highlights the importance of physically checking connector pin tension and not just relying on a visual inspection.
OEM Part Supersession History
89421-47010→89421-47010— No supersession found.
Heads up: This part number appears to be consistent for the 2010-2015 Prius and even later models. No significant revisions or incompatibility issues were noted in the search results.
Model Year Variations Within This Range
- 2010-2015: The 2ZR-FXE engine is considered mechanically identical across the entire 2010-2015 model year range. This means the MAP sensor, its location, and the diagnostic procedure for P0107 are consistent for all Gen 3 Priuses.
Diagnostic Flowchart
Other Known Issues on This Vehicle
Issues unrelated to this code that are worth knowing about as an owner of this generation:
- Head Gasket Failure 🔴 High — Commonly occurs between 120,000 and 200,000 miles. Often preceded by a rough, rattling engine sound on startup. A clogged EGR circuit is a primary contributing factor.
- Excessive Oil Consumption 🟠 Medium — Tends to appear on higher-mileage engines (over 100,000 miles) due to issues with piston ring design. Many owners report adding a quart of oil every 1,500-2,000 miles. (Ref: T-SB-0168-16 and T-SB-0169-16 detail the inspection and repair procedure, which involves replacing pistons and piston rings.)
- Brake Actuator Assembly Failure 🔴 High — Can fail at various mileages, causing a loss of braking power and illuminating multiple brake-related warning lights on the dash. It's a well-documented issue across the generation. (Ref: Toyota issued a Warranty Enhancement Program (Customer Support Program ZJB) to extend coverage for this part, but eligibility varies by time and mileage.)
- Inverter (IPM) Failure 🔴 High — Can cause the vehicle to stall or enter a low-power limp mode. The issue stems from thermal stress on transistors within the Intelligent Power Module (IPM). (Ref: Subject to multiple recalls (e.g., NHTSA 14V053000, 18V684000) where dealers perform a software update or replace the inverter assembly.)
- EGR Valve and Cooler Clogging 🟠 Medium — Carbon buildup clogs the EGR valve, pipe, and intake manifold passages, typically noticed every 60,000-100,000 miles. This is a leading cause of the more serious head gasket failure. (Ref: T-SB-0027-16 was issued for some model years to install an updated EGR valve and reprogram the computer.)
Used vs. New Parts: Buying Guide for This Vehicle
When a used part is the smart pick: A used OEM MAP sensor from a low-mileage donor vehicle is a reasonable choice if budget is a primary concern. Since this is an electronic part without significant mechanical wear, a functional used sensor can perform as well as a new one. However, given the relatively low cost of a new aftermarket Denso sensor, most owners opt for new.
Donor-vehicle mileage cap: roughly under 100000 miles for the part to have meaningful remaining life.
What to inspect on the donor part:
- Check for any physical damage to the sensor body or connector.
- Ensure the O-ring is present and not flattened or cracked, though it's best to replace it regardless.
- Ask for the VIN of the donor car to verify it's from a compatible Prius model and year range.
- If possible, test the resistance or ask the seller if the part is guaranteed to be functional.
OEM-only on this vehicle (don't cheap out):
- While not strictly 'OEM-only', for critical electronic sensors like the MAP, using the OEM supplier (Denso) is highly recommended over generic, unbranded parts to ensure correct voltage signaling and longevity.
Aftermarket brands forum-validated for this vehicle:
- Denso (OEM supplier)
- Standard Motor Products (SMP)
- NGK/NTK
Brands owners have reported issues with on this vehicle:
- Unbranded, 'white-box' sensors from online marketplaces are frequently cited as unreliable or having incorrect calibration, which can cause the code to return or create other performance issues.
Real Owner Stories
Aggregated from forums and TSBs cited above. Mileages and costs reflect what owners reported in those sources.
2014 Toyota Prius v 2ZR-FXE
Symptoms: Persistent P0107 code appearing after a head gasket change.
What fixed it: A dealership traced the fault to a fuel pressure line issue after extensive diagnosis.
Source hint: PriusChat thread titled 'P0107 2014 Prius V' (https://priuschat.com/threads/p0107-2014-prius-v.234698/)
2011 Toyota Prius 2ZR-FXE — 185000 miles
Symptoms: Head gasket failure, which can lead to harness damage during the subsequent heavy engine repair.
What fixed it: Repair of the engine/head gasket (noting that such major work often leads to disturbed wiring and P0107 codes).
Source hint: BobIsTheOilGuy thread titled '2011 Prius Head Gasket Failure at 185k - Summary'
Related OBD-II Codes
Frequently Asked Questions
Where is the MAP sensor located on the 2010-2015 Toyota Prius 1.8L engine?
I just cleaned my EGR cooler and now I have a P0107 code. What happened?
Which replacement MAP sensor is recommended for the 2ZR-FXE engine?
Can a head gasket failure on my 2011 Prius cause MAP sensor codes?
Is there a TSB for the oil consumption issue mentioned in my Prius's history?
How can I confirm if the MAP sensor itself is bad versus a wiring problem?
Helpful Videos
We Have This Part in Stock


The information in this article is provided for general reference and educational purposes only. Vehicle specifications, procedures, and part compatibility can vary by production date, trim level, and region. Always consult your vehicle's factory service manual and verify part numbers before purchasing or performing repairs. Safety-critical components such as airbags, seat belts, and braking systems should be installed by a qualified professional.
- Toyota Prius:
- 🧭 Diagnostic Flowchart
- 🎬 Helpful Videos
- 🛍️ Shop This Part
- What's Unique About the 2010-2015 Toyota Prius
- Symptoms You May Notice
- Most Likely Causes
- Rare But Worth Checking
- Diagnosis Steps
- Parts You'll Likely Need
- Related Codes That Often Appear With This One
- Platform-Specific Known Issues
- Mechanic-Grade Diagnostic Values
- Scan Tool Commands That Help
- Wiring & Ground Locations
- Real Owner Repair Stories
- OEM Part Supersession History
- Model Year Variations Within This Range
- Other Known Issues on This Vehicle
- Used vs. New Parts: Buying Guide for This Vehicle
- Real Owner Stories
- 2014 Toyota Prius v 2ZR-FXE
- 2011 Toyota Prius 2ZR-FXE — 185000 miles
- Related OBD-II Codes
- Frequently Asked Questions
- 🎟️ Get 5% Off