
P0111 on 2019-2023 Dodge Charger: Causes and Fixes for IAT Sensor Performance
This code indicates a problem with the Intake Air Temperature (IAT) sensor's performance. For this specific Dodge Charger, the cause is often a software issue that requires a dealer update per TSB #18-044-26. If not software-related, a faulty IAT sensor is the next most likely cause, which is an inexpensive part to replace. Always check for the software update before replacing parts.
- Always check for the PCM software update mentioned in TSB #18-044-26 before buying parts, especially if code P0071 is also present.
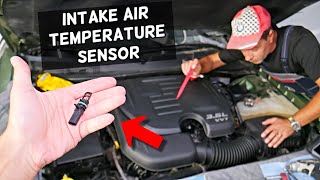
- A faulty IAT sensor is the most common hardware failure. It's an affordable and easy part to replace for a DIYer, located in the intake tube.
- Use a scan tool to compare IAT, AAT, and ECT temperatures on a cold engine; this is the quickest way to diagnose a bad sensor.
- Symptoms are usually minor, such as poor fuel economy and slight hesitation, but should be addressed to prevent long-term issues and to pass emissions tests.
What's Unique About the 2019-2023 Dodge CHARGER
For 2019-2023 Dodge Chargers, a P0111 code is not always a straightforward sensor failure. Dodge issued Technical Service Bulletin (TSB) #18-044-26 for 2019 models, which also applies to later years, indicating that this code can be triggered by a software glitch in the Powertrain Control Module (PCM). This makes it crucial to check for software updates before replacing any hardware, as a simple reflash at the dealership may be the only required fix. This 'software-first' diagnostic approach is common for rationality codes on modern Mopar vehicles, as confirmed by owner discussions on various forums.
Diagnostic Flowchart
Tap your situation to follow the diagnostic path that matches what you're seeing on this vehicle.
Symptoms You May Notice
- Check Engine Light is on
- Reduced fuel economy
- Engine hesitation or stumbling on acceleration
- Rough idle
- Hard starting, especially in cold weather
- Cooling fans running excessively
- Inaccurate outside temperature display if the fault is related to the ambient sensor comparison
- Replacing the IAT sensor when the actual problem is a software issue that requires a PCM update as per TSB #18-044-26.
- Replacing the wrong temperature sensor. The IAT is in the intake tube, not to be confused with the Ambient Air Temperature (AAT) sensor which is typically near the front grille/radiator support.
Most Likely Causes
- Powertrain Control Module (PCM) Software Issue 🔴 High Probability → Shop Engine Control Module (ECM) A known issue documented in TSB #18-044-26 for the 2019 model year, which can affect subsequent years as well. This TSB specifically addresses P0111 and the related P0071 Ambient Air Temperature Sensor code appearing together.
How to confirm: A Dodge dealership or a qualified shop with access to OEM software (like wiTECH) can check if the TSB applies to your vehicle's VIN and if a PCM update is available.
Typical fix: Update the PCM software to the latest version. If the vehicle is out of warranty, this service typically costs between $150 and $350 at a dealership, based on owner reports.
Est. part cost: $0 - Faulty Intake Air Temperature (IAT) Sensor 🟡 Medium Probability → Shop Fuel Injection Air Flow Meter The sensor is a thermistor that can degrade over time due to heat cycles and contamination from engine bay elements. It's a widely used part across many Stellantis vehicles, and failure is common with age.
How to confirm: Using a scan tool, compare the IAT reading to the ambient air temperature on a cold engine; they should be within a few degrees of each other. If the reading is stuck (e.g., -40°F) or doesn't change as the engine warms up, the sensor is likely bad. The sensor is located in the plastic intake air duct between the air filter box and the throttle body.
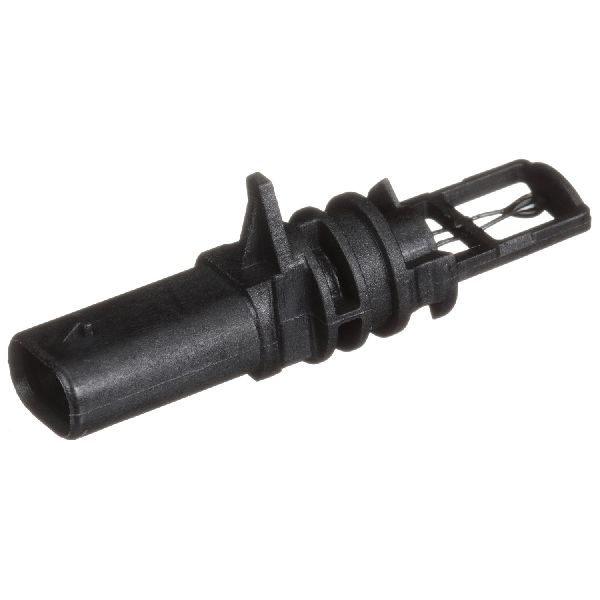
Typical fix: Replace the IAT sensor. This involves unplugging the electrical connector, and twisting the sensor 90 degrees to remove it from the intake duct. 🎬 Watch: How to remove and replace the IAT sensor
Est. part cost: $20-$50 - Damaged Wiring or Connector ⚪ Low Probability Wires can become brittle from heat, and connectors can corrode or loosen, causing an intermittent or lost signal. The IAT sensor wiring is part of the main engine harness and can be subject to chafing.
How to confirm: Visually inspect the IAT sensor's wiring harness and connector for any signs of damage, corrosion, or loose pins. Use a multimeter to check for a 5-volt reference and a good ground at the connector with the key on.
Typical fix: Repair the damaged section of wiring or replace the connector pigtail.
Est. part cost: $10-$30
Rare But Worth Checking
- Dirty Air Filter: → Shop Air Cleaner Assembly A severely clogged air filter can restrict airflow so much that it affects the IAT sensor's ability to read temperature changes accurately. It's a simple and inexpensive item to check before moving to more complex diagnostics.
- Faulty Powertrain Control Module (PCM): → Shop Engine Control Module (ECM) In very rare cases, the internal circuitry of the PCM that processes the IAT signal can fail. This should only be considered after all other possibilities, including the software update, have been exhausted. Several services offer mail-in PCM repair if this is the case.
Diagnosis Steps
- Check for TSBs: First, confirm with a dealer or a shop with access to OEM service information if TSB #18-044-26 applies to your vehicle. If so, a PCM software update is the most likely fix.
- Scan Tool Live Data: Connect a scan tool and observe the IAT sensor reading with the engine off and cold (ideally after sitting overnight). It should be very close to the Ambient Air Temperature (AAT) and Engine Coolant Temperature (ECT) readings.
- Start the Engine: Watch the IAT data as the engine warms up. The temperature should rise steadily. If it's stuck, jumps erratically, or reads an illogical value (like -40°F or over 250°F), the sensor is likely faulty.
- Visual Inspection: Locate the IAT sensor in the intake air duct between the air filter housing and the engine throttle body. Inspect the sensor, its connector, and wiring for any visible damage, corrosion, or loose connections.
- Electrical Tests: If the sensor seems okay, unplug its connector. Use a multimeter to check for a 5-volt reference signal and a good ground connection in the connector pins with the key on.
- Test the Sensor: You can test the sensor's internal resistance with a multimeter set to Ohms. The resistance should change predictably as you warm the sensor tip (e.g., with a hairdryer). 🎬 See this guide for testing and fixing IAT sensor codes While specific charts are best, a typical thermistor will show high resistance when cold (kilo-ohms) and low resistance when hot (hundreds of ohms).
Parts You'll Likely Need
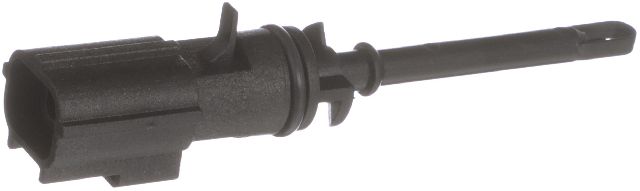
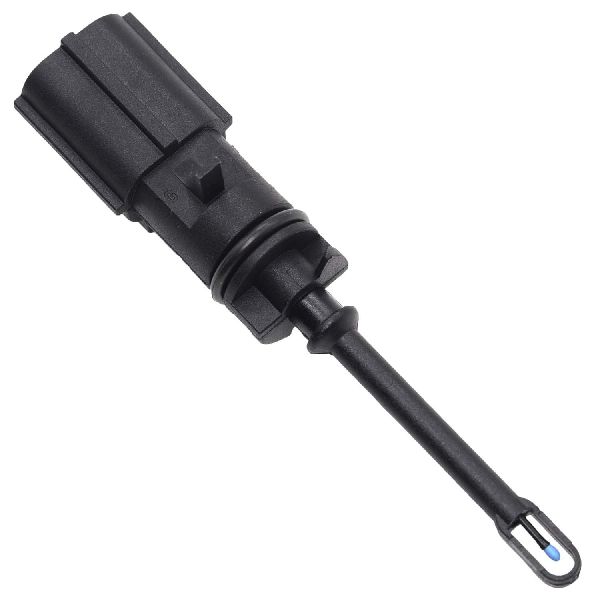
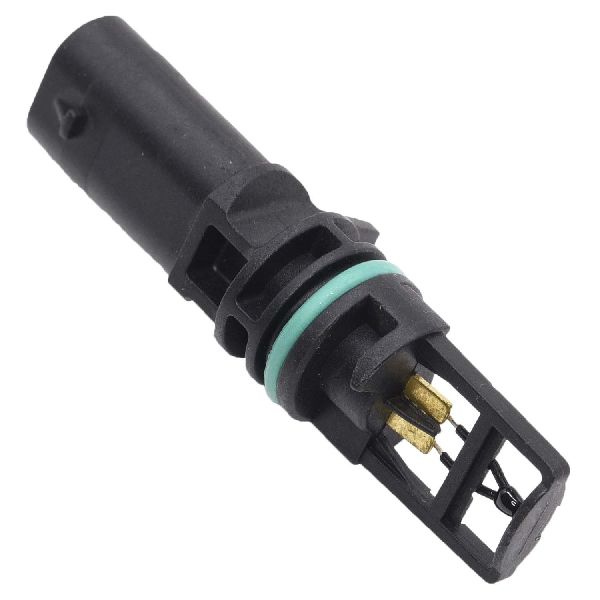
- Intake Air Temperature Sensor
(OEM #05149279AC)— This sensor is the most common hardware failure for this code after software issues are ruled out. It is responsible for measuring the temperature of the air entering the engine. This part number supersedes 5149279AB.
Trusted brands: Mopar, Standard Motor Products, Delphi, NTK
OEM price range: $30-$45
Aftermarket price range: $15-$30
Related Codes That Often Appear With This One
- P0071 — This code for the Ambient Air Temperature Sensor often appears with P0111, as noted in TSB #18-044-26. The PCM compares these two sensors, and a software misinterpretation or a fault in one can trigger a performance code for the other. 🎬 Watch: Understanding symptoms and causes of the P0071 ambient sensor code
- P0112 — Indicates the IAT sensor circuit is low (short to ground), which is a specific type of electrical fault that can lead to the general performance code P0111.
- P0113 — Indicates the IAT sensor circuit is high (open circuit), which is another specific electrical fault that can cause the P0111 performance code.
Technical Service Bulletins (TSBs) & Recalls
- 18-044-26: Addresses Malfunction Indicator Lamp (MIL) illumination for DTCs P0111-00 (Intake Air Temperature Sensor 1 Circuit Range Performance) and/or P0071-00 (Ambient Air Temperature Sensor Performance).
Platform-Specific Known Issues
- TSB #18-044-26: A software update for the Powertrain Control Module (PCM) was issued for 2019 models to address MIL illumination for P0111 and P0071. This is a primary diagnostic step for this vehicle range.
- Owner Experiences: Forum discussions for various Dodge/Ram vehicles confirm that a dealer PCM reflash is a common fix for stubborn P0111 codes that don't resolve after sensor replacement, reinforcing the 'software-first' approach.
Mechanic-Grade Diagnostic Values
- IAT Sensor Resistance vs. Temperature — expected: Approximately 336,600 Ohms at -40°C (-40°F), ~2,500 Ohms at 20°C (68°F), and ~390 Ohms at 120°C (248°F). Resistance decreases as temperature increases.. Failure: A reading of 0 ohms (short) or infinite ohms (open circuit), or a value that does not correspond to the temperature chart, indicates a faulty sensor.
- IAT Sensor Connector Voltage (Key On, Engine Off) — expected: One pin should show a 5-volt reference from the PCM, and the other should be a sensor ground.. Failure: Voltage significantly outside the 4.8-5.2V range on the reference pin, or lack of a good ground, points to a wiring or PCM issue.
- IAT Sensor Signal Voltage (Live Data) — expected: Voltage fluctuates with temperature, typically between 0.5V (hot) and 4.5V (cold).. Failure: A fixed voltage reading (e.g., stuck at 0V or 5V) or readings that don't change as the engine warms up indicate a fault in the sensor or circuit.
Hidden / Shadow Codes Worth Checking
- P0111-00: The '-00' suffix is a component identifier used by Stellantis/Mopar's diagnostic systems. It confirms the fault is with the primary IAT Sensor 1 circuit performance and not a sub-component. It is visible on OEM-level scan tools like wiTECH. (see via OEM-level scan tool (wiTECH) or advanced professional scanners.)
Scan Tool Commands That Help
- wiTECH or equivalent professional scanner: IAT Calibration — Some diagnostic resources suggest running an IAT calibration function after replacing the sensor to synchronize the new component with the PCM and prevent the code from returning.
Wiring & Ground Locations
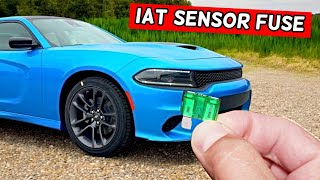
- Front Fuse Box (Under Hood) — Located on the passenger side of the engine bay.. The IAT sensor circuit is tied to general engine management power. Check fuses F31, F34, F35, F37 and relay R65, as a fault in these could interrupt power or signals related to the PCM's sensor processing.
- Rear Fuse Box (Trunk) — Located in the trunk, behind the battery.. Additional engine control relays are located here. Check relays R14 and R29 if front fuses are intact.
- IAT Sensor Connector — On the intake air duct, between the air filter box and throttle body.. This is where to test for the 5V reference and ground signals from the PCM. The two wires are the 5V reference and the sensor ground/signal return.
Real Owner Repair Stories
- RamForum.com user (Dodge Ram (Mopar platform with similar engine controls)) — Check engine light with code P0111.
❌ Tried (didn't work) Initial diagnosis pointed to a bad sensor.
✅ What actually fixed it The owner discovered a previous owner had spliced an aftermarket, in-cab adjustable potentiometer into the IAT sensor wiring to try and trick the computer for performance gains. The potentiometer had failed or was adjusted out of range, causing the code. Removing the modification and restoring the original wiring fixed the issue.
OEM Part Supersession History
5149279AB→05149279AC— Standard part revision by the manufacturer.
Heads up: The new part number (05149279AC) is the correct and direct replacement for the original. No known incompatibilities exist. This sensor is used across a wide variety of Stellantis (Mopar) engines, including the 3.6L, 5.7L, and 6.4L found in the Charger.
Helpful Videos

We Have This Part in Stock

The information in this article is provided for general reference and educational purposes only. Vehicle specifications, procedures, and part compatibility can vary by production date, trim level, and region. Always consult your vehicle's factory service manual and verify part numbers before purchasing or performing repairs. Safety-critical components such as airbags, seat belts, and braking systems should be installed by a qualified professional.
- Dodge CHARGER:
- 🧭 Diagnostic Flowchart
- 🎬 Helpful Videos
- 🛍️ Shop This Part
- What's Unique About the 2019-2023 Dodge CHARGER
- Symptoms You May Notice
- Most Likely Causes
- Rare But Worth Checking
- Diagnosis Steps
- Parts You'll Likely Need
- Related Codes That Often Appear With This One
- Technical Service Bulletins (TSBs) & Recalls
- Platform-Specific Known Issues
- Mechanic-Grade Diagnostic Values
- Hidden / Shadow Codes Worth Checking
- Scan Tool Commands That Help
- Wiring & Ground Locations
- Real Owner Repair Stories
- OEM Part Supersession History
- 🎟️ Get 5% Off