
P0111 on 2017-2020 Hyundai Elantra: Intake Air Temp Sensor Causes and Fixes
On a 2017-2020 Elantra, code P0111 is most often caused by a failing Intake Air Temperature (IAT) sensor, which is integrated into the Manifold Absolute Pressure (MAP) sensor. Replacing the entire MAP sensor assembly is the usual fix, costing around $70-$130 for an OEM part. Before replacement, check for a dirty air filter or loose airbox, as improper airflow can also trigger this code.
- P0111 means the intake air temperature reading is illogical, not necessarily that the circuit is open or shorted.
- The most important diagnostic step is to compare the IAT, ECT, and ambient temp readings on a cold engine with a scan tool.
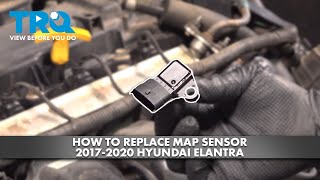
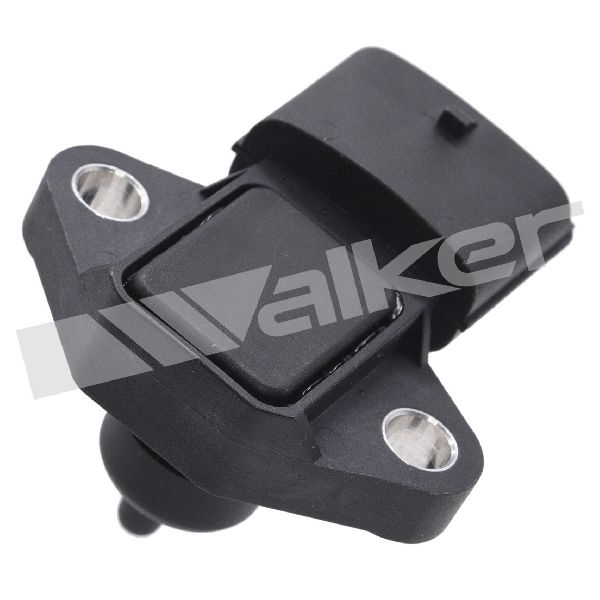
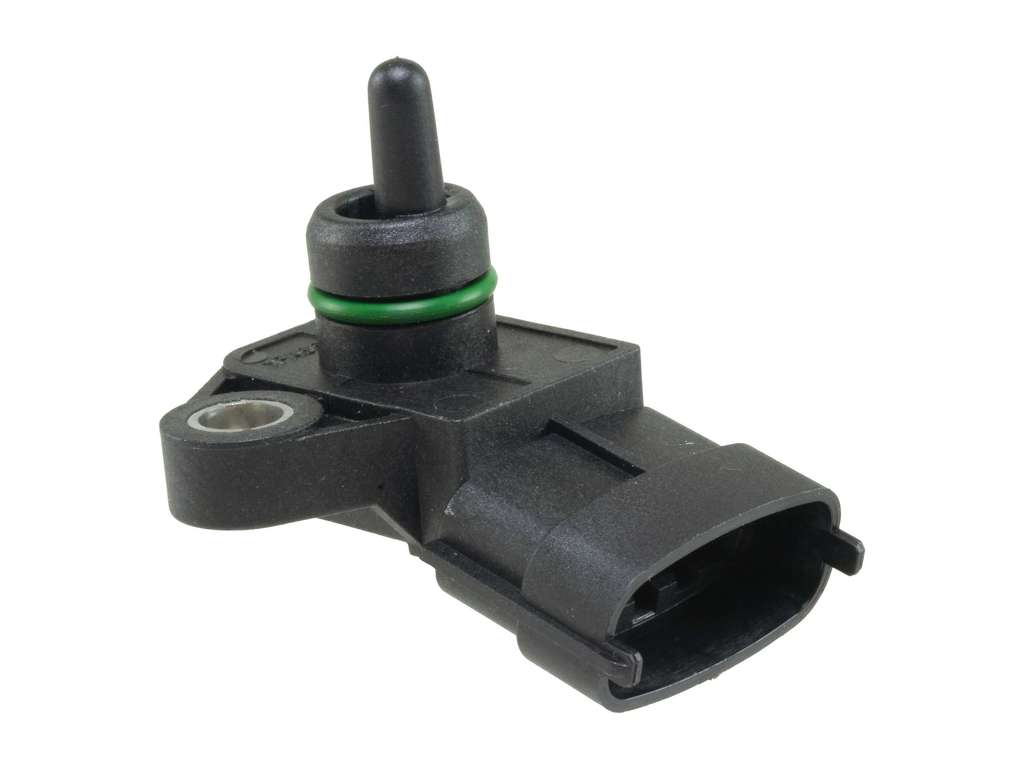
- On the 2017-2020 Elantra, the IAT sensor is part of the MAP sensor. You must replace the entire MAP sensor assembly (Part No. 39300-2B100) to fix a bad IAT.
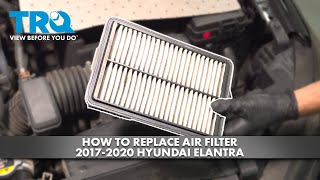
- Before buying parts, always check the sensor's wiring and connector for visible damage. Crucially, if the code appeared after a service, check that the engine air filter box is sealed correctly.
What's Unique About the 2017-2020 Hyundai Elantra
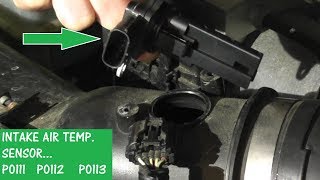
A key point for the 2017-2020 Elantra with the 2.0L Nu engine is that the Intake Air Temperature (IAT) sensor is not a separate, standalone part. Instead, it is integrated into the Manifold Absolute Pressure (MAP) sensor assembly. This means that if the IAT sensor component (a thermistor) fails, the entire MAP sensor unit must be replaced. This can be confusing, as some mechanics or DIYers may look for a separate two-wire IAT sensor in the intake duct that doesn't exist on this specific platform.
Symptoms You May Notice
- Check Engine Light is on
- Reduced fuel mileage
- Engine hesitation or stumbling on acceleration
- Rough idle
- Hard starting, particularly in cold weather
- Engine may run in 'limp mode' with reduced power
- Possible white smoke from exhaust on startup
- Replacing a separate, non-existent IAT sensor. Many technicians may assume a standalone sensor exists, but on this Elantra, it is part of the MAP sensor assembly.
- Overlooking a poorly sealed air filter box after a recent air filter change, which can cause the code to appear.
Most Likely Causes
- Faulty MAP/IAT Sensor Assembly 🔴 High Probability The IAT is an integrated thermistor within the MAP sensor; failure of this internal component requires replacing the whole unit. This is the most common failure point for this code.
How to confirm: With a scan tool on a cold engine (after sitting for 8+ hours), compare the Intake Air Temp, Engine Coolant Temp, and Ambient Air Temp readings. They should be within 5°F (3°C) of each other. If the IAT reading is significantly different (e.g., reading -40°F or a fixed high temp), the sensor is faulty.
Typical fix: Replace the Manifold Absolute Pressure (MAP) sensor assembly. The sensor is located on the intake manifold and is typically held by a single 10mm bolt. 🎬 Watch: Step-by-step guide to replacing the MAP sensor assembly.
Est. part cost: $70 - $130 - Damaged Wiring or Connector 🟡 Medium Probability The wiring harness to the MAP sensor is exposed to engine heat and vibration, potentially leading to corrosion on the connector pins, a loose connection, or frayed wires over time.
How to confirm: Visually inspect the MAP sensor connector and its wiring for any signs of damage, corrosion, or looseness. Wiggle the connector with the engine running to see if it affects the idle. With the key on, engine off, use a multimeter to check for a 5-volt reference signal and a good ground at the connector.
Typical fix: Clean the connector pins with electrical contact cleaner or repair the damaged section of the wiring harness.
Est. part cost: $5 - $50 - Extremely Dirty or Improperly Seated Engine Air Filter ⚪ Low Probability → Shop Air Cleaner Assembly A severely clogged air filter can restrict and alter airflow across the sensor, causing its readings to be slow to respond or inaccurate. More specifically, if the air filter housing is not sealed correctly after a filter change, it can cause turbulent air, throwing off the sensor and triggering a P0111 code.
How to confirm: Visually inspect the engine air filter. If it is black or clogged with debris, replace it. Ensure the air filter box is fully closed and all clips or bolts are secured. A Reddit user reported this exact issue after a filter change where the box wasn't secured properly.
Typical fix: Replace the engine air filter and ensure the airbox is properly sealed.
Est. part cost: $15 - $30
Rare But Worth Checking
- Faulty Engine Control Module (ECM): → Shop Engine Control Module (ECM) This is very rare. Before suspecting the ECM, all other possibilities, especially the sensor and wiring, must be thoroughly ruled out. An ECM failure would likely present with multiple other codes and more severe drivability issues.
Diagnosis Steps
- Connect an OBD-II scanner to check for P0111 and any other related codes.
- Cold Soak Test: With the engine completely cold (off for at least 8 hours), turn the key to the 'ON' position without starting the engine. View the live data on your scanner.
- Compare the 'Intake Air Temperature', 'Engine Coolant Temperature', and 'Ambient Air Temperature' readings. They should all be within a few degrees (approx. 5°F or 3°C) of each other. If the IAT reading is skewed significantly, the sensor is the primary suspect. 🎬 See this video for a full P0111 diagnostic walkthrough.
- Visual Inspection: Turn the engine off. Locate the MAP sensor on the intake manifold. Inspect its electrical connector and wiring for any signs of corrosion, damage, or loose connections. Also, inspect the entire air intake system, including the air filter box, for any leaks or improper sealing.
- Sensor Test (Optional): If you have a multimeter, you can disconnect the sensor and test its internal resistance. The resistance should change predictably when heated with a hairdryer (resistance decreases as temp increases). You would need the specific resistance-to-temperature chart for this part, but a changing reading generally indicates a functional thermistor.
- Wiring Test: If the sensor seems okay, check for a 5-volt reference and a good ground at the connector with the key on, engine off.
- Based on the findings, replace the MAP/IAT sensor assembly if the cold soak test fails, or repair the wiring if a fault is found there. If the issue occurred after an air filter change, double-check the filter installation and housing seal before replacing parts.
Parts You'll Likely Need
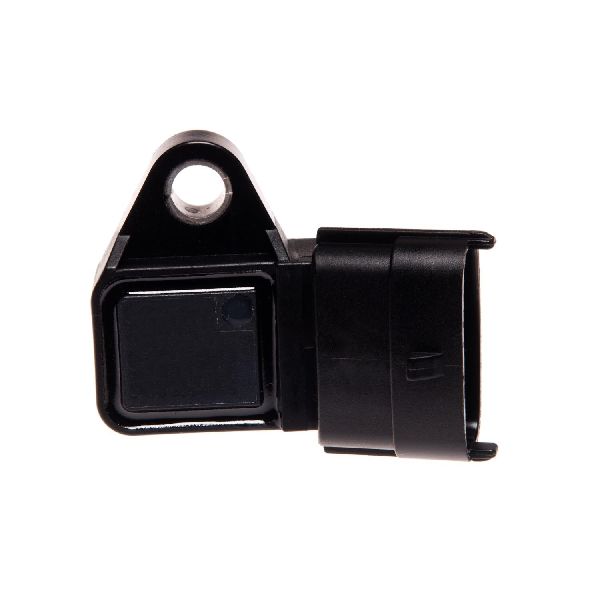
- Manifold Absolute Pressure (MAP) Sensor
(OEM #39300-2B100)— This assembly contains the integrated Intake Air Temperature (IAT) sensor, which is the most common failure point for code P0111 on this vehicle. The part number 39300-2B000 is an earlier version and may also be referenced, but 39300-2B100 is the more current part for this application.
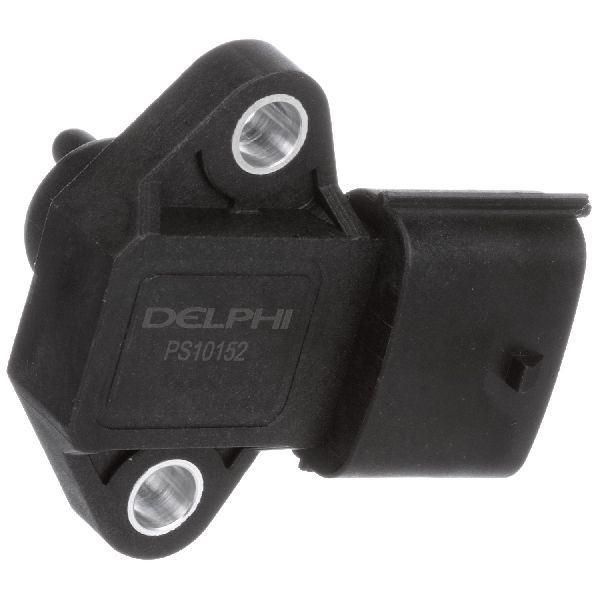
Trusted brands: Hyundai (Genuine OEM), Bosch, Delphi, TRQ
OEM price range: $70-$130
Aftermarket price range: $30-$80
Related Codes That Often Appear With This One
- P0106 — This code relates to MAP Sensor Performance. Since the IAT and MAP sensors are in the same housing, a fault in the unit or its connection can trigger both codes.
- P0112 — This code indicates IAT Sensor Circuit Low Input. It can appear alongside P0111 if the sensor is shorting out intermittently.
- P0113 — This code indicates IAT Sensor Circuit High Input. It can appear with P0111 if there is an intermittent open in the circuit or sensor.
Technical Service Bulletins (TSBs) & Recalls
- TSB 19-AT-016H: Addresses automatic transaxle solenoid replacement for various DTCs on 2017+ Elantra (AD/ADa) models with the Gen2 6-speed valve body.
- TSB 19-AT-015H: Pertains to solenoid replacement for Gen1 6-speed valve bodies, applicable to some earlier models but useful for context on transmission issues.
- TSB 22-EM-007H / 21-EM-001H: Relates to engine long/short block replacement due to piston slap noise, part of a warranty extension.
- TSB 20-AT-014H: Details diagnosis for transmission fluid temperature sensor codes, which can have similar diagnostic principles (comparing sensor readings).
Platform-Specific Known Issues
- A known issue that can trigger P0111 is an improperly sealed air filter housing after a filter change. Before replacing the sensor, ensure the airbox lid is fully seated 🎬 Watch: How to correctly change and seat the air filter. and all clips are latched.
Mechanic-Grade Diagnostic Values
- IAT Sensor Resistance — expected: Approx. 2.3-2.6 kΩ at 20°C (68°F); Approx. 0.31 kΩ at 80°C (176°F). Resistance decreases as temperature increases.. Failure: An open circuit (infinite resistance) or short circuit (near zero resistance), or a reading that does not change when temperature is altered (e.g., with a heat gun).
- IAT Sensor Signal Voltage (Key On, Engine Off) — expected: Varies with temperature. Should be around 2.0-3.0V in a temperate climate. Should roughly match ECT sensor voltage on a cold-soaked engine.. Failure: Voltage is stuck high (near 5V) indicating an open circuit, or stuck low (near 0V) indicating a short circuit.
- MAP/IAT Sensor Connector - 5V Reference Voltage (Key On, Engine Off) — expected: 4.8V - 5.2V. Failure: Voltage below 4.8V or above 5.2V indicates a problem with the ECM or wiring, not necessarily the sensor itself.
- MAP/IAT Sensor Connector - Ground Circuit — expected: Less than 0.1V (or near 0V). Failure: Any significant voltage reading on the ground pin indicates a bad ground connection, which can cause erratic sensor readings.
Scan Tool Commands That Help
- Professional Scan Tool (e.g., Hyundai GDS, Autel, iCarsoft): Live Data Graphing: IAT vs ECT — On a cold start after an overnight soak, graph the IAT and ECT sensors. The lines should start within a few degrees of each other and the ambient temp sensor. As the engine runs, the ECT line will rise steadily while the IAT line remains relatively stable or rises slightly. If the IAT line is erratic, stuck, or mirrors the ECT rise, it indicates a fault.
- Professional Scan Tool: Read DTC Status (Present vs. History) — To determine if the P0111 fault is currently active or if it was an intermittent issue from a previous drive cycle. This helps diagnose loose connections or intermittent failures.
Wiring & Ground Locations
- MAP/IAT Sensor Connector (C414) — On the front of the plastic intake manifold, typically held by a single 10mm bolt.. This 4-pin connector provides power, ground, and signal paths for both the MAP and IAT sensors. A poor connection, corrosion, or wire damage here is a common cause for P0111. The likely pinout is: Pin 1: MAP Signal, Pin 2: Sensor Ground, Pin 3: IAT Signal, Pin 4: 5V Reference.
- Engine Control Ground — Typically located on the left fender of the engine compartment or near the engine block itself. A specific ground point for the 2.0L Elantra is G01 on the left inner fender.. The IAT sensor circuit relies on a clean ground reference provided by the ECM, which in turn relies on a solid chassis ground. A corroded or loose main engine ground can cause floating voltages and trigger various sensor performance codes, including P0111.
Real Owner Repair Stories
- Reddit r/Hyundai (Hyundai Elantra (year not specified, but behavior is relevant)) — P0111 code appeared immediately after a DIY service.
❌ Tried (didn't work) Clearing the code, which would return immediately.
✅ What actually fixed it The air filter housing was not properly seated and clipped shut after an air filter change. Reseating the airbox lid correctly and ensuring it was fully sealed resolved the code without replacing any parts.
OEM Part Supersession History
39300-2B000→39300-2B100— Part revision and update. The -2B000 part is associated with slightly older Hyundai/Kia models, while the -2B100 is the specified part for the 2017-2020 Elantra 2.0L.
Heads up: While the older -2B000 part may physically fit, its calibration or internal electronics may differ slightly. Using the specified 39300-2B100 is critical to ensure correct performance and avoid recurring codes.
Model Year Variations Within This Range
- 2017-2020: The 2019 model year received a significant cosmetic facelift, but the primary 2.0L Nu (G4NH) Atkinson-cycle engine and its engine management system, including the MAP/IAT sensor (39300-2B100), remained consistent across the 2017-2020 model years. Diagnostic procedures for P0111 are identical.
- 2017-2020: An 'Eco' trim was available featuring a 1.4L Turbo GDI engine. While this engine also uses a MAP/IAT sensor, the part number and location may differ from the more common 2.0L engine. However, the P0111 diagnostic principles (cold soak test, wiring checks) remain the same.
Diagnostic Flowchart
Other Known Issues on This Vehicle
Issues unrelated to this code that are worth knowing about as an owner of this generation:
- Excessive Oil Consumption 🔴 High — Widespread issue across multiple Hyundai/Kia models with Nu engines, can start around 100,000 miles but varies. Owners report consuming a quart of oil every 1,000-3,000 miles. (Ref: Subject of multiple class-action lawsuits. A recall for 2019-2020 models with Nu engines was issued for improperly heat-treated piston oil rings, a potential cause.)
- Engine Piston Slap / Knocking Noise 🟠 Medium — Common complaint, especially on cold starts. A ticking or knocking noise that lessens as the engine warms up. Caused by improper piston-to-cylinder wall clearance. (Ref: A class-action lawsuit led to a warranty extension (TXXK) for the 1.8L Nu engine for this issue, but the 2.0L also suffers from it. TSB 22-EM-007H addresses long block replacement for this condition.)
- Failing Door Lock Actuators 🟡 Low — Common problem where doors, particularly rear doors, fail to unlock on the first attempt.
- Faulty Canister Purge Valve (CPV) 🟡 Low — The CPV can stick open or closed, leading to a Check Engine Light and EVAP-related codes.
- Automatic Transmission Shifting Issues 🟠 Medium — Harsh shifting or failure to shift can be caused by faulty speed sensors or internal solenoids. (Ref: TSB 19-AT-016H and 19-AT-015H address procedures for replacing solenoids for various DTCs in 6-speed automatic transmissions used in this generation.)
Used vs. New Parts: Buying Guide for This Vehicle
When a used part is the smart pick: Given the relatively low cost of a new aftermarket sensor, buying new is generally recommended. However, a used OEM sensor from a verified low-mileage (<50,000 miles) donor vehicle is a reasonable budget alternative to a new OEM part, as it avoids the potential quality issues of some aftermarket brands.
Donor-vehicle mileage cap: roughly under 50000 miles for the part to have meaningful remaining life.
What to inspect on the donor part:
- Ensure the donor vehicle was not in a front-end collision.
- Inspect the connector pins for any signs of green or white corrosion.
- Check the plastic housing for cracks or heat damage.
- Look at the sensor tip for heavy oil or carbon fouling; a clean tip is preferable.
OEM-only on this vehicle (don't cheap out):
- While not strictly 'OEM-only', some owners have reported premature failures with budget aftermarket MAP sensors. If the code returns after installing an aftermarket part, the next step should be a genuine OEM sensor.
Aftermarket brands forum-validated for this vehicle:
- NGK/NTK
- Bosch
- Delphi
- Standard Motor Products (SMP)
Brands owners have reported issues with on this vehicle:
- No specific brands were consistently cited as problematic, but ultra-low-cost, unbranded parts from online marketplaces carry a higher risk of poor calibration and premature failure.
Real Owner Stories
Aggregated from forums and TSBs cited above. Mileages and costs reflect what owners reported in those sources.
2017-2020 Hyundai Elantra 2.0L Nu MPI
Symptoms: A P0111 code appeared immediately after the owner changed the engine air filter.
What fixed it: The cause was an improperly secured air filter box. Correctly sealing the airbox resolved the code without replacing any parts.
Source hint: Reddit r/Hyundai - 'P011100 after changing air filter'
Related OBD-II Codes
Frequently Asked Questions
I just changed the engine air filter on my 2018 Elantra and now the Check Engine Light is on with code P0111. Did I break the sensor?
Where is the Intake Air Temperature (IAT) sensor located on my 2017-2020 Hyundai Elantra?
How can I test the IAT sensor on my Elantra without just replacing it?
My mechanic says the whole MAP sensor needs to be replaced for an IAT code. Is that correct?
What other vehicles share the same P0111 issue because they use the same engine and sensor?
Are there any TSBs that can help diagnose sensor problems on my Elantra?
Helpful Videos

We Have This Part in Stock


The information in this article is provided for general reference and educational purposes only. Vehicle specifications, procedures, and part compatibility can vary by production date, trim level, and region. Always consult your vehicle's factory service manual and verify part numbers before purchasing or performing repairs. Safety-critical components such as airbags, seat belts, and braking systems should be installed by a qualified professional.
- Hyundai Elantra:
- 🧭 Diagnostic Flowchart
- 🎬 Helpful Videos
- 🛍️ Shop This Part
- What's Unique About the 2017-2020 Hyundai Elantra
- Symptoms You May Notice
- Most Likely Causes
- Rare But Worth Checking
- Diagnosis Steps
- Parts You'll Likely Need
- Related Codes That Often Appear With This One
- Technical Service Bulletins (TSBs) & Recalls
- Platform-Specific Known Issues
- Mechanic-Grade Diagnostic Values
- Scan Tool Commands That Help
- Wiring & Ground Locations
- Real Owner Repair Stories
- OEM Part Supersession History
- Model Year Variations Within This Range
- Other Known Issues on This Vehicle
- Used vs. New Parts: Buying Guide for This Vehicle
- Real Owner Stories
- 2017-2020 Hyundai Elantra 2.0L Nu MPI
- Related OBD-II Codes
- Frequently Asked Questions
- 🎟️ Get 5% Off