
P0131 on 2014-2017 Cadillac CTS: O2 Sensor Low Voltage Causes and Fixes
P0131 on a 2014-2017 Cadillac CTS indicates low voltage from the upstream oxygen sensor on Bank 1. While this can be a faulty sensor, it's often triggered alongside P0171 (System Too Lean). Before replacing the sensor, check for vacuum leaks, exhaust leaks, and wiring issues. Crucially, GM Technical Service Bulletin #PIP5529B points to loose intake manifold bolts as a specific, known cause for this code combination on these engines. [TSB #PIP5529B]
- P0131 means the upstream O2 sensor on Bank 1 is reading low voltage, indicating a lean condition.
- On the 2014-2017 CTS, always check for other codes. P0131 is often a symptom of a vacuum leak (P0171), not a bad sensor.
- Diagnosis should focus on finding unmetered air leaks (vacuum or exhaust) before replacing the O2 sensor.
- Bank 1 is the passenger side on V6 models. Sensor 1 is the upstream sensor before the catalytic converter.
- If multiple codes from TSB #PIP5529B are present, the issue may be complex and require professional diagnosis.
What's Unique About the 2014-2017 Cadillac CTS
For this generation of Cadillac CTS with the 2.0L or 3.6L engine, P0131 is frequently not a simple case of a bad oxygen sensor. Manufacturer Technical Service Bulletin (TSB) #PIP5529B is extremely relevant, noting that P0131 often appears with other codes like P0171 (System Too Lean) and P0101 (Mass Air Flow Sensor). [TSB #PIP5529B] The TSB directs technicians to a specific, non-obvious cause: loose intake manifold bolts. [TSB #PIP5529B] This creates a vacuum leak that the O2 sensor correctly reports as a lean condition. The official fix is to remove, apply threadlocker to, and re-torque the intake manifold bolts to specification, and to avoid replacing the gasket unless it's proven to be leaking after the bolts are secured. [TSB #PIP5529B] This makes checking the intake bolts a critical and platform-specific diagnostic step.
Diagnostic Flowchart
Tap your situation to follow the diagnostic path that matches what you're seeing on this vehicle.
Symptoms You May Notice
- Check Engine Light is on
- Reduced fuel economy
- Rough or surging idle
- Engine hesitation or stumbling on acceleration
- Strong smell of exhaust or gasoline
- Hissing or whistling sound from the engine bay, indicating a vacuum leak
- Replacing the O2 sensor without checking for other codes or TSBs. If P0171 is also present, the O2 sensor is often just reporting the symptom of another problem. On this CTS, the root cause is very likely loose intake 🎬 Watch: A helpful explanation of the P0171 lean code manifold bolts as described in TSB #PIP5529B. [TSB #PIP5529B]
Most Likely Causes
- Loose Intake Manifold Bolts 🔴 High Probability → Shop Engine Intake Manifold GM TSB #PIP5529B specifically identifies loose intake manifold bolts as a cause for a cluster of codes including P0131 and P0171 on this platform. [TSB #PIP5529B] The bolts can back out over time, creating a small vacuum leak that causes a lean condition.
How to confirm: Visually inspect the intake manifold bolts to see if they are seated properly. A definitive check involves using a torque wrench to verify they are torqued to the manufacturer's specification. A smoke test may also reveal a leak around the manifold sealing surface.
Typical fix: Per the TSB, the correction is to remove one bolt at a time, apply medium-strength threadlocker, reinstall, and torque to the proper specification in the correct sequence. The intake gasket should only be replaced if a leak persists after torquing. [TSB #PIP5529B]
Est. part cost: $5-$15 for threadlocker - Vacuum Leak (other than intake bolts) 🟡 Medium Probability The presence of code P0171 (System Too Lean) alongside P0131 strongly points to unmetered air. On the 3.6L V6, the PCV system is a known weak point; the rear orifice can clog, causing the front diaphragm in the valve cover to rupture and create a large vacuum leak. Cracked hoses and faulty purge solenoids are also common.
How to confirm: Perform a visual inspection of all vacuum lines. On the 3.6L, a hissing or squealing from the driver's side valve cover is a sign of a ruptured PCV diaphragm. The most effective method is to use a smoke machine to introduce smoke into the intake system and watch for where it escapes.
Typical fix: Repair the source of the leak. This may involve replacing a vacuum hose, EVAP purge valve, or the entire valve cover if the PCV diaphragm has failed.
Est. part cost: $10-$200 - Faulty Bank 1, Sensor 1 Oxygen Sensor 🟡 Medium Probability → Shop Oxygen Sensor Oxygen sensors are wear-and-tear items that degrade over time, typically lasting 60,000 to 90,000 miles before their accuracy diminishes. However, on this platform, the sensor is often correctly reporting a problem caused by something else.
How to confirm: Use an OBD-II scanner to monitor the live voltage data from the B1S1 O2 sensor. A healthy sensor's voltage should fluctuate rapidly between approximately 0.1 and 0.9 volts. If the voltage is stuck low (e.g., below 0.2V) and doesn't respond to throttle changes (after confirming no vacuum/exhaust leaks), the sensor is likely faulty.
Typical fix: Replace the Bank 1, Sensor 1 (upstream) oxygen sensor.
Est. part cost: $50-$150 - Exhaust Leak 🟡 Medium Probability A leak in the exhaust manifold or exhaust pipe before the O2 sensor allows outside air to be drawn into the exhaust stream. This extra oxygen causes the sensor to send a false lean (low voltage) signal to the ECM.
How to confirm: Listen for a ticking or puffing noise from the engine bay, especially when the engine is cold. Visually inspect the exhaust manifold and downpipe for cracks or black soot trails indicating a leak.
Typical fix: Replace the leaking exhaust manifold gasket or repair the cracked pipe.
Est. part cost: $20-$300 - Damaged Wiring or Connectors ⚪ Low Probability The O2 sensor wiring harness is close to hot exhaust components and can become brittle, melted, or corroded over time, causing a short or open in the circuit.
How to confirm: Visually inspect the wiring harness leading to the Bank 1 Sensor 1 O2 sensor. Check for any signs of melting, chafing, or corrosion on the pins of the connector. Use a multimeter to check for continuity and proper voltage at the connector.
Typical fix: Repair the damaged section of the wiring harness or replace the connector pigtail.
Est. part cost: $15-$50
Rare But Worth Checking
- Low Fuel Pressure: If the engine is genuinely running lean due to a weak fuel pump or clogged filter, the O2 sensor will correctly report a low voltage. This would typically be accompanied by code P0171. Check fuel pressure if vacuum and exhaust leaks are ruled out.
- Faulty Engine Control Module (ECM): This is extremely rare. Before condemning the ECM, all other possibilities, including the sensor, wiring, and other engine systems, must be exhaustively tested.
Diagnosis Steps
- Scan for Codes & TSBs: Use an OBD-II scanner to confirm P0131 and check for any other codes, especially P0171, P0101, and P0106. Check for applicable TSBs, specifically #PIP5529B. [TSB #PIP5529B]
- Inspect and Torque Intake Manifold Bolts: Following TSB #PIP5529B, inspect the intake manifold bolts for looseness. If loose, use a torque wrench to tighten them to the manufacturer's specification, ideally using threadlocker as the bulletin advises. [TSB #PIP5529B] Clear codes and test drive to see if the problem is resolved.
- Inspect for Other Leaks: If bolts were tight or the problem persists, perform a thorough leak inspection. Visually inspect all vacuum hoses connected to the intake manifold. On 3.6L engines, listen for hissing near the driver-side valve cover (PCV). Inspect the exhaust manifold and downpipe for signs of leaks (soot, cracks).
- Perform Smoke Test: For a definitive vacuum leak test, use a smoke machine to pressurize the intake system and identify the source of any unmetered air leaks.
- Analyze Live Data: With a scan tool, monitor the live data stream for the Bank 1, Sensor 1 O2 sensor. The voltage should fluctuate rapidly. If it's stuck low after all leaks have been ruled out, it points towards a sensor or wiring issue.
- Inspect Wiring: Carefully inspect the O2 sensor's wiring harness and connector for any signs of melting, fraying, or corrosion.
- Test Fuel Pressure: If no leaks are found, connect a fuel pressure gauge to verify that the fuel pump and regulator are operating within specification.
- Test the Sensor: If all other tests pass, the oxygen sensor itself is the most likely culprit. Replace it.
Parts You'll Likely Need
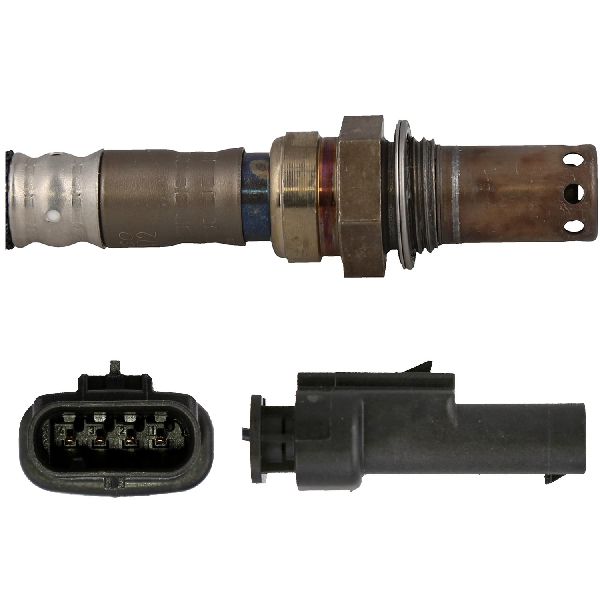
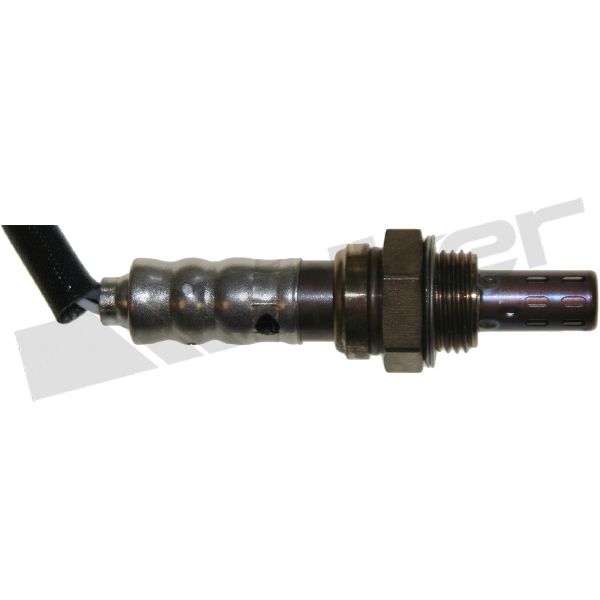
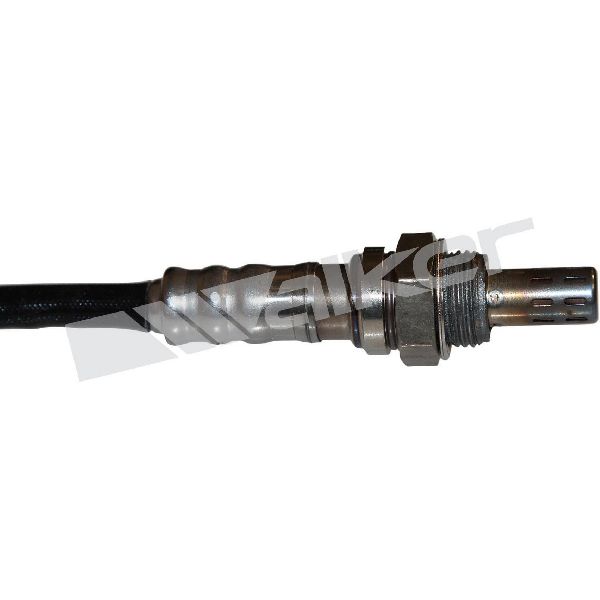
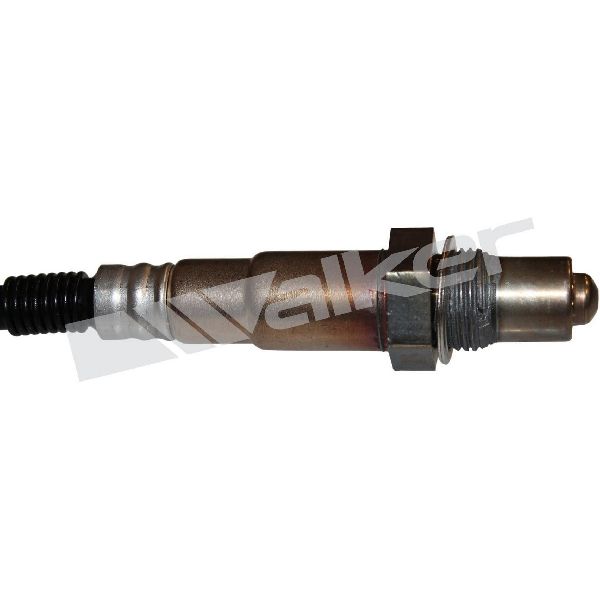
- Oxygen Sensor (Bank 1, Sensor 1)
(OEM #12616201)— This is the sensor that directly reports the low voltage condition. While often not the root cause on this vehicle, it is the component associated with the code and may fail independently.
Related Codes That Often Appear With This One
- P0171 — System Too Lean (Bank 1). This code is the most common companion and is often the root cause. A vacuum leak (from loose intake bolts, PCV, etc.) or low fuel pressure creates a lean condition, which the O2 sensor correctly reports, triggering P0131. [TSB #PIP5529B]
- P0101 — Mass Air Flow (MAF) Sensor Circuit Range/Performance. As noted in TSB #PIP5529B, this code can appear with P0131, suggesting a broader issue with unmetered air or fuel metering system, often stemming from the same intake leak. [TSB #PIP5529B]
- P0106 — Manifold Absolute Pressure (MAP) Sensor Performance. Also listed in TSB #PIP5529B, a MAP sensor code can be triggered by the erratic manifold pressure caused by a vacuum leak. [TSB #PIP5529B]
- P0137 — O2 Sensor Circuit Low Voltage (Bank 1, Sensor 2). If both the upstream and downstream sensors on the same bank show low voltage, it could point to a significant exhaust leak or a wiring issue common to both sensors. [TSB #PIP5529B]
Technical Service Bulletins (TSBs) & Recalls
- PIP5529B
- PIP5529A
Platform-Specific Known Issues
- TSB #PIP5529B: Loose Intake Manifold Bolts: → Shop Engine Intake Manifold General Motors issued this bulletin to address a condition where customers experience a check engine light, hesitation, or stalling with a combination of codes, including P0131, P0171, P0101, and P0106. The root cause is identified as loose intake manifold bolts creating a vacuum leak. The official repair procedure is to remove, apply medium-strength threadlocker to, and re-torque the bolts to the correct specification. The bulletin specifically advises against replacing the intake manifold gasket unless a leak is confirmed after the bolts have been properly torqued.
- PCV System Failure on 3.6L V6 (LFX/LGX): On the 3.6L V6 engine, the PCV system is a common source of vacuum leaks that trigger P0171 and P0131. The system uses a fixed orifice in the rear valve cover that can clog with oil deposits. This blockage increases crankcase pressure, which can then rupture a non-serviceable diaphragm in the front (driver's side) valve cover, causing a significant, often audible, vacuum leak. The fix often requires replacing the entire valve cover.
Mechanic-Grade Diagnostic Values
- B1S1 O2 Sensor Voltage (Scan Tool Live Data) — expected: Rapidly fluctuating between ~100 mV (lean) and ~900 mV (rich).. Failure: Voltage is stuck consistently below 150-200 mV.
- GM P0131 DTC Set Condition — expected: Sensor voltage should not remain low for extended periods.. Failure: The ECM will trigger P0131 if the B1S1 O2 sensor voltage remains below 400 millivolts for more than 20 seconds.
- Low-Side Fuel Pressure (Key On, Engine Off) — expected: 50-100 psi (345-690 kPa).. Failure: Pressure below 50 psi suggests a weak in-tank fuel pump or clogged filter, which can cause a lean condition and trigger P0131.
- Low-Side Fuel Pressure (Engine Idling) — expected: 43-58 psi (300-400 kPa).. Failure: Readings outside this range can indicate an issue with the Fuel Pump Flow Control Module (FPCM) or the in-tank pump.
Scan Tool Commands That Help
- GDS2 (GM Global Diagnostic System): Fuel Trim Reset — After repairing a vacuum leak or replacing a fuel system component, resetting the long-term fuel trim values forces the ECM to relearn the fuel mixture strategy immediately, which can confirm the fix and extinguish the check engine light faster.
- GDS2 (GM Global Diagnostic System): Oxygen Sensor Heater Test — This bidirectional command allows the technician to activate the O2 sensor's internal heater. It helps verify the integrity of the heater circuit, which is necessary for the sensor to reach operating temperature and provide accurate readings. A faulty heater can sometimes contribute to low voltage codes.
Wiring & Ground Locations
- ECM Connector C1, Pin 19 — At the Engine Control Module (ECM).. This is the HO2S High Signal pin for Bank 1 Sensor 1. Probing this pin (PU/WH wire) can verify if the low voltage signal is reaching the ECM.
- ECM Connector C1, Pin 16 — At the Engine Control Module (ECM).. This is the HO2S Heater Low Control pin for Bank 1 Sensor 1 (GY/WH wire). A fault in the heater circuit can prevent the sensor from working correctly, leading to incorrect voltage readings.
- G103 — Located at the left rear of the engine compartment on the cowl, often above the brake booster.. This is a major ground point for the BCM, IPC, and DLC. While not a direct engine ground, high resistance here can cause a multitude of difficult-to-diagnose electrical issues that could potentially affect sensor reference voltages.
- G105 — On the right side of the engine compartment on 3.6L V6 models.. This is a major engine-related ground point. A poor connection here can cause erratic sensor readings, including from the oxygen sensors, as it can create an unstable ground reference for the entire engine management system.
Real Owner Repair Stories
- Go-Parts.com article citing a common owner experience on GM 3.6L engines (Buick Enclave with 3.6L V6 (LFX/LFY engine, shared platform characteristics)) — Rough, unstable idle and a distinct hissing or whistling sound from the engine bay, with code P0171 (often paired with P0131).
❌ Tried (didn't work) Cleaning the MAF sensor, Replacing the MAF sensor, Performing an intake smoke test which showed no leaks, Replacing the Bank 1 O2 sensor
✅ What actually fixed it The problem was an internal vacuum leak from the PCV system. Removing the engine oil cap while the engine was running caused the hissing noise to stop and the idle to stumble, confirming a ruptured diaphragm. The fix was replacing the entire front valve cover which contains the non-serviceable PCV diaphragm.
"I Checked Everything" — The Actual Cause
- In cases involving the GM 3.6L V6 engine, a smoke test for vacuum leaks may come back clean, yet a massive vacuum leak exists. This happens when the PCV diaphragm, which is integrated into the valve cover, ruptures. This creates an internal vacuum leak by drawing unmetered air from the crankcase directly into the intake. A key diagnostic step is to run the engine and remove the oil filler cap; a significant change in idle and a loud sucking sound confirms the ruptured diaphragm, which a smoke test would not typically reveal.
Model Year Variations Within This Range
- 2014-2015 (3.6L V6): These models primarily used the 3.6L LFX V6 engine. This engine is well-documented for the PCV system failure (clogged rear orifice, ruptured front diaphragm) and the loose intake manifold bolt issue described in TSB #PIP5529B. [11, TSB #PIP5529B]
- 2016-2017 (3.6L V6): For the 2016 model year, Cadillac replaced the LFX V6 with the updated LGX 3.6L V6. While architecturally similar, the LGX is a significant redesign with different cylinder heads, timing components, and thermal management. While still susceptible to vacuum leaks, some specific failure points like the PCV system may differ in design from the LFX.
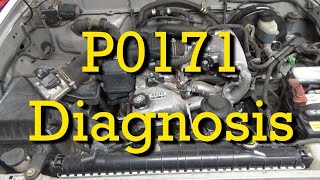
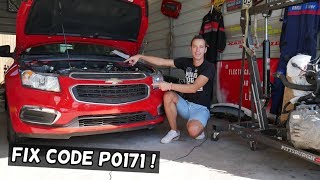
Helpful Videos


We Have This Part in Stock


The information in this article is provided for general reference and educational purposes only. Vehicle specifications, procedures, and part compatibility can vary by production date, trim level, and region. Always consult your vehicle's factory service manual and verify part numbers before purchasing or performing repairs. Safety-critical components such as airbags, seat belts, and braking systems should be installed by a qualified professional.
- Cadillac CTS:
- 🧭 Diagnostic Flowchart
- 🎬 Helpful Videos
- 🛍️ Shop This Part
- What's Unique About the 2014-2017 Cadillac CTS
- Symptoms You May Notice
- Most Likely Causes
- Rare But Worth Checking
- Diagnosis Steps
- Parts You'll Likely Need
- Related Codes That Often Appear With This One
- Technical Service Bulletins (TSBs) & Recalls
- Platform-Specific Known Issues
- Mechanic-Grade Diagnostic Values
- Scan Tool Commands That Help
- Wiring & Ground Locations
- Real Owner Repair Stories
- "I Checked Everything" — The Actual Cause
- Model Year Variations Within This Range
- 🎟️ Get 5% Off