
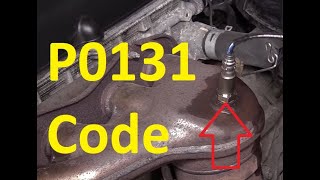
P0131 on 2002-2005 Ford Explorer 4.0L V6: Causes and Fixes for O2 Sensor Low Voltage
This code almost always means the upstream oxygen sensor on the passenger side (Bank 1, Sensor 1) has failed due to age or contamination. Replacing this sensor is the most common fix. Accessing the electrical connector, located high on the transmission bellhousing, is the most challenging part of the job. Expect to pay around $60-$90 for a quality aftermarket part and $110+ for an OEM Motorcraft sensor.
- P0131 on your Explorer points directly to the passenger-side, pre-catalytic converter O2 sensor or its circuit.
- The most likely fix is replacing the sensor itself, but always inspect the wiring for damage first.
- Be prepared for a difficult time accessing the electrical connector, which is high on the transmission.
- Do not ignore this code, as it will cause poor fuel economy and can lead to expensive catalytic converter damage.
What's Unique About the 2002-2005 Ford Explorer
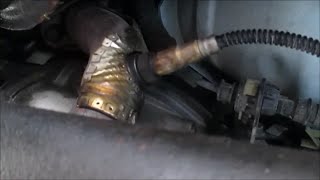
On the 4.0L SOHC V6 engine in the third-generation Explorer, Bank 1 is located on the passenger side of the vehicle. The upstream sensor (Sensor 1) is positioned in the exhaust pipe between the exhaust manifold and the catalytic converter. While the code itself is standard, owners report that accessing the sensor's electrical connector can be extremely difficult as it is often mounted high on the transmission bellhousing. Many DIYers and mechanics find it necessary to remove the front passenger wheel and wheel well liner to gain the leverage and visibility needed to disconnect it.
Symptoms You May Notice
- Check Engine Light is on
- Poor fuel economy
- Rough or unstable idle
- Engine hesitation or stalling during acceleration
- Strong smell of gasoline from the exhaust
- Engine misfires, which can sometimes be mistaken as the primary issue
- Replacing the catalytic converter. The P0131 code indicates an issue with the sensor *before* the converter. A bad converter would typically set a P0420 code.
- Replacing the wrong O2 sensor. This code is specific to Bank 1 (passenger side) and Sensor 1 (upstream/pre-catalyst). Replacing the driver's side (Bank 2) or downstream (Sensor 2) sensor will not fix the issue.
- Assuming a misfire is the root cause. While a misfire can affect O2 sensor readings, a faulty O2 sensor can also cause a misfire. It's important to diagnose the O2 sensor circuit itself before chasing other causes if P0131 is the primary code.
Most Likely Causes
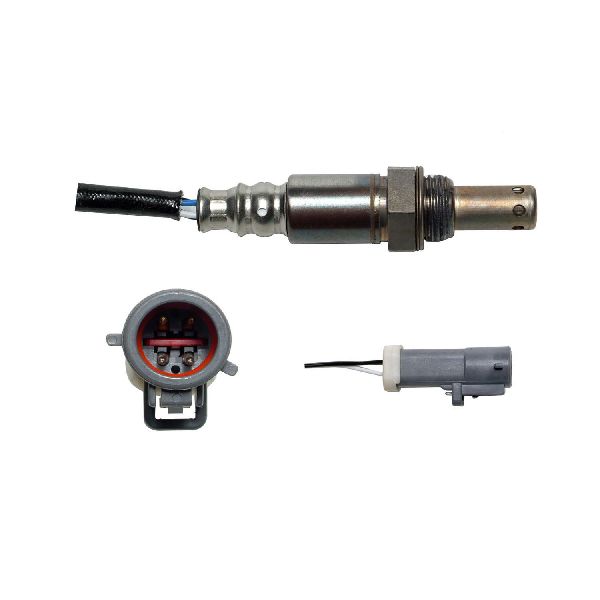
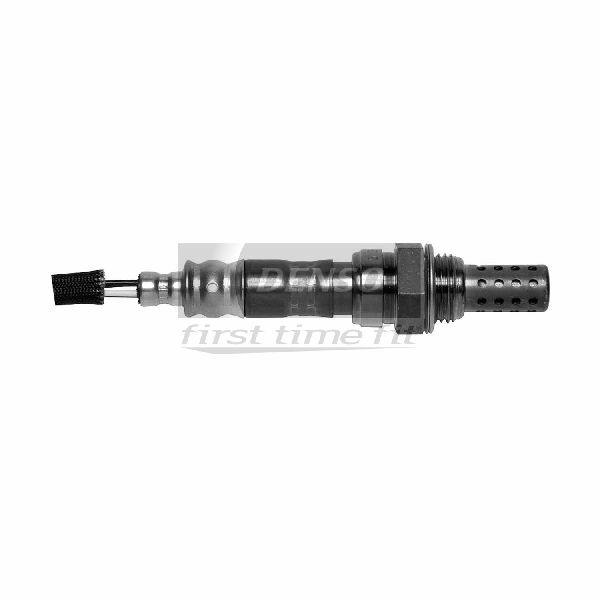
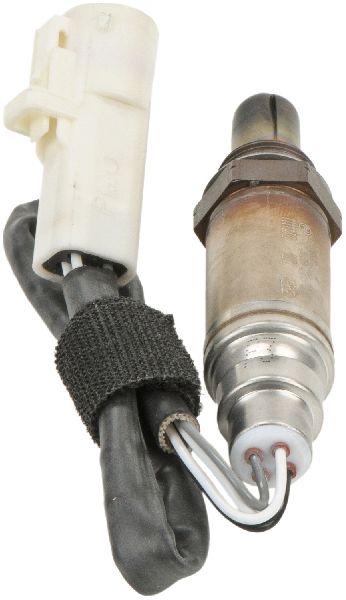
- Failed Bank 1, Sensor 1 Oxygen Sensor 🔴 High Probability → Shop Oxygen Sensor Oxygen sensors are wear-and-tear items with a finite lifespan, typically 70,000-100,000 miles. Contamination from engine byproducts, coolant, or oil eventually causes them to fail and report incorrect voltage.
How to confirm: Use an OBD-II scanner to monitor the live voltage data for the B1S1 O2 sensor ('O2S11'). If the voltage stays consistently low (e.g., below 0.2V) and does not fluctuate rapidly between ~0.1V and ~0.9V when the engine is warm, the sensor is likely faulty.
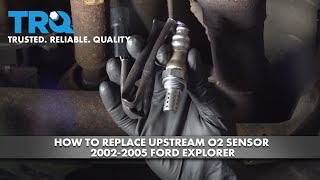
Typical fix: Replace the upstream oxygen sensor on the passenger side. It is highly recommended to use a quality brand like Motorcraft, Bosch, or Denso and to use a dedicated O2 sensor socket for removal. 🎬 Watch this step-by-step walkthrough for replacing the upstream sensor.
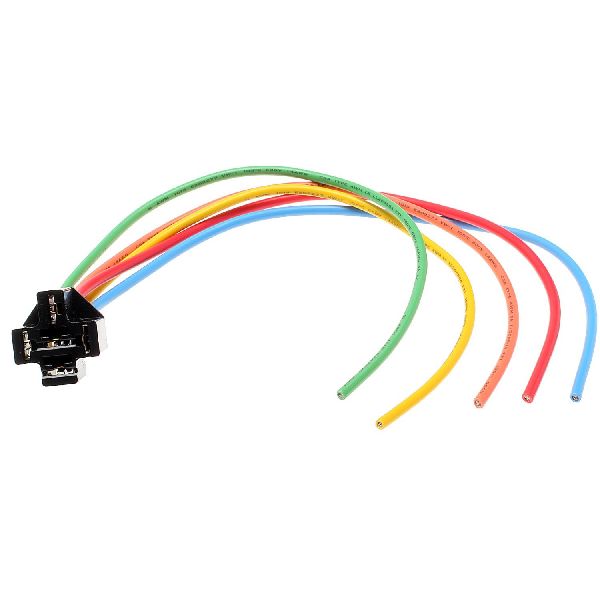
Est. part cost: $60-$120 - Damaged Wiring or Connector 🟡 Medium Probability The sensor's wiring harness is routed near hot exhaust components and the transmission, making it susceptible to melting, chafing, or corrosion over time. The connector itself can also accumulate dirt and moisture, leading to a poor connection.
How to confirm: Visually inspect the entire wiring harness from the O2 sensor to its connection point on the transmission bellhousing. Look for any signs of melted plastic, frayed wires, or corrosion on the connector pins. Use a multimeter to check for continuity and shorts in the circuit.
Typical fix: Repair the damaged section of the wire or replace the connector pigtail. Ensure the repaired harness is properly secured away from heat sources using zip ties.
Est. part cost: $15-$40 - Exhaust Leak ⚪ Low Probability Exhaust manifold gaskets or pipe flanges can develop leaks over time due to rust and heat cycles, allowing outside air to be drawn into the exhaust stream before the sensor. This extra oxygen fools the sensor into sending a low voltage (lean) signal.
How to confirm: Listen for a ticking or puffing noise from the passenger side of the engine bay, especially when the engine is cold. A visual inspection may reveal black soot trails around the leak source, such as the exhaust manifold-to-head flange.
Typical fix: Replace the leaking gasket or repair the cracked exhaust component.
Est. part cost: $20-$100
Rare But Worth Checking
- Low Fuel Pressure: A weak fuel pump or clogged filter can create a genuine lean condition, which the O2 sensor will accurately report as low voltage. This would typically be accompanied by other codes like P0171 (System Too Lean).
- Vacuum Leak: A significant vacuum leak from a cracked hose or bad intake manifold gasket can also cause a lean condition, making the O2 sensor read low. This would also likely trigger a P0171 code. The intake manifold gaskets on the 4.0L SOHC are a known failure point.
- Faulty Powertrain Control Module (PCM): This is extremely rare. The PCM should only be considered after all other possibilities, including the sensor, wiring, and other engine issues, have been definitively ruled out.
Diagnosis Steps
- Connect an OBD-II scanner and confirm P0131 is the active code. Check for any other pending or stored codes, especially P0171 or P1131.
- View the live data stream for the 'O2S11' (Oxygen Sensor Bank 1, Sensor 1) voltage. At a warm, steady idle, it should fluctuate rapidly between approximately 0.1V and 0.9V. If it is stuck below 0.4V, the fault is confirmed. 🎬 See how to diagnose P0131 and test sensor voltage.
- Perform a thorough visual inspection of the Bank 1, Sensor 1 wiring harness and connector. Look for any signs of melting, chafing, corrosion, or loose connections. The connector is often located on the top of the transmission bellhousing, requiring access from the passenger wheel well.
- Inspect the exhaust manifold and downpipe for any signs of leaks (soot trails, audible ticking noises) that are upstream of the sensor.
- If wiring and exhaust are intact, test for vacuum leaks using a smoke machine or by carefully spraying brake cleaner around the intake manifold gaskets and vacuum hoses, listening for a change in engine idle.
- If no other issues are found, the oxygen sensor itself is the most likely culprit and should be replaced. Use a proper 22mm (or 7/8") O2 sensor socket.
- After replacing the sensor, clear the codes and perform a test drive, including city and highway conditions, to ensure the repair was successful and the code does not return.
Parts You'll Likely Need
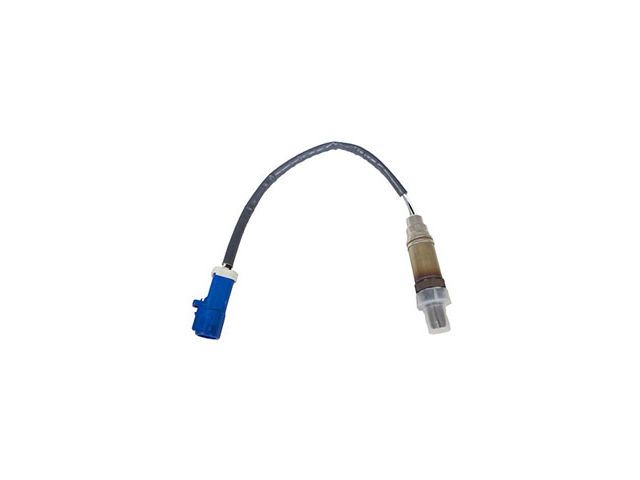
- Upstream Oxygen Sensor (Bank 1, Sensor 1)
(OEM #Motorcraft DY-835 (Supersedes DY-992))— This is the primary component responsible for the measurement that triggers code P0131. It is a common failure item due to age and contamination.
Trusted brands: Motorcraft, Bosch, Denso, NGK/NTK
OEM price range: $110-$140
Aftermarket price range: $60-$90
Related Codes That Often Appear With This One
- P0171 — This code for 'System Too Lean (Bank 1)' can appear with P0131 if there is a legitimate lean condition (like a vacuum or exhaust leak) that the O2 sensor is correctly detecting.
- P0151 — This is the identical 'O2 Sensor Circuit Low Voltage' code but for Bank 2 (driver's side). Seeing both may suggest a common problem like low fuel pressure or a major vacuum leak affecting both sides of the engine.
- P1131 — This is a Ford-specific code for 'Lack of HO2S11 Switch, Sensor Indicates Lean'. It is a more specific version of P0131 and strongly points to a failed sensor or a massive vacuum/exhaust leak on Bank 1.
Platform-Specific Known Issues
- Access to the Bank 1 (passenger side) upstream O2 sensor connector can be challenging. It is often located high on the transmission, and mechanics and DIYers frequently report needing to remove the passenger side front wheel and inner fender liner to gain adequate access to unplug it.
- A YouTube video by 'Ford Explorer 4.0L SOHC O2 Sensor Replacement Part 1' details this difficult access, showing that reaching the clip requires long arms and maneuvering around the wheel well. 🎬 Watch this video to see the tricky connector access point.
Mechanic-Grade Diagnostic Values
- Fuel Pressure (Key On, Engine Running) — expected: 60-65 PSI. Failure: Pressure below 45 PSI often causes noticeable running issues and can contribute to a lean condition.
- O2 Sensor Heater Element Resistance — expected: Between 3 and 30 Ohms. Failure: A reading outside this range indicates a faulty heater circuit within the sensor, which can cause slow sensor response and trigger codes.
- Long Term Fuel Trim (LTFT) at Idle — expected: Should be close to 0%, ideally within +/- 10%.. Failure: A high positive LTFT (e.g., +20% or higher) indicates the PCM is compensating for a perceived lean condition, which could be a vacuum leak, exhaust leak, or low fuel delivery. If P0131 is present, a high positive LTFT on Bank 1 supports the lean reading.
Wiring & Ground Locations
- G101 — On the LH (driver's) side of the upper radiator support.. A poor engine ground can introduce noise and voltage offsets into sensor circuits, potentially causing the PCM to see an incorrect low voltage from the O2 sensor. Ensuring all major grounds are clean and tight is a critical diagnostic step.
- G104 — Lower LH (driver's) front of the engine compartment, on top of the frame rail.. This is a primary chassis ground. Corrosion or a loose connection here can affect the entire engine management system, including the reference ground for sensors like the O2 sensor.
- Engine to Firewall Ground Strap — Often runs from the rear of the driver's side cylinder head to a stud on the firewall, inboard of the brake booster.. This strap provides a direct ground path from the engine block to the vehicle body (and thus to the PCM). A missing or corroded strap can cause erratic sensor behavior.
Real Owner Repair Stories
- Reddit user in r/Ford (2002 Ford Explorer Sport Trac 4.0L SOHC) — High positive Long Term Fuel Trim (+25% on both banks) that gets worse with RPM.
❌ Tried (didn't work) Extensive (5+ hours) search for vacuum leaks, including using a junker intake manifold for testing., Cleaning the MAF sensor., Swapping the MAF sensor with three different used units.
✅ What actually fixed it The user suspected a fuel pump issue (lack of volume despite acceptable pressure) after ruling out vacuum leaks. The final fix was not posted, but the diagnosis correctly moved from air (vacuum) to fuel delivery after the smoke test and MAF swaps failed to resolve the issue.
"I Checked Everything" — The Actual Cause
- In a documented case on a 4.0L SOHC, a user reported maxed-out positive fuel trims (+25%) and lean codes. After spending hours smoke testing and finding no vacuum leaks, and swapping the MAF sensor multiple times with no change, the diagnosis shifted to a fuel delivery problem, specifically a fuel pump not providing enough volume under load, even though the static pressure seemed acceptable. This is a classic pattern where a lean condition isn't caused by unmetered air, but by insufficient fuel delivery that a smoke test cannot identify.
OEM Part Supersession History
XL3Z9F472AA→Motorcraft DY-835— Standard part lifecycle update and consolidation.
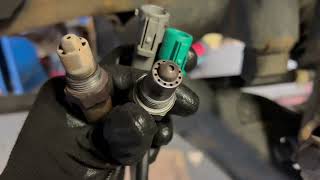
Heads up: Some users have reported issues with aftermarket sensor connectors having different keying tabs than the OEM harness, requiring modification or return. It is wise to compare the new sensor's plug to the old one before installation.
Model Year Variations Within This Range
- 2002-2005: The 4.0L SOHC V6 engine and its management system saw no significant component changes within this specific 2002-2005 third-generation Explorer platform that would affect the diagnosis of P0131. The long block is consistent with those used in Rangers and Mustangs of the era, with only external accessories and intake manifolds differing.
Diagnostic Flowchart
Other Known Issues on This Vehicle
Issues unrelated to this code that are worth knowing about as an owner of this generation:
- Timing Chain Cassette Failure (aka 'Death Rattle') 🔴 High — Very common, especially on pre-2004 models. Noise often starts on cold startup between 80,000-150,000 miles. Failure is catastrophic to the engine. (Ref: TSB 04-15-04, TSB 02-7-6, TSB 99-26-05)
- 5R55W/S Automatic Transmission Failure 🔴 High — Extremely common around 90,000-120,000 miles. Symptoms include flashing O/D light, harsh shifting, shuddering, and loss of gears. Often requires a full rebuild.
- Cracked Plastic Thermostat Housing 🟠 Medium — Very common failure point leading to coolant leaks and potential overheating. The plastic becomes brittle with age and heat cycles. Aftermarket aluminum housings are a popular upgrade.
- Intake Manifold Gasket Leaks 🟠 Medium → Shop Engine Intake Manifold — Common on higher-mileage engines. The O-ring style gaskets shrink and harden, causing vacuum leaks that lead to lean codes (P0171/P0174) and rough idling.
- Cracked Rear Liftgate Trim Panel 🟡 Low — Almost universal on this generation. The plastic trim panel below the rear window cracks, usually near the Ford emblem. This is a cosmetic issue.
Used vs. New Parts: Buying Guide for This Vehicle
When a used part is the smart pick: For this repair, using a used part is generally not recommended for the oxygen sensor itself, as it is a wear item with a finite lifespan. However, if the issue is traced to a damaged wiring harness connector pigtail, obtaining one from a junkyard vehicle is a perfectly acceptable and cost-effective repair.
Donor-vehicle mileage cap: roughly under 100000 miles for the part to have meaningful remaining life.
What to inspect on the donor part:
- For a connector pigtail, inspect for any signs of melting, cracking, or brittleness in the plastic.
- Check that the wire insulation is still flexible and not frayed or exposed.
- Ensure the connector's locking tab is intact and functional.
- Look inside the connector for any green or white corrosion on the pins.
OEM-only on this vehicle (don't cheap out):
- While not strictly 'OEM-only', using a Motorcraft sensor is highly recommended for guaranteed compatibility and performance. Some aftermarket sensors, even from reputable brands, have been reported to have connector keying issues.
Aftermarket brands forum-validated for this vehicle:
- Bosch (often the original OE supplier)
- Denso
- NGK/NTK
Brands owners have reported issues with on this vehicle:
- No-name, unbranded sensors from online marketplaces should be avoided as their quality, accuracy, and lifespan are highly questionable.
Real Owner Stories
Aggregated from forums and TSBs cited above. Mileages and costs reflect what owners reported in those sources.
2002-2005 Ford Explorer 4.0L SOHC V6
Symptoms: The Bank 1 Sensor 1 connector is extremely difficult to reach, located high on the transmission. Reaching the clip requires long arms and maneuvering through the wheel well.
What fixed it: Removed the passenger side front wheel and inner fender liner to access and replace the upstream oxygen sensor.
Source hint: YouTube video by 'Ford Explorer 4.0L SOHC O2 Sensor Replacement Part 1'
2001-2011 Ford Ranger 4.0L SOHC V6
Symptoms: Real-time data for Bank 1 showed 0.000 volts for both sensors.
What fixed it: Identified as a Bank 1 failure mode, often resulting in companion codes P1131 and P0174.
Source hint: ranger-forums.com thread titled 'O2 real time data for Bank 1 reading zero volts for both sensors'
Related OBD-II Codes
Frequently Asked Questions
Which side of my 4.0L SOHC V6 engine is Bank 1 for the P0131 code?
I'm having trouble reaching the O2 sensor connector; is there a specific trick for the 2002-2005 Explorer?
Should I use a specific brand of oxygen sensor to fix P0131 on my Explorer?
Could my rough idle and P0131 be caused by the intake manifold instead of the sensor?
Are there any TSBs related to engine noise that I should check while fixing this code?
Helpful Videos
We Have This Part in Stock


The information in this article is provided for general reference and educational purposes only. Vehicle specifications, procedures, and part compatibility can vary by production date, trim level, and region. Always consult your vehicle's factory service manual and verify part numbers before purchasing or performing repairs. Safety-critical components such as airbags, seat belts, and braking systems should be installed by a qualified professional.
- Ford Explorer:
- 🧭 Diagnostic Flowchart
- 🎬 Helpful Videos
- 🛍️ Shop This Part
- What's Unique About the 2002-2005 Ford Explorer
- Symptoms You May Notice
- Most Likely Causes
- Rare But Worth Checking
- Diagnosis Steps
- Parts You'll Likely Need
- Related Codes That Often Appear With This One
- Platform-Specific Known Issues
- Mechanic-Grade Diagnostic Values
- Wiring & Ground Locations
- Real Owner Repair Stories
- "I Checked Everything" — The Actual Cause
- OEM Part Supersession History
- Model Year Variations Within This Range
- Other Known Issues on This Vehicle
- Used vs. New Parts: Buying Guide for This Vehicle
- Real Owner Stories
- 2002-2005 Ford Explorer 4.0L SOHC V6
- 2001-2011 Ford Ranger 4.0L SOHC V6
- Related OBD-II Codes
- Frequently Asked Questions
- 🎟️ Get 5% Off