
P0131 on 2004-2008 Ford F-150 5.4L: Causes and Fixes for O2 Sensor Low Voltage
This code almost always means the upstream oxygen sensor on the passenger side (Bank 1) has failed. An exhaust leak before the sensor is the second most likely cause. Expect to pay $40-$80 for an aftermarket sensor or $90-$150 for an OEM Motorcraft part. It's a DIY job, but the sensor is in a very tight spot, often requiring removal of the passenger front wheel and inner fender liner for access.
- P0131 on your F-150 points to the upstream O2 sensor on the passenger side.
- The most likely fix is replacing the sensor, but you must first rule out an exhaust leak, which is a known issue on the 5.4L Triton engine.
- Use a scan tool to watch the sensor's live data. A flat line near 0 volts points to a bad sensor, while a fluctuating signal that stays low suggests a real lean condition.
- Accessing this specific sensor is difficult. Plan on removing the passenger front wheel and inner fender liner to make the job easier.
- Using an OEM Motorcraft replacement sensor is strongly recommended for long-term reliability.
What's Unique About the 2004-2008 Ford F-150
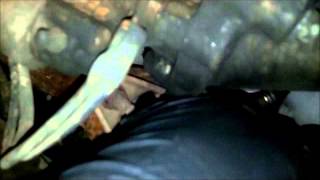
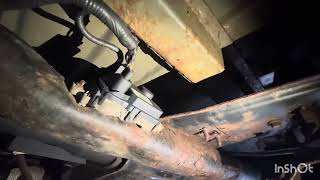
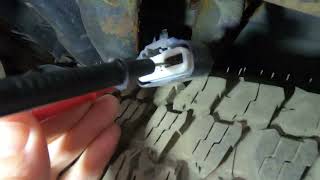
On the 5.4L Triton V8, code P0131 is frequently caused by either the O2 sensor itself failing or an exhaust manifold leak. These engines are notorious for developing exhaust leaks from broken manifold studs, which allows unmetered fresh air to be sucked into the exhaust stream. This extra oxygen causes the O2 sensor to read a false lean condition and report low voltage. The Bank 1 Sensor 1 is also notoriously difficult to access, tucked away on the passenger side near the firewall, making replacement 🎬 Watch: This walkthrough shows how to access the passenger side sensor. more challenging than on other vehicles.
Symptoms You May Notice
- Check Engine Light is on
- Reduced fuel economy
- Rough or unstable idle
- Engine hesitation or stumbling on acceleration
- A smell of gasoline or strong exhaust fumes
- A rhythmic ticking or puffing sound from the passenger side engine bay, especially when cold (indicates an exhaust leak)
- Replacing the O2 sensor without checking for exhaust leaks first. An exhaust leak will cause the new sensor to read low voltage as well, making it seem like the new part is also faulty.
- Confusing Bank 1 with Bank 2. Bank 1 is always the side with cylinder #1, which on a Ford V8 is the passenger side.
- Replacing the wrong sensor. P0131 refers to Sensor 1, which is the 'upstream' sensor located before the catalytic converter.
Most Likely Causes
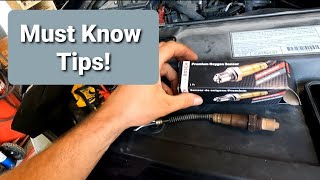
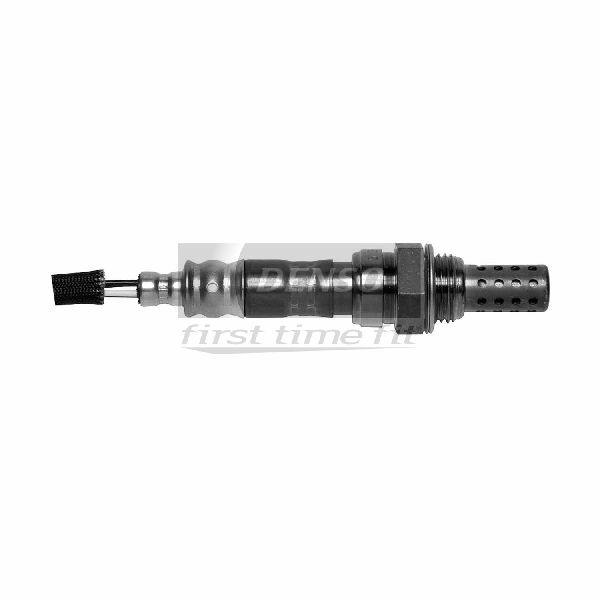
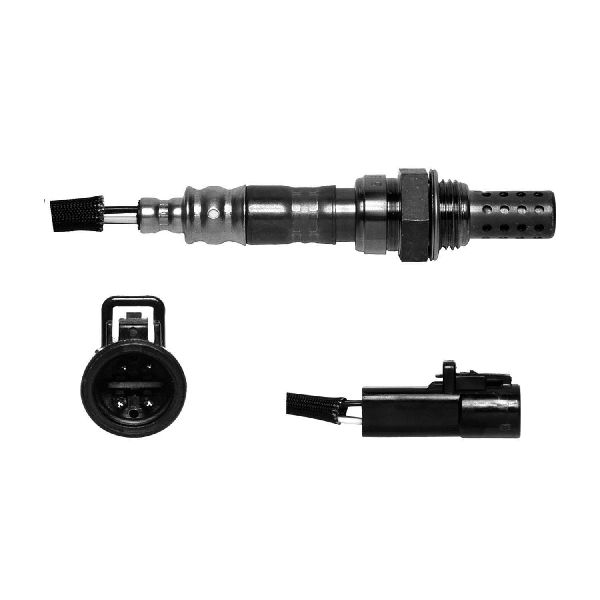
- Failed Upstream Oxygen Sensor (Bank 1, Sensor 1) 🔴 High Probability → Shop Oxygen Sensor Oxygen sensors are wear-and-tear items that degrade over time from extreme heat and exhaust contaminants. This is the most common failure point for this code. Dropping the new sensor during installation can also damage the sensitive internal ceramic element.
How to confirm: Use a scan tool to monitor the live voltage data for 'O2S11'. A healthy, warm sensor will show voltage rapidly fluctuating between approximately 0.1V and 0.9V. A failed sensor will often be 'stuck' with a flat-line reading below 0.2V. You can also test the sensor's internal heater circuit with a multimeter; resistance should typically be between 3-10 ohms.
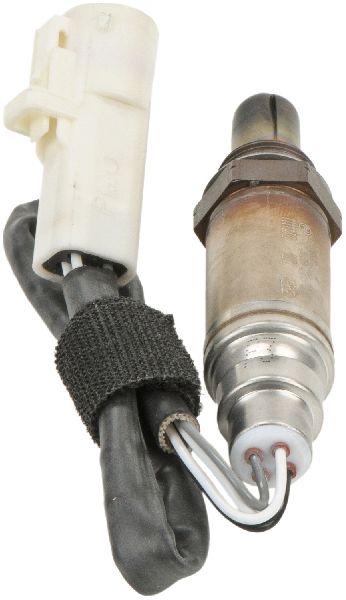
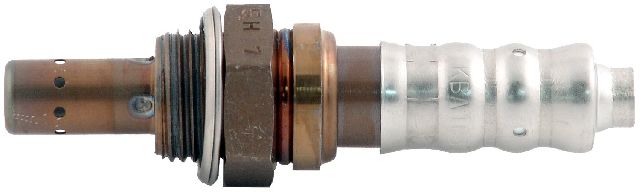
Typical fix: Replace the Bank 1, Sensor 1 oxygen sensor. This is the upstream sensor on the passenger side. Using an OEM Motorcraft sensor (Part No. DY1401 or similar) is highly recommended for compatibility.
Est. part cost: $40-$150 - Exhaust Leak Before the Sensor 🟡 Medium Probability The 5.4L Triton engine is known for exhaust manifold studs breaking due to corrosion and heat cycles. The rear-most studs are particularly susceptible. This creates a leak between the cylinder head and the manifold, drawing in fresh air and causing a false lean reading.
How to confirm: Listen for a rhythmic 'ticking' or 'puffing' sound from the passenger side of the engine, especially when the engine is cold before the metal has expanded. The sound may quiet down as the engine warms up. You may also see black soot trails around the exhaust manifold flange where it meets the cylinder head.
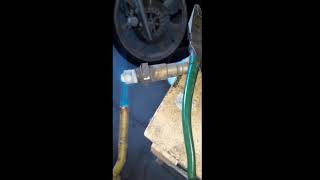
Typical fix: Repair the exhaust leak. This is often a significant job that involves removing the exhaust manifold to extract the broken studs and replace 🎬 See how to replace the manifold and extract broken studs. the gasket. It may require specialized tools for drilling out broken studs.
Est. part cost: $20-$300 - Damaged Wiring or Connector 🟡 Medium Probability
How to confirm: Visually inspect the sensor's wiring harness from the sensor plug back to the main engine harness. Look for melted plastic from contact with the exhaust, chafed wires, or corrosion inside the connector plug. A loose connection at the main harness junction point has also been reported by owners.
Typical fix: Repair the damaged section of the wiring harness or replace the connector pigtail. Ensure the harness is properly secured away from hot exhaust components.
Est. part cost: $15-$50 - Vacuum Leak ⚪ Low Probability
How to confirm: Listen for hissing sounds around the intake manifold, vacuum hoses, and PCV valve. A mechanic can perform a smoke test to pinpoint the source of the leak. A large vacuum leak would likely trigger a P0171 'System Too Lean' code as well.
Typical fix: Replace the leaking vacuum hose, intake manifold gasket, or other failed component. In some Ford models, replacing isolator bolts and port seals has been necessary to resolve P0131 and P0171 codes (NHTSA ODI #10219019).
Est. part cost: $5-$200
Rare But Worth Checking
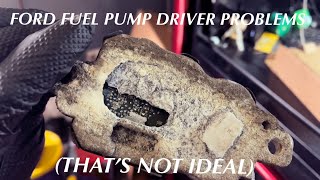
- Low Fuel Pressure: If the truck is genuinely running lean, low fuel pressure from a weak fuel pump or a failing Fuel Pump Driver Module (FPDM) could be the cause. The FPDM on these trucks is notoriously prone to corrosion and failure. 🎬 Watch: Why the FPDM often fails and how to check it. This would likely affect both engine banks and trigger other codes like P0171, P0174, or fuel system codes like P1233.
- Faulty Powertrain Control Module (PCM): This is extremely rare. The PCM should only be considered after all other possibilities, including wiring, have been exhaustively checked and ruled out.
Diagnosis Steps
- Read the code with an OBD-II scanner and confirm P0131 is present. Note any other codes, especially P0171, P0151, or P0053.
- With the engine cold, start it and listen carefully for any rhythmic ticking/puffing noises from the passenger-side exhaust manifold that would indicate a leak. This is a very common cause on the 5.4L Triton.
- Visually inspect the Bank 1, Sensor 1 (passenger side, upstream) wiring harness for any signs of melting, chafing, or damage. Check the connector for corrosion or loose pins. Follow the harness as far back as possible.
- Use a scan tool with live data capability to monitor the 'O2S11' voltage with the engine fully warmed up. It should fluctuate rapidly between ~0.1V and ~0.9V.
- If the voltage is stuck low (<0.2V), the sensor is either bad or it is correctly reporting a lean condition.
- To differentiate, you can introduce a fuel source (like propane from an unlit torch or a burst of carb cleaner) into the intake snorkel. If the O2 sensor voltage jumps high (towards 0.9V), the sensor is working and you have a lean condition (vacuum/exhaust leak, fuel issue). If the voltage stays low, the sensor is bad.
- If an exhaust leak is suspected but not obvious, a smoke test can be performed by introducing smoke into the tailpipe and looking for it to emerge from the manifold area.
- If no leaks are found and the sensor appears to be working, test fuel pressure. Check the condition of the Fuel Pump Driver Module (FPDM), located on the frame crossmember above the spare tire, for heavy corrosion or physical damage.
Parts You'll Likely Need
- Upstream Oxygen Sensor (Bank 1, Sensor 1)
(OEM #Motorcraft DY1401 (replaces DY1093, among others, check specific VIN))— This is the most common component to fail and cause code P0131. It is a standard maintenance item that wears out over time.
Trusted brands: Motorcraft, Bosch, NGK/NTK, Denso
OEM price range: $90-$150
Aftermarket price range: $40-$80
Related Codes That Often Appear With This One
- P0171 — If there is a legitimate lean condition (like a vacuum or exhaust leak), the PCM may also set a 'System Too Lean (Bank 1)' code alongside the sensor code.
- P0151 — This is the same low voltage code but for Bank 2 (driver's side). If both appear together, it strongly suggests a systemic problem like low fuel pressure or a major vacuum leak affecting the whole engine, not just one sensor.
- P0053 — This code for 'HO2S Heater Resistance (Bank 1, Sensor 1)' points specifically to a failure in the O2 sensor's internal heater circuit. Seeing this with P0131 is a very strong confirmation that the sensor itself has failed and needs replacement.
Platform-Specific Known Issues
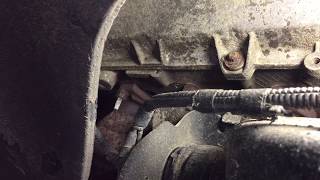
- The Bank 1, Sensor 1 is in a very tight location against the firewall, making it difficult to remove. Many owners find it necessary to remove the passenger-side front wheel and inner fender liner for better access.
- The 5.4L Triton engine is prone to exhaust manifold stud failure, causing leaks that are a common root cause for this code.
- The original O2 sensors can become seized in the exhaust pipe, requiring significant force, heat, and penetrating oil to remove. A specialized O2 sensor socket is highly recommended.
- Manufacturer service bulletins TSB 19-2091 and TSB 17-0014 note that undesired water entry into the engine compartment directly over powertrain components can lead to an illuminated MIL and DTC P0131.
Mechanic-Grade Diagnostic Values
- O2 Sensor Heater Element Resistance — expected: 3 to 30 Ohms (Ω) when cold. Some sources cite a tighter range of 4-10 Ohms.. Failure: A reading of 'OL' (Open Loop/infinite resistance) on a multimeter indicates a broken heater circuit inside the sensor.
- Short Term Fuel Trim (SHRTFT1) on Live Data Scanner — expected: Fluctuating near 0%, typically within +/- 10%.. Failure: Consistently high positive numbers (e.g., +15% to +25%) indicate the PCM is adding significant fuel to compensate for a perceived lean condition, which supports the P0131 code.
- Voltage at O2 Sensor Heater Power Wire (Harness Side) — expected: 10 to 12 Volts DC (or battery voltage) with Key On, Engine Off.. Failure: 0 Volts indicates a blown fuse (check Fuse F2.32 on some models) or a break in the power wire.
Scan Tool Commands That Help
- Ford IDS (Integrated Diagnostic System): Power Balance Test — If drivability issues like a rough idle or misfire accompany the P0131 code, this test can graphically display the power contribution of each cylinder. It helps determine if the lean condition reported by the O2 sensor is causing a specific cylinder to perform poorly due to incorrect fueling.
Wiring & Ground Locations
- G101 — On the firewall behind the PCM, near the right side (passenger side) of the engine compartment.. This is a primary power ground for the engine control system. A poor connection here can cause erratic behavior and incorrect readings from various sensors, including the O2 sensor.
- G104 — On the right side (passenger side) fender apron in the engine compartment.. This is a critical case ground for the PCM. Corrosion or a loose connection at G104 can lead to a variety of electrical issues and phantom codes, as the PCM itself may not have a stable reference.
- Fuse F2.32 (in Battery Junction Box) — Under the hood in the main fuse box.. On some F-150s of this era, this single fuse powers the heater elements for the O2 sensors, the PCV heater, and the MAF sensor. A common failure is for the O2 sensor wiring to melt on the exhaust, shorting this circuit, blowing the fuse, and causing P0131 along with a MAF code (P0102).
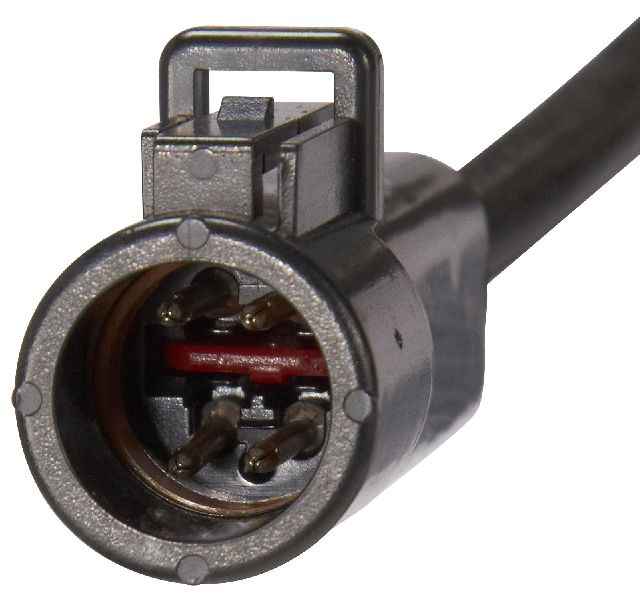
- O2 Sensor Connector (C1160) — On the passenger side, with the harness routing over the transmission.. The harness for the Bank 1 O2 sensors is known to be susceptible to melting from exhaust heat or chafing on the transmission case. The connectors themselves are color-coded (often grey for upstream) to prevent incorrect connections.
Real Owner Repair Stories
- f150forum.com user (2008 Ford F-150 4.6L, 117,000 miles) — Sudden, severe rhythmic bucking under any acceleration. No check engine light initially, but live data showed fluctuating fuel rail pressure. Faintly heard fuel pump cycling on and off at idle.
❌ Tried (didn't work) Initial thought was a coil/plug issue, but symptoms were too severe.
✅ What actually fixed it Replacement of the Fuel Pump Driver Module (FPDM). The original was corroded but not physically broken open. The new module immediately resolved the bucking and fuel pressure instability. - f150forum.com user (2004 Ford F-150 5.4L) — Check Engine Light with P0131. O2 sensor connector was melted.
❌ Tried (didn't work) Attempting to guess wire colors on a new pigtail.
✅ What actually fixed it The user needed a wiring diagram to correctly splice a new pigtail connector for the Bank 1 Sensor 1 O2 sensor after the original melted on the exhaust. Another user provided a diagram and noted the importance of matching the color-coded connectors (grey for upstream on his 2007). - NHTSA ODI #11696972 — An owner reported that after a recall programming, a private reader showed an O2 sensor code P0131 and at one point a P0722 code.
- NHTSA ODI #11443669 — An owner of a Ford vehicle described symptoms of P0131 along with EVAP codes, noting the vehicle started stalling after refueling and hesitated at low speeds.
Model Year Variations Within This Range
- Late 2007-2008: Engines with a build date of October 9, 2007, and later received redesigned cylinder heads to address the problematic two-piece spark plugs that were prone to breaking. While this doesn't directly cause P0131, it's a major serviceability difference within this generation.
- 2004: Some sources suggest that 2004 model year 5.4L engines may have used different camshafts than 2005-2008 models. While long blocks are generally considered interchangeable, all electronics and sensors from the original engine year should be swapped over to the donor engine to ensure PCM compatibility.
Diagnostic Flowchart
Other Known Issues on This Vehicle
Issues unrelated to this code that are worth knowing about as an owner of this generation:
- Cam Phaser Failure 🔴 High — Very common, often starts as a ticking/knocking noise at warm idle between 800-1200 RPM. Can lead to timing chain failure if ignored. (Ref: TSB 06-19-8)
- Two-Piece Spark Plug Breakage 🔴 High — Extremely common during spark plug changes. The plug's lower sleeve seizes to the cylinder head with carbon and breaks off upon removal, requiring a special extraction tool. (Ref: TSB 08-7-6)
- Fuel Pump Driver Module (FPDM) Corrosion 🔴 High → Shop Fuel Pump — Very common. The aluminum module is mounted directly to the steel frame above the spare tire, causing galvanic corrosion that cracks the housing, allows water intrusion, and leads to stalling or no-start conditions.
- Timing Chain Tensioner and Guide Failure 🔴 High — Common, often related to low oil pressure from cam phaser issues. Plastic guides break, and tensioner seals can blow out, causing chain slap against the timing cover and eventual engine failure.
- Ignition Coil Failure 🟠 Medium — Common. The coil-on-plug boots can deteriorate, allowing spark to leak to the cylinder head (plug well) instead of the spark plug, causing misfires under load.
Used vs. New Parts: Buying Guide for This Vehicle
When a used part is the smart pick: A Fuel Pump Driver Module (FPDM) is a good candidate for a used part. They are often available from salvage yards from vehicles like the Crown Victoria or Lincoln Town Car, where they were mounted inside the trunk and protected from the elements, unlike the F-150's exposed frame mounting. Inspect for a clean, corrosion-free aluminum housing.
Donor-vehicle mileage cap: roughly under 120000 miles for the part to have meaningful remaining life.
What to inspect on the donor part:
- For an FPDM, look for zero corrosion on the aluminum case and clean connector pins.
- Ensure the donor vehicle is from a dry, non-salt-belt region if possible.
- Verify the part number matches; however, many Ford models of the era used the same module.
OEM-only on this vehicle (don't cheap out):
- Oxygen Sensor: While some aftermarket brands are good, many forum users strongly recommend sticking with OEM Motorcraft sensors to avoid compatibility issues or premature failure.
- Powertrain Control Module (PCM): Due to programming and security requirements (PATS), a new or professionally reprogrammed PCM is the only reliable option if one is needed.
Aftermarket brands forum-validated for this vehicle:
- NTK/NGK (Oxygen Sensors): Widely regarded as an OEM supplier and a top-tier choice.
- Denso (Oxygen Sensors): Another highly respected OEM-quality brand.
- Bosch (Oxygen Sensors): A common and generally reliable choice, though some older forum posts express mixed opinions.
- Dorman (FPDM): Offers a replacement FPDM that includes updated stand-off hardware to prevent the corrosion that plagues the original design.
Brands owners have reported issues with on this vehicle:
- Ultra-cheap, unbranded oxygen sensors from online marketplaces are frequently reported to be dead-on-arrival or fail within a few months.
Real Owner Stories
Aggregated from forums and TSBs cited above. Mileages and costs reflect what owners reported in those sources.
2008 Ford F-150 5.4L V8
Symptoms: Severe rhythmic bucking under acceleration.
What fixed it: Replacement of the Fuel Pump Driver Module (FPDM) which was found to be heavily corroded.
Source hint: f150forum.com thread titled 'Fuel Pump Driver Module (FPDM) and my symptoms'
2004-2008 Ford F-150 5.4L Triton V8
Symptoms: P0131 code present; owner noted a change in sub-codes after replacing the sensor, suggesting the issue wasn't just the sensor itself.
What fixed it: Investigating intermittent wiring faults and connection issues at the harness.
Source hint: f150forum.com - https://www.f150forum.com/f38/p0131-sub-codes-549119/
Related OBD-II Codes
Frequently Asked Questions
Where is the Bank 1, Sensor 1 oxygen sensor located on my 5.4L Triton?
I hear a ticking sound from the passenger side when my F-150 is cold. Could this cause P0131?
Which replacement oxygen sensor should I use for my 2004-2008 F-150?
Can a bad Fuel Pump Driver Module (FPDM) cause symptoms related to this code?
How can I tell if the sensor is actually bad or if I just have a vacuum leak?
Is there a TSB for the ticking noise often associated with these engine issues?
Helpful Videos

We Have This Part in Stock


The information in this article is provided for general reference and educational purposes only. Vehicle specifications, procedures, and part compatibility can vary by production date, trim level, and region. Always consult your vehicle's factory service manual and verify part numbers before purchasing or performing repairs. Safety-critical components such as airbags, seat belts, and braking systems should be installed by a qualified professional.
- Ford F-150:
- 🧭 Diagnostic Flowchart
- 🎬 Helpful Videos
- 🛍️ Shop This Part
- What's Unique About the 2004-2008 Ford F-150
- Symptoms You May Notice
- Most Likely Causes
- Rare But Worth Checking
- Diagnosis Steps
- Parts You'll Likely Need
- Related Codes That Often Appear With This One
- Platform-Specific Known Issues
- Mechanic-Grade Diagnostic Values
- Scan Tool Commands That Help
- Wiring & Ground Locations
- Real Owner Repair Stories
- Model Year Variations Within This Range
- Other Known Issues on This Vehicle
- Used vs. New Parts: Buying Guide for This Vehicle
- Real Owner Stories
- 2008 Ford F-150 5.4L V8
- 2004-2008 Ford F-150 5.4L Triton V8
- Related OBD-II Codes
- Frequently Asked Questions
- 🎟️ Get 5% Off