
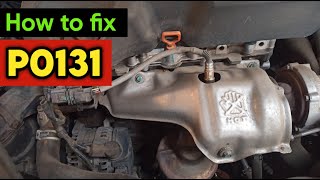
P0131 on 2005-2010 Pontiac G6 3.5L V6: Causes and Fixes for O2 Sensor Low Voltage
On a 2005-2010 Pontiac G6 with the 3.5L V6, code P0131 is almost always caused by a failed upstream oxygen sensor on the rear exhaust manifold (Bank 1). Access is tight against the firewall, but replacing the sensor is the most common fix. Expect to pay $40-$80 for an aftermarket sensor like a Denso or NGK/NTK, or $90-$150 for an OEM ACDelco part.
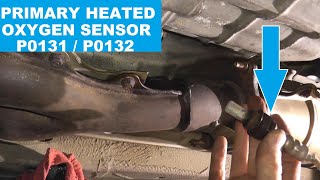
- P0131 on your G6 3.5L points to the upstream O2 sensor on the rear (firewall side) of the engine.
- The most likely cause is simply a worn-out oxygen sensor, which is a normal maintenance item.
- Before replacing the sensor, quickly check its wiring for any obvious melting or damage, and listen for an exhaust leak (ticking noise) from the rear manifold.
- Replacing this specific sensor is challenging due to tight access. You will likely need a special O2 sensor socket, a flexible-head ratchet, and patience.
- Do not ignore this code, as it will decrease fuel economy and can eventually damage your expensive catalytic converter.
What's Unique About the 2005-2010 Pontiac G6
For the Pontiac G6 with the 3.5L V6, the diagnosis for P0131 is typically straightforward. The primary challenge isn't figuring out the problem, but physically accessing the faulty sensor. The Bank 1 Sensor 1 is positioned on the rear exhaust manifold, tucked tightly against the firewall, making it notoriously difficult to reach without specialized tools like a 7/8-inch (22mm) crow's foot or slotted O2 sensor socket and some patience. Unlike some vehicles where this code might point to complex software or electrical issues, on the G6 it's most often a simple case of a worn-out sensor. However, a cracked rear exhaust manifold is a known, albeit less common, issue on this platform that can also cause P0131.
Symptoms You May Notice
- Check Engine Light is on
- Reduced fuel economy
- Rough or unstable idle
- Hesitation or stumbling during acceleration
- Black smoke from the exhaust in some cases.
- Bad or rotten egg smell from the exhaust.
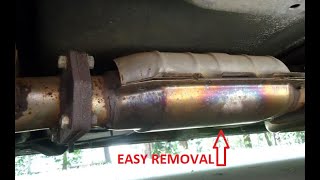
- Replacing the catalytic converter. A P0131 code indicates a problem with the sensor *before* the converter. A bad converter would typically set a P0420 code.
- Replacing the wrong oxygen sensor. Ensure you are replacing Bank 1, Sensor 1 (rear manifold, upstream), not Bank 2 (front manifold) or Sensor 2 (downstream, after the converter). A video from a G6 owner on YouTube highlights this common confusion. 🎬 Watch: Identify and replace the correct sensor on your G6.
Most Likely Causes
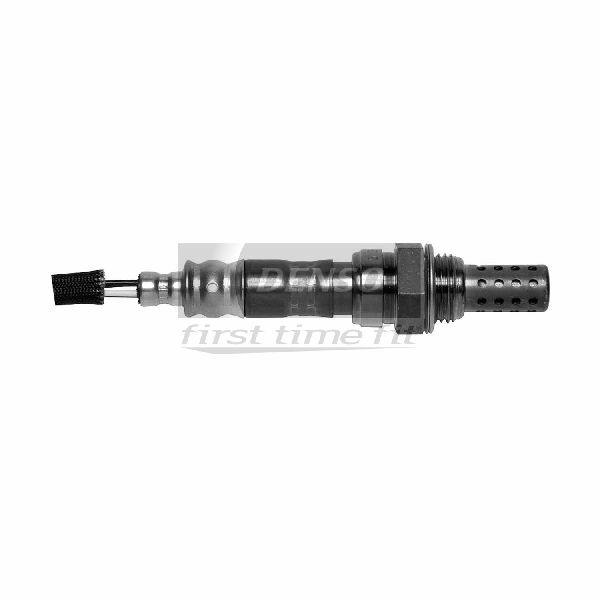
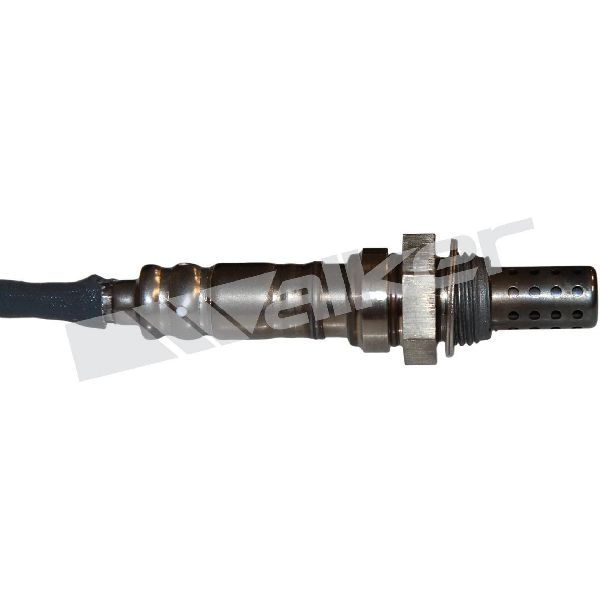
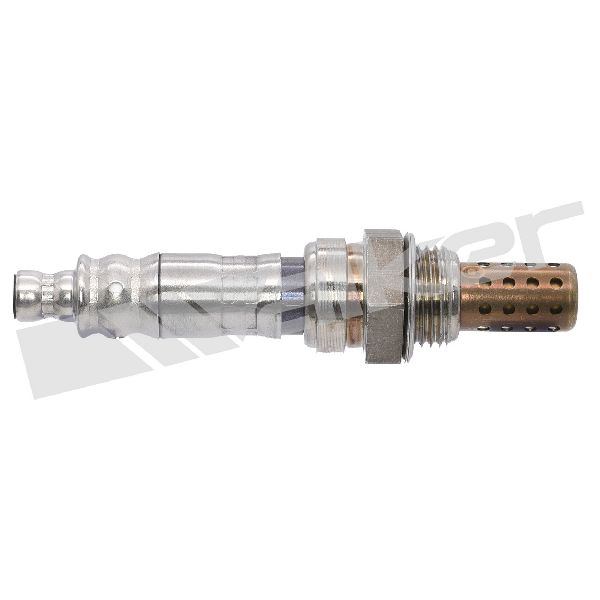
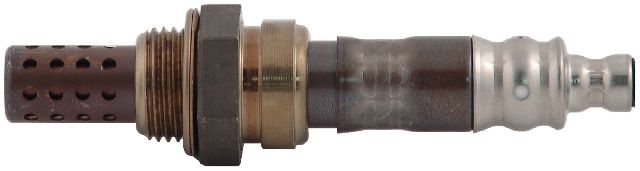
- Failed Upstream Oxygen Sensor (Bank 1, Sensor 1) 🔴 High Probability → Shop Oxygen Sensor Oxygen sensors are wear items with a finite lifespan, typically failing after 70,000-100,000 miles due to constant exposure to extreme heat and exhaust gases. This is the most common failure for P0131 on this vehicle.
How to confirm: Use a scan tool to watch the live data for the B1S1 O2 sensor. A healthy sensor's voltage should fluctuate rapidly between ~0.1V and ~0.9V. If the voltage is stuck low (e.g., below 0.2V) and does not respond to changes in engine RPM, the sensor has failed. 🎬 See this walkthrough on testing and replacing a faulty sensor.
Typical fix: Replace the Bank 1, Sensor 1 oxygen sensor. This sensor is located on the rear exhaust manifold against the firewall. Soaking the sensor threads with penetrating oil beforehand is highly recommended. The OEM part is ACDelco 213-4229, with Denso 234-4648 being a popular aftermarket equivalent.
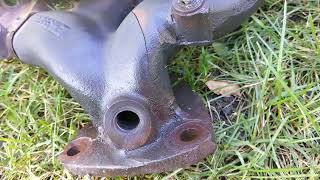
Est. part cost: $40-$150 - Exhaust Leak Before the O2 Sensor 🟡 Medium Probability → Shop Oxygen Sensor The rear exhaust manifold (Bank 1) is known to be susceptible to cracking from thermal stress. Additionally, exhaust manifold gaskets can fail over time, allowing outside air to be sucked into the exhaust stream before the sensor.
How to confirm: Listen for a ticking or tapping noise from the rear of the engine, especially when cold. A visual inspection, though difficult due to access, may reveal black soot trails around the manifold-to-head connection or visible cracks in the manifold itself. A smoke test is the most definitive way to find a leak. 🎬 Watch: How to find and fix a G6 exhaust leak.
Typical fix: Replace the exhaust manifold gasket or the entire exhaust manifold if it is cracked. This is a labor-intensive job due to the manifold's location.
Est. part cost: $20-$300 - Damaged Sensor Wiring or Connector ⚪ Low Probability The sensor's wiring harness is close to hot exhaust components and can become melted, brittle, or chafed over time, leading to a short to ground or an open circuit. The connector itself can also accumulate dirt and corrosion, impeding the signal.
How to confirm: Visually inspect the entire wiring harness from the O2 sensor to its connection point. Look for melted insulation, frayed wires, or corrosion inside the connector plug. Use a multimeter to check for continuity and proper voltage at the connector. Wiggle the harness while observing live data to see if the voltage reading changes.
Typical fix: Repair the damaged section of wire with solder and heat-shrink tubing, or replace the connector pigtail. Clean corroded connectors with electrical contact cleaner.
Est. part cost: $10-$30 - Engine Vacuum Leak ⚪ Low Probability The 3.5L V6 engine is known to have issues with the lower intake manifold gaskets, which are made of a plastic that can warp and degrade, causing a vacuum leak. This typically causes lean codes on both banks (P0171/P0174) but can manifest as P0131 initially.
How to confirm: A vacuum leak will often trigger a lean code for both banks (P0171 and P0174). Perform a smoke test to see if smoke escapes from the intake manifold gaskets or any vacuum hoses. Spraying brake cleaner near the gaskets and listening for an RPM change is another, though less precise, method.
Typical fix: Replace the leaking gaskets or hoses. For the intake manifold, it is highly recommended to use upgraded metal-frame gaskets (e.g., Fel-Pro MS 98014 T) to prevent a repeat failure.
Est. part cost: $30-$100
Rare But Worth Checking
- Low Fuel Pressure: If the engine is truly running lean, a weak fuel pump or faulty fuel pressure regulator could be the cause. This should be investigated if a new O2 sensor doesn't fix the code and no exhaust or vacuum leaks are found.
- Faulty Powertrain Control Module (PCM): This is extremely rare. The PCM's internal circuitry for the O2 sensor can fail. This should only be considered as a last resort after all other possibilities have been ruled out.
Diagnosis Steps
- Check for any other stored trouble codes with a scan tool. Codes like P0171 or P0174 strongly suggest a vacuum or exhaust leak.
- Perform a thorough visual inspection of the Bank 1 O2 sensor wiring and connector. Look for any signs of melting, chafing, corrosion, or loose connections.
- Inspect the rear exhaust manifold for cracks and check for signs of a gasket leak (soot trails, audible ticking).
- Use a scan tool to observe the live voltage data for 'O2S B1S1'. The reading should fluctuate rapidly between 0.1V and 0.9V. If it is stuck below 0.3V, the sensor is the primary suspect.
- If the sensor reads low, test its response by introducing a rich condition (like adding propane to the intake). If the voltage jumps high, the sensor is working and you have a real lean condition. If it stays low, the sensor is bad.
- If a true lean condition is suspected, check fuel pressure to ensure it is within specification and perform a smoke test to check for vacuum or exhaust leaks.
Parts You'll Likely Need
- Upstream Oxygen Sensor (Bank 1, Sensor 1)
(OEM #ACDelco 213-4229)— This is the most common failure point for code P0131. The sensor is a wear item that degrades over time.
Trusted brands: ACDelco (OEM), Denso (p/n 234-4648), Bosch, NGK/NTK
OEM price range: $90-$150
Aftermarket price range: $40-$80
Related Codes That Often Appear With This One
- P0171 — If there is a true lean condition (like a vacuum or exhaust leak) on Bank 1, the ECM will set both the sensor low voltage code (P0131) and the system lean code (P0171).
- P0300 — A lean air-fuel mixture can cause incomplete combustion, leading to random engine misfires. This is especially true if the root cause is a large vacuum leak affecting multiple cylinders.
- P0133 — This code for 'O2 Sensor Slow Response' can appear with P0131 as both point to a degraded or failing Bank 1 Sensor 1 that is not performing within its expected parameters.
Platform-Specific Known Issues
- Access to the Bank 1 Sensor 1 is very restricted due to its location on the rear exhaust manifold against the firewall, making replacement difficult for DIYers without the proper tools like a 22mm crow's foot O2 sensor socket.
- The rear exhaust manifold itself can crack, causing an exhaust leak that mimics a bad sensor. This should be inspected during sensor replacement.
Mechanic-Grade Diagnostic Values
- Fuel Pressure (Key On, Engine Off) — expected: 50 - 60 PSI. Failure: Pressure below 50 PSI suggests a weak fuel pump or clogged filter. Pressure that drops quickly indicates a leak or bad check valve.
- O2 Sensor Heater Circuit Resistance — expected: Typically between 3 and 30 ohms, with some sources citing a tighter range of 1.5-2.5 Ohms or 4-10 Ohms for similar GM sensors.. Failure: A reading of 'OL' (infinite resistance) or near-zero ohms indicates a failed heater element inside the sensor.
- Upstream O2 Sensor Voltage (Scan Tool, Engine Warm, Closed Loop) — expected: Rapidly fluctuating between approximately 0.1V (100mV) and 0.9V (900mV).. Failure: Voltage is stuck low, consistently below 0.2V (200mV), and does not respond to RPM changes or forced rich conditions.
Scan Tool Commands That Help
- Tech2: Engine Data Display (O2S Data) — To monitor the live voltage of all four oxygen sensors simultaneously. For P0131, you would watch the B1S1 data stream to see if it is fluctuating properly or stuck low. The tool allows for graphing the output, making a lazy or dead sensor obvious.
- Tech2: Snapshot Mode — This allows you to capture engine data at the exact moment a fault occurs. You can set it to trigger on the P0131 code, providing a freeze-frame of all related sensor data (fuel trims, MAF readings, etc.) to determine if the cause is a bad sensor or a true lean condition.
Wiring & Ground Locations
- G105 — On the left rear side of the engine compartment, located on an engine-to-transmission stud, below the upper coolant hose.. This is a critical ground point shared by the Engine Control Module (ECM), Transmission Control Module (TCM), and the Park/Neutral Position Switch. A corroded or broken G105 ground is a known issue on the G6 and can cause a host of bizarre electrical problems, including incorrect sensor readings and communication failures that could potentially manifest as a P0131 code or prevent proper diagnosis.
- B1S1 O2 Sensor Connector — At the rear of the engine, near the firewall, connected to the sensor in the rear exhaust manifold. The harness routes up and over the engine.. The wiring harness is in close proximity to the hot exhaust manifold. It is common for the harness to melt, chafe, or for the connector pins to corrode, causing a short or open in the sensor's signal or heater circuit, directly triggering code P0131.
Real Owner Repair Stories
- YouTube channel 'ScannerDanner' (2007 Pontiac G6 3.5L) — No start, no crank, transmission no-communication codes, Park/Neutral switch fault code.
❌ Tried (didn't work) Initial diagnosis pointed to a faulty Park/Neutral Position Switch based on the trouble codes.
✅ What actually fixed it The actual cause was a completely corroded and broken ground connection at G105, the stud on the transmission housing. Multiple wires inside the single ground lug had broken. Repairing this ground connection restored communication and resolved all issues. While the primary code wasn't P0131, this story demonstrates the critical importance of the G105 ground, which also serves the ECM and its sensor inputs.
OEM Part Supersession History
ACDelco 213-1574 (GM 12589321)→ACDelco 213-4228— Part update/revision.
Heads up: These part numbers are often associated with the *downstream* (Sensor 2) position. The Pass 2 data incorrectly listed 213-4229 for the upstream sensor. The correct upstream V6 sensor is closer to ACDelco 213-4668. Always verify part numbers with the vehicle's VIN.
Diagnostic Flowchart
Other Known Issues on This Vehicle
Issues unrelated to this code that are worth knowing about as an owner of this generation:
- Electric Power Steering (EPS) Failure 🔴 High — Common around 70,000-100,000 miles. Can be intermittent at first, often displaying a 'Power Steering' message before failing completely. (Ref: GM Recall 14152 / NHTSA 14V153000 was issued for sudden loss of EPS assist.)
- Leaking Lower Intake Manifold (LIM) Gaskets 🟠 Medium → Shop Engine Intake Manifold — Very common on the 3.5L V6. The original plastic-frame gaskets degrade, causing vacuum leaks (P0171/P0174) and/or coolant leaks.
- Transmission Shift Solenoid Failure / Harsh Shifting 🟠 Medium — Affects the 4T45-E automatic transmission. Owners report delayed or harsh shifts, particularly the 2-3 shift, often requiring solenoid replacement.
- Front End Clunking/Grinding Noises 🟡 Low — Often caused by premature failure of sway bar end links, lower control arm bushings, or strut mount bearings. (Ref: A recall was issued for a joint bearing that could fail prematurely.)
- Body Control Module (BCM) Connector Corrosion 🟠 Medium — Corrosion in BCM connectors can cause a wide range of bizarre electrical issues, most notably brake light malfunctions. (Ref: GM Recall 14V252000 addressed voltage fluctuations in the Brake Apply Sensor (BAS) circuit due to BCM resistance.)
- Camshaft Position Sensor Failure 🟡 Low — The camshaft position sensor on the 3.5L V6 is a common failure item, causing codes like P0341, rough running, and stalling. Access is difficult as it's behind the power steering pump.
Used vs. New Parts: Buying Guide for This Vehicle
When a used part is the smart pick: For this repair, a used part only makes sense for the **exhaust manifold**. If the original manifold is cracked (a known issue), a used one from a lower-mileage donor vehicle is a viable, cost-effective alternative to a new part.
Donor-vehicle mileage cap: roughly under 80000 miles for the part to have meaningful remaining life.
What to inspect on the donor part:
- For an exhaust manifold, inspect thoroughly for hairline cracks, especially around the collector and flange welds.
- Ensure all mounting studs are intact and not stripped or broken.
- Check for excessive rust or pitting on the gasket mating surfaces.
Aftermarket brands forum-validated for this vehicle:
- **Oxygen Sensors**: Denso, NGK/NTK, and Bosch are widely regarded as reliable alternatives to OEM ACDelco.
- **Intake Manifold Gaskets**: Fel-Pro (specifically the metal-framed MS 98014 T) is highly recommended over the OEM-style plastic gaskets to prevent repeat failures.
Brands owners have reported issues with on this vehicle:
- Unnamed or 'white-box' generic oxygen sensors from online marketplaces are frequently reported to fail prematurely or be dead-on-arrival, causing the code to return.
Real Owner Stories
Aggregated from forums and TSBs cited above. Mileages and costs reflect what owners reported in those sources.
2007 Pontiac G6 3.5L V6
Symptoms: Found a large crack in the rear exhaust manifold while attempting to replace the O2 sensor.
What fixed it: Inspection of the rear exhaust manifold revealed the crack was the root cause rather than just a sensor failure.
Source hint: Reddit r/MechanicAdvice
2005-2010 Pontiac G6 3.5L V6
Symptoms: Difficult access to the Bank 1 Sensor 1 due to its location on the rear exhaust manifold against the firewall.
What fixed it: Replacement of the Bank 1 Sensor 1 oxygen sensor using a 7/8" wrench and significant patience.
Source hint: pontiacg6forum.com - Thread titled 'O2 sensor bank 1 sensor 1'
2005-2010 Pontiac G6 3.5L V6 — ~85000 miles
Symptoms: Check Engine Light on with code P0131; sensor voltage stuck low.
What fixed it: Replacement of the Bank 1, Sensor 1 oxygen sensor (ACDelco 213-4229).
Source hint: g6ownersclub.com
Related OBD-II Codes
Frequently Asked Questions
Where is the Bank 1 Sensor 1 located on my 3.5L V6 Pontiac G6?
Is there a specific replacement part recommended for the P0131 code on this vehicle?
Could my P0131 code be related to the common intake manifold issues on the 3.5L engine?
I hear a ticking noise from the rear of the engine along with the P0131 code; what does that mean?
Is there a recall for the power steering message I'm seeing alongside my check engine light?
How can I tell if the P0131 code is a bad sensor or a wiring issue?
Helpful Videos

We Have This Part in Stock


The information in this article is provided for general reference and educational purposes only. Vehicle specifications, procedures, and part compatibility can vary by production date, trim level, and region. Always consult your vehicle's factory service manual and verify part numbers before purchasing or performing repairs. Safety-critical components such as airbags, seat belts, and braking systems should be installed by a qualified professional.
- Pontiac G6:
- 🧭 Diagnostic Flowchart
- 🎬 Helpful Videos
- 🛍️ Shop This Part
- What's Unique About the 2005-2010 Pontiac G6
- Symptoms You May Notice
- Most Likely Causes
- Rare But Worth Checking
- Diagnosis Steps
- Parts You'll Likely Need
- Related Codes That Often Appear With This One
- Platform-Specific Known Issues
- Mechanic-Grade Diagnostic Values
- Scan Tool Commands That Help
- Wiring & Ground Locations
- Real Owner Repair Stories
- OEM Part Supersession History
- Other Known Issues on This Vehicle
- Used vs. New Parts: Buying Guide for This Vehicle
- Real Owner Stories
- 2007 Pontiac G6 3.5L V6
- 2005-2010 Pontiac G6 3.5L V6
- 2005-2010 Pontiac G6 3.5L V6 — ~85000 miles
- Related OBD-II Codes
- Frequently Asked Questions
- 🎟️ Get 5% Off