
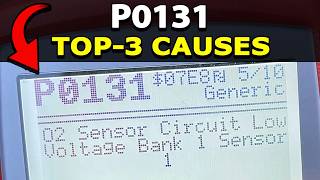
P0131 on 2009-2012 Toyota RAV4 2.5L: Causes and Air/Fuel Sensor Fixes
On a 2009-2012 RAV4 with the 2.5L engine, code P0131 is almost always caused by a failed upstream Air/Fuel Ratio (A/F) sensor. Replacing this sensor, which is Bank 1 Sensor 1, is the most common fix. Expect to pay around $90-$150 for a quality aftermarket sensor (like Denso, the OEM) and $180-$250 for an OEM part.
- P0131 on your 2009-2012 RAV4 points directly to the upstream Air/Fuel Ratio sensor (Bank 1, Sensor 1).
- The most likely fix is to replace this sensor. Using an OEM-brand part like Denso (specifically part number 234-9041) is highly recommended for compatibility and longevity.
- While the sensor is the primary cause, it's wise to perform a quick visual inspection for obvious exhaust leaks or wiring damage before purchasing parts.
What's Unique About the 2006-2012 Toyota RAV4
The user-specified 2006-2012 year range covers the entire third-generation RAV4, but it spans two different 4-cylinder engines. This guide is specific to the 2.5L 2AR-FE engine found in the 2009-2012 models. Toyota uses a high-quality Denso wideband Air/Fuel (A/F) sensor in the upstream position, not a traditional oxygen sensor. While very reliable, these sensors are the most common failure point for this code as they age.
Generation note: The 2006-2012 RAV4 is a single generation (XA30), but the 4-cylinder engine changed. The 2006-2008 models used the 2.4L 2AZ-FE engine, which was known for significant oil consumption issues. The 2009-2012 models received the improved 2.5L 2AR-FE engine, which is the focus of this guide.
Symptoms You May Notice
- Check Engine Light is on
- Reduced fuel economy
- Rough or unstable idle
- Minor hesitation on acceleration
- Increased exhaust emissions
- Engine may run rich, potentially causing a fuel smell from the exhaust
- Replacing the downstream oxygen sensor (Bank 1, Sensor 2) instead of the upstream Air/Fuel Ratio sensor (Bank 1, Sensor 1). The P0131 code specifically refers to Sensor 1.
Most Likely Causes
- Failed Air/Fuel Ratio Sensor (Bank 1, Sensor 1) 🔴 High Probability → Shop Oxygen Sensor This is the most common failure item for this code. The sensor's heating element can fail, or the sensing element can become contaminated or simply wear out over time from heat and exhaust gases.
How to confirm: Use a scan tool to monitor live data for the Bank 1 Sensor 1 voltage. A healthy A/F sensor on this Toyota should show a steady voltage around 3.3V at idle. A sensor that is stuck reading low (e.g., below 3.0V) or is unresponsive to changes in throttle is likely faulty.
Typical fix: Replace the Air/Fuel Ratio sensor located in the exhaust manifold. A 22mm (or 7/8") offset oxygen sensor s 🎬 Watch: How to check and replace an Air Fuel Ratio sensorocket is required for removal and installation.
Est. part cost: $90-$250 - Exhaust Leak (before the sensor) 🟡 Medium Probability Gaskets on the exhaust manifold or the donut gasket after the manifold can degrade over time, allowing un-metered air to enter the exhaust stream. This extra oxygen causes the A/F sensor to read a false lean condition (low voltage).
How to confirm: Visually inspect the exhaust manifold and the gasket between it and the cylinder head for black soot trails, which indicate a leak. You can also listen for a ticking or puffing sound that is most noticeable on a cold start. A shop can perform a smoke test to pinpoint the leak.
Typical fix: Replace the leaking exhaust gasket. The manifold to cylinder head gasket is part number 17173-0V010. Ensure mating surfaces are clean and flat before reassembly.
Est. part cost: $20-$60 - Damaged Wiring or Connector ⚪ Low Probability The wiring harness for the A/F sensor is in the engine bay and exposed to high heat, which can make insulation brittle over time. Rodents can also chew on the wires, as they are often made with soy-based materials.
How to confirm: Visually inspect the entire length of the sensor's wiring harness and connector for any signs of melting, chafing, corrosion, or breaks. Use a multimeter to check for continuity and proper voltage at the connector pins according to the factory service manual.
Typical fix: Repair the damaged section of the wiring harness or replace the connector pigtail.
Est. part cost: $15-$50
Rare But Worth Checking
- Low Fuel Pressure: If the engine is genuinely running lean due to a weak fuel pump or clogged injectors, the A/F sensor will correctly report a low voltage. This will usually be accompanied by other codes, like P0171 (System Too Lean).
- Faulty Engine Control Module (ECM): This is extremely rare. The ECM should only be considered after all other possibilities, including the sensor, wiring, and exhaust leaks, have been definitively ruled out.
Diagnosis Steps
- Connect an OBD-II scanner and confirm the P0131 code is present. Check for any other codes.
- Review the freeze frame data to see the engine conditions (RPM, temperature, speed) when the code was set.
- Perform a thorough visual inspection of the Bank 1 Sensor 1 (upstream A/F sensor) wiring and connector. Look for any signs of melting, corrosion, or physical damage.
- Inspect the exhaust manifold and surrounding area for signs of an exhaust leak (soot trails, audible ticking). A cold start is the best time to hear a leak.
- Using a scan tool with live data, monitor the voltage for 'A/F Sensor B1S1'. On a warm, idling engine, it should be steady around 3.3V. If it's stuck low (e.g., 2.8V or less), it points towards a faulty sensor or a major exhaust/vacuum leak.
- If the sensor is suspected, test its heater circuit. Unplug the sensor and measure the resistance between the two heater pins (usually the two same-colored wires). Refer to a service manual for the correct resistance specification, but it's typically a low number of ohms.
- If the sensor and wiring test good, investigate potential exhaust leaks more thoroughly, possibly with a smoke machine.
- If no other cause is found, the A/F sensor itself is the most likely culprit. Before replacement, spray the old sensor's threads with penetrating oil and let it soak to make removal easier. Use a proper 22mm (7/8") O2 sensor socket.
Parts You'll Likely Need
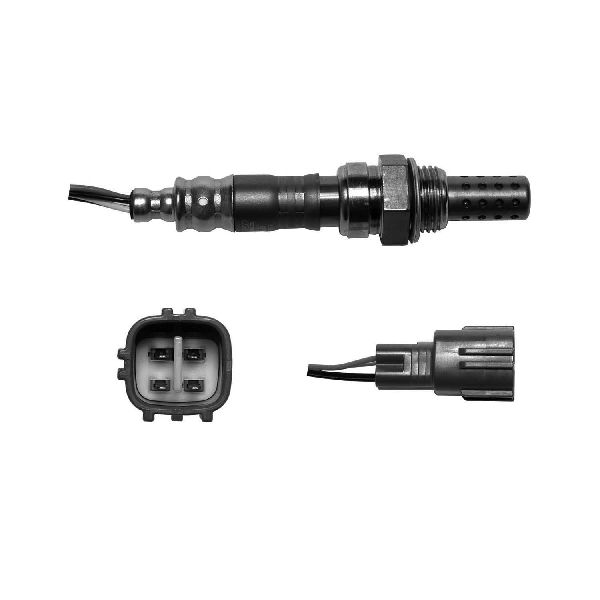
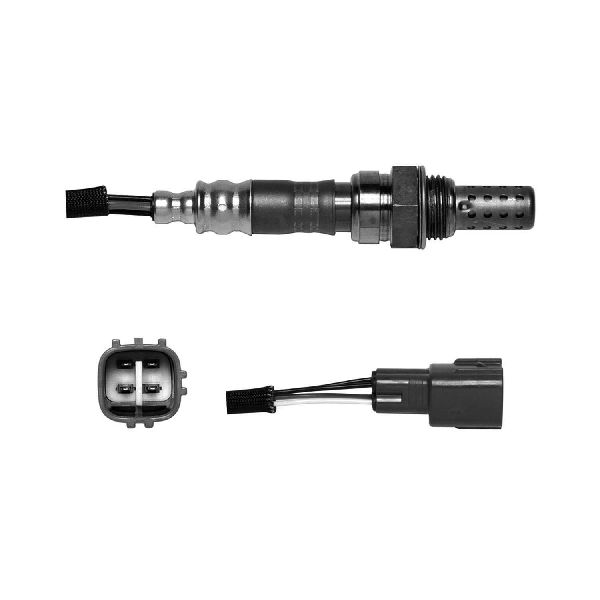
- Air/Fuel Ratio Sensor (Bank 1, Sensor 1)
(OEM #89467-42120)— This is the upstream sensor that directly causes the P0131 code. It is a common wear item and the most probable fix.
Trusted brands: Denso (OEM Manufacturer), NGK/NTK
OEM price range: $180-$250
Aftermarket price range: $90-$150
Related Codes That Often Appear With This One
- P0171 — System Too Lean (Bank 1). This code 🎬 Watch: Solving P0171 lean codes and related engine issues can appear with P0131 because the root cause (like an exhaust leak or a failing sensor giving a false lean reading) can cause the ECM to see a lean condition.
- P0135 — O2 Sensor Heater Circuit Malfunction (Bank 1, Sensor 1). The A/F sensor has an internal heater that brings it to operating temperature quickly. If this heater fails, it can cause the sensor to read incorrectly and may set both P0131 and P0135.
Technical Service Bulletins (TSBs) & Recalls
- No specific TSBs for P0131 were found. This is a common diagnostic trouble code addressed by standard repair procedures rather than a specific campaign.
Platform-Specific Known Issues
- Real Owner Story: Sensor Replacement Fix: An owner of a 2010 RAV4 with 130,000 miles on RAV4World reported getting codes P0131 and P0171. After confirming no vacuum leaks, they replaced the upstream A/F sensor (Bank 1, Sensor 1) with a Denso 234-9041. The repair took about 30 minutes, and the check engine light cleared and stayed off, restoring fuel economy. They noted the sensor was located on the front of the engine, easily accessible from the top after removing the plastic engine cover.
Mechanic-Grade Diagnostic Values
- A/F Sensor Heater Resistance — expected: 1.8 to 3.4 Ω at 20°C (68°F). Failure: Resistance outside of this range indicates a faulty internal heater element.
- A/F Sensor Harness Voltage (KOEO) — expected: 3.0V on the AF- wire (typically white) and 3.3V on the AF+ wire (typically blue), measured at the harness connector with the sensor unplugged.. Failure: Missing or incorrect voltages point to a wiring issue or a problem with the ECM, not the sensor itself.
- A/F Sensor Live Data Voltage (Active Test) — expected: Should fluctuate below 3.0V (e.g., ~2.7V) when commanding rich and above 3.35V (e.g., ~3.7V) when commanding lean.. Failure: A sensor that does not respond quickly or whose voltage does not change significantly is faulty.
- Mass Air Flow (MAF) Sensor Rate at Idle — expected: 1.0 to 3.0 g/sec on a warm, idling engine.. Failure: A reading significantly lower than this may indicate a faulty MAF sensor, which can cause a lean condition and trigger a P0131 code.
Hidden / Shadow Codes Worth Checking
- Mode 6 Data: While not a hidden code, professional scan tools can access Mode 6 data. This allows a technician to view the results of the ECU's last self-test on the A/F sensor circuit, including the exact voltage reading that failed the test and the acceptable min/max thresholds. This can confirm the P0131 is due to a consistent out-of-range reading. (see via Professional OBD-II scan tool or software like Toyota Techstream.)
Scan Tool Commands That Help
- Toyota Techstream: Active Test: A/F Control — This is a critical diagnostic step to confirm a faulty sensor. This function allows the technician to command a specific change in fuel mixture (e.g., +25% rich, -12.5% lean) and observe the A/F sensor's voltage response in real-time. A healthy sensor will react instantly, while a failing one will be slow, lazy, or unresponsive.
Wiring & Ground Locations
- ECM (Engine Control Module) — Located on the left side of the engine compartment.. The ECM is the source of the reference voltages for the A/F sensor and interprets its return signal. All wiring for the sensor terminates here.
- ECM Pins (A/F Sensor) — At the ECM connector. The key pins are HA1A (+B/Heater Power), A1A- (Sensor Signal Negative), and A1A+ (Sensor Signal Positive).. Allows for continuity testing of the A/F sensor harness between the sensor connector and the ECM to rule out an open or short in the wiring.
- Ground Point E1 / E4 — Common ground points for various engine and body electronics are located in the driver's side (E1) and passenger's side (E4) kick panels.. A poor ground connection at one of these locations can introduce electrical noise or voltage drops, potentially affecting sensor readings. While not a direct cause, checking major ground points is good practice in complex electrical diagnoses.
OEM Part Supersession History
89467-42120→This part number is current, but it has superseded several previous numbers including 89467-48120, 89467-48100, 89467-0E090, and 89467-04070.— Standard part consolidation and minor revisions by the manufacturer.
Model Year Variations Within This Range
- 2009-2012: The primary variation affecting this code is the engine itself, which changed from the 2.4L 2AZ-FE in 2006-2008 models to the 2.5L 2AR-FE for 2009-2012. Within the 2009-2012 model years, there are no significant documented changes to the A/F sensor, its wiring, or the diagnostic procedure for code P0131.
Diagnostic Flowchart
Other Known Issues on This Vehicle
Issues unrelated to this code that are worth knowing about as an owner of this generation:
- Torque Converter Shudder 🟠 Medium — Common enough that Toyota issued a Warranty Enhancement Program (ZE7) and TSBs. Typically occurs between 25-50 mph under light load. (Ref: T-SB-0023-15 (later revised) addresses this for 2013-2015 models, but the issue is known in the U660E/F transmission paired with the 2AR-FE.)
- Brief Engine Knock/Rattle at Cold Startup 🟡 Low — A very common annoyance, especially on earlier 2AR-FE engines. A rattle for 1-2 seconds on a cold start is typical. (Ref: T-SB-0041-13 addresses this issue, which is caused by a problem with the VVT-i cam phasers. Most owners live with it as it rarely causes long-term damage.)
- Excessive Oil Consumption 🟠 Medium — While the 2AR-FE is much improved over its 2AZ-FE predecessor, it can still consume oil, especially if oil change intervals are extended past 5,000-7,500 miles. This is often attributed to low-tension piston rings. (Ref: No specific TSB for the 2AR-FE, unlike the major campaign for the 2AZ-FE. It's considered a characteristic that is manageable with regular oil level checks.)
- Water Pump Failure 🟠 Medium — Water pumps can fail, typically starting as a slow coolant leak. It's a common failure point on many engines, but one to watch for on the 2AR-FE as it ages.
- Balance Shaft Rattle 🟡 Low — A rattling noise heard at idle or on light acceleration can be caused by a faulty balance shaft. This is a more recent issue noted as these engines accumulate high mileage.
Used vs. New Parts: Buying Guide for This Vehicle
When a used part is the smart pick: For this repair, a used part is almost never a smart choice. The A/F sensor is a wear item with a finite lifespan. A used sensor from a salvage yard carries a high risk of being near the end of its life or already faulty. A used exhaust manifold would be a viable option only if the original were physically cracked, which is not a common failure on this vehicle.
Donor-vehicle mileage cap: roughly under 40000 miles for the part to have meaningful remaining life.
What to inspect on the donor part:
- For a non-sensor part like a manifold, check for cracks, especially around the flange and O2 sensor bung.
- Ensure all studs are intact and not stripped.
- Avoid parts from vehicles with obvious signs of front-end collision or fire damage.
OEM-only on this vehicle (don't cheap out):
- Air/Fuel Ratio Sensor
Aftermarket brands forum-validated for this vehicle:
- Denso (OEM manufacturer, highly recommended)
- NTK
Brands owners have reported issues with on this vehicle:
- Unbranded, 'white-box' sensors from online marketplaces. Forum users consistently report that these parts often fail quickly or are dead on arrival, making the small initial savings not worth the repeated labor.
Real Owner Stories
Aggregated from forums and TSBs cited above. Mileages and costs reflect what owners reported in those sources.
2010 Toyota RAV4 2.5L — 130000 miles
Symptoms: Check engine light on with codes P0131 and P0171, reduced fuel economy, and confirmed no vacuum leaks.
What fixed it: Replacement of the upstream A/F sensor (Bank 1, Sensor 1) with a Denso 234-9041.
Source hint: RAV4World - Thread 'P0171 and P0131 on 2010 Rav4'
2011 Toyota RAV4 2.5L
Symptoms: Check engine light displaying a combination of a heater circuit code and a low voltage code.
What fixed it: Replacement of the faulty A/F sensor, which resolved both the heater and voltage circuit issues.
Source hint: ToyotaNation - Thread '2011 Rav4 2.5L P0135 and P0131'
Related OBD-II Codes
Frequently Asked Questions
What is the specific part number for the exhaust manifold gasket on my 2.5L RAV4 if I have an exhaust leak causing P0131?
I have a 2010 RAV4 with P0131; which sensor is likely the culprit and what part should I use?
What voltage should I see for the A/F Sensor B1S1 on my Toyota scan tool to confirm it's working?
Is there a TSB for P0131 on the 2006-2012 RAV4?
Can I reach the Bank 1 Sensor 1 myself on the 2.5L engine?
Could my RAV4's cold start rattle be related to the P0131 code?
Helpful Videos

We Have This Part in Stock


The information in this article is provided for general reference and educational purposes only. Vehicle specifications, procedures, and part compatibility can vary by production date, trim level, and region. Always consult your vehicle's factory service manual and verify part numbers before purchasing or performing repairs. Safety-critical components such as airbags, seat belts, and braking systems should be installed by a qualified professional.
- Toyota RAV4:
- 🧭 Diagnostic Flowchart
- 🎬 Helpful Videos
- 🛍️ Shop This Part
- What's Unique About the 2006-2012 Toyota RAV4
- Symptoms You May Notice
- Most Likely Causes
- Rare But Worth Checking
- Diagnosis Steps
- Parts You'll Likely Need
- Related Codes That Often Appear With This One
- Technical Service Bulletins (TSBs) & Recalls
- Platform-Specific Known Issues
- Mechanic-Grade Diagnostic Values
- Hidden / Shadow Codes Worth Checking
- Scan Tool Commands That Help
- Wiring & Ground Locations
- OEM Part Supersession History
- Model Year Variations Within This Range
- Other Known Issues on This Vehicle
- Used vs. New Parts: Buying Guide for This Vehicle
- Real Owner Stories
- 2010 Toyota RAV4 2.5L — 130000 miles
- 2011 Toyota RAV4 2.5L
- Related OBD-II Codes
- Frequently Asked Questions
- 🎟️ Get 5% Off