
P0132 on 2004-2012 Mitsubishi Galant: O2 Sensor High Voltage Causes and Fixes
On the 2004-2012 Mitsubishi Galant, code P0132 is most often caused by a failed upstream oxygen sensor (Bank 1, Sensor 1). Replacing this sensor is a common DIY fix, with aftermarket parts from brands like Denso or NGK costing between $45 and $90. On V6 models, ensure you are replacing the sensor on the firewall side (rear) bank.
- P0132 on a 2004-2012 Galant almost always points to a bad upstream oxygen sensor (Bank 1, Sensor 1).
- For the 3.8L V6 engine, remember that Bank 1 is the rear bank, closer to the firewall.
- Always perform a quick visual inspection of the sensor's wiring and connector for obvious damage before buying a new part.
- Using a direct-fit sensor from a reputable brand like Denso or NGK/NTK is highly recommended for reliability and to avoid compatibility issues.
What's Unique About the 2004-2012 Mitsubishi Galant
The 2004-2012 Galant uses a straightforward emissions system, and this code rarely points to complex issues. The key difference is identifying 'Bank 1'. On the 4G69 2.4L I4 engine, there is only one bank. On the 6G75 3.8L V6 engine, the engine is mounted transversely, and Bank 1 is the cylinder bank closer to the firewall (the rear bank). Misdiagnosing the bank and replacing the front sensor (Bank 2) is a common and costly mistake on the V6 models.
Symptoms You May Notice
- Check Engine Light is on
- Decreased fuel economy
- Rough or unstable engine idle, especially at low RPMs
- Engine may hesitate or stumble during acceleration
- Black smoke from the exhaust in some cases
- Smell of raw fuel from the exhaust
- Replacing the wrong oxygen sensor. On V6 models, owners may mistakenly replace the front (Bank 2) sensor instead of the rear (Bank 1) sensor.
- Replacing the oxygen sensor without first checking for wiring damage or a rich running condition.
- Assuming the sensor is bad when an exhaust leak before the sensor is the true cause.
Most Likely Causes
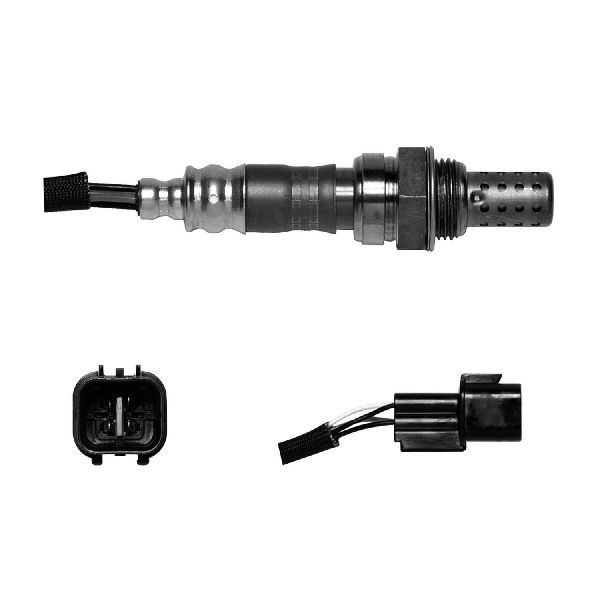
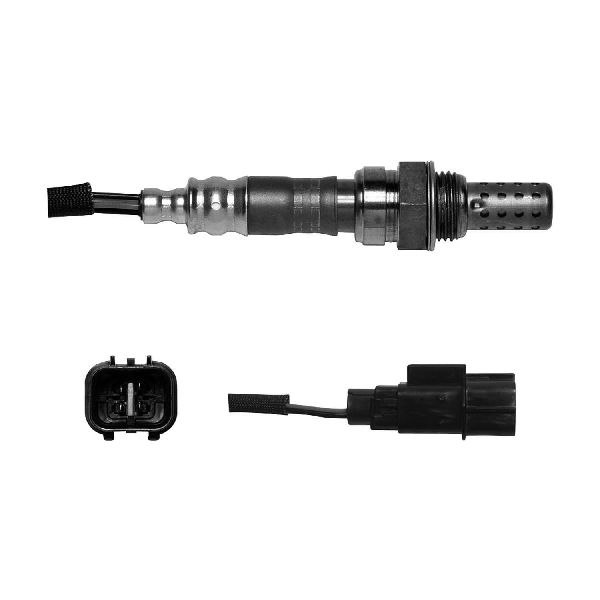
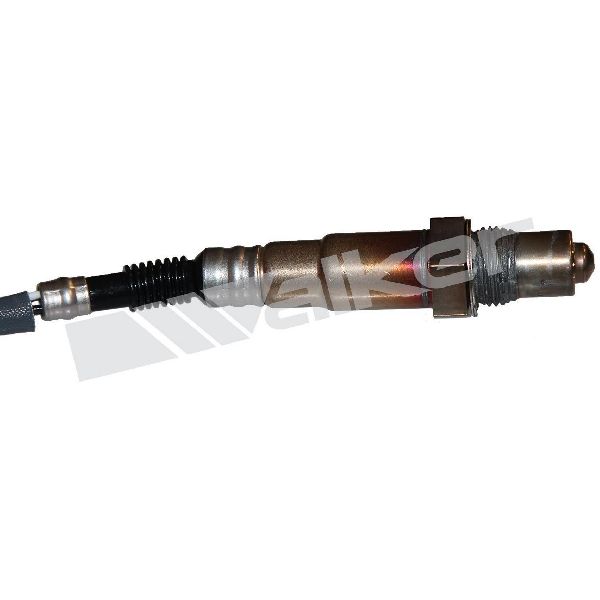
- Failed Upstream Oxygen Sensor (Bank 1, Sensor 1) 🔴 High Probability → Shop Oxygen Sensor Oxygen sensors are wear-and-tear items that degrade over time, typically having a lifespan of around 100,000 miles. An internal short circuit is the most common failure mode leading to a high voltage signal. Contamination from oil, coolant, or fuel can also cause the sensor to fail.
How to confirm: Use a scan tool to observe live data for the B1S1 O2 sensor. If the voltage is stuck above 1.0V and does not fluctuate with engine speed, the sensor has likely failed. You can also test the internal resistance of the sensor's heater circuit with a multimeter; an open circuit indicates failure.
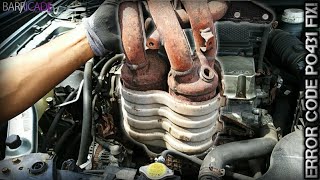
Typical fix: Replace the Bank 1, Sensor 1 oxygen sensor. A 22mm (or 7/8") oxygen sensor socket is highly recommended for removal. 🎬 See this step-by-step oxygen sensor replacement guide Ensure you purchase the correct sensor for your specific engine, as the 2.4L and 3.8L V6 use different parts.
Est. part cost: $45 - $150 - Damaged Wiring or Connector 🟡 Medium Probability The sensor wiring is located under the vehicle and is exposed to heat from the exhaust, moisture, and road debris. This can cause the plastic insulation to become brittle and crack, or the connector pins to corrode, leading to a short to power on the signal wire.
How to confirm: Visually inspect the entire wiring harness from the oxygen sensor to the main engine harness. Look for any signs of melting, chafing, corrosion in the connector pins, or broken wires. Use a multimeter to check for a short to power on the signal wire with the sensor disconnected.
Typical fix: Repair the damaged section of the wiring harness or clean/replace the corroded connector. Sometimes the issue is as simple as a loose pin within the connector.
Est. part cost: $5 - $50 - Engine Running Rich ⚪ Low Probability While less common, a rich condition can be caused by a failing fuel pressure regulator or a leaking fuel injector. A faulty fuel pressure regulator can fail internally, causing excessive fuel pressure and a rich mixture.
How to confirm: Check for other diagnostic trouble codes related to the fuel system (e.g., P0172, or codes for injectors or fuel pressure). Check fuel trim values with a scan tool; consistently negative values indicate a rich condition. A fuel pressure test can confirm a faulty regulator.
Typical fix: Diagnose and repair the underlying cause of the rich condition, such as replacing a leaking fuel injector or a faulty fuel pressure regulator.
Est. part cost: $50 - $400+ - Exhaust Leak ⚪ Low Probability
How to confirm: Visually inspect the exhaust manifold and pipes located before the Bank 1 Sensor 1 for any cracks or gasket leaks. You may hear a ticking sound that gets louder with engine speed. An exhaust leak can allow outside air into the system, confusing the sensor.
Typical fix: Replace the leaking exhaust gasket or repair the cracked manifold/pipe. 🎬 Watch: How to replace the exhaust manifold
Est. part cost: $20 - $300
Rare But Worth Checking
- Faulty Engine Control Module (ECM): → Shop Engine Control Module (ECM) This is extremely rare. The ECM should only be considered after all other possibilities, including the sensor and its entire circuit, have been thoroughly tested and ruled out. A faulty ECM might misinterpret the sensor's signal.
Diagnosis Steps
- Read the Codes: Use an OBD-II scanner to confirm P0132 is the primary code. 🎬 Watch: How to fix code P0132 and clear the light Note any other codes present, especially fuel system codes like P0172.
- Visual Inspection: Carefully inspect the Bank 1, Sensor 1 oxygen sensor and its wiring harness. On the V6, remember Bank 1 is the rear bank near the firewall. Look for any signs of melting, corrosion, or physical damage to the wires and connector.
- Analyze Live Data: With the engine running, use a scan tool to monitor the voltage of the Bank 1, Sensor 1. A healthy sensor's voltage should fluctuate rapidly between approximately 0.1V and 0.9V. If the voltage is stuck high (e.g., above 1.0V), it strongly indicates a faulty sensor or a short in the signal wire.
- Check for Rich Condition: Examine short-term and long-term fuel trims. If they are significantly negative (e.g., -10% or more), it suggests the engine is running rich, and you should investigate the fuel system (injectors, pressure regulator) as the root cause.
- Inspect for Exhaust Leaks: With the engine cool, start it and listen for ticking or puffing sounds from the exhaust manifold area before the O2 sensor. You can also use a smoke machine to pinpoint leaks.
- Test the Circuit: Disconnect the sensor. Use a multimeter to check for voltage on the signal wire coming from the ECM. There should be a low reference voltage. If you find 12V, there is a short to power in the harness that must be repaired.
- Replace the Sensor: If the wiring is intact and there is no evidence of a rich condition or exhaust leak, the oxygen sensor itself is the most likely culprit and should be replaced.
Parts You'll Likely Need
- Upstream Oxygen Sensor (4G69 2.4L I4)
(OEM #1588A207)— This is the Bank 1, Sensor 1 for the 4-cylinder engine. It is the most common failure point for code P0132 on this engine.
Trusted brands: Denso, NGK/NTK, Bosch
OEM price range: $120-$180
Aftermarket price range: $45-$90 - Upstream Rear Oxygen Sensor (6G75 3.8L V6)
(OEM #1588A081)— This is the Bank 1, Sensor 1 for the V6 engine, located on the exhaust manifold closer to the firewall. It is the most common failure point for code P0132 on this engine.
Trusted brands: Denso, NGK/NTK, Bosch
OEM price range: $130-$200
Aftermarket price range: $55-$110
Related Codes That Often Appear With This One
- P0172 — System Too Rich (Bank 1). This code can appear if the engine is genuinely running rich, which in turn causes the P0132 high voltage reading from the O2 sensor.
- P0135 — O2 Sensor Heater Circuit Malfunction (Bank 1, Sensor 1). A failure in the sensor's internal heater element can sometimes accompany a signal circuit failure, triggering both codes.
Platform-Specific Known Issues
- V6 Rear Sensor Access: On the 6G75 3.8L V6, the Bank 1 Sensor 1 is on the rear cylinder bank against the firewall. Access is notoriously tight. Many owners report needing a combination of extensions, a universal/swivel joint, and a specialized O2 sensor socket to successfully remove and replace it from either above or below the vehicle.
Mechanic-Grade Diagnostic Values
- O2 Sensor Heater Element Resistance — expected: 11 to 18 Ohms at 20°C (68°F). Some sources state a broader acceptable range of 5-20 Ohms.. Failure: An open circuit (infinite resistance/OL) or a reading significantly outside the expected range indicates a failed heater element.
- Live O2 Sensor Voltage (Engine at operating temp) — expected: Rapidly fluctuating between approximately 0.1V and 0.9V.. Failure: Voltage is stuck high, consistently reading above 0.9V or 1.0V.
- DTC Trigger Threshold — expected: Sensor voltage should remain below 1.2V - 1.8V.. Failure: The ECM sets code P0132 if the sensor's output voltage remains above 1.2V or 1.8V for more than 2 seconds.
Scan Tool Commands That Help
- Mitsubishi M.U.T.-III: Data List (Service AC: Oxygen sensor (front)) — This is the manufacturer-specific command to monitor the live voltage output of the front oxygen sensor to confirm if it is stuck high, which is the primary condition for a P0132 fault.
Wiring & Ground Locations
- ECM Pin 38 (Signal) & Pin 39 (Ground) — At the Engine Control Module (ECM) connector. The specific connector may be designated B-08 or B-108 in service manuals.. These are the specific terminals where the Bank 1 Sensor 1 signal and ground wires terminate. Testing for shorts or opens between the sensor connector and these pins is a definitive way to diagnose a wiring harness fault.
- Engine/Transmission Grounds — A primary ground strap typically runs from the firewall to the intake manifold. Another key ground is located on the transmission case, leading to the frame rail.. Poor engine grounding can introduce electrical noise and voltage offsets, potentially affecting sensor readings. Ensuring these main grounds are clean and secure is a crucial, often overlooked, diagnostic step.
- G10 & G11 — G10 is located at the front of the engine compartment; G11 is at the left front of the engine compartment.. These are chassis grounds within the engine bay. While not directly for the O2 sensor, they are part of the overall engine management ground path and should be checked for corrosion or looseness if electrical issues are suspected.
Model Year Variations Within This Range
- 2006-2008 (V6 Models): A Technical Service Bulletin (TSB-13-15-001) was issued concerning catalytic converter performance, which is closely monitored by the oxygen sensors. This may have led to an ECM software update to change catalyst monitoring sensitivity. While this TSB is for code P0420, an overly sensitive system could potentially be a factor in unusual O2 sensor behavior.
Diagnostic Flowchart
Other Known Issues on This Vehicle
Issues unrelated to this code that are worth knowing about as an owner of this generation:
- Premature Automatic Transmission Failure 🔴 High — A significant number of owners report transmission problems, including slipping, harsh shifting, or complete failure, sometimes occurring before 100,000 miles.
- Cracked Dashboard 🟡 Low — Very common across the generation, especially in warmer climates. The dashboard material becomes brittle and develops cracks, particularly around the passenger airbag area and instrument cluster.
- Faulty Crankshaft Position Sensor 🟠 Medium — A known issue that can cause the engine to stall unexpectedly or fail to start. This is a relatively common failure part.
- Clear Coat Peeling 🟡 Low — Widespread reports of the clear coat on the paint failing and peeling, especially on darker colored vehicles. This is a cosmetic issue but very common.
- Power Window Failure 🟡 Low — The window regulators or motors are known to fail, causing one or more power windows to stop working.
Used vs. New Parts: Buying Guide for This Vehicle
When a used part is the smart pick: It is almost never a smart choice to buy a used oxygen sensor. They are wear-and-tear items with a finite lifespan, and it's impossible to know the remaining life of a used part. The cost savings are minimal compared to the risk of premature failure and the labor to replace it again.
Donor-vehicle mileage cap: roughly under 20000 miles for the part to have meaningful remaining life.
What to inspect on the donor part:
- If considering a used sensor in an emergency, inspect the sensor tip for heavy carbon deposits, white ash (from coolant contamination), or oil fouling.
- Check the wiring and connector for any signs of melting, brittleness, or corrosion.
- Avoid any sensor that shows signs of physical impact or damage to the metal body.
OEM-only on this vehicle (don't cheap out):
- While not strictly OEM-only, using high-quality aftermarket brands is critical. Cheap, unbranded oxygen sensors are a common cause of repeat failures or persistent codes.
Aftermarket brands forum-validated for this vehicle:
- Denso
- NGK/NTK
Brands owners have reported issues with on this vehicle:
- Generic or 'no-name' sensors sold on online marketplaces are frequently reported by mechanics and forum users to have high failure rates or incorrect voltage ranges, leading to the code returning.
Real Owner Stories
Aggregated from forums and TSBs cited above. Mileages and costs reflect what owners reported in those sources.
2004-2012 Mitsubishi Galant 3.8L V6
Symptoms: The Bank 1 Sensor 1 is located on the rear cylinder bank against the firewall where access is notoriously tight.
What fixed it: Replacement of the sensor using a combination of extensions, a universal/swivel joint, and a specialized O2 sensor socket to remove it from either above or below the vehicle.
Source hint: vehicle_specific_issues section titled 'V6 Rear Sensor Access'
2004-2012 Mitsubishi Galant 2.4L I4 — ~100000 miles
Symptoms: Upstream O2 sensor failure; looking for direct-fit alternatives to expensive OEM parts.
What fixed it: Replacement with a Denso 234-4739 direct-fit oxygen sensor.
Source hint: EvolutionM.net forum citation
Related OBD-II Codes
Frequently Asked Questions
Where is the Bank 1 Sensor 1 located on my 3.8L V6 Galant?
Is there a specific aftermarket O2 sensor recommended for the Galant instead of the expensive OEM part?
Can I use the same oxygen sensor for both the 2.4L and 3.8L engines?
What tools do I need to change the sensor on my 2004-2012 Galant?
Could my P0132 code be caused by an exhaust leak instead of a bad sensor?
Does the Mitsubishi Endeavor or Eclipse share this same O2 sensor issue?
Helpful Videos


We Have This Part in Stock


The information in this article is provided for general reference and educational purposes only. Vehicle specifications, procedures, and part compatibility can vary by production date, trim level, and region. Always consult your vehicle's factory service manual and verify part numbers before purchasing or performing repairs. Safety-critical components such as airbags, seat belts, and braking systems should be installed by a qualified professional.
- Mitsubishi Galant:
- 🧭 Diagnostic Flowchart
- 🎬 Helpful Videos
- 🛍️ Shop This Part
- What's Unique About the 2004-2012 Mitsubishi Galant
- Symptoms You May Notice
- Most Likely Causes
- Rare But Worth Checking
- Diagnosis Steps
- Parts You'll Likely Need
- Related Codes That Often Appear With This One
- Platform-Specific Known Issues
- Mechanic-Grade Diagnostic Values
- Scan Tool Commands That Help
- Wiring & Ground Locations
- Model Year Variations Within This Range
- Other Known Issues on This Vehicle
- Used vs. New Parts: Buying Guide for This Vehicle
- Real Owner Stories
- 2004-2012 Mitsubishi Galant 3.8L V6
- 2004-2012 Mitsubishi Galant 2.4L I4 — ~100000 miles
- Related OBD-II Codes
- Frequently Asked Questions
- 🎟️ Get 5% Off