
P0132 on 2003-2009 Toyota 4Runner 4.0L V6: Causes, Symptoms, and Fixes for High Voltage O2 Sensor
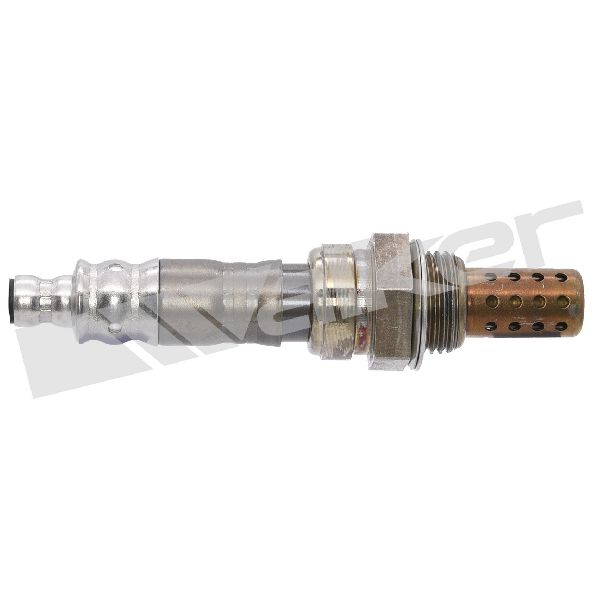
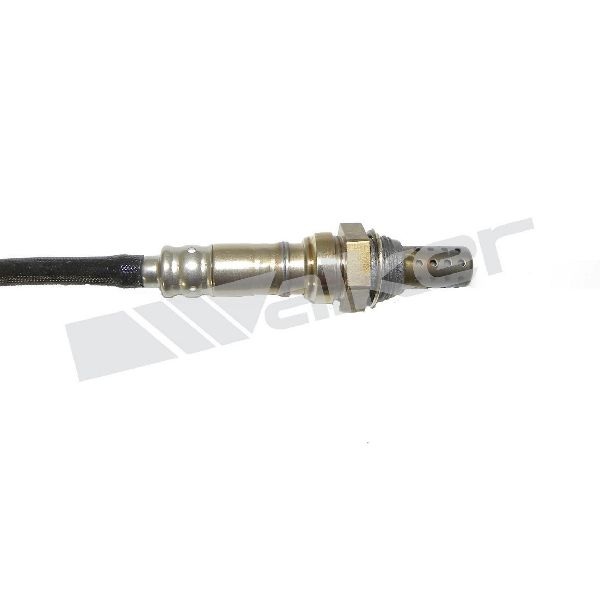
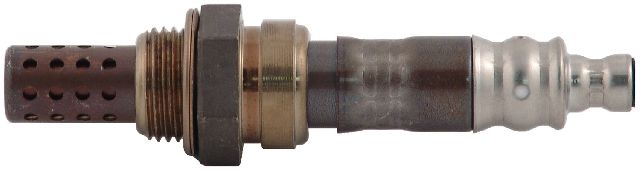
On a 2003-2009 4Runner with the 4.0L V6, code P0132 is almost always caused by a failed upstream Air/Fuel Ratio (A/F) sensor on Bank 1 (passenger side). Replacing this sensor is the most common fix, costing around $150-$200 for an OEM-quality part and is a straightforward DIY job. Using the OEM supplier, Denso (part #234-9051), is highly recommended for reliability.
- P0132 on your 4Runner points to the upstream Air/Fuel Ratio sensor on the passenger side (Bank 1, Sensor 1).
- The most common fix is to replace this sensor. Using the OEM supplier, Denso (part #234-9051), is highly recommended for reliability.
- Before buying parts, check the sensor's wiring and connector for any obvious damage, a
What's Unique About the 2003-2009 Toyota 4Runner
The 4th generation 4Runner's 1GR-FE engine uses a wide-band Air/Fuel (A/F) ratio sensor for its upstream "Sensor 1" position, rather than a conventional narrow-band oxygen sensor. This is a critical distinction because A/F sensors provide a more precise and wider range of air-fuel mixture readings. The P0132 code is triggered when the voltage from this sensor remains high for an extended period, which is a condition the ECM interprets as a problem. Bank 1 on the 1GR-FE V6 engine is the passenger side of the vehicle.
Symptoms You May Notice
- Check Engine Light is on
- Decreased fuel economy
- Rough or unstable idle
- Engine hesitation or stumbling during acceleration
- Black smoke from the exhaust or a strong smell of fuel (in severe cases)
- Failed emissions test
- Replacing the downstream (Sensor 2) 🎬 Watch: How to identify and replace the downstream sensor. oxygen sensor. The P0132 code specifically refers to Sensor 1, which is the upstream Air/Fuel Ratio sensor.
- Replacing the wrong side sensor. Bank 1 is the passenger side on the 4.0L V6. Always confirm the bank before replacement.
- Assuming the sensor is bad without checking wiring. A short in the harness can mimic a failed sensor.
Most Likely Causes
- Failed Bank 1, Sensor 1 (Air/Fuel Ratio Sensor) 🔴 High Probability A/F sensors have a finite lifespan and are subjected to extreme heat and exhaust gases, leading to eventual failure. This is the most common reason for P0132. Contamination from fuel, oil, or coolant can also cause failure.
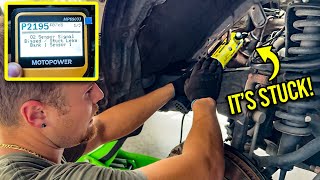
How to confirm: Use an OBD-II scanner to monitor live data for the Bank 1 Sensor 1 voltage. If the voltage is stuck high (e.g., above 3.5V) and not fluctuating around its target (typically ~3.3V), the sensor has likely failed. 🎬 Watch: How to diagnose and fix the P0132 high voltage code. A healthy sensor's voltage should respond quickly to throttle changes.
Typical fix: Replace the Bank 1, Sensor 1 Air/Fuel Ratio sensor. Bank 1 is on the passenger side. Using a 22mm oxygen sensor socket and penetrating oil on the old sensor's threads is highly recommended.
Est. part cost: $150-$220 - Damaged Wiring or Connector 🟡 Medium Probability The sensor wiring is located under the vehicle and can be damaged by road debris, heat from the exhaust, or corrosion, leading to a short circuit that causes a high voltage reading. The harness connector can also become filled with dirt or moisture.
How to confirm: Visually inspect the entire wiring harness from the A/F sensor to the main engine harness. Check the connector for corrosion, bent pins, melted plastic, or debris. Check for a short to power in the signal wire.
Typical fix: Repair the damaged section of the wire or replace the connector pigtail. Ensure the wiring is properly secured away from the hot exhaust pipes.
Est. part cost: $10-$30 - Engine Running Rich ⚪ Low Probability While less common, a leaking fuel injector or a faulty fuel pressure regulator can cause an actual rich condition, which the A/F sensor will accurately report as high voltage.
How to confirm: Check fuel trim data with a scanner. If short-term and long-term fuel trims are highly negative, the engine is trying to compensate for a rich condition. Test fuel pressure and inspect fuel injectors for leaks.
Typical fix: Replace the leaking fuel injector or faulty fuel pressure regulator.
Est. part cost: $50-$400
Rare But Worth Checking
- Exhaust Leak: An exhaust leak before the A/F sensor can sometimes, though rarely, cause this code by altering the gas flow and temperature characteristics around the sensor, leading to incorrect readings. It more commonly causes lean codes, but it is a possibility.
- Faulty Powertrain Control Module (PCM): → Shop Engine Control Module (ECM) This is extremely rare. The internal driver circuit for the sensor in the PCM can fail, but all other possibilities should be exhausted before considering PCM replacement.
Diagnosis Steps
- Confirm the code P0132 is present using an OBD-II scanner. Check for any pending or stored codes.
- Check for any other stored codes that could indicate a related problem (e.g., fuel system codes P0172, P0175).
- Use the scanner's live data function to observe the voltage of 'Bank 1, Sensor 1'. On this 4Runner, it should be an A/F sensor, so the voltage should fluctuate around 3.3V. If it is stuck high (e.g., >3.5V), this confirms the fault condition.
- Compare Bank 1 Sensor 1 readings to Bank 2 Sensor 1. If Bank 2 is reading normally, it points towards a localized issue with the Bank 1 sensor or its circuit.
- Visually inspect the A/F sensor's wiring harness and connector for any signs of melting, chafing, corrosion, or physical damage. Ensure it is not touching the exhaust.
- Inspect the exhaust manifold and pipe area before the sensor for any signs of an exhaust leak (soot trails, audible ticking noise).
- If the wiring is intact and no leaks are found, the A/F sensor itself is the most probable cause of failure.
- If replacing the sensor does not resolve the code, further diagnosis of the fuel system (fuel pressure, injectors) or a potential wiring short is necessary to rule out a true rich-running condition.
Parts You'll Likely Need
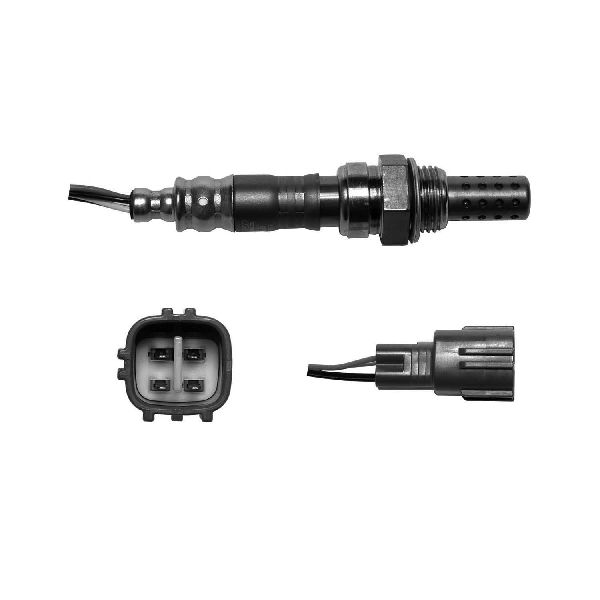
- Air/Fuel Ratio Sensor (Bank 1, Sensor 1)
(OEM #89467-35110)— This is the primary component that fails and directly causes the P0132 code. It is a wear-and-tear item.
Trusted brands: Denso (OEM Supplier, Part #234-9051)
OEM price range: $180-$220
Aftermarket price range: $150-$190
Platform-Specific Known Issues
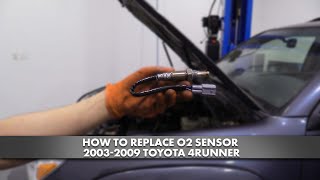
- The A/F sensor can be very difficult to remove due to rust and heat cycling. Generous use of a high-quality penetrating oil (like PB Blaster or Kroil) well before attempting removal is highly recommended. A 22mm O2 sensor socket is essential 🎬 See this walkthrough for replacing the upstream sensor. for the job.
- Owners strongly recommend using the OEM Denso sensor (part #234-9051). Using cheaper, off-brand sensors has been reported in forums to cause recurring codes or premature failure.
Mechanic-Grade Diagnostic Values
- A/F Sensor (Bank 1, Sensor 1) Heater Resistance — expected: 1.8 to 3.4 Ω at 20°C (68°F). Failure: A reading outside this range indicates a faulty heater element within the sensor.
- A/F Sensor (Bank 1, Sensor 1) Signal Voltage at Idle — expected: Fluctuating around 3.3 V. Failure: A voltage stuck consistently above 3.5V or below 2.9V indicates a sensor or circuit fault.
- A/F Sensor (Bank 1, Sensor 1) Signal Voltage on Deceleration — expected: Should rise to 4.0 V or higher during fuel cut. Failure: Failure to reach a high voltage during sudden, closed-throttle deceleration points to a slow or failing sensor.
- Fuel Pressure (VVT-i 1GR-FE) — expected: 284 kPa. Failure: Significantly higher fuel pressure can cause a rich condition that the A/F sensor correctly reports as high voltage.
Scan Tool Commands That Help
- Toyota Techstream: Active Test: "Control the Injection Volume for A/F Sensor" — This test allows a technician to manually command a +12.5% or -12.5% change in fuel injection volume. By observing the A/F sensor's lambda value response, you can confirm if the sensor is reacting correctly to rich and lean conditions. A healthy sensor should report lambda values near 0.85 (for +12.5% fuel) and 1.14 (for -12.5% fuel). This can isolate a bad sensor from a true rich condition.
- Toyota Techstream: Data List: AFS B1 S1 and AFS B2 S1 — Use this to compare the live voltage and lambda values of the Bank 1 sensor to the Bank 2 sensor. If Bank 2 is operating normally (around 3.3V) while Bank 1 is stuck high, it strongly points to a fault in the Bank 1 sensor or its specific circuit, rather than a systemic engine problem.
Wiring & Ground Locations
- Engine Control Module (ECM) — Behind the right end of the dashboard, accessible after removing the glove box assembly.. The ECM is the destination for the A/F sensor's signal wires. All voltage and resistance tests at the harness connector are ultimately checking the circuit's integrity back to this module.
- Engine Block Ground (Battery Negative to Block) — A large ground cable runs from the battery's negative terminal to a bolt on the engine block, located on the passenger side, below the exhaust manifold. It shares a bolt with the smaller frame-to-block ground.. A poor engine ground can cause erratic voltage readings across multiple sensors, including the A/F sensor. While not a primary cause of a steady high voltage code like P0132, ensuring this ground is clean and tight is a crucial step in diagnosing any electrical fault.
- A/F Sensor Connector (Bank 1, Sensor 1) — The connector is typically mounted on a bracket on the passenger side of the transmission bell housing or upper engine area, away from the direct heat of the exhaust manifold.. This is the primary point for testing. You can check for voltage, ground, and heater circuit resistance here without having to access the ECM directly. The wire colors for the A/F sensor circuit are typically available in wiring diagrams.
OEM Part Supersession History
89467-35110→89467-04060— Standard part number update and consolidation by Toyota for newer model years or minor revisions.
Heads up: While functionally similar, the primary difference can be the wire harness length. Using the wrong part number might result in a harness that is too short to reach the connector. Always verify the part number by VIN.
Model Year Variations Within This Range
- 2003-2009: The 1GR-FE engine in this generation is the single VVT-i version. The later Dual VVT-i version (introduced in 2009 for the 150-series Prado, not the 4Runner of this generation) has different cylinder heads, a higher compression ratio, and different fuel pressure, but the A/F sensor function and P0132 diagnosis remain consistent for the 2003-2009 4Runner.
- 2003-2004 vs 2005-2009: Forum discussions indicate there are differences in engine wiring and some sensors between the 2003-2004 and 2005-2009 1GR-FE engines, making direct engine swaps between these ranges complicated without swapping harnesses and ECUs. However, for a P0132 fault, the A/F sensor part number and diagnostic procedure are the same.
Diagnostic Flowchart
Other Known Issues on This Vehicle
Issues unrelated to this code that are worth knowing about as an owner of this generation:
- Head Gasket Failure 🔴 High — Affects a small percentage of early 1GR-FE engines (esp. 2003-2005) typically after 125k miles. Symptoms include coolant loss, gurgling from the heater core, and misfires on startup.
- Frame Rust 🔴 High — Very common, especially in salt-belt states. Can lead to structural failure. Toyota faced lawsuits for similar issues on other trucks but the 4Runner was not included in the US recall/warranty extension program. (Ref: Class-action lawsuit, but no official US recall for the 4Runner frame.)
- Seized Brake Calipers 🟠 Medium — Front calipers are notorious for seizing, causing the vehicle to pull to one side, a burning smell, and rapid brake pad wear. Often occurs after 50,000 miles.
- Cracked Exhaust Manifolds (V8 Only) 🟠 Medium — Primarily affects the 4.7L V8 engine, not the 4.0L V6. Causes a ticking noise that is loudest on a cold start and may diminish as the engine warms up.
- Driveshaft 'Clunk' or 'Thump' 🟡 Low — Common issue where the driveshaft slip yoke binds and releases, causing a clunking sensation when stopping or starting. Requires periodic greasing of the driveshaft zerks to mitigate.
Used vs. New Parts: Buying Guide for This Vehicle
When a used part is the smart pick: For this specific repair, purchasing a used Air/Fuel ratio sensor is NOT recommended. A/F sensors are wear-and-tear items with a finite lifespan, similar to spark plugs or brake pads. A used sensor may have significant wear and could fail shortly after installation, or provide inaccurate readings, leading to wasted time and money.
What to inspect on the donor part:
- Not applicable as used sensors are not advised.
OEM-only on this vehicle (don't cheap out):
- Air/Fuel Ratio Sensor
Aftermarket brands forum-validated for this vehicle:
- Denso (This is the Original Equipment Manufacturer; buying a Denso-branded part is equivalent to buying the genuine Toyota part but often at a lower cost).
- NGK/NTK (Widely regarded as a high-quality alternative to Denso in forum discussions).
Brands owners have reported issues with on this vehicle:
- Bosch: While a major sensor manufacturer, numerous Toyota owners across different models report that their vehicles 'do not play well' with Bosch sensors, sometimes leading to incorrect performance or recurring codes. Given that the price difference is often minimal, sticking with Denso or NTK is the safer choice.
Real Owner Stories
Aggregated from forums and TSBs cited above. Mileages and costs reflect what owners reported in those sources.
2003 Toyota 4Runner 4.0L V6
Symptoms: The owner received a P0132 code and sought help identifying the correct sensor location and type.
What fixed it: Replacement of the upstream Air/Fuel ratio sensor on the passenger side (Bank 1) with a Denso brand sensor.
Source hint: ToyotaNation Forum thread titled 'P0132 Help'
2003-2009 Toyota 4Runner 4.0L V6
Symptoms: The vehicle triggered both P0132 and P0152 codes simultaneously.
What fixed it: Replacing both upstream A/F sensors (Bank 1 and Bank 2) using Denso parts.
Source hint: T4R.org thread titled 'P0132 and P0152 on T4R.org'
Related OBD-II Codes
Frequently Asked Questions
Which side of my 4Runner's 4.0L V6 engine is Bank 1 for the P0132 code?
Can I use a universal or budget-brand sensor to fix P0132 on my 4Runner?
Is the P0132 code related to the cracked exhaust manifold issue common on 4th Gen 4Runners?
What tools do I need to replace the Bank 1 Sensor 1 on my 4.0L V6?
What is the normal voltage reading for the Bank 1 Sensor 1 on this specific vehicle?
Could my 4Runner's frame rust issue be related to the P0132 wiring faults?
Helpful Videos

We Have This Part in Stock


The information in this article is provided for general reference and educational purposes only. Vehicle specifications, procedures, and part compatibility can vary by production date, trim level, and region. Always consult your vehicle's factory service manual and verify part numbers before purchasing or performing repairs. Safety-critical components such as airbags, seat belts, and braking systems should be installed by a qualified professional.
- Toyota 4Runner:
- 🧭 Diagnostic Flowchart
- 🎬 Helpful Videos
- 🛍️ Shop This Part
- What's Unique About the 2003-2009 Toyota 4Runner
- Symptoms You May Notice
- Most Likely Causes
- Rare But Worth Checking
- Diagnosis Steps
- Parts You'll Likely Need
- Platform-Specific Known Issues
- Mechanic-Grade Diagnostic Values
- Scan Tool Commands That Help
- Wiring & Ground Locations
- OEM Part Supersession History
- Model Year Variations Within This Range
- Other Known Issues on This Vehicle
- Used vs. New Parts: Buying Guide for This Vehicle
- Real Owner Stories
- 2003 Toyota 4Runner 4.0L V6
- 2003-2009 Toyota 4Runner 4.0L V6
- Related OBD-II Codes
- Frequently Asked Questions
- 🎟️ Get 5% Off