
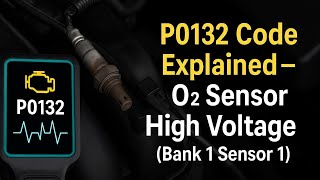
P0132 on 2007-2024 Toyota Camry: O2 Sensor High Voltage Causes and Fixes
On a 2007-2024 Toyota Camry, code P0132 is almost always caused by a failed upstream oxygen sensor (Air-Fuel Ratio Sensor). Replacing this sensor is the most common fix, with DIY difficulty rated at 2/5. Expect to pay around $70-$120 for an aftermarket sensor (like Denso) or $150-$250 for an OEM part. On many Camry models, this is fixed by replacing the sensor about 75% of the time.
- P0132 on a Camry almost always means the upstream oxygen sensor (Bank 1, Sensor 1) has failed.
- Symptoms include a lit Check Engine Light, poor gas mileage, and a rough idle.
- Before replacing the sensor, perform a quick visual check of the wiring and connector for obvious damage.
- Use a quality replacement sensor, such as one from Denso (the OEM supplier), for the best results.
- Do not ignore this code, as it will lead to failed emissions tests and can cause long-term damage to the catalytic converter.
What's Unique About the 2007-2024 Toyota Camry
For the Toyota Camry across the XV40, XV50, and XV70 generations (2007-2024), this code has a very consistent and straightforward diagnosis. Unlike some vehicles where this code can be intermittent or caused by complex software issues, on the Camry, it most often points directly to the upstream O2 sensor (often called an Air-Fuel Ratio or A/F sensor) having failed due to age or contamination. Toyota uses high-quality Denso sensors from the factory, which are robust but are still a wear-and-tear item that eventually fails. The location of Bank 1 Sensor 1 varies: on 4-cylinder engines, it is on the exhaust manifold at the front or rear of the engine bay. On V6 engines, 'Bank 1' is the cylinder bank closer to the firewall, which can make access more challenging.
Generation note: This guide covers the Toyota Camry XV40 (2007-2011), XV50 (2012-2017), and XV70 (2018-2024) generations. The causes, symptoms, and repair process for code P0132 are highly consistent across these generations, as the fundamental design of the emission control system and the role of the upstream A/F sensor have not significantly changed. Part numbers for the sensor will vary by generation and engine.
Symptoms You May Notice
- Check Engine Light is on
- Decreased fuel economy
- Rough or unstable idle
- Engine hesitation or stumbling during acceleration
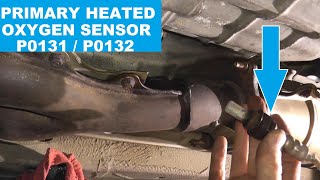
- Black smoke from the exhaust or a strong fuel smell (in more severe cases) 🎬 Watch: A detailed breakdown of the P0132 code and symptoms.
- Replacing the downstream (Bank 1, Sensor 2) oxygen sensor. The code P0132 specifically refers to Sensor 1, which is before the catalytic converter.
- Replacing the catalytic converter. A bad converter typically sets codes like P0420, not P0132. A P0132 left unfixed can damage the converter, but the converter is not the cause.
- Ignoring a potential wiring short. Some owners replace the sensor, only for the code to return because the underlying issue was a frayed wire intermittently shorting to a power source.
- Misinterpreting A/F Sensor voltage. Technicians accustomed to traditional 0.1-0.9V O2 sensors may misdiagnose a healthy A/F sensor. For Toyota A/F sensors, high voltage (e.g., >3.4V) means lean, and low voltage (<3.0V) means rich; this is the opposite of a traditional sensor.
Most Likely Causes
- Failed Upstream Oxygen Sensor (Bank 1, Sensor 1) 🔴 High Probability → Shop Oxygen Sensor Air-Fuel Ratio sensors are a normal wear item. After many thousands of miles, the sensing element degrades or the internal heater circuit fails, causing a stuck or slow-to-respond signal. This is the cause in approximately 70-75% of P0132 cases on a Camry.
How to confirm: Use an OBD-II scanner with live data. For a Toyota A/F sensor, the voltage should be around 3.3V at idle and respond quickly to changes in throttle. A sensor causing P0132 will likely be stuck at a low voltage (e.g., below 3.0V) or respond very slowly. A definitive test is to measure the resistance of the sensor's internal heater circuit; it should be between 1.8 and 3.4 Ohms at 68°F (20°C).
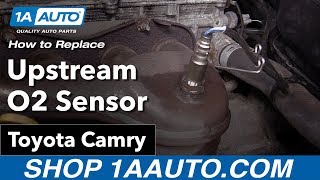
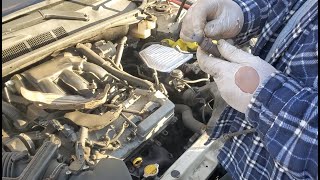
Typical fix: Replace the Bank 1, Sensor 1 Air-Fuel Ratio Sensor. This sensor is typically located on the exhaust manifold. An O2 sensor socket (22mm or 7/8") is recommended for removal.
Est. part cost: $70-$250 - Damaged Wiring or Corroded Connector 🟡 Medium Probability The sensor wiring is located in the hot engine bay and under the vehicle, making it susceptible to heat damage, fraying, or corrosion over time. A short circuit between the signal and heater circuit wires or to ground can cause an incorrect voltage reading.
How to confirm: Visually inspect the entire wiring harness from the A/F sensor to the ECM. Look for melted insulation, frayed wires, or green/white corrosion inside the connector plug. Use a multimeter to check for shorts to power or ground on the signal wire. With the key on, you should measure a reference voltage of approximately 3.0V and 3.3V on the two sensor signal wires at the harness connector.
Typical fix: Repair the damaged section of the wiring harness or clean/replace the corroded connector.
Est. part cost: $5-$50 - Engine Running Rich ⚪ Low Probability While less common, a separate issue can cause a legitimate rich condition that the A/F sensor is correctly reporting. This is not a sensor failure but a symptom of another problem, such as a leaking fuel injector or faulty fuel pressure regulator.
How to confirm: Look for other diagnostic trouble codes that may be present (e.g., fuel trim codes). Check fuel pressure to see if it's too high. A leaking fuel injector can also cause a rich condition. Diagnosis can be complex and may require more advanced tools.
Typical fix: Diagnose and repair the root cause of the rich condition, such as replacing a faulty fuel pressure regulator or a leaking fuel injector.
Est. part cost: $50-$400
Rare But Worth Checking
- Exhaust Leak: An exhaust leak upstream of the A/F sensor can disrupt sensor readings by allowing outside air into the exhaust stream, though it more commonly causes lean codes. It's worth a quick inspection of the exhaust manifold for cracks or gasket leaks.
- Faulty Engine Control Module (ECM): → Shop Engine Control Module (ECM) This is extremely rare, accounting for about 2% of cases. The ECM itself may have a failed internal circuit, misinterpreting the sensor's signal. This should only be considered after all other possibilities have been exhaustively ruled out.
Diagnosis Steps
- Connect an OBD-II scanner to confirm P0132 is the only code present. If other codes exist (especially fuel system or misfire codes), diagnose them first as they may be the root cause.
- Use the scanner's live data function to monitor the voltage of the Bank 1, Sensor 1 A/F sensor ('AFS B1 S1'). A healthy sensor's voltage should hover near a stoichiometric value (e.g., 3.3V) at idle and change rapidly with throttle input. A reading stuck low (e.g., <3.0V) points towards a sensor or wiring issue.
- Perform a thorough visual inspection of the upstream A/F sensor's wiring harness and connector. Look for any signs of melting, chafing, corrosion, or loose pins. Pay close attention to where the harness might contact hot exhaust components.
- Test the sensor's heater circuit. Disconnect the sensor and measure the resistance between the two heater pins (often marked HT and +B). The resistance should be between 1.8 and 3.4 ohms at 20°C (68°F). An open or shorted heater circuit requires sensor replacement. 🎬 See this guide on testing and replacing the heated sensor.
- Check the wiring harness connector for correct voltages. With the sensor unplugged and the ignition ON, check the two signal pins; one should read ~3.3V and the other ~3.0V. Check the heater power pin for battery voltage.
- If a new sensor does not resolve the code, re-check the wiring for a short circuit to power or ground using a multimeter. Check for continuity between the sensor connector and the ECM connector pins.
- As a final, low-probability check, inspect for a condition causing the engine to run excessively rich, such as a leaking fuel injector or faulty fuel pressure regulator.
Parts You'll Likely Need
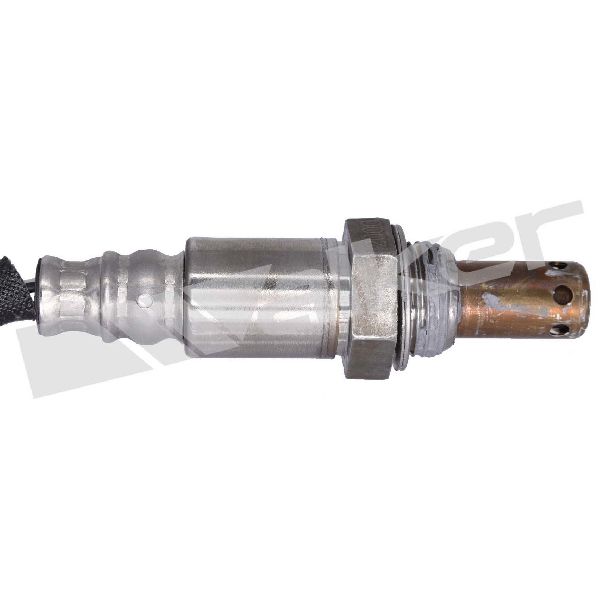
- Upstream Oxygen Sensor / Air-Fuel Ratio Sensor (Bank 1, Sensor 1)
(OEM #XV40 (2007-2011): 89467-06110; XV50 (2012-2017 2.5L): 89467-06160; XV70 (2018+): 89467-06120 or 89467-33290 (Varies by engine/build))— This sensor is the most frequent point of failure for code P0132 on the Camry. It is a standard wear item that fails with age and mileage.
Trusted brands: Denso (OEM supplier), Bosch, NGK/NTK
OEM price range: $150-$250
Aftermarket price range: $70-$120
Platform-Specific Known Issues
- Access to Bank 1 Sensor on V6 Models: On Camry models equipped with the V6 engine (e.g., 2GR-FE), Bank 1 is the cylinder bank located against the firewall. Accessing the upstream A/F sensor (Bank 1, Sensor 1) can be difficult and may require removing other components for clearance, increasing labor time compared to the more accessible sensor on 4-cylinder models. The main engine harness ground for this bank is also located on the side of the head, underneath the throttle body area.
Mechanic-Grade Diagnostic Values
- A/F Sensor Heater Circuit Resistance — expected: 1.8 to 3.4 Ω at 20°C (68°F). Failure: A reading outside this range (open circuit or short) indicates a failed heater element within the sensor.
- A/F Sensor Live Data Voltage (Stoichiometric) — expected: Approximately 3.3V at steady idle. Failure: Stuck low (e.g., < 3.0V) for P0132, or stuck high (e.g., > 3.4V) for lean codes. Slow response to throttle changes.
- A/F Sensor Live Data Voltage (Hard Acceleration) — expected: Voltage should drop below 2.8V. Failure: Voltage does not drop significantly, indicating a slow or non-responsive sensor.
- A/F Sensor Live Data Voltage (Deceleration Fuel Cut-Off) — expected: Voltage should rise to 4.0V or higher. Failure: Voltage does not rise significantly, indicating a slow or non-responsive sensor.
- Harness Connector Signal Wire Voltages (Key On, Engine Off) — expected: One signal wire at ~3.3V, the other at ~3.0V (referenced to ground). Failure: Missing or incorrect voltages point to a wiring issue or a problem with the ECM's reference voltage supply.
Hidden / Shadow Codes Worth Checking
- P0125: Insufficient Coolant Temperature for Closed Loop Fuel Control. On many Toyotas, this code can be set misleadingly when the A/F sensor has insufficient voltage activity, even if the coolant temperature is normal. It's a one-trip code that often points to a slow or failing A/F sensor. (see via Standard OBD-II scanner.)
Scan Tool Commands That Help
- Toyota Techstream: Active Test: 'Control the Injection Volume for A/F Sensor' — This bidirectional test allows a technician to command the fuel mixture rich (+12.5% or +25%) or lean (-12.5%). By observing the A/F sensor's voltage response (e.g., dropping below 3.0V for rich, rising above 3.35V for lean), you can definitively confirm if the sensor is responding correctly and quickly.
- Toyota Techstream: Utility: 'Reset Memory' or 'Learning Value Reset' — After replacing an A/F sensor or fixing a rich/lean condition, it's good practice to reset the engine's long-term fuel trim and A/F learning values. This forces the ECM to relearn fuel strategy with the new, correctly functioning components.
Wiring & Ground Locations
- Bank 1 A/F Sensor Connector — On a 4-cyl (2AR-FE), located on the exhaust manifold. On a V6 (2GR-FE), located on the rear exhaust manifold, against the firewall.. This is the primary connection point to test sensor resistance and harness voltages. It is susceptible to heat damage and corrosion.
- Engine Harness Ground (V6) — For the 2GR-FE V6, a critical engine harness ground point is located on the side of the rear cylinder head (Bank 1), underneath the throttle body assembly.. A poor ground connection at this point can cause incorrect sensor readings and trigger various spurious codes, including those for the A/F sensor located on that same bank.
- EFI No. 2 Fuse / A/F Relay — Located in the under-hood fuse/relay box (Engine Room R/B).. The A/F sensor's heater circuit receives power through a dedicated relay and fuse. A blown fuse or faulty relay will disable the heater, causing performance issues and setting heater circuit codes (P0031/P0032), which can sometimes accompany P0132.
Real Owner Repair Stories
- Tacoma World Forum (Toyota Tacoma V6 (Shares engine architecture with Camry V6)) — Rough idle, poor performance.
❌ Tried (didn't work) Initial diagnosis was unclear.
✅ What actually fixed it Replaced all four O2/AF sensors with Denso parts from a reputable source (RockAuto), along with spark plugs and an air filter. The user noted one of the old A/F sensor's threads disintegrated upon removal, indicating severe age/wear. The idle became smooth and performance returned.
OEM Part Supersession History
Varies by year/engine→Varies by year/engine— Standard part evolution and supplier changes.
Heads up: While Denso is the OEM supplier for Toyota, there are forum reports of slight physical or performance differences between a Toyota-boxed part and a Denso-branded aftermarket part for the same application. To ensure 100% compatibility, using a Toyota-branded part or a Denso part verified by VIN is the safest option. Buying from non-reputable sources like Amazon or eBay carries a risk of counterfeit parts.
Model Year Variations Within This Range
- 2007-2024: The specific OEM and Denso part numbers for the Bank 1 Sensor 1 A/F sensor change between the XV40, XV50, and XV70 generations, and also depend on whether the engine is a 4-cylinder or V6. Always confirm the part number with the vehicle's VIN.
Diagnostic Flowchart
Related OBD-II Codes
Frequently Asked Questions
Where is the Bank 1 Sensor 1 located on my V6 Toyota Camry?
How can I test the Air-Fuel Ratio sensor on my Camry to confirm it's causing the P0132 code?
What should the reference voltage be at the sensor harness connector on my Camry?
Is the P0132 code common on the 2007-2024 Camry?
Does this code affect other Toyota models with the same engine?
Where is the main engine harness ground located for Bank 1 on the V6 Camry?
Helpful Videos
We Have This Part in Stock


The information in this article is provided for general reference and educational purposes only. Vehicle specifications, procedures, and part compatibility can vary by production date, trim level, and region. Always consult your vehicle's factory service manual and verify part numbers before purchasing or performing repairs. Safety-critical components such as airbags, seat belts, and braking systems should be installed by a qualified professional.
- Toyota Camry:
- 🧭 Diagnostic Flowchart
- 🎬 Helpful Videos
- 🛍️ Shop This Part
- What's Unique About the 2007-2024 Toyota Camry
- Symptoms You May Notice
- Most Likely Causes
- Rare But Worth Checking
- Diagnosis Steps
- Parts You'll Likely Need
- Platform-Specific Known Issues
- Mechanic-Grade Diagnostic Values
- Hidden / Shadow Codes Worth Checking
- Scan Tool Commands That Help
- Wiring & Ground Locations
- Real Owner Repair Stories
- OEM Part Supersession History
- Model Year Variations Within This Range
- Related OBD-II Codes
- Frequently Asked Questions
- 🎟️ Get 5% Off