
P0132 on 2006-2012 Toyota RAV4 2.4L: Causes and Fixes for A/F Sensor High Voltage
On a 2006-2012 RAV4 with the 2.4L engine, code P0132 almost always means the upstream Air/Fuel Ratio (A/F) sensor has failed. This failure is frequently caused by contamination from excessive oil consumption, a known issue with the 2AZ-FE engine. Replacing this sensor, preferably with an OEM-quality brand like Denso (Part No. 234-9048), is the most reliable fix. Expect to pay $100-$180 for the part.
- P0132 on this RAV4 almost always points to a bad upstream Air/Fuel Ratio sensor in the exhaust manifold.
- The root cause can be related to the 2AZ-FE engine's known oil consumption issue, which fouls the sensor.
- Always use a high-quality replacement sensor from a brand like Denso for a lasting repair.
- Do not replace the downstream (post-catalyst) O2 sensor, as it will not solve this code.
- While you can drive with this code, fix it promptly to avoid poor fuel mileage and potential damage to the catalytic converter.
What's Unique About the 2006-2012 Toyota RAV4
The 2AZ-FE engine used in this generation of RAV4 has a well-documented history of excessive oil consumption, addressed by Toyota Technical Service Bulletin (TSB) T-SB-0094-11. Over time, burning oil contaminates the tip of the sensitive Air/Fuel Ratio sensor with deposits, causing it to fail and get stuck reporting a high voltage, which triggers the P0132 code. While the sensor itself is the direct cause, this underlying engine defect is often the root of the problem, making P0132 particularly common on high-mileage 2AZ-FE engines. For this reason, using a high-quality OEM replacement sensor (like Denso) is critical, as cheaper alternatives may fail quickly when exposed to the same oil-burning conditions. Owners on forums like RAV4World frequently discuss how a new Denso sensor resolves the code, but also stress the importance of monitoring oil levels to mitigate the root cause.
Symptoms You May Notice
- Check Engine Light is on
- Decreased fuel economy
- Rough or unstable idle
- Hesitation or stumbling during acceleration
- Noticeable exhaust odor or black smoke if the engine is truly running rich
- Replacing the downstream oxygen sensor (Sensor 2), which is located after the catalytic converter. This sensor monitors catalyst efficiency and will not fix a P0132 code.
- Replacing fuel injectors or the fuel pump without confirming a rich condition through fuel trim data and fuel pressure tests.
- Assuming the sensor is bad without first checking the wiring harness for shorts or damage, which can mimic a failed sensor.
Most Likely Causes
- Faulty Upstream Air/Fuel Ratio Sensor (Bank 1, Sensor 1) 🔴 High Probability → Shop Oxygen Sensor This is the most common failure point. The 2AZ-FE engine's tendency to consume oil (per TSB T-SB-0094-11) fouls the sensor tip with carbon and oil deposits, causing it to fail and read a constant high voltage.
How to confirm: Use a scan tool with live data to monitor the B1S1 voltage. For this A/F sensor, the voltage should be stable near 3.3V at idle. A reading stuck low (indicating rich) can trigger a high voltage logic code. You can also test the sensor's internal heater circuit with a multimeter; an open circuit (infinite resistance) or a reading outside the 1.8 to 3.4 ohm specification 🎬 See how to test and replace an air fuel sensor. indicates failure.
Typical fix: Replace the Air/Fuel Ratio sensor located in the exhaust manifold. The correct Denso aftermarket part is often cited as #234-9048. Apply anti-seize compound to the threads of the new sensor for easier future removal. An oxygen sensor socket is highly recommended for removal. 🎬 Watch: This walkthrough shows you how to swap the sensor.
Est. part cost: $100-$180 - Damaged Wiring or Connector 🟡 Medium Probability The wiring harness is close to hot exhaust components and can become brittle, melted, or chafed over time, leading to a short circuit to power.
How to confirm: Visually inspect the wiring harness leading to the A/F sensor for any signs of melting, chafing, or corrosion. Check the connector pins for moisture or damage. A short to a power source in the harness can cause a constant high voltage reading.
Typical fix: Repair the damaged section of the wiring harness or clean/replace the connector. Ensure the harness is properly secured away from the exhaust manifold.
Est. part cost: $5-$50 - Engine Running Rich ⚪ Low Probability
How to confirm: This is less likely than a bad sensor. Look for other trouble codes, especially P0172 (System Too Rich). Check long-term and short-term fuel trims with a scan tool; consistently negative values confirm a rich condition. Other causes could be a leaking fuel injector or a faulty fuel pressure regulator.
Typical fix: Diagnose and repair the underlying cause of the rich condition. This is not a sensor issue, but the sensor correctly reporting a problem.
Est. part cost: $50-$400 - Exhaust Leak Before the Sensor ⚪ Low Probability Exhaust manifold gaskets can degrade over time.
How to confirm: Listen for an audible ticking or hissing sound from the exhaust manifold area, especially when the engine is cold. A visual inspection may reveal black soot trails around a crack or a bad gasket. An exhaust leak before the sensor can sometimes paradoxically cause a high voltage reading by confusing the sensor's readings.
Typical fix: Replace the cracked exhaust manifold or the faulty gasket.
Est. part cost: $20-$300
Rare But Worth Checking
- Faulty Powertrain Control Module (PCM): → Shop Engine Control Module (ECM) This is extremely rare. The PCM should only be considered after all other possibilities, including the sensor, wiring, and fuel system, have been thoroughly ruled out and confirmed to be in perfect working order.
Diagnosis Steps
- Read the code with an OBD-II scanner and check for any other stored codes. Note any codes like P0172 or misfire codes.
- Use the scanner's live data feature to observe the voltage of 'B1S1' or 'A/F Sensor Bank 1 Sensor 1'.
- For a Toyota A/F sensor, the voltage should be steady around 3.3V at idle. A voltage stuck low (e.g., < 3.0V) indicates a rich condition which the ECU interprets as a 'high voltage' fault, triggering P0132.
- If the voltage appears normal, the issue might be intermittent. Wiggle the sensor's wiring harness while monitoring live data to see if you can induce the fault.
- Perform a thorough visual inspection of the sensor's wiring and connector for melting, chafing, corrosion, or loose pins.
- If wiring is intact, check for exhaust leaks between the cylinder head and the A/F sensor. Listen for ticking noises when cold.
- If no leaks are found, investigate potential causes of a rich fuel condition by checking fuel trim data. If fuel trims are highly negative (e.g., -15% or more), diagnose the fuel system (leaking injectors, fuel pressure).
- If all other tests pass, the A/F sensor is the most likely culprit. Before replacing, test its internal heater circuit with a multimeter. Disconnect the sensor and measure resistance between the two heater pins (+B and HA1A). It should be between 1.8 and 3.4 ohms at 68°F (20°C).
- After replacement, clear the codes and perform a test drive to ensure the fix was successful.
Parts You'll Likely Need
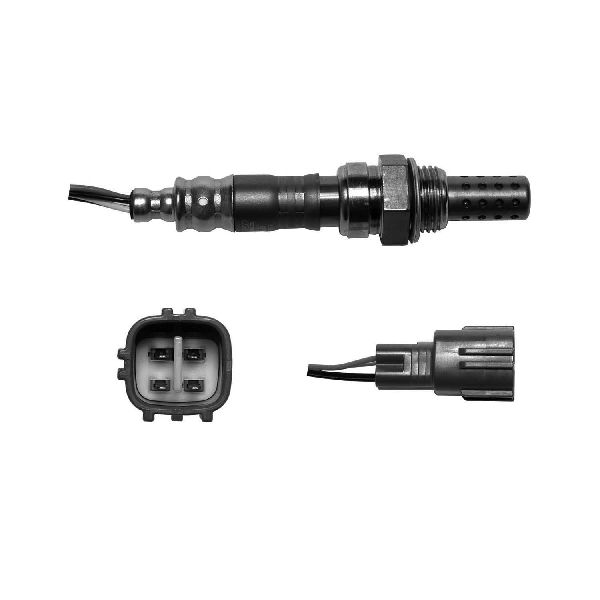
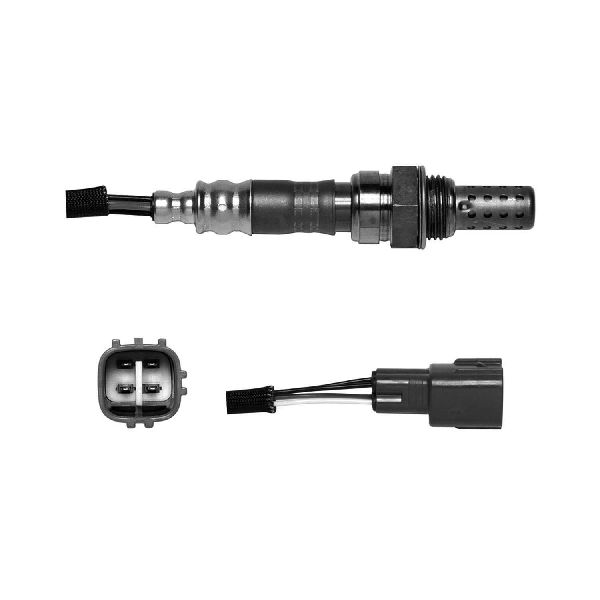
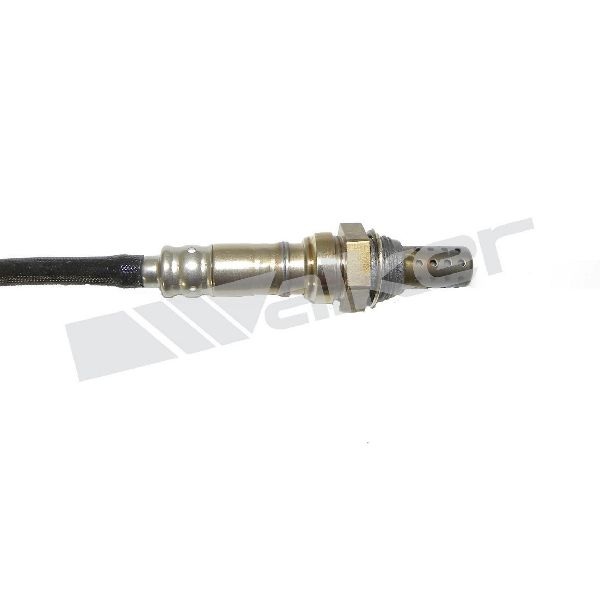
- Upstream Air/Fuel Ratio Sensor (Bank 1, Sensor 1)
(OEM #89467-42070)— This is the sensor that generates the signal monitored by the ECU for code P0132. It is the most common point of failure for this specific code on this vehicle, often due to oil contamination.
Trusted brands: Denso (OEM Manufacturer), NGK/NTK
OEM price range: $150-$220
Aftermarket price range: $100-$180
Related Codes That Often Appear With This One
- P0172 — P0172 means "System Too Rich (Bank 1)". This code can appear alongside P0132 if the engine is genuinely running rich, causing the A/F sensor to correctly report high voltage.
- P030x (e.g., P0301, P0302) — Misfire codes can be related. For example, a leaking fuel injector can cause both a rich condition (P0132) and a cylinder-specific misfire.
- P0420 — While not immediate, a long-term P0132 condition (stuck rich) can eventually overwhelm and damage the catalytic converter, leading to a P0420 "Catalyst System Efficiency Below Threshold" code.
Technical Service Bulletins (TSBs) & Recalls
- T-SB-0094-11 (Rev2): Addresses the repair procedure for excessive engine oil consumption on 2AZ-FE engines, which involves replacing the piston and ring assembly. This is the root cause of frequent A/F sensor failure.
- T-SB-0158-14: Outlines the official oil consumption test procedure dealers must perform to confirm if a vehicle qualifies for the repair under T-SB-0094-11.
Platform-Specific Known Issues
- The 2AZ-FE engine in 2006-2008 RAV4 models was subject to a warranty enhancement program (ZE7) and a Technical Service Bulletin (T-SB-0094-11) for excessive oil consumption due to faulty piston and piston ring design. This condition causes oil to contaminate the A/F sensor, leading to its failure and triggering code P0132. Owners should monitor engine oil levels closely, as consumption of more than 1 quart per 1,200 miles was the threshold for the warranty repair. Even if the engine repair was performed, high-mileage examples may still consume enough oil to shorten sensor life.
Mechanic-Grade Diagnostic Values
- A/F Sensor Heater Circuit Resistance — expected: 1.8 to 3.4 Ω at 20°C (68°F). Failure: A reading of 10 kΩ or higher (open circuit) or below 1.8 Ω (short) indicates a failed heater element inside the sensor.
- A/F Sensor Harness Connector Voltage (KOEO) — expected: Approximately 3.3V on one signal wire (A1A+) and 3.0V on the other (A1A-) when measured to ground.. Failure: Missing or incorrect reference voltages point to a wiring issue or a problem with the ECM.
- A/F Sensor Live Data Voltage (Scan Tool) — expected: Stable at approximately 3.3V at steady idle/cruise.. Failure: For a P0132, the sensor voltage will be stuck low (e.g., < 3.0V), which the ECU interprets as a persistent rich condition, logging a high voltage fault. Voltage should drop below 3.0V on enrichment (throttle snap) and rise above 3.4V on decel fuel cut.
- A/F Sensor Heater Current (Techstream) — expected: 0.9 to 9.9 A. Failure: Current below 0.8 A triggers P0031 (Low); current above 10 A triggers P0032 (High). These codes often accompany a failed sensor.
Hidden / Shadow Codes Worth Checking
- Mode $06, TID $81, CID $01 (example): Toyota utilizes Mode $06 to display results for non-continuous monitors, including A/F sensor response rate tests. For this vehicle generation, specific Test IDs (TID) and Component IDs (CID) for A/F sensor performance are not standardized and require access to Toyota's specific service information (TIS) to decipher. A failing value here can indicate a degraded sensor before a hard code like P0132 is set. (see via Advanced OBD-II scan tool with Mode $06 capability (e.g., Techstream, high-end Autel/Snap-on).)
Scan Tool Commands That Help
- Toyota Techstream: Active Test: 'Control the Injection Volume for A/F Sensor' — This is a definitive bidirectional test to confirm sensor function. A technician can command the fuel mixture lean (-12.5%) or rich (+12.5%). A healthy A/F sensor's voltage (or Lambda value) on the live data screen will react instantly and predictably. If the sensor voltage does not change, or responds very slowly, it confirms the sensor is faulty.
- Toyota Techstream: Utility: 'Reset Memory' — After replacing the A/F sensor, it is best practice to perform a 'Reset Memory' function. This clears the long-term fuel trim learning values from the ECM, forcing it to immediately start learning with the data from the new, accurate sensor, which can resolve idle or performance issues more quickly.
Wiring & Ground Locations
- B1 / EC — On the left side of the cylinder head (driver's side).. This is a primary engine ground point for the 2AZ-FE. A loose or corroded connection here can create a voltage offset and interfere with the sensitive readings from the A/F sensor, potentially causing incorrect signals and triggering codes like P0132.
- A/F Sensor Connector — Attached to a bracket on the side of the engine, near the top of the transmission bellhousing area.. This 4-pin connector is where all voltage and resistance tests for the sensor and harness begin. Its proximity to heat makes it susceptible to becoming brittle. The pins are: +B (Heater Power), HA1A (Heater Control from ECM), A1A+ (Signal), and A1A- (Signal).
Real Owner Repair Stories
- YouTube channel 'Fix It Angel' (2011 Toyota RAV4 2.5L (2AR-FE, similar architecture and issue)) — Check Engine Light with code P2195 (A/F Signal Biased/Stuck Lean), but the diagnostic principle is identical for a rich-biased code like P0132.
❌ Tried (didn't work) The previous mechanic had replaced the A/F sensor with a cheap, non-OEM part only a few months prior. The code returned.
✅ What actually fixed it The technician noted that Toyotas are very finicky about sensor values. He replaced the cheap aftermarket sensor with the correct OEM-quality Denso sensor. This resolved the code, highlighting the importance of using high-quality parts on this system.
OEM Part Supersession History
89467-42070→89467-42090, which was then superseded by 89467-0R020— Standard part evolution for improved materials, performance, or manufacturing efficiency.
Heads up: While the latest part number (89467-0R020) is the correct OEM replacement, using the widely available Denso 234-9048 aftermarket equivalent is confirmed to work correctly and is often more cost-effective.
Model Year Variations Within This Range
- 2009-2012: Starting in the 2009 model year, the RAV4 was also offered with a 2.5L (2AR-FE) 4-cylinder engine alongside the 2.4L (2AZ-FE). While the P0132 code and its causes are fundamentally the same, the specific OEM part numbers for the A/F sensor may differ between the 2.4L and 2.5L engines. Always verify the part by VIN.
Diagnostic Flowchart
Other Known Issues on This Vehicle
Issues unrelated to this code that are worth knowing about as an owner of this generation:
- Excessive Oil Consumption 🔴 High — Very common, particularly in 2006-2009 models. Can start as early as 60,000 miles but is more prominent after 100,000 miles. (Ref: T-SB-0094-11, T-SB-0158-14, Warranty Enhancement ZE7)
- Intermediate Steering Shaft Noise 🟠 Medium — Common in 2006-2008 models, presenting as a clunk or knock when turning the steering wheel. (Ref: T-SB-0318-08)
- Water Pump Failure 🟠 Medium — Prone to leaking or bearing failure, sometimes as early as 30,000-60,000 miles. Symptoms include coolant leaks, whining/grinding noises from the front of the engine, and overheating.
- Torque Converter Shudder (Automatic Transmission) 🟡 Low — Some owners report a brief shudder under light load, typically between 25-50 mph, on automatic transmission models. (Ref: T-SB-0057-15)
- Stripped Cylinder Head Bolt Threads 🔴 High — A less common but catastrophic issue where the head bolt threads in the aluminum engine block can strip, leading to head gasket failure. An expensive repair. (Ref: T-SB-0015-11)
Used vs. New Parts: Buying Guide for This Vehicle
When a used part is the smart pick: For this specific repair, buying a used Air/Fuel Ratio sensor is strongly discouraged. It is a sensitive electronic component and a primary wear item. The 2AZ-FE's oil consumption issue means that a used sensor from a junkyard likely has significant contamination and reduced remaining life.
Donor-vehicle mileage cap: roughly under 20000 miles for the part to have meaningful remaining life.
What to inspect on the donor part:
- If forced to consider used, visually inspect the sensor tip for heavy, black, sooty deposits. Any significant buildup is a red flag.
- Check the wiring pigtail and connector for any signs of melting, brittleness, or corrosion.
OEM-only on this vehicle (don't cheap out):
- Air/Fuel Ratio Sensor (Bank 1, Sensor 1)
Aftermarket brands forum-validated for this vehicle:
- Denso (This is the Original Equipment Manufacturer; the Denso aftermarket part #234-9048 is identical to the Toyota-branded part)
- NGK / NTK
Brands owners have reported issues with on this vehicle:
- Unbranded, 'white-box', or generic eBay/Amazon sensors. Forum and YouTube reports confirm these often fail within months, causing the code to return and wasting time and money.
Real Owner Stories
Aggregated from forums and TSBs cited above. Mileages and costs reflect what owners reported in those sources.
2006-2011 Toyota RAV4 2.4L 2AZ-FE
Symptoms: Check Engine Light on with code P0132; owner noted the engine was a 'high mileage' example known for oil burning.
What fixed it: Replacing the upstream A/F sensor (Bank 1, Sensor 1) with a Denso 234-9048 sensor.
Source hint: RAV4World.com thread titled 'P0132 Code - Oxygen Sensor Circuit High Voltage'
2006-2009 Toyota RAV4 2.4L 2AZ-FE — ~100000 miles
Symptoms: Excessive oil consumption (more than 1 quart per 1,200 miles) leading to fouled O2 sensors and spark plugs.
What fixed it: Repair procedure involving replacing the piston and ring assembly as outlined in T-SB-0094-11.
Source hint: T-SB-0094-11 (Rev2)
2001-2007 Toyota Highlander 2.4L 2AZ-FE
Symptoms: Patterns of oil burning leading to sensor and catalytic converter issues.
What fixed it: Diagnosing the 2AZ-FE oil consumption issue which fouls the upstream A/F sensor.
Source hint: platform_mates: 2001-2007 Toyota Highlander (2.4L 2AZ-FE)
Related OBD-II Codes
Frequently Asked Questions
Does TSB T-SB-0094-11 apply to my 2006-2012 Toyota RAV4 with the 2.4L engine?
What is the correct replacement part number for the Bank 1 Sensor 1 A/F sensor on my RAV4?
Is there a warranty extension for the oil consumption issue that causes P0132 on my RAV4?
Why does my RAV4's A/F sensor keep failing even after the oil consumption TSB repair?
What should the voltage reading be for the Bank 1 Sensor 1 on my RAV4 to confirm it's working?
Can a ticking noise from my engine be related to the P0132 code?
Helpful Videos

We Have This Part in Stock


The information in this article is provided for general reference and educational purposes only. Vehicle specifications, procedures, and part compatibility can vary by production date, trim level, and region. Always consult your vehicle's factory service manual and verify part numbers before purchasing or performing repairs. Safety-critical components such as airbags, seat belts, and braking systems should be installed by a qualified professional.
- Toyota RAV4:
- 🧭 Diagnostic Flowchart
- 🎬 Helpful Videos
- 🛍️ Shop This Part
- What's Unique About the 2006-2012 Toyota RAV4
- Symptoms You May Notice
- Most Likely Causes
- Rare But Worth Checking
- Diagnosis Steps
- Parts You'll Likely Need
- Related Codes That Often Appear With This One
- Technical Service Bulletins (TSBs) & Recalls
- Platform-Specific Known Issues
- Mechanic-Grade Diagnostic Values
- Hidden / Shadow Codes Worth Checking
- Scan Tool Commands That Help
- Wiring & Ground Locations
- Real Owner Repair Stories
- OEM Part Supersession History
- Model Year Variations Within This Range
- Other Known Issues on This Vehicle
- Used vs. New Parts: Buying Guide for This Vehicle
- Real Owner Stories
- 2006-2011 Toyota RAV4 2.4L 2AZ-FE
- 2006-2009 Toyota RAV4 2.4L 2AZ-FE — ~100000 miles
- 2001-2007 Toyota Highlander 2.4L 2AZ-FE
- Related OBD-II Codes
- Frequently Asked Questions
- 🎟️ Get 5% Off