
P0133 on 2009-2012 Audi Q5 3.2L V6: Slow O2 Sensor Response Causes and Fixes
For a 2009-2012 Audi Q5 with the 3.2L V6, code P0133 almost always means the Bank 1 (passenger side) upstream oxygen sensor has failed. Replacing this sensor is the most common fix. Expect to pay $100-$200 for an OEM-quality sensor and consider it a moderately difficult DIY job due to tight access.
- P0133 on your 2009-2012 Q5 3.2L points to the upstream oxygen sensor on the passenger side failing.
- The most common fix is replacing the Bank 1, Sensor 1 O2 sensor with an OEM-quality part from Bosch, NTK, or Denso.
- While you can drive with the light on, doing so for too long will hurt fuel economy and can damage the catalytic converter.
- Before replacing the sensor, check for obvious exhaust leaks ahead of the sensor and inspect the wiring for damage.
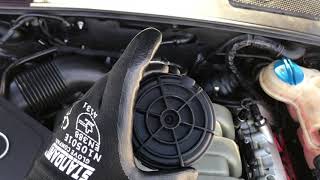
- Accessing the sensor is tight; removing the airbox is necessary for clearance.
What's Unique About the 2009-2017 Audi Q5
The 3.2L FSI V6 engine (engine code: CALB) was offered in the Q5 from 2009 to 2012. On this V6 engine, identifying the correct bank is crucial; Bank 1 is the passenger side of the engine. While the P0133 code itself is standard, related codes for the sensor's heater circuit (like P1196) have been common enough on this platform to be noted in technical service bulletins, suggesting the sensor assembly itself is a frequent failure point. Accessing the Bank 1 sensor is notoriously tight and requires removing the airbox for clearance.
🎬 Watch this DIY walkthrough for replacing the 3.2L oxygen sensorGeneration note: The specified vehicle range (2009-2017) covers the full first generation of the Audi Q5 (Typ 8R). However, the CALB 3.2L FSI V6 engine was only available from model years 2009 through 2012. This guide is specific to those years.
Symptoms You May Notice
- Check Engine Light is on
- Reduced fuel economy
- Rough or uneven idle
- Hesitation during acceleration 🎬 Watch: Overview of P0133 causes, symptoms, and common fixes
- Failure to pass an emissions test
- Slightly sweet or sulfurous exhaust smell
- Replacing the wrong oxygen sensor (e.g., Bank 2 instead of Bank 1, or the downstream Sensor 2 instead of the upstream Sensor 1).
- Replacing the Mass Airflow (MAF) sensor. The 3.2L CALB engine is a speed-density system that uses a Manifold Absolute Pressure (MAP) sensor, not a MAF sensor.
Most Likely Causes
- Failing Bank 1, Sensor 1 Oxygen Sensor 🔴 High Probability → Shop Oxygen Sensor Oxygen sensors are wear items that degrade over time from heat and contaminants. The sensor's internal heating element can also fail, which is a documented issue on this powertrain, often triggering related codes like P0135 or the Audi-specific P1196.
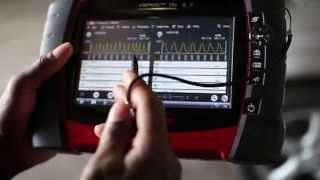
How to confirm: Use a scan tool to graph the voltage of 'Bank 1, Sensor 1'. It should fluctuate rapidly between approximately 0.1 and 0.9 volts multiple times per second when warm. A lazy, slow-moving waveform confirms the issue. 🎬 See how to use a scan tool to check for slow response You can also test the resistance of the sensor's internal heater circuit with a multimeter; a reading of infinite or very high resistance (well over 25 ohms) indicates failure.
Typical fix: Replace the Bank 1, Sensor 1 oxygen sensor. This is the upstream sensor on the passenger side. A 22mm offset oxygen sensor socket is highly recommended for removal and installation.
Est. part cost: $100-$220 - Exhaust Leak 🟡 Medium Probability Exhaust manifold gaskets or the flexible joint at the downpipe can develop leaks from constant heat cycles and vibration. A leak before the O2 sensor introduces unmetered air into the exhaust stream, which cools the exhaust gases and skews the sensor's readings, causing the ECM to interpret the signal as 'slow'.
How to confirm: Visually inspect the exhaust manifold and downpipe for black soot trails, which indicate a leak. Listen for a 'ticking' or 'puffing' noise from the engine bay, especially when the engine is cold. A smoke test of the exhaust system is the most definitive way to find a small leak.
Typical fix: Replace the leaking gasket or tighten the loose connection. This may require replacing rusted bolts or studs.
Est. part cost: $20-$60 - Damaged Wiring or Connector ⚪ Low Probability
How to confirm: Visually inspect the entire wiring harness leading to the Bank 1 Sensor 1 O2 sensor. Look for any signs of melting from contact with the exhaust manifold, chafing against other components, or corrosion inside the connector plug. Use a multimeter to check for continuity and ensure there are no shorts to ground or power.
Typical fix: Repair the damaged section of the harness or replace the connector pigtail. Ensure the wiring is properly secured away from hot exhaust components using zip ties or clips.
Est. part cost: $15-$50
Rare But Worth Checking
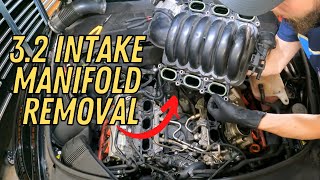
- Intake Manifold or PCV System Vacuum Leak: → Shop Engine Intake Manifold A significant vacuum leak can lean out the air-fuel mixture to a point that it affects the O2 sensor's ability to switch properly. This would typically be accompanied by lean codes (P0171) or fuel trim codes.
- Fuel Delivery Issue: A leaking fuel injector can cause a rich condition, while a weak fuel pump can cause a lean one. This can sometimes be misinterpreted by the ECU as a slow sensor response, though it's more likely to set fuel trim or misfire codes first.
Diagnosis Steps
- Connect an OBD-II scanner and confirm P0133 is present. Note any other codes, especially for heater circuits (P0135, P1196) or fuel trim (P0171, P0174).
- Start the engine from cold and listen for any ticking or puffing sounds from the passenger side exhaust manifold, which would indicate an exhaust leak.
- Once the engine is warm, use the scanner's live data function to monitor the voltage of 'O2 Sensor B1S1'. It should switch rapidly and consistently between ~0.1V and ~0.9V. A slow, lazy, or flat-lined signal points to a bad sensor.
- Visually inspect the sensor's wiring harness and connector for any signs of melting, chafing, or corrosion. Ensure the connector is securely plugged in.
- If the sensor signal is slow and no exhaust leaks or wiring damage are found, the oxygen sensor itself is the most likely culprit and should be replaced. A 22mm (7/8") oxygen sensor socket will be necessary.
- If replacing the sensor does not resolve the code, perform a smoke test to check for hard-to-find vacuum leaks in the intake manifold or PCV system, or a subtle exhaust leak.
Parts You'll Likely Need
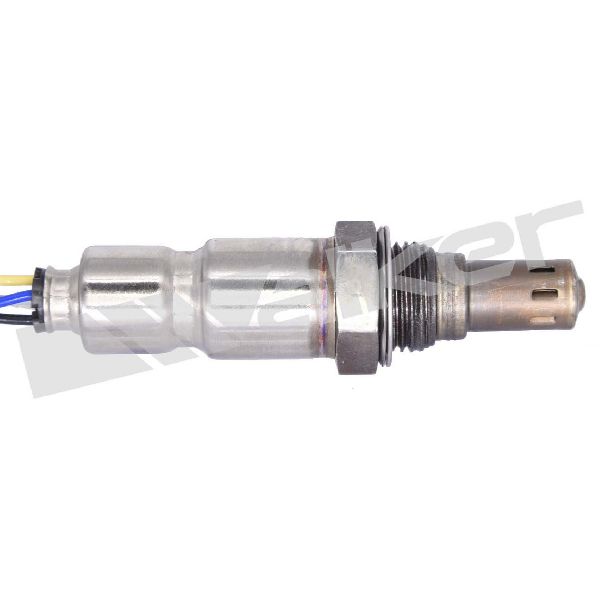
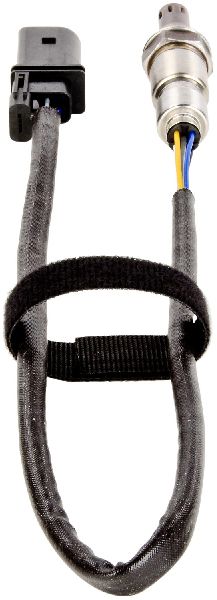
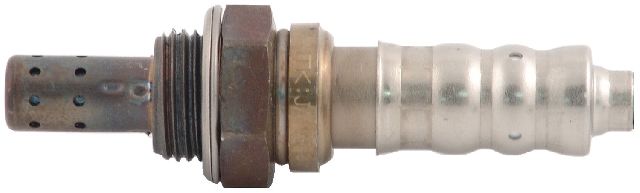
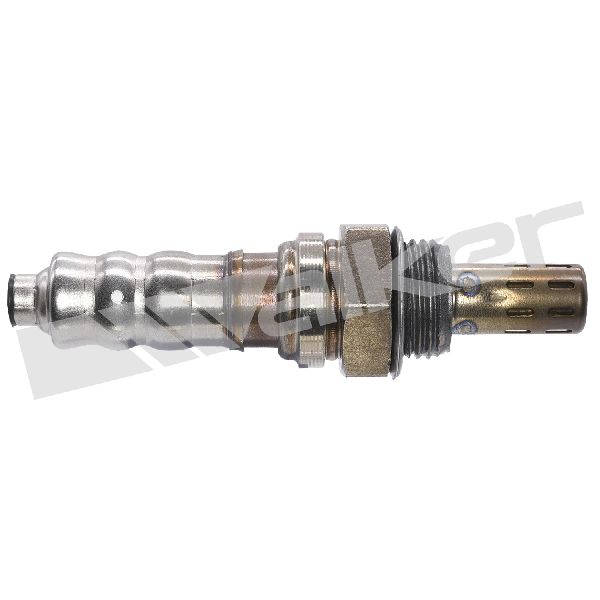
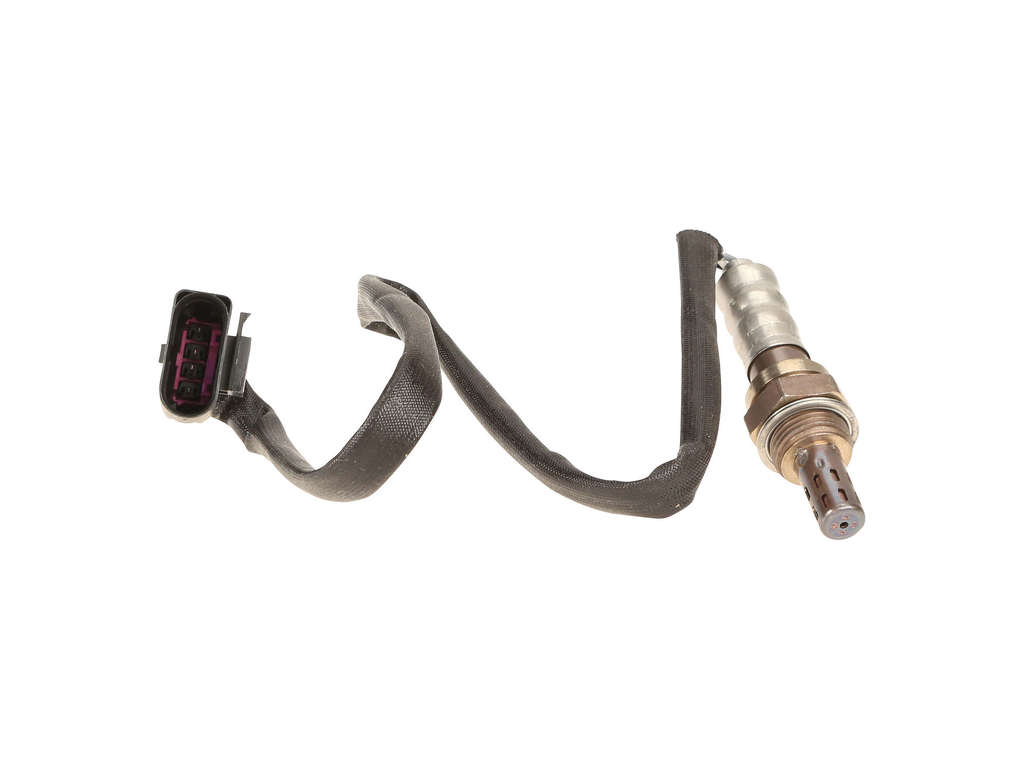
- Upstream Oxygen Sensor (Bank 1, Sensor 1)
(OEM #06E906265S (supersedes 06E906265F, 06E906265R))— This is the primary component responsible for the signal that triggers code P0133. It is a common wear-and-tear item.
Trusted brands: Bosch (OEM supplier, P/N: 18089 or 17099), NGK/NTK (P/N: 24308), Denso (P/N: 234-5120)
OEM price range: $180-$220
Aftermarket price range: $100-$160
Related Codes That Often Appear With This One
- P0135 — This code indicates a malfunction in the heater circuit for the same sensor (Bank 1, Sensor 1). They often appear together when the sensor's internal heater fails.
- P1196 — This is an Audi-specific code for an electrical malfunction in the Bank 1, Sensor 1 heater circuit, pointing directly to a failed sensor.
- P0171 — This code for 'System Too Lean (Bank 1)' can be caused by an exhaust leak or a failing O2 sensor that is incorrectly reading high oxygen levels.
Technical Service Bulletins (TSBs) & Recalls
- TSB #01139020337671 (related): While for code P1196, this TSB addresses heater circuit failures in the Bank 1 Sensor 1 on the 3.2L FSI engine, supporting the diagnosis of a faulty sensor for related codes like P0133.
Platform-Specific Known Issues
- The Bank 1 Sensor 1 is located on the passenger side of the 3.2L V6 engine, and access is significantly improved by removing the engine airbox assembly.
- Audi issued a Technical Service Bulletin (TSB) related to the heater circuit (P1196) for this sensor on the 3.2L engine, which corroborates that the sensor itself is a common point of failure.
Mechanic-Grade Diagnostic Values
- O2 Sensor Heater Element Resistance — expected: 2.5 - 25 Ohms (at approx. 20°C / 68°F). Failure: A reading of infinite resistance (Open Loop / OL) or near zero Ohms (short circuit) indicates a failed heater element inside the sensor.
- Voltage at O2 Sensor Heater Harness — expected: Approximately 12 Volts (Battery Voltage) with Key On, Engine Off.. Failure: Zero or very low voltage points to a wiring issue, blown fuse, or faulty ECM power relay, not a bad sensor.
- Low-Side Fuel Pressure (Pre-HPFP) — expected: Approximately 6 Bar (~87 PSI). Failure: Significantly lower pressure indicates a failing in-tank fuel pump or clogged filter, which can affect the air/fuel mixture and mimic a sensor issue.
- High-Side Fuel Pressure (at Fuel Rail, Idle) — expected: Approximately 35 Bar (~507 PSI). Failure: Pressure that is significantly low (e.g., dropping below 50 bar under load) or erratic can indicate a failing High-Pressure Fuel Pump (HPFP), a common issue on FSI engines.
Scan Tool Commands That Help
- VCDS (VAG-COM): Engine -> Basic Settings -> Throttle Body Adaptation — After cleaning the throttle body or addressing a major vacuum leak. This re-calibrates the throttle plate's home position.
- VCDS (VAG-COM): Engine -> Adaptation -> Channel 'IDE00433 - Reset learned values' — After replacing a component that affects the air/fuel mixture (like an O2 sensor, fuel injector, or fixing a vacuum/exhaust leak) to clear the old long-term fuel trim data and force the ECU to re-learn faster.
Wiring & Ground Locations
- Ground Point 12 — In the engine compartment on the left side, between the shock absorber strut and the plenum chamber (water drainage box).. This is a primary engine ground. Corrosion here can cause unstable voltage and erratic signals for multiple engine sensors, including the O2 sensor.
- Ground Point 685 — On the front right side member, located behind the wheel arch liner.. A chassis ground on the same side as Bank 1. A poor connection here could potentially affect the sensor's ground reference.
- ECM Location — In the plenum chamber, located under the windshield cowl on the passenger's side.. This area is prone to collecting water and debris if the plenum drains are clogged. This can lead to water intrusion and corrosion on the ECM connectors, causing a host of issues including O2 sensor codes.
"I Checked Everything" — The Actual Cause
- A common scenario that won't be found with a smoke test is a failed diaphragm in the PCV (Positive Crankcase Ventilation) valve, which is integrated into the valve cover on the 3.2L engine. A torn diaphragm creates a significant, unmetered vacuum leak. A definitive symptom is a loud whistling or sucking noise at idle. To confirm, try to remove the oil filler cap with the engine running; if the cap is held on by strong vacuum and the whistling stops when the cap is removed, the PCV valve has failed and the entire valve cover assembly typically needs to be replaced.
OEM Part Supersession History
06E906265F, 06E906265R→06E906265S— Standard part revision and improvement by the manufacturer.
Heads up: The sensor is a 5-wire wideband type. While physically similar, using a cheaper narrowband or incorrect aftermarket sensor can cause immediate or recurring codes. It is critical to use the correct OEM part number or a direct cross-reference from a reputable OEM supplier like Bosch.
Diagnostic Flowchart
Other Known Issues on This Vehicle
Issues unrelated to this code that are worth knowing about as an owner of this generation:
- Intake Valve Carbon Buildup 🔴 High — Common on all FSI direct injection engines, typically requires cleaning every 60,000-80,000 miles. Symptoms include rough idle, hesitation, and reduced power.
- Upper Timing Chain Tensioner Wear/Failure 🔴 High — A rattle on cold starts is the primary warning sign. While less common than on the 2.0T engine, failure can be catastrophic. Inspection is recommended, especially after 100,000 miles.
- Water Pump Failure 🟠 Medium — The original water pumps often had plastic components that could fail, leading to coolant leaks. An updated part with metal components is available. Failure can occur anywhere from 60,000 miles onward.
- Thermostat Failure 🟠 Medium — Can fail, leading to engine cooling issues. It is often replaced preventatively along with the water pump.
- Cracked Fuel Pump Flange 🔴 High — Subject to a recall (NHTSA ID: 16V660000). The flange could develop hairline cracks, leading to a fuel leak and fire risk. (Ref: NHTSA Recall #16V660000)
- Panoramic Sunroof Rattles/Leaks 🟡 Low — A very common complaint involving rattling noises from the sunroof frame or leaks from clogged drain tubes.
Used vs. New Parts: Buying Guide for This Vehicle
When a used part is the smart pick: For this code, a used part is generally not recommended for the oxygen sensor itself as it is a wear item. However, a used OEM wiring harness pigtail from a reputable salvage yard is a smart choice if only the connector is damaged. A used OEM valve cover assembly could also be a cost-effective fix for a failed PCV valve, provided it's from a low-mileage donor.
Donor-vehicle mileage cap: roughly under 60000 miles for the part to have meaningful remaining life.
What to inspect on the donor part:
- For a wiring pigtail: Check for brittle plastic, corrosion on the pins, and any signs of melting or heat stress.
- For a valve cover (PCV): Inspect for cracks, especially around bolt holes. Ensure the plastic breather tube connections aren't broken, as they become extremely brittle.
OEM-only on this vehicle (don't cheap out):
- Oxygen Sensor: Strongly recommend using an OEM part or one from an OEM supplier (Bosch, NTK, Denso). Universal or cheap aftermarket sensors are known to cause compatibility issues on this platform.
Aftermarket brands forum-validated for this vehicle:
- Bosch (often the original supplier)
- NGK / NTK
- Denso
Brands owners have reported issues with on this vehicle:
- Avoid 'universal' oxygen sensors that require splicing wires and unbranded, low-cost sensors from online marketplaces.
Real Owner Stories
Aggregated from forums and TSBs cited above. Mileages and costs reflect what owners reported in those sources.
2010 Audi Q5 3.2L V6 FSI
Symptoms: Rough idle, hesitation, and reduced power; required a carbon cleaning service to address top-end engine performance.
What fixed it: Disassembly of the top of the engine for carbon cleaning and inspection of components.
Source hint: YouTube, Channel: 'CJs Car Collection', Video: 'CARBON CLEANING on my 2010 Audi Q5 3.2L V6 FSI!'
2009-2017 Audi Q5 3.2L V6 — ~100000 miles
Symptoms: Rattle on cold starts.
What fixed it: Inspection and replacement of upper timing chain tensioners.
Source hint: AudiWorld Forums, Thread: 'Q5 3.2L timing chain/guide issues - inevitable? anything to do preventably?'
Related OBD-II Codes
Frequently Asked Questions
Does TSB #01139020337671 apply to my 3.2L Q5 if I have a P0133 code?
Where is the Bank 1 Sensor 1 located on the Audi Q5 3.2L V6?
What specific tools do I need to replace the upstream O2 sensor on my Q5?
Can I use a used oxygen sensor to fix this code?
Is the P0133 code related to the carbon buildup issues common on the 3.2L FSI engine?
Are there any recalls for the 2009-2017 Audi Q5 that might involve the fuel system or exhaust?
Helpful Videos


![[PCV Remove] Audi A5/A6 3.2L Engine, Coolant Problem Loss/leak D.i.Y.](https://img.youtube.com/vi/8ojv5WVT1es/mqdefault.jpg)
We Have This Part in Stock


The information in this article is provided for general reference and educational purposes only. Vehicle specifications, procedures, and part compatibility can vary by production date, trim level, and region. Always consult your vehicle's factory service manual and verify part numbers before purchasing or performing repairs. Safety-critical components such as airbags, seat belts, and braking systems should be installed by a qualified professional.
- Audi Q5:
- 🧭 Diagnostic Flowchart
- 🎬 Helpful Videos
- 🛍️ Shop This Part
- What's Unique About the 2009-2017 Audi Q5
- Symptoms You May Notice
- Most Likely Causes
- Rare But Worth Checking
- Diagnosis Steps
- Parts You'll Likely Need
- Related Codes That Often Appear With This One
- Technical Service Bulletins (TSBs) & Recalls
- Platform-Specific Known Issues
- Mechanic-Grade Diagnostic Values
- Scan Tool Commands That Help
- Wiring & Ground Locations
- "I Checked Everything" — The Actual Cause
- OEM Part Supersession History
- Other Known Issues on This Vehicle
- Used vs. New Parts: Buying Guide for This Vehicle
- Real Owner Stories
- 2010 Audi Q5 3.2L V6 FSI
- 2009-2017 Audi Q5 3.2L V6 — ~100000 miles
- Related OBD-II Codes
- Frequently Asked Questions
- 🎟️ Get 5% Off