
P0133 on 2010-2015 Toyota Prius: O2 Sensor Slow Response Causes and Fixes
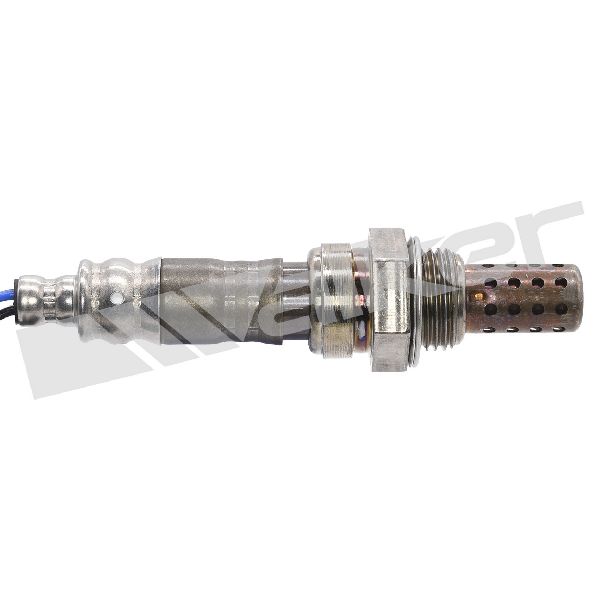
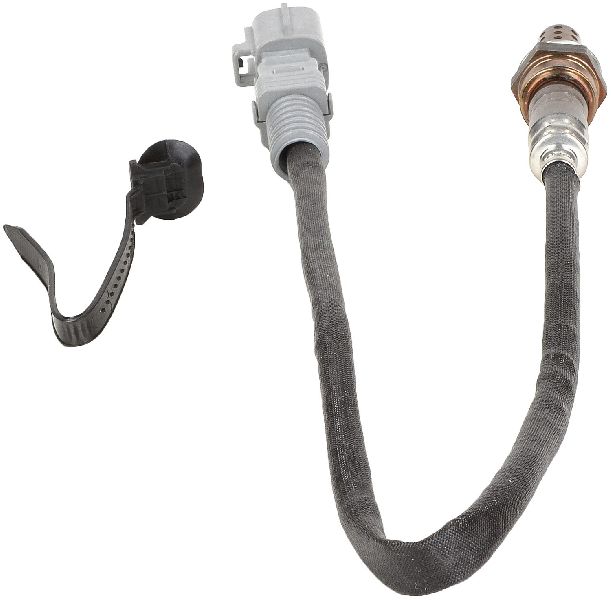
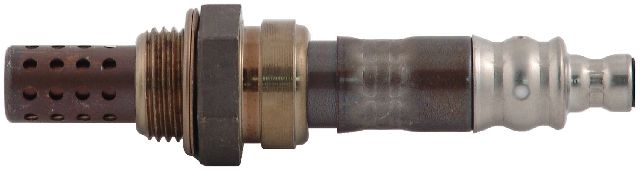
On a 2010-2015 Prius, code P0133 almost always points to a failing upstream oxygen sensor, also known as the Air/Fuel Ratio Sensor. This is a common wear item, especially on high-mileage vehicles. Replacing this sensor with a quality part (like the OEM Denso) is the most common fix. Expect to pay between $120 for an aftermarket part and $220 for an OEM Denso sensor.
- P0133 on your Prius points directly to a slow-reacting upstream oxygen sensor (Bank 1, Sensor 1).
- The most likely fix is to replace the sensor itself, which is a common wear item, especially over 120,000 miles.
- Before replacing the sensor, it's wise to quickly check for obvious exhaust leaks (soot, noise) between the engine and the sensor, as this is the second most common cause.
- Always use a high-quality replacement sensor, like one from Denso (the original manufacturer, aftermarket part #234-9112), to ensure a lasting repair.
- This is a DIY-friendly repair for those with basic tools, but the sensor can sometimes be difficult to remove if it's seized in the exhaust manifold.
What's Unique About the 2010-2015 Toyota Prius
The 2010-2015 Toyota Prius (third generation) uses the 2ZR-FXE engine, which operates on an Atkinson cycle and frequently starts and stops as part of its hybrid operation. This constant thermal cycling can contribute to wear and tear on exhaust components, including the upstream Air/Fuel Ratio sensor. While the code's meaning is standard, the operating conditions of a hybrid may shorten the sensor's effective lifespan compared to a conventional vehicle. Furthermore, this generation is known for EGR system clogging and oil consumption issues, which can contaminate the exhaust and foul the A/F sensor, potentially accelerating its failure.
Symptoms You May Notice
- Check Engine Light is on
- Decreased fuel economy
- Rough or uneven idle
- Failure to pass an emissions test
- Engine hesitation or misfires
- Replacing the downstream oxygen sensor (Bank 1, Sensor 2) instead of the upstream sensor (Bank 1, Sensor 1). P0133 specifically refers to the upstream sensor.
- Replacing the sensor without first checking for exhaust leaks. An exhaust leak can mimic the symptoms of a failed sensor and will cause the new sensor to report the same error.
Most Likely Causes
- Failing Upstream Oxygen (A/F Ratio) Sensor 🔴 High Probability → Shop Oxygen Sensor The sensor is a normal wear-and-tear item, and its lifespan can be affected by the frequent on-off cycling of the Prius's gasoline engine. Owners on forums like PriusChat often report this failure between 120,000 and 180,000 miles. Contamination from oil burning, a known issue on some 2ZR-FXE engines, can also shorten its life.
How to confirm: Use an OBD-II scan tool with live data capability. Observe the voltage or current for Bank 1, Sensor 1. A healthy sensor will show rapid fluctuations (switching between rich and lean states quickly). A slow, lazy, or flat-lined signal indicates the sensor has failed. A good sensor should switch from low to high voltage (or vice-versa) in under 100 milliseconds.
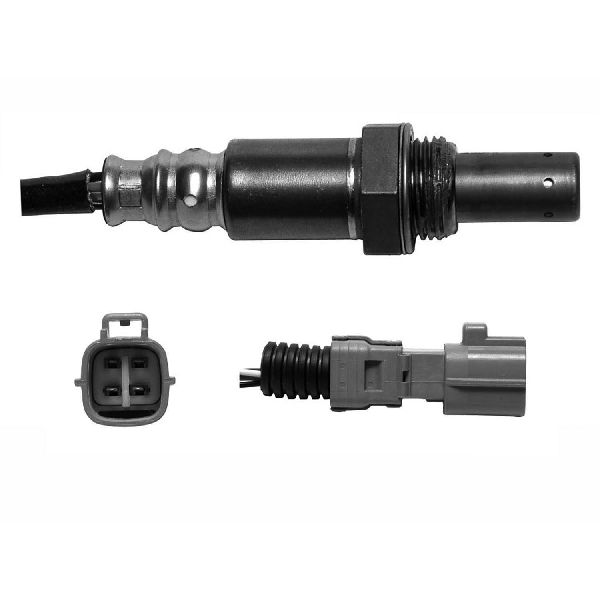
Typical fix: Replace the upstream Air/Fuel Ratio sensor. It is located on the exhaust manifold, accessible from the engine bay after removing the wiper cowl assembly. 🎬 Watch: This clever trick makes sensor replacement much easier. Use a 22mm oxygen sensor socket and penetrating oil for easier removal.
Est. part cost: $120-$220 - Exhaust Leak 🟡 Medium Probability Gaskets and exhaust manifold welds can fail over time due to thermal stress and corrosion, allowing outside air to enter the exhaust stream before the sensor. This unmetered air fools the sensor into thinking the engine is running lean, affecting its response time.
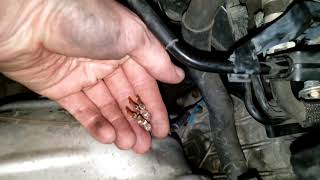
How to confirm: Visually inspect the exhaust manifold and the pipe leading to the sensor for black soot trails, which indicate a leak. A professional smoke test is the most definitive way to find small leaks. 🎬 See this simple method for finding hidden exhaust leaks. You may also hear a ticking or hissing sound from the engine bay, especially when the engine is cold.
Typical fix: Replace the leaking gasket (e.g., exhaust manifold gasket) or repair/replace the cracked exhaust component.
Est. part cost: $20-$300 - Damaged Wiring or Connector ⚪ Low Probability The wiring harness is close to hot exhaust components and can become brittle or damaged over time. Rodents can also chew on the wires.
How to confirm: Visually inspect the wiring harness and connector for the upstream O2 sensor. Look for any signs of melting, chafing, corrosion on the pins, or broken wires. Use a multimeter to check for continuity and proper voltage at the connector.
Typical fix: Repair the damaged section of the harness or clean/replace the connector.
Est. part cost: $10-$50
Rare But Worth Checking
- Contaminated Sensor: If the engine is burning oil (a known issue with the 2ZR-FXE) or leaking coolant internally, the deposits can foul the oxygen sensor, causing it to respond slowly. This is less a cause and more a symptom of a larger engine problem like clogged piston rings or a failing head gasket.
- Powertrain Control Module (ECM) Issue: → Shop Engine Control Module (ECM) In very rare cases, a software glitch or internal failure of the ECM can incorrectly interpret the sensor's signal. This should only be considered after all other possibilities have been exhaustively ruled out. A dealer may need to check for available software updates.
Diagnosis Steps
- Connect an OBD-II scanner to confirm the P0133 code and check for any other pending or active codes.
- View the live data stream for the 'Bank 1, Sensor 1' Air/Fuel Ratio sensor. A healthy sensor's signal should fluctuate rapidly. A slow or biased signal points to a faulty sensor.
- Perform a thorough visual inspection of the exhaust manifold and the area around the sensor for any signs of cracks or black soot, which would indicate an exhaust leak.
- Inspect the sensor's wiring harness and connector for any signs of damage, melting, or corrosion. Check for good pin fit and tension.
- If an exhaust leak is suspected but not visible, perform a smoke test on the exhaust system to pinpoint the leak's location.
- If no exhaust leaks or wiring issues are found, and the live data confirms a slow response, the upstream A/F ratio sensor is faulty and should be replaced.
- After replacement, clear the code and perform a drive cycle to ensure the fix was successful and the Check Engine Light does not return.
Parts You'll Likely Need
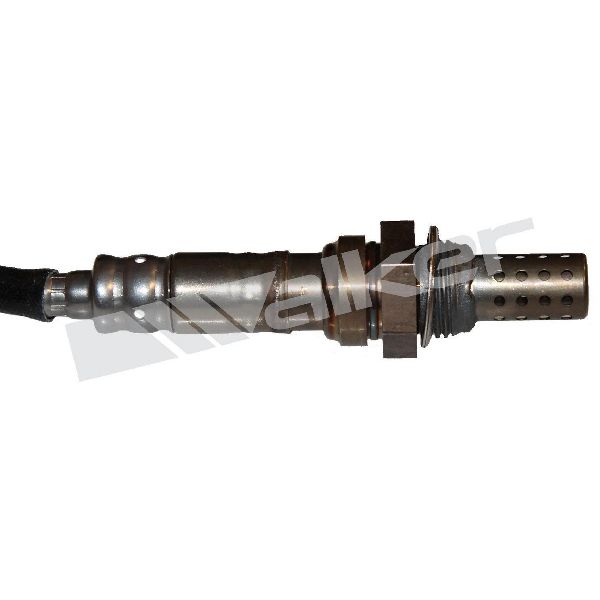
- Upstream Air/Fuel Ratio Sensor
(OEM #89467-47020)— This is the primary sensor responsible for the measurement that triggers code P0133. It is a common wear item and the most frequent cause of the code.
Trusted brands: Denso (OEM), Bosch, NTK
OEM price range: $180-$220
Aftermarket price range: $120-$160
Related Codes That Often Appear With This One
- P0171 — System Too Lean. An exhaust leak before the O2 sensor can cause this code to appear alongside P0133, as the unmetered air makes the sensor read a lean condition.
- P0401 — EGR Flow Insufficient. While not directly related, a clogged EGR system is a very common issue on this Prius generation. The resulting poor combustion and potential for engine knock can sometimes affect exhaust readings, though a direct link to P0133 is uncommon.
Technical Service Bulletins (TSBs) & Recalls
- Safety Recall 20TA10: While not directly for P0133, a recall for the 2013-2015 Prius involved a hybrid system software update. It's worth ensuring your vehicle's software is current, as control module logic can affect sensor readings.
- T-SB-0027-16: This TSB addresses code P0401 (EGR Flow Insufficient) due to carbon buildup. 🎬 Watch: How to properly clean your Prius EGR system. While for a different code, it highlights the common EGR clogging issue on these engines, which can lead to exhaust contamination and potentially affect O2 sensor life.
Platform-Specific Known Issues
- PriusChat forums contain numerous owner accounts of successfully resolving P0133 by replacing the upstream A/F sensor. Many threads emphasize using a Denso brand replacement to avoid premature failure of cheaper alternatives.
- The location of the sensor on the front of the engine, on the exhaust manifold, makes it relatively accessible for a DIY repair, but it can be seized due to heat and corrosion. Using a good quality O2 sensor socket and penetrating oil is crucial.
Mechanic-Grade Diagnostic Values
- A/F Sensor (Bank 1 Sensor 1) Voltage at Idle — expected: Fluctuates from less than 3.0V to greater than 3.35V.. Failure: Voltage is slow to change, flat, or remains consistently high (lean) or low (rich). A response time exceeding 0.8-1.1 seconds to swing from rich to lean can trigger the code.
- A/F Sensor (Bank 1 Sensor 1) Voltage under Load — expected: On hard acceleration, voltage should drop below 2.8V. On sudden, closed-throttle deceleration, voltage should rise above 4.0V.. Failure: Sensor voltage does not change appropriately with engine load, indicating a lazy response.
- A/F Sensor Heater Circuit Resistance — expected: Approximately 2.6 to 3.7 ohms when measured on a disconnected sensor at ambient temperature. Some Toyota service data for other models suggests a range of 11.7 to 14.3 Ω, indicating that specifications can vary.. Failure: An open circuit (infinite resistance) or a dead short (zero resistance) indicates a failed heater element within the sensor.
- Techstream 'A/F Control' Active Test at +12.5% Fuel Injection — expected: A/F Sensor voltage should drop to around 2.5V.. Failure: Sensor voltage does not respond or changes very slowly, indicating it is not reading the forced rich condition correctly.
- Techstream 'A/F Control' Active Test at -12.5% Fuel Injection — expected: A/F Sensor voltage should rise to around 3.9V.. Failure: Sensor voltage does not respond or changes very slowly, indicating it is not reading the forced lean condition correctly.
Scan Tool Commands That Help
- Toyota Techstream: Active Test: 'Control Injection Volume for A/F Sensor' (or 'A/F Control') — Use this to verify if the A/F sensor is capable of responding to forced changes in the air-fuel mixture. By commanding the ECM to add or subtract fuel (e.g., +12.5% or -12.5%), you can watch the live data for the sensor's voltage to see if it responds quickly and correctly, which definitively tests its function beyond passive observation.
Wiring & Ground Locations
- A/F Sensor Connector — In the engine compartment, under the hood, located below the hybrid inverter assembly.. This is the primary connection point for testing the sensor's wiring back to the ECM. Access requires removing the plastic cowl cover and the entire windshield wiper transmission assembly. Damage here from heat or improper servicing can cause the P0133 code.
- Wiper Cowl Assembly — The plastic and metal assembly at the base of the windshield.. This entire assembly must be removed to gain access to the upstream A/F sensor and its connector for testing or replacement.
OEM Part Supersession History
89467-47020→89467-47020 (no supersession found)— This part number appears to be consistent for the entire 2010-2015 generation.
Heads up: While the Toyota part number has not changed, it is critical to use the OEM Denso sensor. Forum users consistently report that generic or non-Denso aftermarket sensors may fit but often fail quickly or do not communicate correctly with the Prius's sensitive ECU, causing the code to return.
Model Year Variations Within This Range
- 2010-2015: The 2ZR-FXE engine is considered mechanically identical throughout the third generation (2010-2015). No significant variations in the engine, exhaust system, or sensor design that would affect the diagnosis of P0133 have been identified. A cosmetic facelift occurred for the 2012 model year, but it did not alter these components.
Diagnostic Flowchart
Other Known Issues on This Vehicle
Issues unrelated to this code that are worth knowing about as an owner of this generation:
- EGR System Clogging 🔴 High — Very common, typically surfaces between 100,000 and 150,000 miles. Leads to rough idle, misfires (P0300-P0304), and eventually head gasket failure if ignored. (Ref: T-SB-0027-16 (for P0401))
- Excessive Oil Consumption 🟠 Medium — Common in 2010-2014 models, especially early in the range. Caused by carbon buildup on low-tension piston rings. Can start around 100,000 miles and worsen over time, requiring frequent oil top-offs.
- Brake Actuator Assembly Failure 🔴 High — A significant and expensive failure. The electric pump in the actuator wears out, leading to a loss of brake assist, multiple warning lights, and a loud, frequent buzzing noise from under the hood. Can occur at various mileages, often over 100k. Toyota issued a warranty enhancement program, but many owners report failures outside the coverage window. (Ref: Safety Recall on some 2010 models; Warranty Enhancement Program (ZJB) for others.)
- Hybrid Inverter Failure 🔴 High — The Intelligent Power Module (IPM) within the inverter can fail from thermal stress, causing the car to stall or enter a low-power limp mode. Most common on 2010-2014 models. (Ref: Multiple recalls issued (e.g., 18V684000, 14V053000) to update software or replace the IPM.)
Used vs. New Parts: Buying Guide for This Vehicle
When a used part is the smart pick: For this specific code, a used part is almost never a smart choice for the sensor itself. However, if the cause is a cracked exhaust manifold, a used manifold from a low-mileage donor vehicle is a perfectly acceptable and cost-effective repair.
Donor-vehicle mileage cap: roughly under 100000 miles for the part to have meaningful remaining life.
What to inspect on the donor part:
- For an exhaust manifold, check for any visible hairline cracks, especially around the welds and flange.
- Ensure all mounting studs are intact and not broken off.
- Verify the donor vehicle was not in a front-end collision that could have stressed the manifold.
OEM-only on this vehicle (don't cheap out):
- Air/Fuel Ratio Sensor
Aftermarket brands forum-validated for this vehicle:
- Denso (Aftermarket packaging, part number 234-9112, is the OEM manufacturer and is highly recommended).
- NTK (Also a reputable OEM supplier for many brands).
Brands owners have reported issues with on this vehicle:
- Generic, unbranded, or 'white-box' sensors from online marketplaces. Forum discussions frequently cite these as failing prematurely or not meeting the response time requirements of the Prius ECU, leading to the code returning.
Real Owner Stories
Aggregated from forums and TSBs cited above. Mileages and costs reflect what owners reported in those sources.
2010-2015 Toyota Prius 1.8L I4 — ~150000 miles
Symptoms: Owners on forums report the Check Engine Light appearing with a slow-responding sensor signal.
What fixed it: Replacement of the upstream Air/Fuel Ratio sensor with a Denso brand unit.
Source hint: vehicle_specific_issues
2010-2014 Toyota Prius 1.8L I4 — ~100000 miles
Symptoms: Fouling of exhaust components and heavy carbon buildup.
What fixed it: Cleaning the EGR system and addressing oil consumption issues caused by carbon buildup on low-tension piston rings.
Source hint: PriusChat Forum - 'How bad is the oil burning issue 2010 to 2015?'
Related OBD-II Codes
Frequently Asked Questions
Does T-SB-0027-16 apply to my P0133 code on a 2010-2015 Prius?
Is there a specific brand of sensor I should use for my 2ZR-FXE engine?
Can the Prius oil burning issue cause a P0133 code?
Do I need to remove the wiper cowl to replace the sensor on my 2010-2015 Prius?
Could a software update fix my sensor response issues?
How can I tell if my P0133 is a sensor failure or an exhaust leak?
Helpful Videos

We Have This Part in Stock


The information in this article is provided for general reference and educational purposes only. Vehicle specifications, procedures, and part compatibility can vary by production date, trim level, and region. Always consult your vehicle's factory service manual and verify part numbers before purchasing or performing repairs. Safety-critical components such as airbags, seat belts, and braking systems should be installed by a qualified professional.
- Toyota Prius:
- 🧭 Diagnostic Flowchart
- 🎬 Helpful Videos
- 🛍️ Shop This Part
- What's Unique About the 2010-2015 Toyota Prius
- Symptoms You May Notice
- Most Likely Causes
- Rare But Worth Checking
- Diagnosis Steps
- Parts You'll Likely Need
- Related Codes That Often Appear With This One
- Technical Service Bulletins (TSBs) & Recalls
- Platform-Specific Known Issues
- Mechanic-Grade Diagnostic Values
- Scan Tool Commands That Help
- Wiring & Ground Locations
- OEM Part Supersession History
- Model Year Variations Within This Range
- Other Known Issues on This Vehicle
- Used vs. New Parts: Buying Guide for This Vehicle
- Real Owner Stories
- 2010-2015 Toyota Prius 1.8L I4 — ~150000 miles
- 2010-2014 Toyota Prius 1.8L I4 — ~100000 miles
- Related OBD-II Codes
- Frequently Asked Questions
- 🎟️ Get 5% Off