
P0133 on 2013-2018 Toyota RAV4 2.5L: O2 Sensor Slow Response Causes and Fixes
On a 2013-2018 RAV4, code P0133 almost always means the upstream Air/Fuel Ratio sensor (Bank 1, Sensor 1) has become old and slow. Replacing this sensor is the most common fix. Expect to pay ~$120-$175 for an OEM Denso part, with a DIY difficulty of 2/5.
- P0133 on your RAV4 almost always points to a failing upstream Air/Fuel Ratio sensor (Bank 1, Sensor 1).
- Do not confuse this with the downstream O2 sensor (Sensor 2). P0133 is for Sensor 1 only.
- Before replacing the sensor, perform a quick visual inspection for obvious exhaust leaks (soot streaks) around the manifold or damage to the sensor's wiring.
- For a reliable repair, use a high-quality replacement sensor from an OEM brand like Denso (Part # 234-9114 is a common fit). Aftermarket sensors are known to sometimes cause issues.
- This is a DIY-friendly repair for those with basic tools, including a 22mm or 7/8" O2 sensor socket.
What's Unique About the 2013-2018 Toyota RAV4
The 2013-2018 RAV4 (XA40 generation) with the 2AR-FE engine is known for its reliability, and this code is a straightforward wear-and-tear issue. There are no widespread design flaws or complex TSBs related to P0133 on this platform. The key is knowing that Toyota calls this an Air/Fuel Ratio sensor, not a traditional oxygen sensor, and that Denso is the original equipment manufacturer, making it the most reliable replacement brand. Some owners report aftermarket sensors causing persistent issues, reinforcing the recommendation for OEM/Denso parts.
Symptoms You May Notice
- Check Engine Light is on
- Decreased fuel economy
- Rough or uneven idle
- Possible hesitation during acceleration
- Failure to pass an emissions test
- Black smoke from the exhaust (in rare cases of a very rich mixture)
- Replacing the downstream (Bank 1, Sensor 2) oxygen sensor. P0133 specifically refers to Sensor 1, which is upstream of the catalytic converter.
- Replacing the catalytic converter. This code indicates a problem with the sensor's response time, not the efficiency of the converter itself (which would typically trigger a P0420 code).
- Replacing the A/F sensor when a significant vacuum leak is the actual problem, especially if accompanied by a P0171 code.
- Ignoring a small exhaust leak. A tiny leak upstream of the sensor is a very common cause for this code and is often overlooked.
Most Likely Causes
- Failing Upstream Air/Fuel Ratio Sensor 🔴 High Probability → Shop Oxygen Sensor The sensor is a wearable item that degrades over time and with mileage (typically over 80,000 miles). Contamination from combustion byproducts, oil, or soot eventually slows its response time.
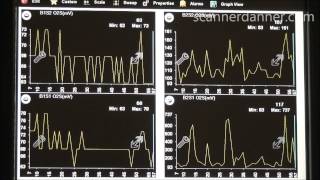
How to confirm: Use an OBD-II scan tool with live data graphing. Observe the 'Bank 1 Sensor 1' voltage or current. A healthy, warm A/F sensor's graph should show rapid, sharp fluctuations. A slow sensor will show a lazy, rounded, or delayed wave pattern. Compare it to Bank 1 Sensor 2 (downstream), which should be relatively stable if the catalytic converter is working.
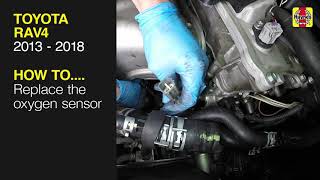
Typical fix: Replace the upstream Air/Fuel Ratio sensor (Bank 1, Sensor 1) located in the exhaust manifold, before the catalytic converter. Use a 22mm (or 7/8") offset oxygen sensor socket for removal and installation. Apply a small amount of anti-seize compound to the new sensor's threads, avoiding the sensor tip. 🎬 Watch: Step-by-step guide to replacing the upstream sensor.
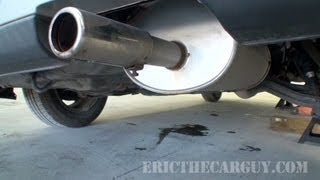
Est. part cost: $120-$175 - Exhaust Leak 🟡 Medium Probability Gaskets and welds in the exhaust manifold can develop small leaks over time due to heat cycles and corrosion. A leak before the A/F sensor allows outside oxygen to enter the exhaust stream, which the ECM interprets as a lean condition, mathematically slowing the sensor's perceived switching time.
How to confirm: Perform a visual inspection of the exhaust manifold and downpipe when the engine is cold. Look for fine black soot trails or streaks, which are a definitive sign of a leak. You can also perform a smoke test by introducing smoke into the exhaust system and watching for where it escapes. 🎬 See this pro tip for finding hidden exhaust leaks. A ticking noise from the engine bay, especially when cold, can also indicate a leak.
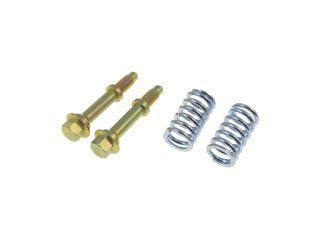
Typical fix: Replace the leaking exhaust manifold gasket or repair the cracked component. Tighten bolts to the correct torque specification, typically working from the center outwards.
Est. part cost: $15-$40 - Damaged Wiring or Connector ⚪ Low Probability
How to confirm: Visually inspect the A/F sensor's wiring harness from the sensor plug back to the main loom. Look for any signs of melting from contact with the exhaust, chafing against other components, corrosion on the connector pins, or rodent damage.
Typical fix: Repair the damaged section of the harness or clean the connector terminals with electrical contact cleaner. Ensure the harness is properly secured away from heat sources.
Est. part cost: $5-$50 - Failing Sensor Heater Circuit ⚪ Low Probability The A/F sensor has an internal heater to bring it to operating temperature (around 600°F+) quickly. If this heater fails or has high resistance, the sensor will warm up too slowly, causing it to respond sluggishly and trigger a P0133 code, especially on shorter trips.
How to confirm: This may trigger a separate heater circuit code (like P0135). With a multimeter, you can test the resistance between the two heater circuit pins on the sensor itself. Compare the reading to the manufacturer's specification (typically a low number of ohms).
Typical fix: The heater is internal to the sensor, so the entire A/F sensor assembly must be replaced.
Est. part cost: $120-$175
Rare But Worth Checking
- Engine Vacuum Leak: This is more likely if code P0171 (System Too Lean) is also present. A leak in the intake system can throw off the air-fuel mixture and cause the A/F sensor to behave erratically.
- Low Fuel Pressure or Dirty Fuel Injectors: Issues with fuel delivery can affect the air-fuel ratio, but are unlikely to be the root cause of a 'slow response' code without other symptoms or codes being present.
Diagnosis Steps
- Connect an OBD-II scanner and confirm that P0133 is the primary code. Check for any other codes, such as P0171 or P0135, as they provide critical diagnostic clues.
- Clear the codes and perform a test drive. Note if the code returns, confirming a hard fault. Some owners report the code appearing after a battery disconnect as the ECM re-runs readiness tests.
- With the engine cold, visually inspect the exhaust manifold and the area around the upstream A/F sensor for any signs of an exhaust leak (fine black soot trails).
- Inspect the A/F sensor's wiring harness and connector for any visible damage, melting, or corrosion.
- Using the live data graphing function on your scanner, warm the engine to operating temperature and hold the RPMs steady around 2000. Monitor the waveform of 'Bank 1 Sensor 1'. A healthy sensor will show a rapid, clean sine wave. If the wave is slow, jagged, or lazy, it points to a failing sensor or an exhaust leak.
- If P0171 is also present, or if the sensor readings are erratic but not necessarily slow, perform a smoke test to check for vacuum leaks from the intake manifold, gaskets, or vacuum hoses.
- If no exhaust leaks, vacuum leaks, or wiring issues are found, and especially if the sensor's live data graph is slow, the A/F sensor is the most likely cause and should be replaced.
Parts You'll Likely Need
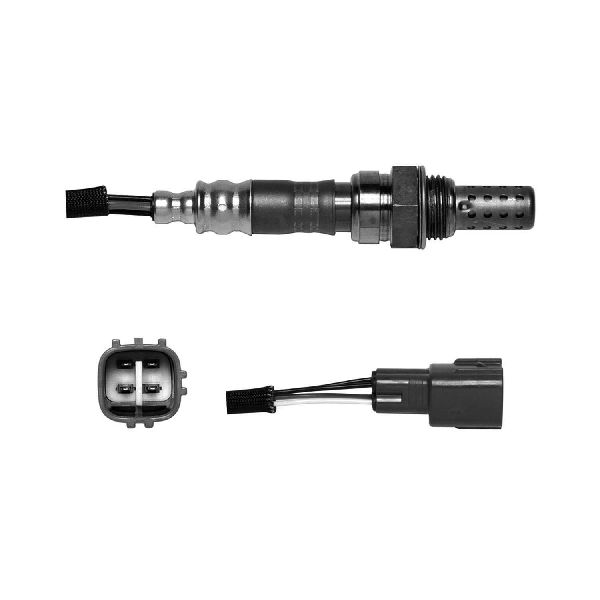
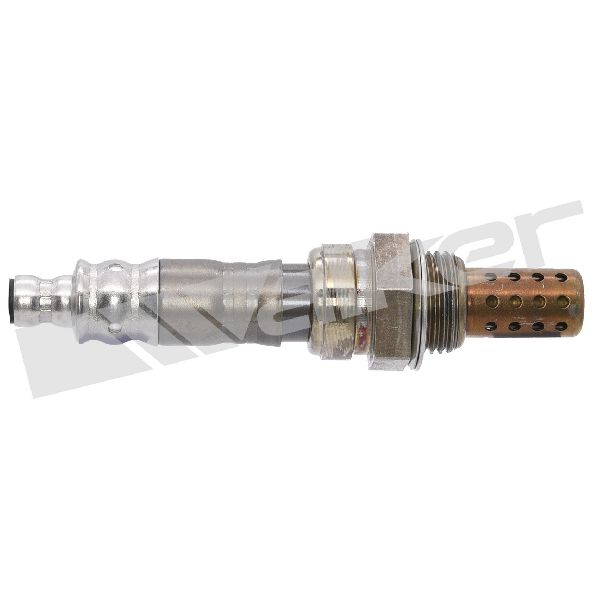
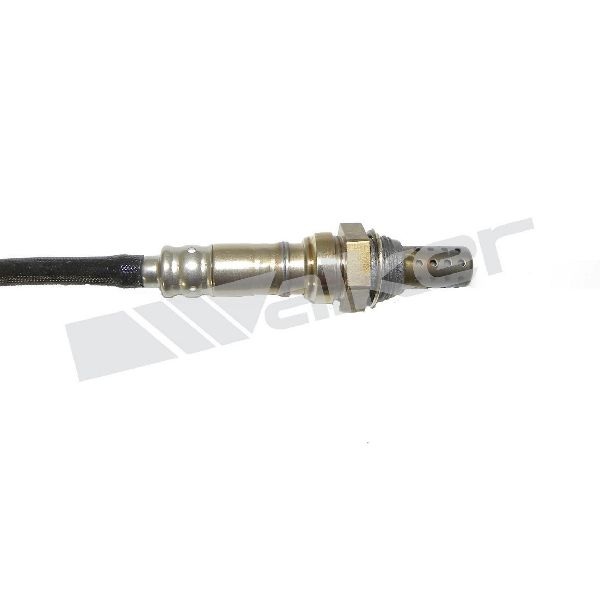
- Upstream Air/Fuel Ratio Sensor
(OEM #89467-42120)— This is the primary component responsible for measuring the air-fuel ratio. It is a wear item that degrades over time, and its failure is the most common cause of code P0133.
Trusted brands: Denso (OEM), Part #234-9114
OEM price range: $150-$200
Aftermarket price range: $120-$175 - Exhaust Manifold Gasket
(OEM #17173-0V020 (varies by specific manifold))— If an exhaust leak is found to be the cause of the code, this gasket will need to be replaced.
Trusted brands: Toyota (OEM), Fel-Pro
OEM price range: $20-$30
Aftermarket price range: $10-$20
Related Codes That Often Appear With This One
- P0171 — A vacuum leak or an exhaust leak can cause both a lean condition (P0171) and erratic readings that the ECM interprets as a slow sensor response (P0133).
- P0135 — This code for the 'O2 Sensor Heater Circuit Malfunction (Bank 1, Sensor 1)' directly points to a failure of the sensor's internal heater. A sensor that cannot heat up properly will be slow to respond, often causing P0133 to appear alongside it.
Technical Service Bulletins (TSBs) & Recalls
- T-SB-0023-15 Rev2: Addresses a torque converter shudder on 2013-2015 models, a common unrelated issue.
- T-SB-0037-15 Rev: Addresses a grinding noise from rear brakes on 2013-2015 models.
- NHTSA Recall 23V-722: Concerns a fire risk from improperly sized replacement 12V batteries for all 2013-2018 models.
Mechanic-Grade Diagnostic Values
- A/F Sensor Heater Resistance — expected: 1.8 to 3.4 Ω at 20°C (68°F). Failure: Resistance is outside the specified range, indicating a faulty internal heater.
- A/F Sensor Live Data (Voltage) — expected: On a wideband A/F sensor like this, voltage should hover around 3.3V at idle and fluctuate slightly. It should not be confused with a traditional O2 sensor's 0.1-0.9V switching pattern.. Failure: A voltage that is fixed, biased high or low, or shows a very lazy, delayed reaction to changes in engine load or RPM.
- Mode $06, Test ID $01, Component ID $01 — expected: The measured value for the B1S1 response rate test should be below the maximum threshold set by the manufacturer.. Failure: A value that exceeds the maximum threshold indicates the sensor is responding too slowly, which is the direct trigger for code P0133.
Scan Tool Commands That Help
- Toyota Techstream: Active Test: 'A/F Control' or 'Control the Injection Volume for A/F Sensor' — This is the most definitive bidirectional test. It allows the technician to command the fuel mixture rich (e.g., +25%) and lean (e.g., -12.5%) and watch the A/F sensor's real-time response on a graph. A healthy sensor will react almost instantly; a slow or non-responsive graph confirms a faulty sensor and the P0133 condition.
Wiring & Ground Locations
- A/F Sensor Connector (Bank 1 Sensor 1) — On the back of the engine, near the firewall, connected to the sensor that is screwed into the exhaust manifold.. This is the primary connection point for testing the sensor's heater resistance and checking for voltage signals to the ECM. The connector for the 2AR-FE A/F sensor is typically labeled C6.
- ECM Connector Pins (A/F Sensor) — At the Engine Control Module (ECM). The specific pins for the B1S1 A/F sensor on a 2AR-FE are typically A1A+ (Pin 41), A1A- (Pin 102), and HA1A (Pin 125) for the heater.. If the sensor and its local connector are good, testing for continuity and voltage at these ECM pins can identify a wiring break in the main harness.
- Engine Ground Points — The 2AR-FE engine typically has primary ground points from the valve cover to a bracket on the strut tower.. A poor or corroded engine ground can cause a variety of electrical issues and false sensor readings, including erratic behavior from the A/F sensor that could be misinterpreted as a slow response.
Real Owner Repair Stories
- RAV4World Forum (2014 Toyota RAV4, 117,000 miles) — Check Engine Light with code P0133.
❌ Tried (didn't work) The user first sought advice before attempting repairs.
✅ What actually fixed it Replacing the upstream Air/Fuel Ratio sensor (Bank 1, Sensor 1) with a Denso OEM part resolved the code.
OEM Part Supersession History
89467-42120→This part number appears to be stable for the specified vehicle range.— N/ADenso 234-9114→This part number is the correct and current OEM-equivalent replacement.— N/A
Heads up: This sensor fits a wide range of Toyota/Lexus vehicles with the 2AR-FE and other engines. Ensure the listed application includes the 2013-2018 RAV4 before purchasing.
Model Year Variations Within This Range
- 2016-2018: A significant facelift in early 2016 introduced Toyota Safety Sense and other cabin/feature improvements, but did not fundamentally change the 2AR-FE engine or the emissions components related to code P0133. The diagnostic and repair procedure remains the same across the 2013-2018 range.
Diagnostic Flowchart
Other Known Issues on This Vehicle
Issues unrelated to this code that are worth knowing about as an owner of this generation:
- Torque Converter Shudder 🟠 Medium — Common on 2013-2015 models. Feels like driving over rumble strips at low speeds (25-50 mph) under light load. (Ref: Toyota TSB T-SB-0023-15 Rev2; Warranty Enhancement Program ZH1 extended coverage.)
- VVT-i Cam Gear Rattle on Cold Start 🟡 Low — A brief, 1-3 second metallic rattle upon cold startup. Caused by a sticking lock pin in the VVT-i actuator. Generally considered a nuisance rather than a critical failure, but can be expensive to fix. (Ref: No specific TSB for the RAV4, but a widely known issue on the 2AR-FE engine family.)
- Fire Risk from Improper Replacement Battery 🔴 High — Affects all 2013-2018 models. If a replacement 12V battery with smaller top dimensions is used, it can move, short against the hold-down clamp, and cause a fire. (Ref: NHTSA Recall 23V-722 / Toyota Recall 23TA13. Dealers will replace the battery hold-down clamp, tray, and terminal cover.)
- Fuel Pump Failure 🔴 High — Some later models (2019-2020) were part of a massive recall, but the issue of potential stalling due to fuel pump failure is a known concern for Toyota during this era. (Ref: Large recall primarily affected 2019+ models, but owners of this generation should be aware.)
- Grinding Noise from Rear Brakes 🟡 Low — A grinding noise from the rear at low speeds when applying brakes, caused by rust buildup. (Ref: Toyota TSB T-SB-0037-15 Rev addresses this for 2013-2015 models.)
Used vs. New Parts: Buying Guide for This Vehicle
When a used part is the smart pick: For this repair, using a used part is not recommended. The A/F sensor is a wear-and-tear item with a finite lifespan. A used sensor from a junkyard has an unknown history and could fail soon after installation, leading to repeated labor.
What to inspect on the donor part:
- Not applicable as a used sensor is not a viable repair option.
OEM-only on this vehicle (don't cheap out):
- Air/Fuel Ratio Sensor
Aftermarket brands forum-validated for this vehicle:
- Denso (This is the Original Equipment Manufacturer and is the most highly recommended brand)
Brands owners have reported issues with on this vehicle:
- Generic, unbranded, or 'white-box' sensors are frequently reported on forums to cause persistent issues, fail quickly, or not meet the precise response specifications required by the Toyota ECM.
Real Owner Stories
Aggregated from forums and TSBs cited above. Mileages and costs reflect what owners reported in those sources.
2014 Toyota RAV4 2.5L I4 — 117000 miles
Symptoms: Check Engine Light with code P0133.
What fixed it: Replaced the upstream A/F sensor (Bank 1, Sensor 1) with a Denso part.
Source hint: RAV4World - P0133 on 2014 RAV4
2013-2018 Toyota RAV4 2AR-FE — ~85000 miles
Symptoms: The sensor responds sluggishly, especially on shorter trips, causing a P0133 code.
What fixed it: Replacement of the entire A/F sensor assembly because the internal heater circuit had failed or developed high resistance.
Source hint: ARTICLE CONTEXT - Failing Sensor Heater Circuit
Related OBD-II Codes
Frequently Asked Questions
Does TSB T-SB-0023-15 Rev2 for the 2013-2015 RAV4 relate to my P0133 code?
I have a 2014 RAV4 with 117,000 miles and a P0133 code. What is the recommended replacement part?
Could the 2013-2018 RAV4 battery recall (23V-722) be causing my Check Engine Light?
Is the metallic rattle I hear on cold starts related to the P0133 sensor code?
Can an exhaust leak cause a P0133 on my RAV4 even if the sensor is good?
What tool do I need to replace the Bank 1 Sensor 1 on my 2.5L RAV4?
Helpful Videos
We Have This Part in Stock


The information in this article is provided for general reference and educational purposes only. Vehicle specifications, procedures, and part compatibility can vary by production date, trim level, and region. Always consult your vehicle's factory service manual and verify part numbers before purchasing or performing repairs. Safety-critical components such as airbags, seat belts, and braking systems should be installed by a qualified professional.
- Toyota RAV4:
- 🧭 Diagnostic Flowchart
- 🎬 Helpful Videos
- 🛍️ Shop This Part
- What's Unique About the 2013-2018 Toyota RAV4
- Symptoms You May Notice
- Most Likely Causes
- Rare But Worth Checking
- Diagnosis Steps
- Parts You'll Likely Need
- Related Codes That Often Appear With This One
- Technical Service Bulletins (TSBs) & Recalls
- Mechanic-Grade Diagnostic Values
- Scan Tool Commands That Help
- Wiring & Ground Locations
- Real Owner Repair Stories
- OEM Part Supersession History
- Model Year Variations Within This Range
- Other Known Issues on This Vehicle
- Used vs. New Parts: Buying Guide for This Vehicle
- Real Owner Stories
- 2014 Toyota RAV4 2.5L I4 — 117000 miles
- 2013-2018 Toyota RAV4 2AR-FE — ~85000 miles
- Related OBD-II Codes
- Frequently Asked Questions
- 🎟️ Get 5% Off