
P0134 on 2005-2009 Chevrolet Equinox 3.4L: Causes and Fixes for O2 Sensor Inactivity
This code almost always means the upstream oxygen sensor (Bank 1, Sensor 1) has failed. It's located on the rear exhaust manifold, closer to the firewall. Replacing the sensor is the most common fix, costing between $40-$90 for an aftermarket part and is a manageable DIY job.
- P0134 means the upstream O2 sensor on the rear cylinder bank isn't sending a signal.
- The most likely fix is to replace the Bank 1, Sensor 1 oxygen sensor.
- Before buying parts, check the O2 sensor fuse and visually inspect the sensor's wiring for any melting or damage, as it's located in a tight, hot area.
- The sensor is best accessed from underneath the vehicle, not from the top.
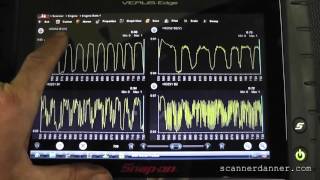
- Use a scan tool to watch live data; a healthy sensor's voltage bounces up and down, while a bad one will be flat.
What's Unique About the 2005-2009 Chevrolet Equinox
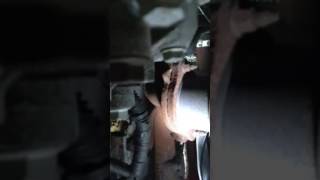
On the 3.4L V6 engine in the first-generation Equinox, there are only two oxygen sensors in total. The one that causes P0134, Bank 1 Sensor 1, is located in the rear exhaust manifold, making it difficult to see and access from the top 🎬 Watch: Locate the Bank 1 Sensor 1 oxygen sensor of the engine bay. Mechanics and DIYers almost always access this sensor from underneath the vehicle. Due to its proximity to the hot exhaust manifold, the sensor's wiring harness is susceptible to melting if not properly secured, which can be a cause of the code besides sensor failure itself.
Symptoms You May Notice
- Check Engine Light is on
- Decreased fuel economy
- Rough or hesitant idle
- Failing an emissions test
- Replacing the catalytic converter. A P0134 code points to the sensor *before* the converter, not the converter itself.
- Replacing the downstream (Bank 1, Sensor 2) oxygen sensor. This code is specific to the upstream sensor (Sensor 1).
Most Likely Causes
- Failed Bank 1, Sensor 1 Oxygen Sensor 🔴 High Probability → Shop Oxygen Sensor Oxygen sensors are wear items and typically fail due to age, contamination, or internal heater circuit failure after many miles of service.
How to confirm: Using a scan tool, observe the live data for Bank 1 Sensor 1 voltage. If the voltage is stuck at a fixed number (e.g., ~0.45V) and does not fluctuate rapidly when the engine is warm, the sensor has failed.
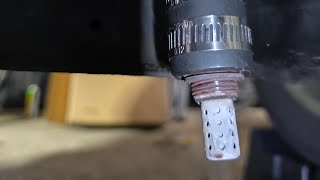
Typical fix: Replace the Bank 1, Sensor 1 oxygen sensor. This sensor is located on the rear exhaust manifold. 🎬 See this walkthrough for removing the upstream sensor
Est. part cost: $40-$90 - Damaged Wiring or Connector 🟡 Medium Probability The sensor wiring is routed near the hot exhaust manifold. If a retaining clip breaks or the harness is misrouted, it can easily melt, causing a short or open circuit.
How to confirm: Visually inspect the entire wiring harness from the O2 sensor to its main connection point. Look for melted insulation, frayed wires, or corrosion inside the connector pins.
Typical fix: Repair the damaged section of the wire or replace the connector pigtail. Secure the harness away from hot exhaust components.
Est. part cost: $10-$30 - Blown O2 Sensor Heater Fuse ⚪ Low Probability → Shop Oxygen Sensor A short in the sensor's heater element or its wiring can cause the corresponding fuse to blow.
How to confirm: Locate the fuse box in the engine bay and check the fuse designated for the O2 sensor or emissions components. A video for a later model Equinox shows specific O2 sensor fuses, so check your owner's manual for the correct one.
Typical fix: Replace the blown fuse. If the new fuse blows immediately, it indicates a persistent short circuit in the heater wiring or the sensor itself that must be diagnosed.
Est. part cost: $1-$5 - Exhaust Leak ⚪ Low Probability Exhaust manifold gaskets can fail over time, or the manifold itself can crack, though less common.
How to confirm: Listen for a ticking or puffing noise from the rear of the engine, especially when cold. You can also use a smoke machine to introduce smoke into the exhaust and look for leaks before the O2 sensor.
Typical fix: Replace the exhaust manifold gasket or repair/replace the cracked manifold.
Est. part cost: $20-$200
Rare But Worth Checking
- Faulty Powertrain Control Module (PCM): → Shop Engine Control Module (ECM) This is extremely rare. The PCM should only be considered after all other possibilities, including the sensor, wiring, and fuses, have been definitively ruled out.
Technical Service Bulletins (TSBs) & Recalls
While specific to the same manufacturer, TSB Bulletin #PIT5336 notes that a technician may find the Emission 1 Fuse is open when diagnosing codes such as P0134 and P0030. This bulletin highlights the importance of checking for blown fuses in the emissions circuit when these oxygen sensor codes are present.
Diagnosis Steps
- Read the code with an OBD-II scanner to confirm P0134 is present.
- Check the fuse for the O2 sensor heater circuit in the engine bay fuse box. Replace if blown.
- Visually inspect the Bank 1, Sensor 1 oxygen sensor and its wiring harness. The sensor is on the rear exhaust manifold. Look for any signs of melting, chafing, or corrosion on the wires and connector.
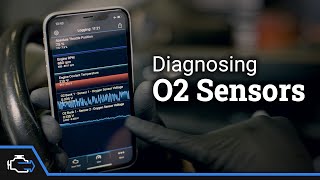
- With the engine warm, use a scan tool with live data capability to monitor the 'B1S1 O2 Sensor Voltage'. A healthy sensor will show voltage fluctuating rapidly between roughly 0.1 and 0.9 volts. A flat, unchanging voltage indicates a problem. 🎬 Watch: A mechanic's guide to diagnosing O2 sensors
- If the wiring and fuse are good but the sensor voltage is flat, the oxygen sensor has failed and needs to be replaced.
- If you replace the sensor and the code returns, re-check the wiring for an intermittent open or short, and check for exhaust leaks between the cylinder head and the sensor.
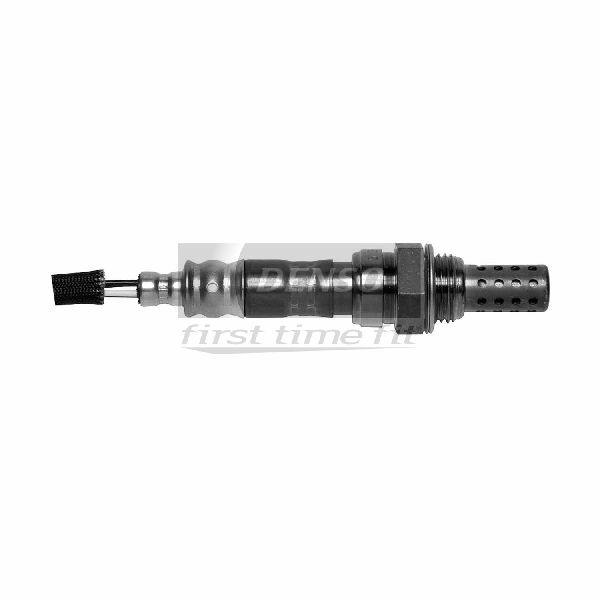
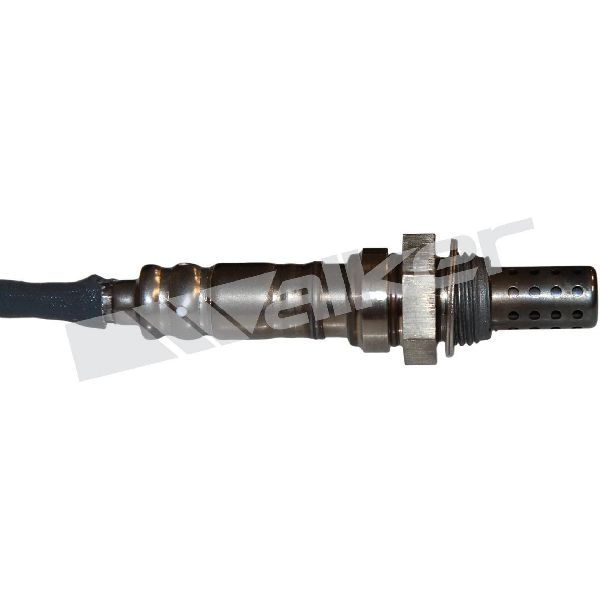
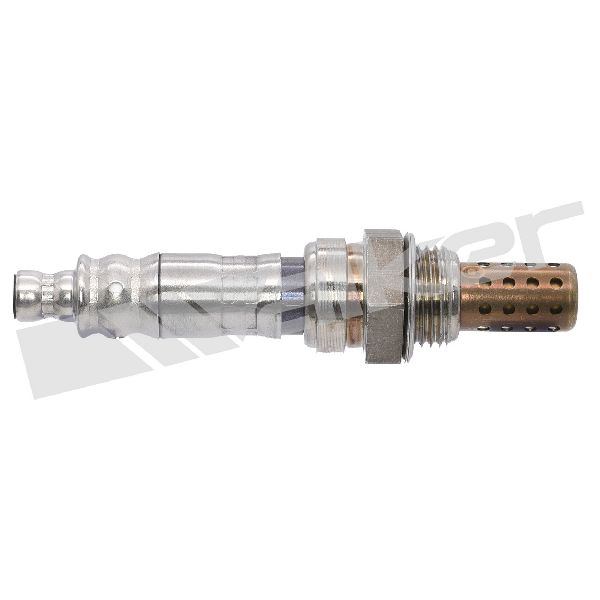
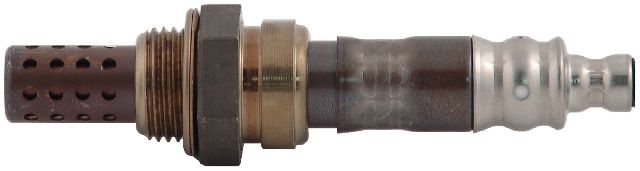
Parts You'll Likely Need
- Upstream Oxygen Sensor (Bank 1, Sensor 1) — This is the sensor that the code directly identifies as inactive. It is a common wear-and-tear component that fails over time.
Trusted brands: ACDelco, Denso, Bosch, NGK/NTK
OEM price range: $80-$120
Aftermarket price range: $40-$90
Mechanic-Grade Diagnostic Values
- O2 Sensor Heater Circuit Resistance — expected: Approximately 4 to 6 Ohms at room temperature.. Failure: An open circuit (infinite resistance) or a dead short (zero resistance) indicates a failed heater element inside the sensor.
- HO2S B1S1 Signal Wire Voltage (at PCM, sensor unplugged) — expected: ~450 mV (0.45V). Failure: A reading of 0V or battery voltage indicates a short to ground or a short to power in the harness. This is the PCM's bias voltage, and it should be present.
- HO2S B1S1 Low Reference Wire (at PCM) — expected: Near 0V. Failure: Voltage significantly above 0V indicates a wiring issue or a problem with the PCM's ground reference.
Scan Tool Commands That Help
- Tech2 / GDS2 (or equivalent professional scanner): O2 Sensor Heater Test — This command actively turns the O2 sensor heater on and off to verify the integrity of the heater, its wiring, and the PCM driver circuit. It's useful for isolating a heater circuit fault (like code P0030) that often accompanies P0134.
Wiring & Ground Locations
- PCM Connector C1, Pin 69 — This is the main engine computer, typically located in the engine bay. C1 is one of the large multi-pin connectors.. This pin is the HO2S High Signal for Bank 1 Sensor 1. The Purple/White wire at this pin carries the sensor's voltage signal to the PCM. It can be back-probed to test for the signal directly at the computer.
- PCM Connector C1, Pin 29 — This is on the same PCM connector as the signal wire.. This pin is the HO2S Low Signal (Low Reference) for Bank 1 Sensor 1, carrying a Tan wire. A bad connection here can cause the sensor signal to be skewed or absent.
- Quick Wiring Integrity Test — At the B1S1 O2 sensor harness connector (vehicle side).. With the sensor unplugged and ignition on, a scan tool should show the bias voltage (~450mV). Touching a test light connected to ground to the signal wire pin in the harness connector should pull this voltage down to 0V on the scan tool. This quickly confirms the signal wire from the PCM to the connector is not open.
Real Owner Repair Stories
- 2CarPros Forum (Chevrolet Silverado (similar GM V-engine architecture)) — P0134 and P0154 (no activity on both upstream sensors) appeared immediately after replacing all four O2 sensors.
❌ Tried (didn't work) Replacing the O2 sensors
✅ What actually fixed it The front and rear O2 sensor connectors were accidentally swapped on both banks. Because GM used the same wire colors for front and rear sensors on some models, it's an easy mistake. Swapping the connectors back to their correct positions resolved the codes.
OEM Part Supersession History
ACDelco AFS109 (GM 19178958)→Current part number is still widely referenced as AFS109.— This part number has been stable for many years and fits a wide range of GM vehicles from the late 90s through the 2000s.
Heads up: While this is the correct upstream sensor, be aware that the downstream sensor (post-catalytic converter) is a different part number and they are not interchangeable, even if the connectors look similar.
Diagnostic Flowchart
Used vs. New Parts: Buying Guide for This Vehicle
When a used part is the smart pick: For this repair, a used part is almost never a good choice for the oxygen sensor itself. However, sourcing a used wiring harness pigtail from a junkyard is a very smart and cost-effective option if only the connector or a small section of wire is melted or damaged.
Donor-vehicle mileage cap: roughly under 100000 miles for the part to have meaningful remaining life.
What to inspect on the donor part:
- For a wiring pigtail, inspect for any signs of melting, brittleness, or corrosion on the connector pins.
- Ensure the locking tab on the connector is intact and clicks securely.
- Cut the pigtail as far back from the connector as possible to leave plenty of wire to work with for splicing.
OEM-only on this vehicle (don't cheap out):
- While not strictly required, many professional technicians prefer using OEM (ACDelco) or original-equipment supplier (Denso, NTK) oxygen sensors to avoid compatibility issues that can sometimes arise with budget aftermarket brands.
Aftermarket brands forum-validated for this vehicle:
- Denso
- NTK (a brand of NGK)
- Bosch
Brands owners have reported issues with on this vehicle:
- Unnamed, no-brand "universal" sensors that require splicing wires are often a source of future problems and should be avoided.
Real Owner Stories
Aggregated from forums and TSBs cited above. Mileages and costs reflect what owners reported in those sources.
2008 Chevy Equinox
Symptoms: Check engine light on with codes P0030 and P0134. Also experiencing slow acceleration ('takes long to get going after sitting at a stop light') and the vehicle 'tops out at 60mph with 4000rpms'. Cruise control and reverse gear still work.
What fixed it: The user attempted to fix the issue by changing the O2 sensor and replacing the catalytic converter, but the codes remained; the diagnostic dead end suggested a deeper electrical or transmission-related issue (P0700, P0716, P0717) that was not yet resolved.
Source hint: Chevrolet Forum - source_quote regarding P0030 and P0134
2005-2009 Chevrolet Equinox 3.4L V6
Symptoms: Recurring P0134 code even after the oxygen sensor was replaced with a new unit.
What fixed it: The owner was advised to check the wiring for damage as the next logical step, as melted insulation or frayed wires near the exhaust manifold often cause the code to return.
Source hint: GM Forum
Related OBD-II Codes
Frequently Asked Questions
Where is the Bank 1 Sensor 1 oxygen sensor located on my 2005-2009 Equinox 3.4L V6?
Is there a specific part number recommended for the O2 sensor on a 2005 Equinox?
Why does my Equinox keep blowing the O2 sensor fuse?
Can I use a universal 'one-size-fits-all' oxygen sensor to fix P0134?
What should the voltage readings look like for a healthy B1S1 sensor on a scan tool?
Could an exhaust leak cause the P0134 code on my 3.4L V6?
Helpful Videos
We Have This Part in Stock


The information in this article is provided for general reference and educational purposes only. Vehicle specifications, procedures, and part compatibility can vary by production date, trim level, and region. Always consult your vehicle's factory service manual and verify part numbers before purchasing or performing repairs. Safety-critical components such as airbags, seat belts, and braking systems should be installed by a qualified professional.
- Chevrolet Equinox:
- 🧭 Diagnostic Flowchart
- 🎬 Helpful Videos
- 🛍️ Shop This Part
- What's Unique About the 2005-2009 Chevrolet Equinox
- Symptoms You May Notice
- Most Likely Causes
- Rare But Worth Checking
- Technical Service Bulletins (TSBs) & Recalls
- Diagnosis Steps
- Parts You'll Likely Need
- Mechanic-Grade Diagnostic Values
- Scan Tool Commands That Help
- Wiring & Ground Locations
- Real Owner Repair Stories
- OEM Part Supersession History
- Used vs. New Parts: Buying Guide for This Vehicle
- Real Owner Stories
- 2008 Chevy Equinox
- 2005-2009 Chevrolet Equinox 3.4L V6
- Related OBD-II Codes
- Frequently Asked Questions
- 🎟️ Get 5% Off