
P0134 on 2000-2005 Dodge Neon 2.0L: O2 Sensor No Activity Causes and Fixes
This code almost always means the upstream oxygen sensor (Bank 1, Sensor 1) has failed. On the 2.0L Neon, this is a very common repair. Expect to pay $40-$80 for a quality aftermarket sensor like an NTK or Denso and plan for about an hour of DIY labor. Before replacing, always check the wiring for melting near the exhaust and verify the sensor's fuse isn't blown.
- P0134 on a 2000-2005 Neon points directly to the upstream O2 sensor (before the catalytic converter).
- The most likely fix is replacing the sensor itself, which is a common and accessible DIY job.
- Before buying a new sensor, always inspect the wiring harness for melting or damage, as this is a known issue on this car.
- Check the fuse for the O2 sensor heater circuit before performing more complex diagnostics.
- Use a quality aftermarket brand like NTK or Denso for the replacement sensor to ensure compatibility.
What's Unique About the 2000-2005 Dodge Neon
On the second-generation Neon, the P0134 code is straightforward and almost always points to the O2 sensor itself or its wiring. The wiring harness is routed near hot exhaust components, making it susceptible to melting or chafing over time, which can mimic a failed sensor. Additionally, like other Chrysler products of this era, a leaking oil pressure switch can wick oil up the wiring harness, potentially contaminating the O2 sensor connector and causing this fault.
Symptoms You May Notice
- Check Engine Light is on
- Reduced fuel economy
- Rough or unstable idle
- Engine hesitation or surging
- Failing a vehicle emissions test
- Rotten egg smell from the exhaust
- Replacing the downstream (post-catalyst) O2 sensor instead of the upstream (pre-catalyst) sensor.
- Replacing the O2 sensor without first checking the wiring and fuse, potentially wasting money on a part that isn't needed.
- Assuming an aftermarket 'universal' sensor will work correctly. Many owners report issues with non-OEM style sensors and recommend sticking to direct-fit brands like NTK or Denso.
Most Likely Causes
- Failed Upstream Oxygen Sensor (Bank 1, Sensor 1) 🔴 High Probability → Shop Oxygen Sensor Oxygen sensors are wear items with a finite lifespan, typically 60,000 to 100,000 miles. Given the age of these vehicles, sensor failure is the most common reason for P0134.
How to confirm: Use a scan tool to monitor live data for the B1S1 O2 sensor. If the voltage is stuck at a steady value (e.g., ~0.45V) and does not fluctuate rapidly with the engine at operating temperature, the sensor has failed. You can also test the internal resistance of the sensor's heater circuit, which should typically be between 4-7 ohms when cold for this platform.
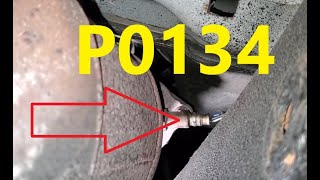
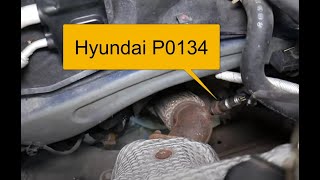
Typical fix: Replace the upstream oxygen sensor. It is located in the exhaust manifold, accessible from the top of the engine bay. A 22mm or 7/8" oxygen sensor socket is required. Apply anti-seize compound to the threads of the new sensor before installation.
Est. part cost: $40 - $100 - Damaged O2 Sensor Wiring or Connector 🟡 Medium Probability → Shop Oxygen Sensor The wiring harness is close to the hot exhaust manifold and other engine components, making it vulnerable to melting, chafing, or becoming brittle and breaking over time. This is a well-documented issue on Neons.
How to confirm: Visually inspect the entire length of the O2 sensor's wiring harness from the sensor to the main engine harness. Look for melted plastic, frayed wires, or corrosion inside the connector. Pay close attention to where the harness may contact the engine or exhaust.
Typical fix: Repair the damaged section of wire with solder and heat shrink, or replace the connector pigtail if it is damaged. Use high-temperature wire loom to protect the repaired section from future heat damage.
Est. part cost: $10 - $30 - Blown Fuse for O2 Sensor Heater Circuit ⚪ Low Probability → Shop Oxygen Sensor
How to confirm: Locate the fuse for the O2 sensor heater circuit in the vehicle's fuse box (consult the owner's manual or online diagrams). Visually inspect the fuse or test for continuity with a multimeter. A non-functional heater circuit will prevent the sensor from warming up and becoming active, triggering P0134.
Typical fix: Replace the blown fuse. If the new fuse blows immediately, there is a short circuit in the heater circuit wiring that must be found and repaired.
Est. part cost: $1 - $5 - Exhaust Leak Before the O2 Sensor ⚪ Low Probability → Shop Oxygen Sensor Exhaust manifold gaskets can fail over time, and the manifolds themselves can crack.
How to confirm: Listen for a ticking or hissing sound from the exhaust manifold area, especially when the engine is cold. A leak allows outside oxygen into the exhaust stream, which can cause the sensor to provide an inaccurate, flat-lined reading. You can also use a smoke machine to pinpoint the source of the leak.
Typical fix: Repair the exhaust leak. This may involve replacing a cracked exhaust manifold or a failed gasket.
Est. part cost: $20 - $300
Rare But Worth Checking
- Oil Contamination from Leaking Oil Pressure Switch: On some Chrysler/Dodge vehicles, a failing oil pressure switch can leak oil directly into the wiring harness. This oil can travel through the harness via capillary action and contaminate the O2 sensor and even the PCM connectors, causing a variety of sensor codes. Check the oil pressure switch connector for signs of oil.
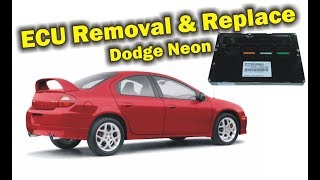
- Faulty Powertrain Control Module (PCM): → Shop Engine Control Module (ECM) This is very rare. The PCM's internal driver for the O2 sensor circuit can fail. This should only be considered after all other possibilities, including wiring and the sensor itself, have been definitively ruled out. A P0601 code may sometimes accompany O2 sensor codes when the PCM is at fault.
Diagnosis Steps
- Connect an OBD-II scanner and confirm that P0134 is the primary code. Note any other codes present, especially P0135 (Heater Circuit).
- Visually inspect the upstream O2 sensor's wiring harness and connector. Look for any signs of melting, chafing, corrosion, or loose connections. Pay special attention to the area near the exhaust manifold.
- Check the fuse for the O2 sensor heater circuit in the Power Distribution Center. Replace if blown.
- Using the scan tool's live data function, monitor the voltage for 'O2S B1S1'. At operating temperature, it should fluctuate rapidly between approximately 0.1V and 0.9V. If it is stuck at a steady voltage (e.g., 0.45V), this confirms the 'no activity' condition.
- If the wiring appears intact, use a multimeter to test the heater circuit at the sensor's connector. With the key on, you should find power (12V) and ground. Also, check the resistance of the heater element through the sensor's pins; an open circuit (infinite resistance) or a reading outside the typical 4-7 ohm range indicates a failed heater.
- Check for exhaust leaks between the cylinder head and the O2 sensor. Listen for ticking noises when the engine is cold.
- Inspect the oil pressure switch connector for any signs of oil leakage that could be wicking into the main harness.
- If all wiring, fuses, and the sensor itself test good, the final, least likely possibility is a fault within the PCM.
Parts You'll Likely Need
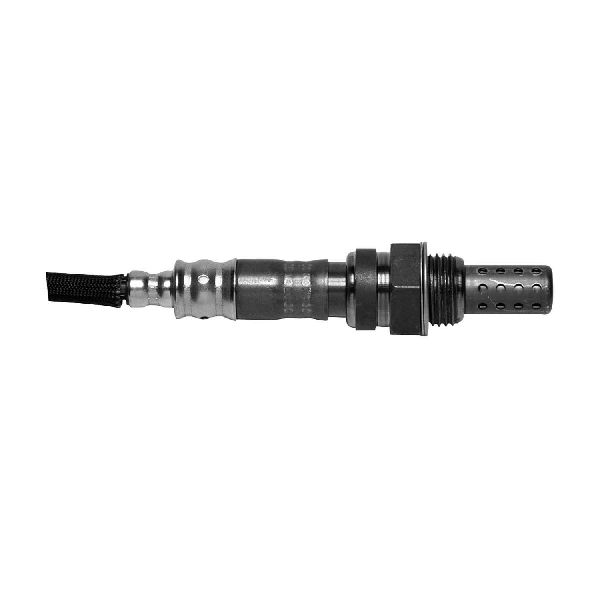
- Upstream Oxygen Sensor
(OEM #5269868AB)— This is the sensor (Bank 1, Sensor 1) that the code directly refers to, and it is the most common point of failure.
Trusted brands: NTK (OEM supplier, P/N: 23132), Denso (P/N: 234-4079), Mopar, Bosch (P/N: 13313)
OEM price range: $80-$130
Aftermarket price range: $40-$80
Related Codes That Often Appear With This One
- P0135 — P0135 indicates a fault in the heater circuit for the same O2 sensor. These codes often appear together because a failure in the heater will prevent the sensor from becoming active, triggering both codes.
- P0132 — P0132 indicates high voltage from the same sensor. It can sometimes appear with P0134 if there is an intermittent short to power in the wiring.
Technical Service Bulletins (TSBs) & Recalls
- While no TSB is directly for P0134 on the Neon, TSB 25-001-05 and 25-005-13 were issued for other Chrysler vehicles of the era for O2 sensor monitor readiness issues, highlighting the sensitivity of these systems.
- TSB 18-031-03 was issued for heat-soak related issues on other Chrysler engines, showing a pattern of heat-related component problems in the engine bay.
Platform-Specific Known Issues
- The O2 sensor wiring harness is known to melt or get damaged due to its proximity to the exhaust manifold.
- A leaking oil pressure sensor can wick oil into the main wiring harness, contaminating the O2 sensor connector and causing this code.
- The OEM Mopar O2 sensor is often an NTK-branded part, so choosing NTK as an aftermarket replacement is a reliable option.
Mechanic-Grade Diagnostic Values
- Upstream O2 Sensor Heater Circuit Resistance — expected: 4-7 Ohms (when cold). Failure: Infinite resistance (open circuit) or near-zero resistance (short circuit) indicates a failed heater element.
- Upstream O2 Sensor Heater Circuit Power Supply — expected: Battery Voltage (approx. 12V+). Failure: No voltage at the heater power pin on the harness-side connector (with key on) points to a blown fuse, faulty ASD relay, or wiring issue.
- Upstream O2 Sensor Connector Pinout (2000-2005) — expected: Pin 1: Heater Control (from PCM), Pin 2: Heater Power (from ASD relay), Pin 3: Sensor Ground, Pin 4: Sensor Signal (to PCM). Failure: Incorrect voltages or lack of continuity on these specific pins helps isolate the fault between the sensor, wiring, and PCM.
Scan Tool Commands That Help
- Chrysler DRB III or equivalent: O2 Sensor Test — A dealer-level scan tool can force the system into open and closed loop modes and display sensor response times, which can help differentiate a lazy sensor from a completely dead one, or identify intermittent wiring issues that a basic code reader might miss.
Wiring & Ground Locations
- Engine Harness Rub Point — On first-generation Neons, a common rub point was on the engine wiring harness near the transaxle. While less documented on the second generation, it's worth inspecting the harness for any areas where it might contact the chassis or engine components.. A harness that rubs through can short the O2 sensor signal, heater, or ground wires, directly causing a P0134 code.
- Cylinder Head to Body Ground Strap — Connects the cylinder head to the vehicle's body/chassis.. A poor or missing ground connection here can create electrical noise and unstable ground references for sensors, including the O2 sensor, leading to incorrect readings or no activity.
- Engine to Body Ground Strap — Main ground strap connecting the engine block to the chassis.. This is the primary ground path for the engine block. If it's corroded or loose, the PCM and its sensors may not have a stable ground reference, causing a host of electrical issues including sensor fault codes.
- Battery Negative to Transaxle Ground — A ground wire runs from the negative battery terminal directly to a bolt on the transaxle case.. This is a critical ground point. A loose or corroded connection here can affect the entire engine management system, leading to erratic sensor behavior.
Real Owner Repair Stories
- DodgeForum.com user 'das2123' (1998 Dodge Neon (First Gen, but relevant wiring issue)) — No spark, no injector pulse, no start condition.
❌ Tried (didn't work) Replaced PCM, Replaced crank sensor, Replaced cam sensor, Tested all fuses and relays
✅ What actually fixed it The user suspected a missing ground or a wiring issue. Another user provided a photo showing a common spot where the engine wiring harness rubs through on the chassis near the transaxle, causing shorts. This is a known issue that can cause various electrical problems, including sensor faults.
Model Year Variations Within This Range
- 2003-2005: Starting in 2003, Dodge phased in the Next Generation Controller (NGC) PCM, replacing the earlier SBEC (Single Board Engine Controller). While the function of the O2 sensor is the same, diagnostic strategies and PCM pinouts can differ. When diagnosing, it is critical to use a wiring diagram specific to the vehicle's year to ensure you are testing the correct pins at the PCM connector.
Diagnostic Flowchart
Other Known Issues on This Vehicle
Issues unrelated to this code that are worth knowing about as an owner of this generation:
- Head Gasket Failure 🔴 High — Common, especially on vehicles that have overheated. Can occur between 80,000-120,000 miles. Symptoms include unexplained coolant loss, overheating, and white smoke from exhaust.
- Motor Mount Collapse 🟠 Medium — Very common failure item. The passenger-side upper mount and lower torque struts are the first to fail, causing excessive engine vibration at idle and clunking noises.
- Timing Belt Failure (Interference Engine) 🔴 High — The 2.0L is an interference engine. The timing belt has a 100,000-mile replacement interval. If it breaks, catastrophic engine damage (bent valves) will occur. The water pump should always be replaced at the same time.
- Front Crankshaft Seal Leak 🟡 Low — A common oil leak source as the vehicle ages. Oil from the seal is slung by the crank pulley, coating the passenger side of the engine bay and dripping down, often being mistaken for an oil pan gasket leak.
Used vs. New Parts: Buying Guide for This Vehicle
When a used part is the smart pick: A used part is generally not recommended for the oxygen sensor itself, as it is a wear-and-tear item with a finite lifespan. However, obtaining a used connector pigtail from a junkyard harness is a smart choice if only the connector is damaged, as it provides an OEM-quality connector for splicing.
Donor-vehicle mileage cap: roughly under 80000 miles for the part to have meaningful remaining life.
What to inspect on the donor part:
- For a connector pigtail, inspect for at least 6-8 inches of clean, flexible wire.
- Check that the plastic is not brittle, cracked, or melted.
- Ensure the connector's locking tab is intact and functional.
- Look for clean, corrosion-free metal pins inside the connector.
OEM-only on this vehicle (don't cheap out):
- While not strictly OEM-only, it is highly recommended to use the OEM supplier (NTK) or a reputable equivalent like Denso for the oxygen sensor.
Aftermarket brands forum-validated for this vehicle:
- NTK (often the OEM supplier)
- Denso
Brands owners have reported issues with on this vehicle:
- Universal-fit sensors requiring splicing
- No-name or generic 'white box' brands from online marketplaces
Real Owner Stories
Aggregated from forums and TSBs cited above. Mileages and costs reflect what owners reported in those sources.
2001 Plymouth Neon 2.0L
Symptoms: Check engine light on for upstream O2 sensor.
What fixed it: Replacement of the upstream O2 sensor with a Bosch premium oxygen sensor.
Source hint: youtube_comment from TinkerMan
2001 Chrysler PT Cruiser 2.0L
Symptoms: P0134 code appearing alongside a P0601 (PCM Internal Error).
What fixed it: The source identifies this as a rare case of PCM failure.
Source hint: Chrysler Klub (Czech Forum)
2000-2005 Dodge Neon 2.0L
Symptoms: P0134 code; visual inspection revealed melted plastic and frayed wires near the exhaust manifold.
What fixed it: Repairing the damaged section of the wiring harness with solder and heat shrink and protecting it with high-temperature loom.
Source hint: neons.org forum threads
Related OBD-II Codes
Frequently Asked Questions
Which brand of oxygen sensor should I use for my 2000-2005 Dodge Neon to fix P0134?
Is there a specific TSB for P0134 on the Dodge Neon?
Can a leaking oil pressure switch cause a P0134 code on this vehicle?
Where is the upstream oxygen sensor located on the 2.0L ECB engine?
What is the correct resistance for the O2 sensor heater circuit on a Neon?
Could an exhaust leak be the cause of my P0134 'no activity' code?
Helpful Videos

We Have This Part in Stock

The information in this article is provided for general reference and educational purposes only. Vehicle specifications, procedures, and part compatibility can vary by production date, trim level, and region. Always consult your vehicle's factory service manual and verify part numbers before purchasing or performing repairs. Safety-critical components such as airbags, seat belts, and braking systems should be installed by a qualified professional.
- Dodge Neon:
- 🧭 Diagnostic Flowchart
- 🎬 Helpful Videos
- 🛍️ Shop This Part
- What's Unique About the 2000-2005 Dodge Neon
- Symptoms You May Notice
- Most Likely Causes
- Rare But Worth Checking
- Diagnosis Steps
- Parts You'll Likely Need
- Related Codes That Often Appear With This One
- Technical Service Bulletins (TSBs) & Recalls
- Platform-Specific Known Issues
- Mechanic-Grade Diagnostic Values
- Scan Tool Commands That Help
- Wiring & Ground Locations
- Real Owner Repair Stories
- Model Year Variations Within This Range
- Other Known Issues on This Vehicle
- Used vs. New Parts: Buying Guide for This Vehicle
- Real Owner Stories
- 2001 Plymouth Neon 2.0L
- 2001 Chrysler PT Cruiser 2.0L
- 2000-2005 Dodge Neon 2.0L
- Related OBD-II Codes
- Frequently Asked Questions
- 🎟️ Get 5% Off