
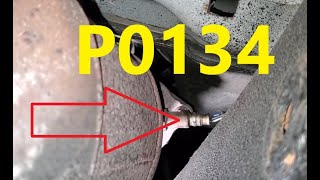
P0134 on 2002-2005 Ford Explorer 4.0L V6: Causes, Fixes, and O2 Sensor Guide
This code almost always means the front oxygen sensor on the passenger side (Bank 1, Sensor 1) has failed. Replacing the sensor is the most common fix. Before replacing, check the fuse for the O2 heater circuit. Expect to pay $40-$80 for an aftermarket sensor or $90-$150 for an OEM Motorcraft part. It's a DIY-friendly job with the right O2 sensor socket.
- P0134 on your Explorer means the front O2 sensor on the passenger side isn't working.
- The most likely cause, by far, is a failed oxygen sensor.
- Before buying parts, check the sensor's fuse and visually inspect its wiring for obvious damage.
- You can continue to drive, but your fuel mileage will suffer and you risk damaging your catalytic converter over time.
What's Unique About the 2002-2005 Ford Explorer
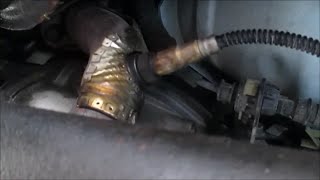
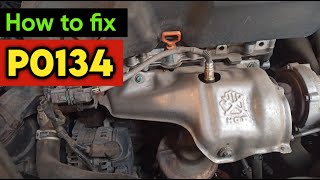
On the third-generation Explorer with the 4.0L SOHC V6, this code is straightforward and rarely points to complex issues. The primary challenge is often physical access to the sensor itself, which is tucked into the passenger-side exhaust manifold in a tight space. Unlike some platforms where this code might hint at deeper issues like software glitches or fuel pressure problems, on this particular Explorer, the cause is overwhelmingly a failed sensor, its heater circuit, or its immediate wiring. A blown fuse for the heater circuit is a common culprit that should be checked first.
Symptoms You May Notice
- Check Engine Light is on
- Reduced fuel economy
- Rough or unstable idle
- Engine hesitation or sluggish acceleration
- Failing a state emissions test
- Rotten egg or sulfur-like smell from the exhaust
- Replacing the wrong oxygen sensor (e.g., the downstream sensor or the sensor on the driver's side). Bank 1 is the passenger side on V-engines like this one.
- Replacing the catalytic converter when the issue is simply a non-responsive sensor upstream of it.
- Ignoring a blown fuse and replacing the O2 sensor, only for the code to return because the new sensor's heater still has no power.
Most Likely Causes
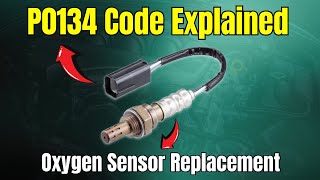
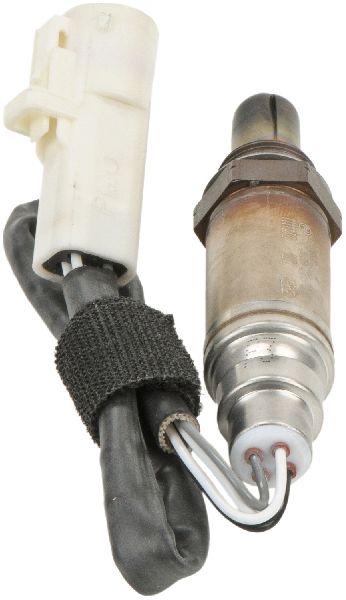
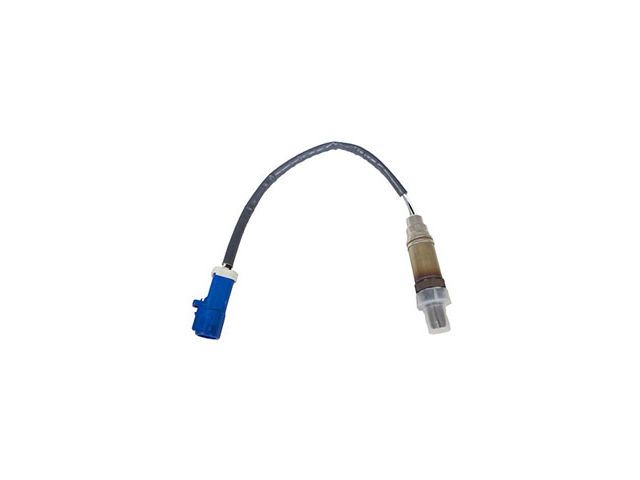
- Failed Bank 1, Sensor 1 Oxygen Sensor 🔴 High Probability → Shop Oxygen Sensor Oxygen sensors are wear-and-tear items that fail over time due to constant exposure to extreme heat and exhaust gases. The internal heater element, which is necessary for the sensor to warm up quickly, is a common point of failure. If the heater fails, the sensor cannot reach operating temperature and will not produce a signal, triggering the P0134 code.
How to confirm: Use a scan tool to monitor live data for 'O2S11' (or similar). If the voltage is flat and not fluctuating between approximately 0.1V and 0.9V once the engine is warm, the sensor is inactive. You can also test the resistance of the sensor's heater circuit with a multimeter; an open circuit (infinite resistance) confirms failure. A healthy heater circuit typically has a resistance of a few ohms.
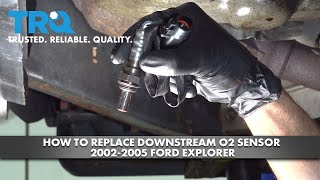
Typical fix: Replace the Bank 1, Sensor 1 (upstream, passenger side) oxygen sensor. 🎬 Watch this walkthrough for replacing the upstream sensors.
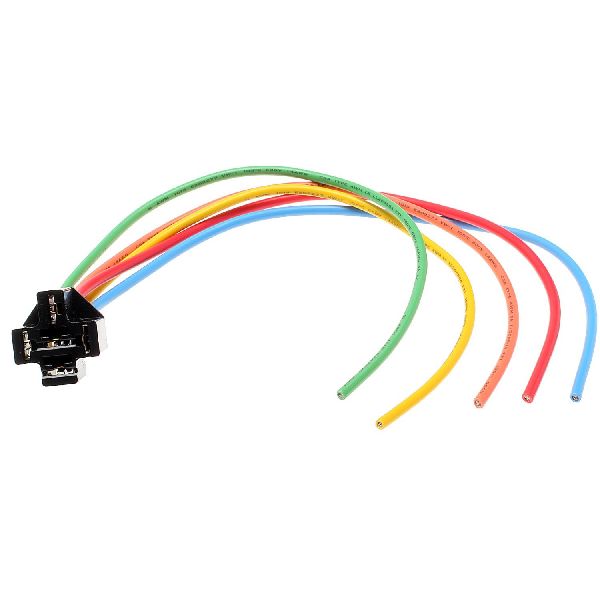
Est. part cost: $40-$150 - Damaged Wiring or Connector 🟡 Medium Probability The sensor's wiring harness is close to the hot exhaust manifold and can become brittle, melt, or fray over time, causing an open or short circuit. The connector can also accumulate dirt and moisture, leading to corrosion on the pins which interrupts the signal.
How to confirm: Visually inspect the entire length of the wiring from the sensor to the main harness. Look for melted insulation, chafed spots, or breaks. Unplug the connector and check for green or white corrosion on the pins. Check for continuity on the signal and heater wires using a multimeter.
Typical fix: Repair the damaged section of wire with a new pigtail connector or by splicing in a new wire. Clean corroded connectors with electrical contact cleaner.
Est. part cost: $5-$30 - Blown Fuse for O2 Sensor Heater ⚪ Low Probability → Shop Oxygen Sensor A short in the heater circuit wiring or within the sensor itself can cause the associated fuse to blow, cutting power to the heater and preventing the sensor from activating properly. On related Ford platforms like the Ranger, owners have reported that a single blown fuse can cause multiple O2 sensor and EVAP system codes simultaneously.
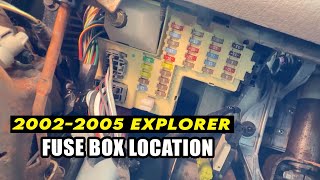
How to confirm: Consult the owner's manual or the fuse box diagram to locate the fuse for the 'HEGO' (Heated Exhaust Gas Oxygen) sensors. On many Ford trucks of this era, this may be a 15A fuse in the central junction box. 🎬 See this guide to locate your Explorer's fuse box. Pull the fuse and visually inspect if it is blown.
Typical fix: Replace the blown fuse. If the new fuse blows immediately, it indicates a persistent short circuit in the wiring or the sensor that must be diagnosed and repaired.
Est. part cost: $1-$5
Rare But Worth Checking
- Exhaust Leak: An exhaust leak from a cracked manifold or bad gasket near the sensor can introduce fresh oxygen, causing strange readings. While this usually sets a 'lean' code (P0171), a large leak could potentially prevent the sensor from reading exhaust gas correctly, mimicking inactivity.
- Powertrain Control Module (PCM) Failure: → Shop Engine Control Module (ECM) In very rare cases, the fault may lie with the PCM's internal driver circuit for the oxygen sensor. This should only be considered after all other possibilities (sensor, wiring, fuses) have been definitively ruled out. A forum user with a similar Ford 4.0L engine considered this after verifying wiring continuity to the ECU.
Diagnosis Steps
- Read the code with an OBD-II scanner to confirm P0134 is present. 🎬 Watch a professional mechanic diagnose and repair the P0134 code.
- Check the fuse box for any blown fuses related to the O2 sensors (often labeled 'HEGO'). Replace if necessary.
- Visually inspect the wiring harness and connector for the passenger-side upstream O2 sensor. Look for any signs of melting, chafing, or corrosion.
- Use a scan tool with live data capability to observe the voltage for 'O2 Bank 1 Sensor 1'. With the engine warm and running, it should fluctuate rapidly between ~0.1V and ~0.9V. If it is stuck at a fixed voltage (e.g., 0.45V) or shows 0V, the sensor is not working.
- If the wiring and fuse are intact but the sensor shows no activity, the sensor itself has most likely failed.
- Before removing the old sensor, spray it with penetrating oil (like PB B'laster) and let it soak to make removal easier, as they are often seized in the exhaust manifold.
- Using a specialized O2 sensor socket (typically 22mm or 7/8") and a breaker bar, remove the old sensor.
- Install the new sensor, ensuring the threads have anti-seize compound (most new sensors include this). Torque to specification, typically around 30 ft-lbs.
- Connect the new sensor's wiring harness.
- Clear the trouble codes with the scanner and take the vehicle for a test drive to ensure the Check Engine Light does not return.
Parts You'll Likely Need
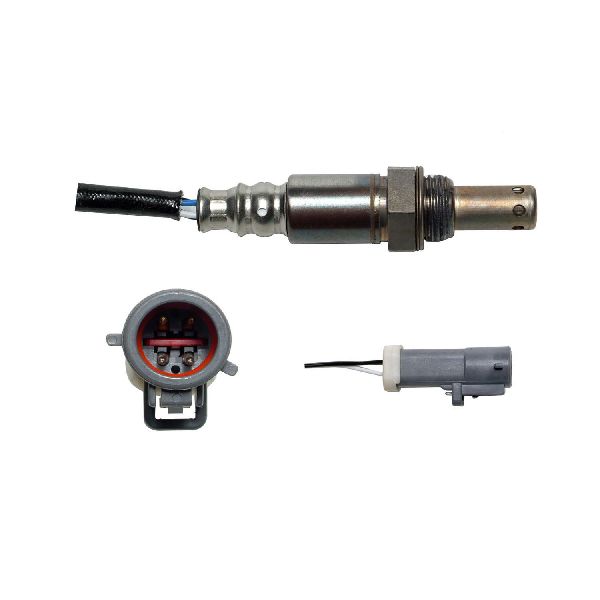
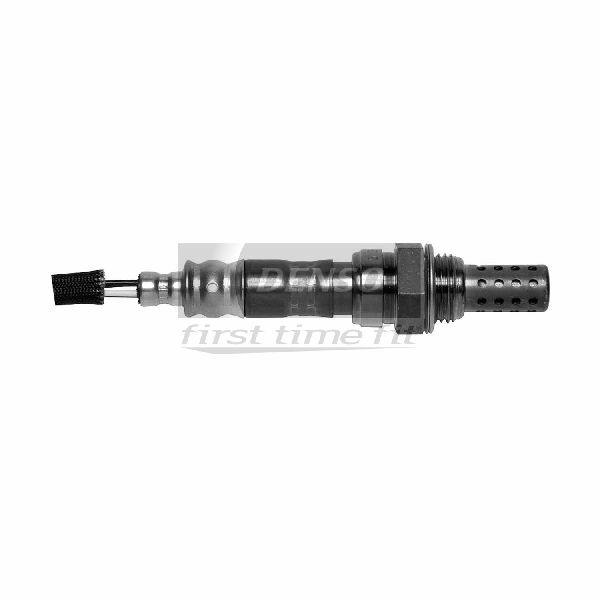
- Oxygen Sensor (Bank 1, Sensor 1)
(OEM #XC2Z-9F472-BB)— This is the upstream sensor on the passenger side. It is the component that has failed in the vast majority of P0134 cases.
Trusted brands: Motorcraft (OEM), Bosch (e.g., 15717), Denso (e.g., 234-4071), NTK
OEM price range: $90-$150
Aftermarket price range: $40-$80
Related Codes That Often Appear With This One
- P0135 — P0135 specifically points to a malfunction in the 'Heater Circuit' for Bank 1, Sensor 1. Since a failed heater will prevent the sensor from becoming active, it's common to see both codes together or for P0135 to precede P0134.
- P0171 — If the sensor is failing intermittently before going completely inactive, it might send false lean signals, triggering a 'System Too Lean (Bank 1)' code.
- P0154 — This is the equivalent 'No Activity Detected' code for the driver's side (Bank 2, Sensor 1). Seeing both codes together could point to a common power or ground issue, such as a blown HEGO fuse.
Technical Service Bulletins (TSBs) & Recalls
- TSB 02-25-6, TSB 03-12-6 - Related to the cracked rear tailgate applique, not the P0134 code.
Mechanic-Grade Diagnostic Values
- O2 Sensor Heater Element Resistance — expected: 2-30 Ohms. Failure: An 'OL' (Over Limit/Open) or 0 Ohm (short) reading on a multimeter.
- Live Data: HO2S Heater Resistance (PID) — expected: 1-10 Ohms on a cold start. Failure: A value outside the expected range, or one that doesn't appear.
- Live Data: HO2S Heater Current (PID) — expected: 0.5-1.5 Amps on a cold start. Failure: A reading of 0 Amps indicates an open circuit (bad heater, blown fuse, or bad wiring).
- Harness Ground Circuit Voltage Drop — expected: Less than 0.2V (200mV). Failure: A reading above 0.2V indicates excessive resistance in the ground circuit, which can cause sensor issues.
Hidden / Shadow Codes Worth Checking
- Mode $06: Mode $06 provides results from non-continuous monitor self-tests. While a specific Test ID (TID) for 'no activity' is not consistently documented, a technician can review the results for the 'Exhaust Gas Sensor Monitor' and 'Exhaust Gas Sensor Heater Monitor' to see if the sensor is failing its internal self-test, even before a code is set. For 2005 and newer CAN-bus vehicles, these may be listed under Monitor IDs (MID) instead of TIDs. (see via Professional-grade OBD-II scan tool with Mode $06 functionality.)
Wiring & Ground Locations
- HEGO Heater Wires — Within the 4-wire connector for the O2 sensor.. On most 4-wire sensors for this vehicle, the two same-colored wires (typically both white) are for the heater circuit. Testing resistance across these two pins on the sensor side confirms the heater's integrity. One wire should have 12V with the key on, and the other is a PCM-controlled ground.
- G101 / G102 / G103 / G104 — At the left front of the engine compartment, near the battery.. These are major chassis and engine ground points. A corroded or loose connection at these locations can cause a variety of electrical issues, including poor sensor grounding, which can lead to incorrect readings or a no-activity code.
- G108 — At the center rear of the engine compartment, often on the firewall.. This is another primary engine ground point. Verifying it is clean and tight is a crucial step when diagnosing any electrical fault that could be related to a bad ground, including sensor circuit codes.
- PCM HEGO Heater/Ground Pins — At the Powertrain Control Module (PCM) connector.. On similar 4.0L SOHC engines, the HEGO heater power wire (e.g., Pin 93) and PCM ground (e.g., Pin 24) can be damaged by rodents or chafing, causing an open or short. This confirms the PCM directly controls the heater ground and that a wiring fault can occur far from the sensor itself.
Real Owner Repair Stories
- Go-Parts.com Owner Story Compilation (2010 Ford Explorer 4.0L V6) — Check Engine Light with heater resistance codes for all four O2 sensors (P0053, P0054, P0059, P0060).
❌ Tried (didn't work) Replacing the Bank 1 Sensor 1 O2 sensor., Using a catalytic converter cleaner additive.
✅ What actually fixed it The shared power supply fuse for all O2 sensor heaters was blown. The root cause was a chafed wire in the main wiring harness that shorted to ground, blowing the fuse. Repairing the wire and replacing the fuse fixed all codes. This highlights that multiple simultaneous sensor codes almost always point to a shared circuit failure, not multiple bad sensors.
OEM Part Supersession History
XC2Z-9F472-BB→XC2Z-9F472-BB (current)— This is the established OEM part number from Motorcraft for the upstream sensor.
Heads up: While aftermarket sensors like the Bosch 15717 are functionally equivalent and often used, some Ford platforms can be sensitive to non-OEM electronics. If a P0134 or related code appears immediately after replacing with an aftermarket part, the new sensor may be incompatible or faulty.
Diagnostic Flowchart
Other Known Issues on This Vehicle
Issues unrelated to this code that are worth knowing about as an owner of this generation:
- Timing Chain Cassette Failure ('Death Rattle') 🔴 High — Very common, especially on engines over 100k miles. Often presents as a metallic rattle noise on startup that goes away after a few seconds. Failure of the plastic guides can lead to catastrophic engine damage. (Ref: Ford issued multiple TSBs and updated tensioner parts over the years, but no formal recall was issued for the core problem.)
- 5R55W/5R55S Transmission Failure 🔴 High — Extremely common. Symptoms include harsh shifting, delayed engagement, slipping, or a flashing O/D light. Often caused by a worn servo bore in the aluminum transmission case or solenoid pack failure.
- Cracked Rear Tailgate Applique 🟡 Low — Widespread cosmetic issue where the plastic panel below the rear window develops a vertical crack. While mostly cosmetic, it can allow water intrusion. (Ref: Multiple TSBs (e.g., 02-25-6, 03-12-6) were issued, and a class-action lawsuit was filed regarding this defect.)
- Intake Manifold Gasket Leaks 🟠 Medium — Common on high-mileage engines. The plastic intake manifold gaskets deteriorate, causing vacuum leaks that lead to lean codes (P0171/P0174) and a rough idle.
Used vs. New Parts: Buying Guide for This Vehicle
When a used part is the smart pick: For this repair, a used part only makes sense for the wiring connector (pigtail) if the original is physically damaged, melted, or corroded. A pigtail can be spliced in from a junkyard vehicle harness.
Donor-vehicle mileage cap: roughly under 150000 miles for the part to have meaningful remaining life.
What to inspect on the donor part:
- For a wiring pigtail, inspect for any signs of melting, brittleness, or cracking in the insulation.
- Ensure the connector's locking tab is intact.
- Check the internal pins for any green or white corrosion.
OEM-only on this vehicle (don't cheap out):
- While not strictly 'OEM-only', using a Motorcraft sensor is the safest bet to avoid compatibility issues. Some PCMs are sensitive to the specific resistance and response characteristics of the OEM sensor.
Aftermarket brands forum-validated for this vehicle:
- Bosch (often the OEM manufacturer for Ford)
- Denso
- NTK (NGK)
Brands owners have reported issues with on this vehicle:
- Unknown or 'white-box' generic brands. An owner story noted that an aftermarket sensor had incorrect heater resistance, causing a new code to appear immediately after installation.
Real Owner Stories
Aggregated from forums and TSBs cited above. Mileages and costs reflect what owners reported in those sources.
2002 Ford Explorer XLT 4.0L
Symptoms: Engine runs for 5 minutes, then dies. O2 sensor shows no response and coolant sensor reading drops to -26 degrees.
What fixed it: The technician suspected the ECU was the issue after initial repairs (replacing the O2 and temp sensors) failed to resolve the intermittent signal loss.
Source hint: iATN (International Automotive Technicians Network)
2005 Ford Ranger 4.0L SOHC V6
Symptoms: Multiple O2 sensor and EVAP system codes occurring simultaneously.
What fixed it: Replacing a single blown fuse that powered all affected components.
Source hint: ranger-forums.com
Related OBD-II Codes
Frequently Asked Questions
Which oxygen sensor is Bank 1, Sensor 1 on my 4.0L Explorer?
Could a blown fuse cause the P0134 code on my Explorer?
Do TSB 02-25-6 or TSB 03-12-6 address my P0134 check engine light?
Why is my Explorer idling roughly and smelling like rotten eggs along with this code?
Is the P0134 issue common on the Mercury Mountaineer as well?
What should the voltage reading be for 'O2S11' on a scan tool?
Helpful Videos
We Have This Part in Stock


The information in this article is provided for general reference and educational purposes only. Vehicle specifications, procedures, and part compatibility can vary by production date, trim level, and region. Always consult your vehicle's factory service manual and verify part numbers before purchasing or performing repairs. Safety-critical components such as airbags, seat belts, and braking systems should be installed by a qualified professional.
- Ford Explorer:
- 🧭 Diagnostic Flowchart
- 🎬 Helpful Videos
- 🛍️ Shop This Part
- What's Unique About the 2002-2005 Ford Explorer
- Symptoms You May Notice
- Most Likely Causes
- Rare But Worth Checking
- Diagnosis Steps
- Parts You'll Likely Need
- Related Codes That Often Appear With This One
- Technical Service Bulletins (TSBs) & Recalls
- Mechanic-Grade Diagnostic Values
- Hidden / Shadow Codes Worth Checking
- Wiring & Ground Locations
- Real Owner Repair Stories
- OEM Part Supersession History
- Other Known Issues on This Vehicle
- Used vs. New Parts: Buying Guide for This Vehicle
- Real Owner Stories
- 2002 Ford Explorer XLT 4.0L
- 2005 Ford Ranger 4.0L SOHC V6
- Related OBD-II Codes
- Frequently Asked Questions
- 🎟️ Get 5% Off