
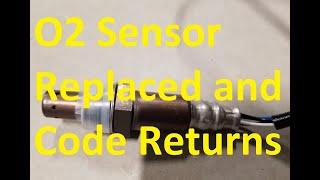
P0134 on 2005-2010 Ford Mustang: Causes and Fixes for O2 Sensor No Activity
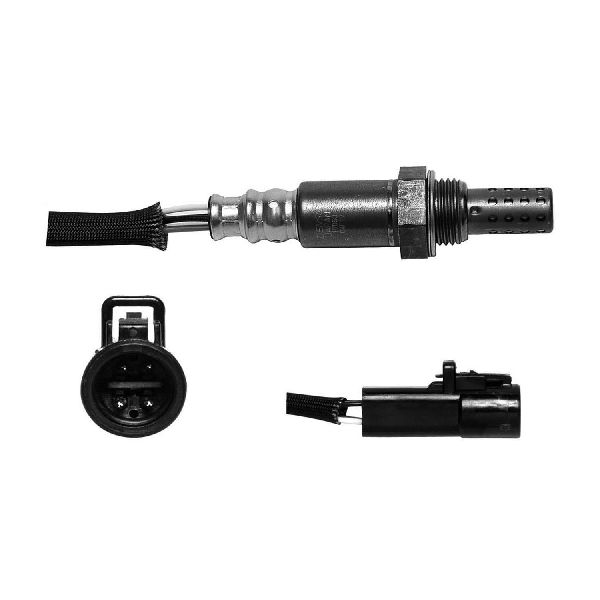
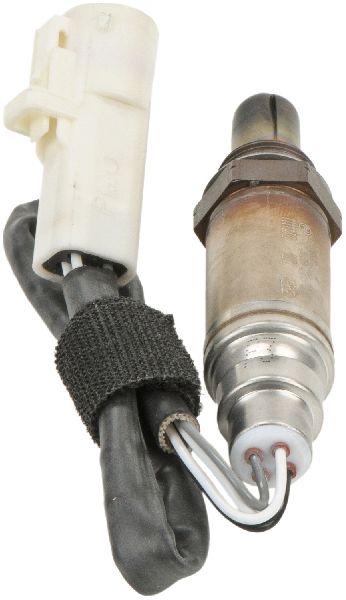
This code almost always means the upstream oxygen sensor on the passenger side (Bank 1, Sensor 1) has failed. Before replacing the sensor (Motorcraft DY-1401), check fuse #45 (10A) or #47 (15A) in the under-hood fuse box. Replacing the sensor is the most common fix, costing around $50-$100 for an aftermarket part and is a straightforward DIY job.
- P0134 points to a problem with the upstream oxygen sensor on the passenger side.
- The most likely fix is replacing the Bank 1, Sensor 1 O2 sensor with a quality part (Motorcraft or NTK).
- Before replacing the sensor, always check fuse #45 (10A) or #47 (15A) in the under-hood fuse box and inspect the wiring harness for damage, especially over the transmission bellhousing.
What's Unique About the 2005-2010 Ford Mustang
For the 2005-2010 Ford Mustang (S197 generation), the P0134 code is a very common and straightforward issue. Both the 4.0L V6 and 4.6L V8 engines use conventional heated oxygen sensors that have a finite lifespan and are a frequent wear-and-tear replacement item. There are no widespread, unique design flaws on this platform that cause the code; it's typically just a failed sensor or, less commonly, a wiring issue. A known issue is the O2 sensor wiring harness being stretched too tightly over the bellhousing, which can lead to broken wires over time.
Symptoms You May Notice
- Check Engine Light is on
- Reduced fuel economy
- Rough or uneven idle
- Engine hesitation or loss of power
- Failing an emissions test
- Smell of unburnt fuel from the exhaust
- Replacing the wrong oxygen sensor (e.g., replacing the downstream Sensor 2, or the Bank 2 sensor on the driver's side).
- Replacing the O2 sensor without first checking for wiring damage or a blown fuse.
- Using a cheap, universal-style oxygen sensor which may not be compatible with the Ford PCM, leading to the code returning.
Most Likely Causes
- Failed Bank 1, Sensor 1 Oxygen Sensor 🔴 High Probability → Shop Oxygen Sensor Oxygen sensors are a normal wear item and typically fail after 80,000+ miles due to heat and contamination. The internal heater element is a common point of failure, which will prevent the sensor from becoming active.
How to confirm: Use an OBD-II scanner to monitor live data for the 'O2S11' voltage. A healthy sensor's voltage will fluctuate rapidly between approximately 0.1V and 0.9V. A failed sensor will have a flat, non-fluctuating voltage, often stuck near 0.45V or 0V.
Typical fix: Replace the Bank 1, Sensor 1 (passenger side, upstream) oxygen sensor. It is highly recommended to use an OEM Motorcraft or NTK branded sensor, as some aftermarket brands have been reported to not work correctly.
Est. part cost: $50-$120 - Damaged Wiring or Connector 🟡 Medium Probability The wiring harness for the O2 sensors runs over the top of the transmission bellhousing. On some cars, this harness is stretched tightly and does not have enough slack, leading to wires breaking from engine and transmission movement over time. This is a known design flaw. Wires can also be damaged by heat from the nearby exhaust.
How to confirm: Visually inspect the wiring harness and connector leading to the O2 sensor. Pay close attention to the harness section on top of the transmission bellhousing, directly behind the engine, as this is a common failure point. Check for a secure connection and look for corroded pins inside the connector.
Typical fix: Repair the damaged section of the wiring harness or clean/replace the connector. If the wire is broken at the bellhousing, add some length to the wire during repair to prevent a repeat failure.
Est. part cost: $5-$50 - Blown Fuse for O2 Sensor Heater Circuit ⚪ Low Probability → Shop Oxygen Sensor A short in the sensor or its wiring can cause the associated fuse to blow. This fuse often powers other components as well.
How to confirm: Locate the Power Distribution Box (fuse box) in the engine compartment. Check fuse #45 (10A) or #47 (15A). Forum discussions indicate some model years may use a 10A while others use a 15A. This fuse powers the heaters for the O2 sensors, and may also power VCT solenoids and the EVAP canister purge valve.
Typical fix: Replace the blown fuse. If it blows again, there is an underlying short circuit in one of the components on that circuit that must be diagnosed and repaired.
Est. part cost: $1-$5 - Exhaust Leak ⚪ Low Probability Exhaust manifold gaskets or pipe connections can develop leaks over time, allowing outside air to enter the exhaust stream before the sensor. This fresh air can make the sensor read incorrectly, sometimes causing it to flatline.
How to confirm: Listen for a ticking or puffing noise from the engine bay, especially when the engine is cold. Visually inspect the exhaust manifold and pipes near the sensor for black soot marks, which indicate a leak.
Typical fix: Replace the leaking gasket or tighten/repair the leaking exhaust component.
Est. part cost: $20-$150
Rare But Worth Checking
- Faulty Powertrain Control Module (PCM): → Shop Engine Control Module (ECM) This is extremely rare. The PCM should only be considered after all other possibilities, including the sensor, wiring, and fuses, have been thoroughly tested and ruled out. A failure of the PCM's internal driver for the O2 sensor can mimic a failed sensor.
Diagnosis Steps
- Confirm the code P0134 is present using an OBD-II scanner.
- Check fuse #45 (10A) or #47 (15A) in the under-hood Power Distribution Box. Replace if blown and re-test.
- Visually inspect the Bank 1, Sensor 1 (passenger side, upstream) oxygen sensor's wiring and connector for any signs of melting, corrosion, or physical damage. Pay special attention to the harness where it crosses the top of the transmission bellhousing.
- Use a scan tool to observe the live voltage data for 'O2S11'. With the engine warm and at idle, the voltage should be actively switching between ~0.1V and ~0.9V. If it is stuck at a steady voltage (e.g., 0.45V) or shows 0V, the sensor is not active.
- Check for exhaust leaks between the cylinder head and the O2 sensor. Listen for audible ticks and look for soot trails.
- If the wiring, fuse, and exhaust are all confirmed to be good, the oxygen sensor itself has most likely failed and should be replaced. Use of a Motorcraft or NTK sensor is strongly recommended.
Parts You'll Likely Need
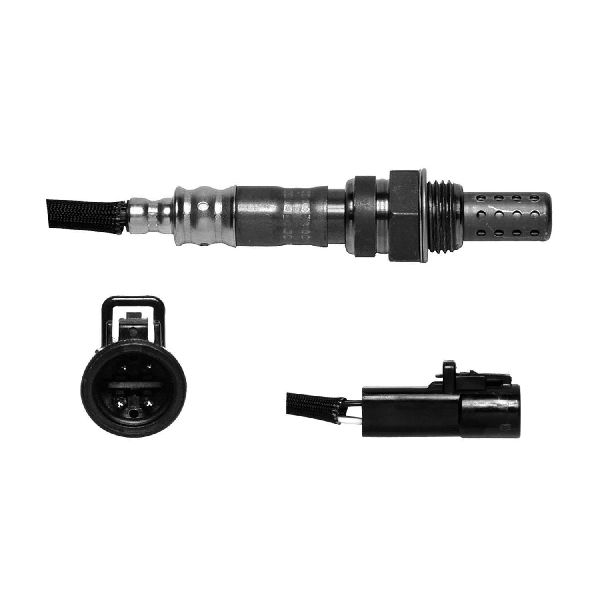
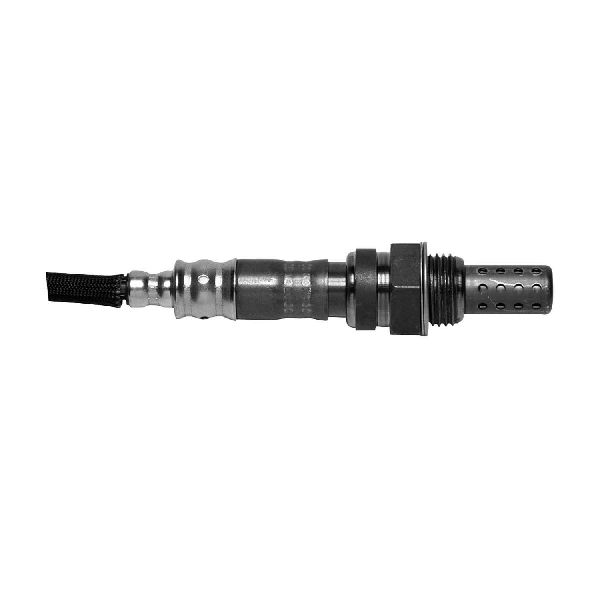
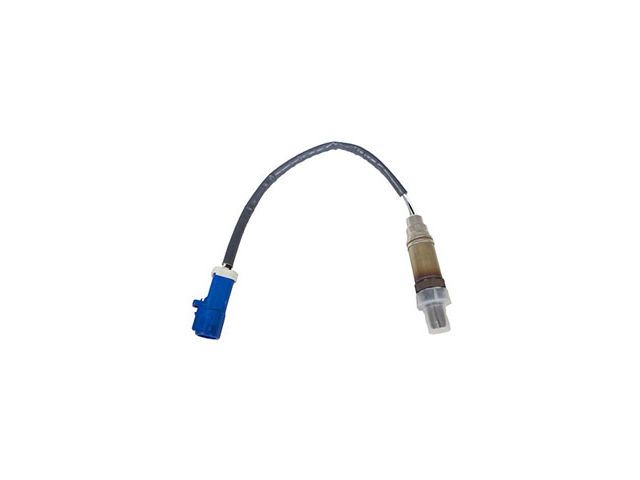
- Oxygen Sensor (Bank 1, Sensor 1)
(OEM #Motorcraft DY-1401 (Ford P/N: 5C5Z-9F472-BA))— This is the upstream sensor on the passenger side. It is the component that directly measures the exhaust gas and is the most common failure point for this code.
Trusted brands: Motorcraft, Bosch, Denso, NGK/NTK
OEM price range: $80-$120
Aftermarket price range: $50-$100
Related Codes That Often Appear With This One
- P0135 — P0135 indicates a fault in the heater circuit of the same sensor (Bank 1, Sensor 1). These codes often appear together as a heater failure will prevent the sensor from becoming active and producing a signal.
- P0171 — If the O2 sensor is failing and incorrectly reporting a lean condition, the PCM may try to compensate by adding too much fuel, which can sometimes trigger a P0171 (System Too Lean) code on the opposite bank as the engine's computer struggles to balance the overall fuel trim.
- P0154 — This is the same 'No Activity' code but for Bank 2, Sensor 1 (driver's side). If both P0134 and P0154 appear together, it strongly points to a common cause like a blown fuse that powers both sensor heaters.
Platform-Specific Known Issues
- Stretched/Broken O2 Sensor Harness: → Shop Oxygen Sensor A notable number of owners have discovered the O2 sensor wiring harness that runs over the top of the transmission bellhousing is pulled too taut from the factory. Over time, engine and transmission movement can cause the wires to stretch and break internally or pull out of the connector. A YouTube video by user 'Philip Cochum' details this exact failure mode on two separate V6 Mustangs.
Mechanic-Grade Diagnostic Values
- HO2S Heater Element Resistance — expected: 2 to 14 Ohms when cold.. Failure: A reading of infinite Ohms (open circuit) or near 0 Ohms (short circuit) indicates a failed heater element within the sensor.
- O2 Sensor Signal Voltage (at PCM or connector) — expected: Rapidly fluctuating between 0.1V and 0.9V on a warm, running engine in closed loop.. Failure: Voltage is flat, stuck near 0.45V, or shows 0V. This indicates no activity.
- O2 Sensor Signal Circuit Bias Voltage (Key On, Engine Off, Sensor Unplugged) — expected: 0V. Unlike many GM vehicles, Ford systems of this era typically do not apply a bias voltage to the O2 sensor signal wire.. Failure: The presence of significant voltage (e.g., 0.45V or higher) on the signal wire with the sensor unplugged could indicate a short to another circuit, though this is not the expected behavior for this platform.
Scan Tool Commands That Help
- Ford IDS / FORScan: A/F CONTROL Active Test — This function allows a technician to manually command a rich or lean fuel mixture. While observing the O2S11 voltage, if the voltage does not respond to the commanded change, it helps confirm the sensor or its circuit is inactive.
Wiring & Ground Locations
- Bank 1 Sensor 1 Connector Wires (4.6L V8) — Connector for the upstream oxygen sensor on the passenger side.. Knowing the wire colors is essential for testing. For the right front (Bank 1, Sensor 1) O2 sensor, the signal wires are typically Red/White and Grey/Light Blue. The heater wires are Red/Yellow (power) and Grey/Red (ground).
- G101 (4.6L V8) — Ground for the A/C compressor clutch field coil, location varies but is in the engine bay.. While not a direct PCM or sensor ground, poor engine-related grounds can introduce electrical noise and issues. Ensuring all major engine bay grounds are clean and tight is a good practice when diagnosing electrical faults.
- G201 — Located on the passenger side kick panel, near the PCM.. This is a primary ground for the Powertrain Control Module (PCM). A poor connection here can cause a wide range of erratic engine management issues, including incorrect sensor readings.
- Main Engine Ground Strap — A large braided strap from the back of the driver's side cylinder head to the firewall. Also, the main battery ground cable connects to the passenger side motor mount bracket on the engine block.. This is the primary ground path for the entire engine block to the chassis. A loose or corroded main ground can cause the sensor circuits, which are grounded through the engine and PCM, to behave erratically.
Real Owner Repair Stories
- YouTube video by 'Philip Cochum' (2005 Ford Mustang V6 (two separate vehicles)) — Check Engine Light with O2 sensor codes (P0130, P0131, P0132 mentioned, which are related to Bank 1 Sensor 1 circuit faults).
❌ Tried (didn't work) The video implies that simply replacing the sensor might not have been the fix, as the focus is on the wiring.
✅ What actually fixed it The wiring harness for the O2 sensor was broken on top of the transmission bellhousing due to being stretched too tightly from the factory. The fix was to splice in a new piece of wire to add slack and repair the broken connection.
OEM Part Supersession History
5C5Z-9F472-BA→GU2Z-9G444-A— Part number consolidation and updates by Ford.
Heads up: The original part number 5C5Z-9F472-BA was also preceded by XC2Z-9F472-BA. When searching, ensure the replacement part is listed as compatible with the specific 2005-2010 Mustang model year and engine.
Model Year Variations Within This Range
- 2005-2010: The fuse powering the O2 sensor heaters can vary. Some owner's manuals and forum discussions point to fuse #45 (a 10A fuse), while others, particularly the 2007 wiring diagram, specify fuse #47 (a 15A fuse). Both should be checked when diagnosing a potential heater circuit issue.
Diagnostic Flowchart
Other Known Issues on This Vehicle
Issues unrelated to this code that are worth knowing about as an owner of this generation:
- Water Leak into Passenger Footwell / Smart Junction Box (SJB) 🔴 High — Very common. Caused by clogged cowl drains under the windshield wipers. Can lead to major electrical problems, including O2 sensor circuit faults if the SJB is damaged. (Ref: TSB 08-26-7)
- Cracked Plastic Thermostat Housing (4.0L V6) 🔴 High — Extremely common failure item on the V6, leading to coolant leaks and potential overheating. Often replaced with an aluminum aftermarket part.
- Timing Chain Rattle (4.0L SOHC V6) 🔴 High — A notorious and expensive issue. The timing chain guides and tensioners wear out, typically after 80,000-100,000 miles, causing a rattling noise, especially on startup. If ignored, can lead to catastrophic engine failure.
- Two-Piece Spark Plug Breakage (4.6L 3V V8, 2005-early 2008) 🟠 Medium — The original Motorcraft spark plugs have a design that can cause the lower portion to seize in the cylinder head and break off during removal. Requires a special extraction tool. Later 2008+ models used a revised plug design. (Ref: TSB 08-7-6)
- Failing Alternator (4.6L V8) 🟠 Medium — A common failure point, often occurring between 60,000 and 100,000 miles. Symptoms include a 'Check Charging System' warning light.
- Peeling Door Panel Inserts 🟡 Low — Very common cosmetic issue where the adhesive on the vinyl or leather door panel inserts fails, causing them to detach from the door card.
Used vs. New Parts: Buying Guide for This Vehicle
When a used part is the smart pick: A used part is a smart choice for a replacement wiring harness pigtail or connector. If the original connector is melted or the locking tab is broken, sourcing a used pigtail from a junkyard is a cost-effective and reliable repair.
Donor-vehicle mileage cap: roughly under 150000 miles for the part to have meaningful remaining life.
What to inspect on the donor part:
- For a wiring pigtail, ensure there are at least 4-6 inches of wire past the connector.
- Inspect the connector for any signs of melting, cracking, or corrosion on the pins.
- Check that the wire insulation is not brittle, cracked, or oil-soaked.
OEM-only on this vehicle (don't cheap out):
- Oxygen Sensor
Aftermarket brands forum-validated for this vehicle:
- NTK (also known as NGK)
- Denso
- Bosch
Brands owners have reported issues with on this vehicle:
- No-name, unbranded 'universal' sensors from online marketplaces. These often have incorrect heater resistance or response characteristics, leading to the code returning.
Real Owner Stories
Aggregated from forums and TSBs cited above. Mileages and costs reflect what owners reported in those sources.
2005-2009 Ford Mustang V6
Symptoms: The owner experienced O2 sensor codes and discovered the wiring harness was pulled too taut from the factory.
What fixed it: Repaired the O2 sensor harness located on top of the transmission bellhousing where the wires had stretched and broken internally due to engine and transmission movement.
Source hint: YouTube video by user 'Philip Cochum' titled '05'-09' Mustang O2 Sensor Codes and Wiring Harness Location'
2007 Ford Mustang
Symptoms: Owner was investigating O2 sensor power issues and required specific fuse locations for the heater circuit.
What fixed it: Identified fuse F47 (15A) in the under-hood fuse box as the power source for the Heated Oxygen Sensors (HO2S).
Source hint: MustangForums.com - 'Is there a fuse for the O2 sensors?'
2005-2010 Ford Mustang — ~85000 miles
Symptoms: Check Engine Light with a flatline O2 sensor voltage reading near 0.45V.
What fixed it: Replacement of the Bank 1, Sensor 1 oxygen sensor with a Motorcraft unit after the internal heater element failed.
Source hint: Common causes and diagnosis steps for Bank 1, Sensor 1 Oxygen Sensor failure
Related OBD-II Codes
Frequently Asked Questions
Which fuse should I check for an O2 sensor heater circuit issue on my 2005-2010 Mustang?
Is there a specific brand of oxygen sensor recommended for the 4.0L or 4.6L Mustang?
Where is the Bank 1, Sensor 1 oxygen sensor located on my Mustang V6 or V8?
Can a water leak in my passenger footwell cause O2 sensor codes like P0134?
I've heard the wiring harness is too short on these cars; where does it usually break?
What are the symptoms of a P0134 code on a 2005-2010 Mustang?
Helpful Videos

We Have This Part in Stock


The information in this article is provided for general reference and educational purposes only. Vehicle specifications, procedures, and part compatibility can vary by production date, trim level, and region. Always consult your vehicle's factory service manual and verify part numbers before purchasing or performing repairs. Safety-critical components such as airbags, seat belts, and braking systems should be installed by a qualified professional.
- Ford Mustang:
- 🧭 Diagnostic Flowchart
- 🎬 Helpful Videos
- 🛍️ Shop This Part
- What's Unique About the 2005-2010 Ford Mustang
- Symptoms You May Notice
- Most Likely Causes
- Rare But Worth Checking
- Diagnosis Steps
- Parts You'll Likely Need
- Related Codes That Often Appear With This One
- Platform-Specific Known Issues
- Mechanic-Grade Diagnostic Values
- Scan Tool Commands That Help
- Wiring & Ground Locations
- Real Owner Repair Stories
- OEM Part Supersession History
- Model Year Variations Within This Range
- Other Known Issues on This Vehicle
- Used vs. New Parts: Buying Guide for This Vehicle
- Real Owner Stories
- 2005-2009 Ford Mustang V6
- 2007 Ford Mustang
- 2005-2010 Ford Mustang — ~85000 miles
- Related OBD-II Codes
- Frequently Asked Questions
- 🎟️ Get 5% Off