
P0134 on 2000-2006 GMC Yukon V8: Causes and Fixes for O2 Sensor Inactivity
This code means the upstream oxygen sensor on the driver's side (Bank 1, Sensor 1) is not sending a signal. The most common fix is replacing the sensor itself, which costs about $50-$80 for an aftermarket part (Denso, Bosch) or $100+ for an OEM ACDelco part. Before replacing, it's crucial to check for blown O2 sensor fuses and exhaust leaks from cracked manifolds, both common issues on this platform. It's a straightforward DIY job for many owners.
- P0134 on your Yukon almost always points to a bad driver's side upstream (pre-catalytic converter) oxygen sensor.
- Before buying a new sensor, perform a quick visual inspection of the wiring for any obvious damage and check the O2 sensor fuse.
- Listen for a 'ticking' sound from the engine, which could indicate an exhaust manifold leak—a known issue on these trucks that can also cause this code.
- Replacing the sensor is a manageable DIY job with the correct O2 sensor socket, saving significant labor costs.
- Always use a quality replacement sensor from brands like ACDelco, Denso, or Bosch to ensure longevity and proper function.
What's Unique About the 2000-2006 GMC Yukon
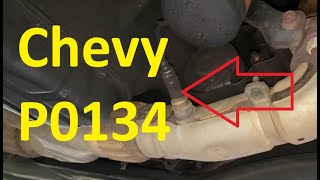
On the GMT800 platform, which includes the 2000-2006 Yukon, the V8 engines are generally robust, but the O2 sensors are a common wear-and-tear item. Their location on the exhaust manifold makes them susceptible to both extreme heat and potential damage to the wiring harness. While the code itself is standard, owners of these trucks frequently encounter it as the vehicle surpasses 100,000 miles. The fix is often a new sensor, but checking for two other platform-specific issues is critical: exhaust leaks from cracked manifolds (especially the rear driver's side bolt) and blown 15-amp O2 sensor fuses in the under-hood fuse box. A particularly notorious issue is that the front and rear O2 sensor connectors are physically identical and use the same wire colors, making it easy to accidentally swap them during replacement 🎬 Watch: A guide to diagnosing P0134 on GMC trucks, which will cause this code.
Symptoms You May Notice
- Check Engine Light is on
- Reduced fuel economy
- Rough or unstable idle
- Engine hesitation or misfiring
- Failure to pass an emissions test
- Noticeable exhaust or gas smell in the cabin
- Loud ticking or tapping noise from the engine bay, especially when cold, if caused by an exhaust leak
- Replacing the catalytic converter. A P0134 code points to the sensor *before* the converter and does not indicate converter health.
- Replacing the wrong O2 sensor. Ensure you are replacing Bank 1 (driver's side) and Sensor 1 (upstream/pre-cat).
- Ignoring an exhaust leak. Many replace the O2 sensor only to have the code return because the root cause was an exhaust leak giving the sensor a bad reading.
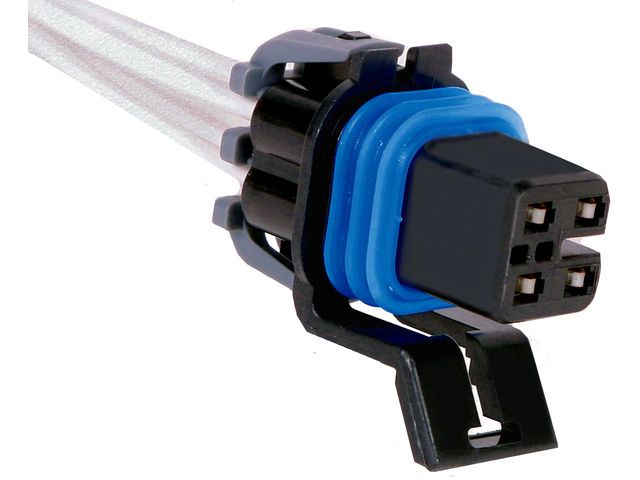
- Accidentally swapping the upstream and downstream sensor connectors. On GMT800 trucks, the connectors and wire colors for the upstream (Sensor 1) and downstream (Sensor 2) O2 sensors on the same bank are often identical, making it easy to plug them in incorrectly after a replacement.
Most Likely Causes
- Faulty Bank 1, Sensor 1 Oxygen Sensor 🔴 High Probability → Shop Oxygen Sensor Oxygen sensors are wear items with a typical lifespan of 80,000-100,000 miles. Given the age of this vehicle range, sensor failure due to age, internal heater circuit burnout, or contamination is very common.
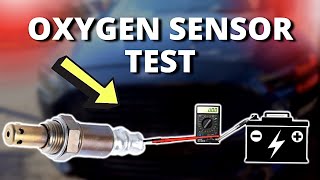
How to confirm: Use an OBD-II scanner with live data. The voltage for 'O2S B1S1' should fluctuate rapidly between approximately 0.1V and 0.9V. If it is stuck at a fixed voltage (often around 0.45V) or shows no reading, the sensor has failed. You can also test the internal heater circuit with a multimeter set to ohms; a good sensor will show low resistance (e.g., 2-15 ohms) between the two same-colored heater wires, while a bad one will show infinite resistance (open circuit).
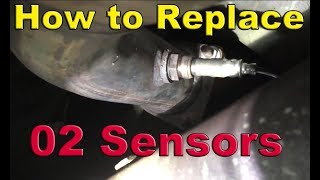
Typical fix: Replace the Bank 1, Sensor 1 oxygen sensor. On GM V8s, Bank 1 is the driver's side, and Sensor 1 is the upstream sensor located on the exhaust manifold 🎬 Watch: Step-by-step O2 sensor replacement for your Yukon before the catalytic converter.
Est. part cost: $50-$150 - Damaged Wiring or Connector 🟡 Medium Probability The sensor's wiring harness is routed near hot exhaust components and can become brittle, melted, or frayed. A known issue on some GM trucks is power steering fluid leaking from a hose directly onto the O2 sensor harness, contaminating the connector and causing signal issues.
How to confirm: Visually inspect the wiring harness leading to the O2 sensor. Look for any signs of melting, chafing against the engine block or frame, or corrosion in the connector pins. Check for fluid contamination from above, particularly from power steering lines. Test for continuity and voltage at the connector with a multimeter.
Typical fix: Repair the damaged section of wire or replace the connector pigtail. If contaminated with fluid, clean both sides of the connector thoroughly with electrical contact cleaner and fix the source of the fluid leak. Ensure the repaired harness is secured away from heat sources.
Est. part cost: $10-$40 - Exhaust Leak Before the Sensor 🟡 Medium Probability The cast iron exhaust manifolds on these GM V8s are notorious for having bolts break off, especially the rearmost bolt on the driver's side due to thermal stress. This allows outside air to enter the exhaust stream, which makes the O2 sensor read a false lean condition, sometimes causing it to go inactive.
How to confirm: Listen for a distinct ticking or tapping noise from the engine bay, which is often loudest on a cold start and may quiet down as the engine warms up and the metal expands. Visually inspect the manifold for black soot trails around the mating surface to the cylinder head. A smoke test can definitively identify leaks.
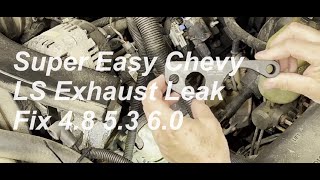
Typical fix: If a manifold bolt is broken, it must be extracted and replaced. As a common and effective workaround, an aftermarket clamp (like Dorman part #917-107) can be installed to press the manifold back against the head, sealing the leak without requiring bolt extraction. 🎬 See how to install an easy manifold bolt repair clamp If the manifold itself is cracked, it must be replaced.
Est. part cost: $20-$300 - Blown Fuse for O2 Heater Circuit ⚪ Low Probability A short in the sensor's heater element or its wiring can cause the fuse to blow. Without power to the internal heater, the sensor won't reach operating temperature and will remain inactive, triggering P0134.
How to confirm: Check the fuse box under the hood on the driver's side. For this GMT800 platform, there are typically two 15-amp fuses for the O2 sensors, often labeled 'O2 A' and 'O2 B' or simply marked by position. Consult the fuse box lid diagram and inspect the relevant fuses.
Typical fix: Replace the blown 15-amp fuse. If it blows again immediately, there is a short circuit in the wiring or one of the O2 sensors that must be found and repaired.
Est. part cost: <$5
Rare But Worth Checking
- Faulty Powertrain Control Module (PCM): → Shop Engine Control Module (ECM) This is extremely rare. The PCM should only be considered after all other possibilities, including the sensor, wiring, fuses, and exhaust system, have been thoroughly ruled out. PCM failure typically presents with multiple, often unrelated, trouble codes.
- Water Intrusion in Body Connectors: GM TSB PIT5608E notes that on some trucks, water can leak past body plugs in the 'A' pillar and corrode the main door harness-to-body connectors (X500/X600). While not a direct cause, this type of corrosion in major electrical junctions can lead to unpredictable electrical issues, potentially including O2 sensor circuit faults.
Diagnosis Steps
- Read the code with an OBD-II scanner to confirm P0134 is present.
- Check for any other stored codes that could provide more clues (e.g., P0135, P0154, P0300).
- Use the scanner's live data function to monitor the 'O2S B1S1' voltage. A healthy sensor will show voltage fluctuating rapidly between ~0.1V and ~0.9V. A flat line near 0.45V confirms the 'no activity' fault.
- Inspect the under-hood fuse box on the driver's side. Locate and check the two 15-amp fuses for the oxygen sensors (often labeled 'O2 A' and 'O2 B').
- Perform a thorough visual inspection of the driver's side exhaust manifold for signs of leaks, such as black soot trails or broken rear bolts. Listen for an exhaust tick when the engine is cold.
- Visually inspect the Bank 1, Sensor 1 (driver's side, upstream) wiring and connector for any obvious damage like melting, fraying, fluid contamination, or loose connections.
- If wiring looks okay, test the sensor's internal heater. Disconnect the sensor and use a multimeter on the sensor side of the plug. Measure the resistance between the two same-colored wires (usually both black or both white). A reading of 2-15 Ohms is typical; an open loop (OL) reading means the heater is bad and the sensor needs replacement.
- If the sensor heater tests good, test the harness side. With the key on and engine off, check for 12V at one of the heater circuit pins on the vehicle's harness connector. This confirms power is getting to the sensor.
- If all wiring, fuses, and the exhaust system are confirmed to be good, the oxygen sensor itself is the most likely culprit and should be replaced.
Parts You'll Likely Need
- Oxygen Sensor (Bank 1, Sensor 1)
(OEM #12576131, 12583804)— This is the upstream sensor on the driver's side. It is a common wear item and the direct cause of the P0134 code in most cases.
Trusted brands: ACDelco (OEM), Denso (often the OE manufacturer), Bosch
Related Codes That Often Appear With This One
- P0135 — P0135 indicates a fault in the heater circuit for the same sensor (Bank 1, Sensor 1). They often appear together when the sensor has an internal failure affecting both its sensing and heating elements, or if the shared fuse is blown.
- P0300 — A random misfire code (P0300) can sometimes be triggered alongside P0134. An inactive O2 sensor prevents the PCM from properly adjusting fuel trim, which can lead to a rich or lean condition that causes misfires across multiple cylinders.
- P0154 — This is the same 'No Activity Detected' code but for Bank 2, Sensor 1 (passenger side). Seeing both P0134 and P0154 simultaneously points strongly toward a common cause affecting both sensors, such as a blown fuse, a major exhaust leak, or a fuel pressure issue.
Technical Service Bulletins (TSBs) & Recalls
- GM TSB PIP5516: Mentions that a power steering fluid leak can contaminate the Bank 1 O2 sensor wiring harness, causing skewed readings and triggering codes. The fix involves repairing the leak and cleaning or replacing the contaminated harness/sensor.
- GM TSB PIT5608E: Describes a condition where water can enter the main body-to-door harness connectors in the A-pillar (X500/X600), leading to corrosion and various electrical faults. This is a possible, though less direct, cause of sensor circuit issues.
- GM Bulletin #PIT5336: While issued for other models, this bulletin notes that a technician may find the Emission 1 Fuse is open when diagnosing P0134 and related O2 sensor codes.
Platform-Specific Known Issues
- The rear-most exhaust manifold bolt on the driver's side is prone to breaking, causing an exhaust leak that can trigger this code. A special aftermarket bracket (e.g., Dorman 917-107) is available to fix this without having to extract the broken bolt.
- Power steering fluid lines routed above the driver's side of the engine can leak onto the O2 sensor wiring harness, contaminating the connector and causing a P0134 code, as noted in a GM service bulletin.
Mechanic-Grade Diagnostic Values
- Upstream O2 Sensor (B1S1) Live Data Voltage — expected: Rapidly fluctuating between 0.1V and 0.9V when in closed loop.. Failure: Stuck at a steady voltage, typically around 0.45V (450mV), or showing 0V.
- O2 Sensor Heater Element Resistance — expected: 5-15 Ohms between the two same-colored heater wires on the sensor side of the connector.. Failure: Infinite resistance (OL) indicates a burned-out heater. 0 Ohms indicates a shorted heater.
- O2 Sensor Heater Power Supply — expected: 12V (Battery Voltage) at the pink wire on the harness-side connector with key on, engine off.. Failure: 0V indicates a blown fuse (O2 A or O2 B) or a break in the power wire.
- O2 Sensor Heater Ground Control — expected: A pulsing ground signal from the PCM when the engine is running.. Failure: No ground signal (wire stays at 12V) when tested with a test light connected to battery positive. This points to a wiring issue or a faulty PCM driver if wiring continuity to the PCM is confirmed.
Scan Tool Commands That Help
- Tech2 / High-End Bidirectional Scanner: O2 Heater On/Off Command or A/F Control Active Test — This command allows a technician to manually activate the O2 sensor heater circuit. If the heater turns on with the scan tool but not during normal operation, it may point to a PCM logic issue. If it doesn't turn on via the command, it helps isolate the issue to the wiring, sensor heater, or the PCM driver itself.
Wiring & Ground Locations
- G103 — On the rear of the passenger side (Bank 2) cylinder head.. This is a primary engine computer ground. A poor connection here can cause erratic behavior and fault codes for multiple sensors, including oxygen sensors.
- G104 — On the rear of the driver's side (Bank 1) cylinder head.. This is the primary ground for Bank 1 components. A corroded or loose G104 is a direct potential cause for faults on the driver's side, including P0134 for the Bank 1 O2 sensor.
- Engine-to-Firewall Ground Strap — A braided metal strap typically running from the back of the driver's side cylinder head to the firewall, near the brake booster.. This strap ensures the engine block has a solid ground connection to the vehicle body/chassis. If it breaks or corrodes, the PCM and sensor circuits can lose their ground reference, causing a wide range of electrical gremlins, including O2 sensor codes.
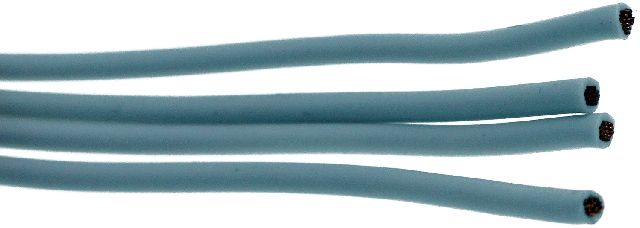
- B1S1 Connector Pins (Typical) — 4-pin connector for the driver-side upstream O2 sensor.. Knowing the pin functions is essential for testing. Typical GMT800 layout: TAN and PPL wires are for the O2 signal (high and low), while the PNK wire is 12V+ for the heater, and the BLK/WHT wire is the PCM-controlled ground for the heater.
Real Owner Repair Stories
- 2CarPros Forum, user 'GLVIDRINE8' and expert 'STEVE W' (1999 Chevrolet Silverado 1500 5.3L V8 (GMT800 Platform)) — P0134 and P0154 codes appeared immediately after replacing all four O2 sensors.
❌ Tried (didn't work) Replacing all four O2 sensors.
✅ What actually fixed it The expert identified that on these GM trucks, the front (Sensor 1) and rear (Sensor 2) O2 sensor connectors are physically identical, and the wire colors are the same. The owner had likely swapped the connectors, plugging the new upstream sensor into the downstream harness and vice-versa. Swapping them back to their correct positions would resolve the codes. - LS1Tech Forum, user with engine-swapped 2004 Silverado (2004 Chevrolet Silverado with 4.8L swapped to 6.0L) — O2 sensor heater circuit never activated, leading to codes.
❌ Tried (didn't work) Confirmed 12V power to the heater circuit., Confirmed continuity on all wires from the sensor connector to the PCM., Confirmed all PCM ground pins had continuity to the battery ground.
✅ What actually fixed it The user diagnosed that the PCM was not providing the pulsed ground to activate the heater circuit. The final diagnosis pointed to a faulty PCM heater driver circuit, requiring PCM repair or replacement. The user created a custom test light from an O2 pigtail to visually confirm the lack of a ground signal from the PCM.
OEM Part Supersession History
12576131→12583804 (and others, often sold under ACDelco 213-1699)— Standard part evolution and supplier changes.
Heads up: Denso (part #234-4668) is a widely cited OE equivalent. Ensure the replacement part is specified for the correct engine (gasoline vs. Flex Fuel VIN 'Z') as calibrations may differ even if the part fits.
Model Year Variations Within This Range
- 2002-2006: Models equipped with the Flex Fuel 5.3L V8 (VIN 'Z') have different fuel injectors and fuel system components compared to the standard gasoline 5.3L V8 (VIN 'T'). While the O2 sensors may be physically interchangeable, the PCM's fuel strategy is different, and using the wrong sensor or having a tune that doesn't account for the correct hardware can cause fuel trim and sensor activity issues.
Diagnostic Flowchart
Real Owner Stories
Aggregated from forums and TSBs cited above. Mileages and costs reflect what owners reported in those sources.
2003 Chevrolet Suburban V8
Symptoms: Experienced codes P0300, P0134, and P0135 simultaneously.
What fixed it: Replaced O2 sensors with no change; diagnosis shifted to checking fuses, wiring, and potential vacuum leaks due to the complexity of the codes appearing together.
Source hint: Tahoe Yukon Forum - 'P0300, P0134, P0135' (2020-07-07)
Chevrolet Tahoe/Suburban V8 (Fresh Rebuild)
Symptoms: Received both P0134 and P0154 codes after an engine rebuild. Live data showed both upstream sensors stuck at 0.445V.
What fixed it: Identified as a systemic issue like a blown fuse or common wiring problem rather than two simultaneously failed sensors.
Source hint: Chevrolet Forum - 'Help Request: P0134 P0154 Fresh Rebuild' (2020-07-03)
2000 GMC Yukon XL V8
Symptoms: Triggered code P0134.
What fixed it: Replacing the Bank 1 Sensor 1 oxygen sensor, confirming the long-standing commonality of this fix on the GMT800 platform.
Source hint: Tahoe Yukon Forum - 'O2 Sensor - Cadillac Escalade' (2014-02-11)
Related OBD-II Codes
Frequently Asked Questions
Does GM TSB PIP5516 apply to my 2000-2006 Yukon V8 for code P0134?
I hear a loud ticking noise when my Yukon is cold and have a P0134 code. Are they related?
Do I have to extract the broken exhaust manifold bolt to fix the P0134 exhaust leak?
Which specific fuses should I check for the O2 sensor heater circuit on the GMT800 platform?
Which sensor is Bank 1, Sensor 1 on the GMC Yukon V8?
My scanner shows the O2S B1S1 voltage stuck at 0.45V. What does this mean for my Yukon?
Helpful Videos
We Have This Part in Stock


The information in this article is provided for general reference and educational purposes only. Vehicle specifications, procedures, and part compatibility can vary by production date, trim level, and region. Always consult your vehicle's factory service manual and verify part numbers before purchasing or performing repairs. Safety-critical components such as airbags, seat belts, and braking systems should be installed by a qualified professional.
- GMC Yukon:
- 🧭 Diagnostic Flowchart
- 🎬 Helpful Videos
- 🛍️ Shop This Part
- What's Unique About the 2000-2006 GMC Yukon
- Symptoms You May Notice
- Most Likely Causes
- Rare But Worth Checking
- Diagnosis Steps
- Parts You'll Likely Need
- Related Codes That Often Appear With This One
- Technical Service Bulletins (TSBs) & Recalls
- Platform-Specific Known Issues
- Mechanic-Grade Diagnostic Values
- Scan Tool Commands That Help
- Wiring & Ground Locations
- Real Owner Repair Stories
- OEM Part Supersession History
- Model Year Variations Within This Range
- Real Owner Stories
- 2003 Chevrolet Suburban V8
- Chevrolet Tahoe/Suburban V8 (Fresh Rebuild)
- 2000 GMC Yukon XL V8
- Related OBD-II Codes
- Frequently Asked Questions
- 🎟️ Get 5% Off