
P0134 on 2002-2007 Saturn Vue 2.2L: Causes and Fixes for O2 Sensor Inactivity
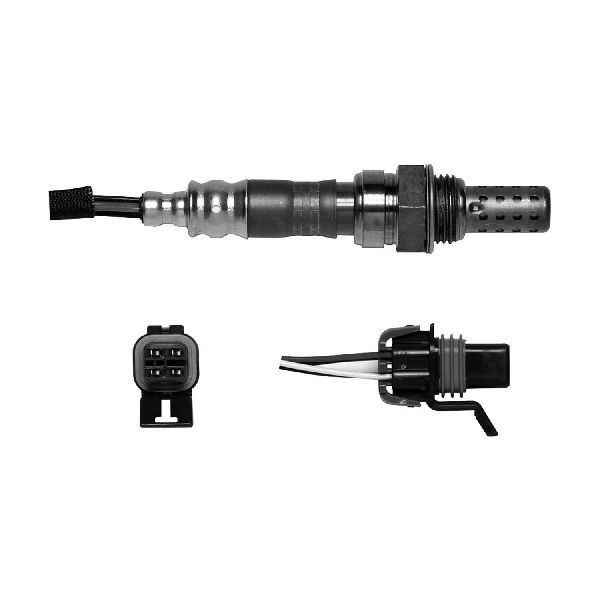
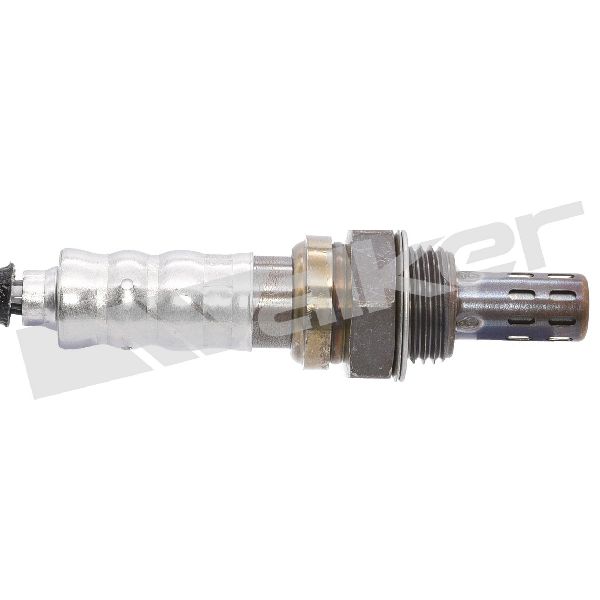
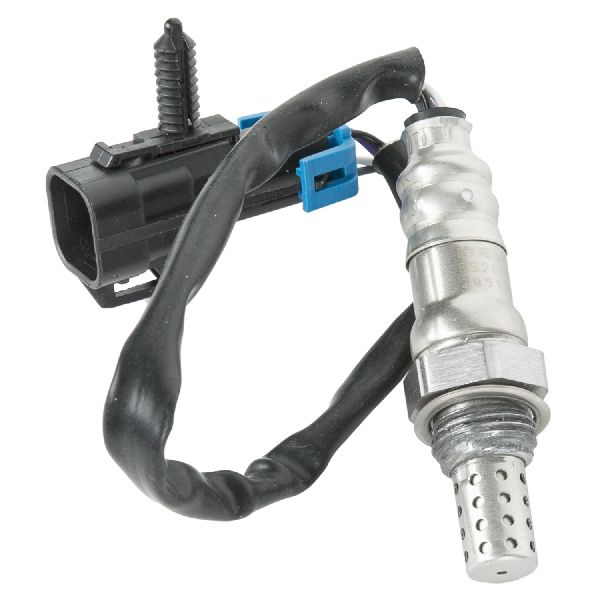
This code almost always means the upstream oxygen sensor (Bank 1, Sensor 1) has failed. Replacing it is the most common fix. Before replacing, check the O2 sensor fuse and inspect the engine ground wires on the block. Expect to pay $40-$80 for an aftermarket sensor (Denso is often recommended over Bosch by owners) or $90-$150 for an OEM ACDelco part. It's a straightforward DIY job for many owners.
- P0134 on your Saturn Vue means the primary, upstream oxygen sensor isn't sending a signal.
- The most likely fix is to replace the upstream (Bank 1, Sensor 1) O2 sensor. Denso is a highly-regarded brand for this application.
- Before buying parts, check the sensor's fuse, inspect its wiring for damage, and verify the engine ground connections are clean and tight, especially the one on the back of the block.
- You can continue driving in the short term, but expect poor gas mileage and get it fixed soon to avoid potential damage to your catalytic converter.
What's Unique About the 2002-2007 Saturn Vue
While the P0134 code is common on many vehicles, Saturn Vue and other L61-platform owners have specifically pointed to poor engine ground connections as a potential hidden cause. One critical ground point is located on the back of the engine block, above the starter and under the #4 intake runner, secured by a 10mm bolt holding two ring terminals with tan and black/white wires. Corrosion or internal wire damage here can mimic a failed sensor. Some owners have even added a supplementary ground wire directly to the ECM casing to resolve persistent electronic issues. Otherwise, the causes and fixes are typical for a GM vehicle from this era, with the O2 sensor itself being the most frequent point of failure.
Symptoms You May Notice
- Check Engine Light is on
- Reduced fuel economy by 10-15%
- Rough or unstable idle
- Engine hesitation or sluggish acceleration
- Failing an emissions test
- A smell of rotten eggs or visible black smoke from the exhaust in some cases
- Replacing the downstream (Bank 1, Sensor 2) oxygen sensor. This code specifically points to the upstream sensor (Sensor 1).
- Immediately replacing the O2 sensor without checking for blown fuses, wiring damage, or bad grounds first.
- Replacing the PCM when the actual fault is a broken wire or poor ground connection.
Most Likely Causes
- Failed Upstream Oxygen Sensor (Bank 1, Sensor 1) 🔴 High Probability → Shop Oxygen Sensor Oxygen sensors are wear-and-tear items with a finite lifespan, typically 80,000-100,000 miles. The internal heater circuit is a common failure point, which prevents the sensor from reaching operating temperature and triggering P0134.
How to confirm: Use a scan tool to view live data for 'B1S1 O2 Sensor Voltage'. A healthy sensor's voltage will fluctuate rapidly between approximately 0.1V and 0.9V. If the voltage is stuck (e.g., at 0.45V) or shows a flat line at 0V, the sensor has likely failed. You can also test the resistance of the heater circuit with a multimeter; an open circuit indicates failure.
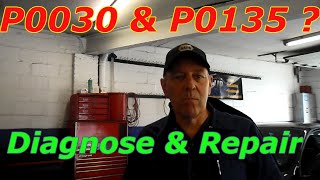
Typical fix: Replace the upstream oxygen sensor. It is located in the exhaust manifold, accessible from the front of the engine bay 🎬 Watch: See the exact location and removal on a Saturn Vue. after removing the heat shield. Use a 7/8" wrench or a specialized O2 sensor socket. 🎬 See this step-by-step walkthrough for changing an oxygen sensor. Torque the new sensor to spec (typically around 30 ft-lbs).
Est. part cost: $40-$150 - Damaged O2 Sensor Wiring or Connector 🟡 Medium Probability → Shop Oxygen Sensor The wiring is close to hot exhaust components and can become brittle, melted, or chafed over time. The connector can also accumulate dirt and corrosion, leading to a poor connection.
How to confirm: Visually inspect the entire wiring harness from the sensor to the main loom for any signs of melting, chafing, or corrosion at the connector. Check for continuity on the signal and heater circuit wires with a multimeter. A forum user on SaturnFans reported fixing a P0130/P0134 by discovering and repairing a wire with non-visible internal damage.
Typical fix: Repair the damaged section of the wire or replace the connector pigtail. Ensure the repaired harness is secured away from hot exhaust parts.
Est. part cost: $15-$40 - Exhaust Leak Before the O2 Sensor ⚪ Low Probability → Shop Oxygen Sensor Gaskets on the exhaust manifold can degrade over time, and the manifold itself can develop cracks, causing leaks. An exhaust leak allows outside air into the exhaust stream, which makes the O2 sensor read a constant lean condition (high oxygen), which the PCM can interpret as 'no activity'.
How to confirm: Listen for a ticking or puffing noise from the engine bay, especially when the engine is cold. Visually inspect the exhaust manifold for black soot trails indicating a leak. You can also spray soapy water on a cold engine's manifold and start it; bubbles will form at the leak. 🎬 Watch: How to find and fix exhaust leaks for under $15.
Typical fix: Replace the exhaust manifold gasket or the manifold itself if cracked.
Est. part cost: $20-$50 for a gasket, $100+ for a manifold. - Poor Engine Ground Connection ⚪ Low Probability A Saturn-specific forum post noted that a corroded or internally damaged ground wire on the engine block can cause this code. The specific ground point under the #4 intake runner is a known trouble spot.
How to confirm: Locate the main engine harness ground straps/wires. One key location is a 10mm bolt on the back of the block under the #4 intake runner. Unbolt it, clean the contact surfaces of the terminal and the block to bare metal with a wire brush, and re-secure them tightly. Check other main ground points from the engine to the chassis.
Typical fix: Clean or replace the ground wire. Some owners add a redundant ground for reliability.
Est. part cost: $5-$20
Rare But Worth Checking
- Blown Fuse for O2 Heater Circuit: The O2 sensor has an internal heater to get it to operating temperature quickly. This heater is on a fused circuit, often labeled 'EMI' or 'O2 HTR'. If the fuse blows, the sensor won't activate properly, triggering P0134.
- Faulty Powertrain Control Module (PCM): → Shop Engine Control Module (ECM) This is very rare and should be a last resort. A shop may suspect the PCM if multiple new sensors don't fix the code, but a broken wire or bad ground is still more likely. Before replacing the PCM, all other possibilities, including the sensor, wiring, fuses, and grounds, must be exhaustively ruled out.
Diagnosis Steps
- Read the code with an OBD-II scanner to confirm P0134 is the only code present.
- Visually inspect the upstream O2 sensor's wiring harness and connector. Look for obvious signs of damage, such as melting from contact with the exhaust, chafing, or corrosion.
- Check the vehicle's fuse box for a blown fuse related to the emissions system or O2 sensors (e.g., 'EMI', 'O2 HTR').
- Inspect the exhaust manifold and the area around the O2 sensor for signs of an exhaust leak (black soot, audible ticking noise).
- Locate and inspect the main engine ground wires. Pay special attention to the ground point on the back of the block under the #4 intake runner. Ensure they are clean, tight, and free of corrosion.
- Using a scan tool with live data, monitor the voltage for 'O2 Bank 1 Sensor 1'. Start the engine and let it warm up.
- Observe the voltage reading. It should fluctuate rapidly between roughly 0.1 and 0.9 volts. If it remains static (often stuck near 0.45V) or shows 0V, the sensor has likely failed or is not getting power/ground.
- If the sensor signal is flat and all wiring/fuses/grounds are confirmed to be good, replace the upstream oxygen sensor. A special O2 sensor socket is recommended for removal and installation.
Parts You'll Likely Need
- Upstream Oxygen Sensor (Bank 1, Sensor 1)
(OEM #ACDelco 213-2899 (This is a common GM part number for this application, but always verify with VIN. Other related ACDelco numbers could be 213-4247 or 213-4246).)— This is the sensor that the code directly identifies as inactive. It is the most common failure point for P0134.
Trusted brands: ACDelco (OEM), Denso (Often the OEM manufacturer for GM, highly recommended by forum users), NGK/NTK, Bosch (Some forum users report mixed results with Bosch sensors on these platforms)
OEM price range: $90-$150
Aftermarket price range: $40-$80
Platform-Specific Known Issues
- Engine Harness Ground Point Failure: A key ground point for engine sensors is located on the back of the engine block, under the #4 intake runner, secured by a 10mm bolt. This point, which grounds several tan and black/white wires, is prone to corrosion or the wires can suffer internal breaks. Cleaning this ground point or running a new ground wire has resolved P0134 for owners even after replacing the O2 sensor.
- ECM Grounding Suggestion: In the Saturn community, for various electrical gremlins, some owners have found success by adding a redundant ground wire from the metal casing of the Engine Control Module (ECM) directly to the chassis or battery negative terminal to ensure a solid ground connection.
Mechanic-Grade Diagnostic Values
- O2 Sensor Heater Circuit Resistance — expected: Between 3 and 30 Ohms, depending on sensor brand (typically 5-15 Ohms for Denso/ACDelco).. Failure: A reading of OL (Open Loop/infinite resistance) indicates a burned-out heater element. A reading of 0 Ohms indicates a short.
- O2 Sensor Heater Circuit Voltage (Key On, Engine Off) — expected: One of the heater wires (often pink) should show battery voltage (approx. 12V) when tested against chassis ground.. Failure: 0V indicates a blown fuse (e.g., 'EMI' fuse), a bad relay, or a break in the power wire.
- O2 Sensor Signal Wire Voltage (Key On, Engine Off, after initial prime) — expected: The PCM should supply a bias voltage of approximately 450mV (0.45V) to the signal wire.. Failure: A reading of 0V or battery voltage suggests a short or open in the signal wire or a faulty PCM driver circuit (rare).
- Mode $06 Test for O2 Sensor Response — expected: The component value for the O2 sensor switching test should be within the MIN/MAX limits specified by the PCM.. Failure: A test value that fails or is near the limit indicates a slow or lazy sensor, even if it hasn't set a P0133 (slow response) code yet.
Scan Tool Commands That Help
- Tech 2: Engine Data Display > O2 Sensor Data — Used to monitor live B1S1 voltage. A healthy sensor fluctuates rapidly between ~100mV and ~900mV. A flat line at ~450mV or 0V confirms the 'No Activity' fault.
- Tech 2: O2 Heater Test / O2 Sensor Update Test — This is a specific diagnostic function that tests the sensor's ability to respond. With the key on, the tool monitors the sensor voltage. Within two minutes, the voltage should change by at least 150mV from its initial ~450mV reading as the heater activates. If it doesn't, it confirms a fault in the heater, sensor, or wiring.
Wiring & Ground Locations
- G107 (or similar) — On the rear of the engine block, specifically described by forum users as being under the #4 intake runner, above the starter. It secures two ring terminals with tan and black/white wires via a 10mm bolt.. This is a primary sensor ground for the engine harness. Corrosion, looseness, or internal wire breaks at this specific, hard-to-see location are a known cause of P0134 on this platform, mimicking a failed O2 sensor.
- G105 — At the left rear of the engine.. This is another engine block ground point. While G107 is the more frequently cited culprit for P0134, all engine-to-chassis grounds should be inspected for integrity as part of a thorough diagnosis.
- ECM (Engine Control Module) — Mounted on the front of the intake manifold, under the ignition coil housing.. This is the location of the PCM/ECM. The O2 sensor wiring terminates here. Knowing its location is critical for testing wire continuity from the sensor connector to the ECM connector pins.
Real Owner Repair Stories
- SaturnForum.com user 'Dave Gunger' (Saturn Vue, year/engine not specified but in L61 context) — Persistent P0130 and P0134 codes.
❌ Tried (didn't work) Replacing the O2 sensor (twice, with different brands), Cleaning every visible ground connection, Replacing coolant temperature sensor and connector, Running a new wire (initially unsuccessful)
✅ What actually fixed it The user discovered one of the tan ground wires going to the engine block had non-visible internal damage. The final fix was running a new, separate ground wire directly from the computer (ECM) to a clean chassis ground, bypassing the faulty section of the factory harness.
Model Year Variations Within This Range
- 2002-2007: While the L61 2.2L engine was used throughout this period, minor changes in wiring harnesses and connector types can exist. The 2006-2007 models received a facelift which included some interior and exterior changes, and potentially minor electrical revisions. Always verify part numbers with the vehicle's VIN.
Diagnostic Flowchart
Used vs. New Parts: Buying Guide for This Vehicle
When a used part is the smart pick: For this repair, using used parts is generally not recommended for the sensor itself. However, a used exhaust manifold from a low-mileage donor is a viable option if the original is found to be cracked. A used wiring harness pigtail from a junkyard can also be a cost-effective repair for a damaged connector.
Donor-vehicle mileage cap: roughly under 80000 miles for the part to have meaningful remaining life.
What to inspect on the donor part:
- For an exhaust manifold: Inspect thoroughly for hairline cracks, especially around the welds and flanges.
- For a connector pigtail: Ensure the plastic is not brittle, the locking tab is intact, and there is no corrosion on the pins. Get as much wire as possible.
- Avoid parts from vehicles that show signs of major engine failure, fire, or flood damage.
OEM-only on this vehicle (don't cheap out):
- While not strictly 'OEM-only', forum consensus strongly favors OEM (ACDelco) or the original equipment manufacturer (Denso) for the oxygen sensor itself to avoid compatibility issues.
Aftermarket brands forum-validated for this vehicle:
- Denso (often the OEM supplier for GM)
- NTK/NGK
Brands owners have reported issues with on this vehicle:
- Bosch (some owners report inconsistent performance and premature failures on this specific platform)
- No-name 'universal' sensors that require splicing wires are highly discouraged due to the high potential for creating a new failure point.
Real Owner Stories
Aggregated from forums and TSBs cited above. Mileages and costs reflect what owners reported in those sources.
2002-2007 Saturn Vue 2.2L I4
Symptoms: Had recurring P0130 and P0134 codes that would not go away.
What fixed it: The problem was an internally damaged tan ground wire connected to the engine block, which looked fine from the outside. Running a new ground wire from the computer permanently solved the issue.
Source hint: SaturnForum.com Repair Story (P0130/P0134 thread)
2002-2007 Saturn Vue 2.2L I4
Symptoms: Check Engine Light was on with codes P0130 and P0134.
What fixed it: The cause was traced to the specific engine ground point located on the back of the block under the #4 intake runner. Cleaning the corroded contacts at this location resolved the codes.
Source hint: SaturnForum.com thread on ground wires
Related OBD-II Codes
Frequently Asked Questions
I replaced the O2 sensor on my 2.2L Vue, but the P0134 code came back. What's a common vehicle-specific cause for this?
Where is the upstream (Bank 1, Sensor 1) oxygen sensor located on my 2004 Saturn Vue?
What should the O2 sensor voltage look like on a scan tool if it's working correctly?
I hear a ticking noise from the engine bay. Could this be related to the P0134 code?
Are other GM cars with the 2.2L engine known to have this same P0134 problem?
What's the recommended fix for the known ground wire issue on the Saturn Vue?
Helpful Videos


We Have This Part in Stock


The information in this article is provided for general reference and educational purposes only. Vehicle specifications, procedures, and part compatibility can vary by production date, trim level, and region. Always consult your vehicle's factory service manual and verify part numbers before purchasing or performing repairs. Safety-critical components such as airbags, seat belts, and braking systems should be installed by a qualified professional.
- Saturn Vue:
- 🧭 Diagnostic Flowchart
- 🎬 Helpful Videos
- 🛍️ Shop This Part
- What's Unique About the 2002-2007 Saturn Vue
- Symptoms You May Notice
- Most Likely Causes
- Rare But Worth Checking
- Diagnosis Steps
- Parts You'll Likely Need
- Platform-Specific Known Issues
- Mechanic-Grade Diagnostic Values
- Scan Tool Commands That Help
- Wiring & Ground Locations
- Real Owner Repair Stories
- Model Year Variations Within This Range
- Used vs. New Parts: Buying Guide for This Vehicle
- Real Owner Stories
- 2002-2007 Saturn Vue 2.2L I4
- 2002-2007 Saturn Vue 2.2L I4
- Related OBD-II Codes
- Frequently Asked Questions
- 🎟️ Get 5% Off