
P0134 on 2005-2009 Subaru Outback 2.5L: Causes and Fixes for No O2 Sensor Activity
This code almost always means the front oxygen sensor (A/F sensor) has failed. The sensor's internal heater circuit is a common failure point. Replacing the sensor with a quality Denso (234-9120 for Federal models) or NTK part is the typical fix, costing around $90-$150 for the part and is a manageable DIY job with an O2 sensor socket.
- P0134 means your front oxygen (A/F) sensor is not working at all.
- The most likely fix is to replace the front A/F sensor. Choose a quality brand like Denso or NTK for reliability.
- Before buying a new sensor, always perform a quick visual inspection of the wiring and check the sensor's fuse.
- Do not confuse the front (Sensor 1) with the rear (Sensor 2). This code is only for the front sensor.
- Driving with this code can lead to poor fuel economy and potential damage to your catalytic converter.
What's Unique About the 2005-2009 Subaru Outback
The 2005-2009 (third generation) Outback, like many Subarus of this era using the EJ253 engine, relies heavily on the front A/F sensor for precise fuel control. While the code itself is standard, these vehicles are known for the front A/F sensor failing with age. The failure is often internal to the sensor's heater element, which is critical for getting the sensor to operating temperature quickly. Owners frequently resolve P0134 simply by replacing this sensor, but it is crucial to use an OEM or high-quality aftermarket part, as cheap sensors are known to fail or not work at all.
Symptoms You May Notice
- Check Engine Light is on
- Decreased fuel economy
- Rough or unstable idle
- Engine hesitation or lack of power during acceleration
- Failing an emissions test
- Replacing the rear (downstream) O2 sensor. This code specifically points to Sensor 1, which is the front (upstream) sensor.
- Using a cheap, no-name aftermarket sensor. Many owner forums report that universal or low-quality sensors either don't work, fail quickly, or cause other codes to appear. Sticking to OEM or a known OE-supplier like Denso or NTK is critical.
Most Likely Causes
- Failed Front Air/Fuel (O2) Sensor 🔴 High Probability The internal heater element of the sensor is a common point of failure. Over time, thousands of heat cycles and contamination from exhaust gases cause the sensor to wear out and stop sending a signal.
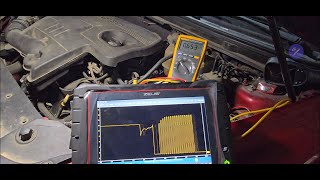
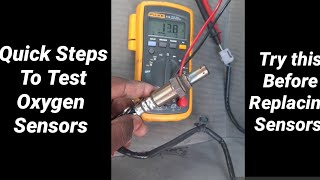
How to confirm: Use a scan tool to monitor live data for 'Bank 1 Sensor 1'. If the voltage is flat (e.g., stuck at a specific value and not fluctuating) while the engine is running and warmed up, the sensor is dead. You can also test the resistance of the heater circuit within the sensor using a multimeter; an open circuit (infinite resistance) or a reading outside the 2-10 Ohm range confirms failure. 🎬 Watch: How to test oxygen sensor heater circuits with a multimeter.
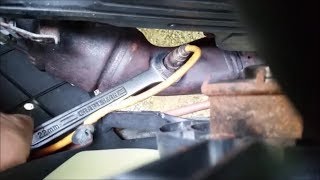
Typical fix: Replace the front A/F (O2) sensor. A 22mm (or 7/8") offset O2 sensor socket is highly recommended. Apply anti-seize compound to the threads of the new sensor if not pre-applied.
Est. part cost: $90-$180 - Damaged Wiring or Connector 🟡 Medium Probability The sensor wiring is routed near hot exhaust components and can become brittle, melt, or chafe over time, leading to an open or short circuit. The plastic clips holding the harness away from the engine can break, allowing the wires to make contact with the hot exhaust manifold.
How to confirm: Visually inspect the entire wiring harness from the sensor to its connection point. The connector is typically a grey plug mounted on a bracket near the passenger side strut tower. Look for melted plastic, frayed wires, or corrosion inside the connector plug.
Typical fix: Repair the damaged section of wire with a new connector or by soldering and heat-shrinking the broken wire. Secure the harness away from hot surfaces with new clips or high-temp zip ties.
Est. part cost: $5-$30 - Blown Fuse for O2 Sensor Heater ⚪ Low Probability → Shop Oxygen Sensor A short in the sensor or its wiring can sometimes cause the associated fuse to blow, cutting power to the sensor's heater circuit.
How to confirm: Locate the main fuse box in the engine bay. Identify the fuse for the O2 or A/F sensor heater circuit (often labeled 'A/F-O2 HTR' or similar, typically a 15A fuse). Pull the fuse and visually inspect if it has blown. Test for continuity with a multimeter.
Typical fix: Replace the blown fuse. If the new fuse blows immediately, it indicates a persistent short circuit in the wiring or the sensor itself that must be found and fixed before replacing the fuse again.
Est. part cost: $1-$5 - Exhaust Leak ⚪ Low Probability Rust can cause leaks at the exhaust manifold gaskets or flanges. While more likely to cause lean codes (like P0171), a large leak near the sensor can sometimes affect its readings enough to trigger an activity code by introducing outside air.
How to confirm: Listen for a ticking or puffing sound from the engine bay, especially when the engine is cold. You can also use a shop towel to briefly block the tailpipe; this will increase pressure and make leaks more audible.
Typical fix: Replace the leaking gasket or tighten the loose flange bolts.
Est. part cost: $15-$50
Rare But Worth Checking
- Faulty Engine Control Module (ECM): → Shop Engine Control Module (ECM) This is extremely rare. Before condemning the ECM, all other possibilities (sensor, wiring, fuses, exhaust leaks) must be exhaustively ruled out.
Diagnosis Steps
- Scan for Codes: Use an OBD-II scanner to confirm P0134 and check for any other related codes like P0030 or P0031.
- Inspect Wiring: Visually inspect the A/F sensor's wiring harness for any signs of melting, chafing, or damage. Follow the wire from the sensor in the exhaust manifold up to its connector, which is typically a grey plug mounted near the passenger-side strut tower. Ensure the connector is securely plugged in and free of corrosion.
- Check the Fuse: In the under-hood fuse box, locate and inspect the 15A fuse for the O2 sensor heater circuit. Replace if blown.
- Check for Exhaust Leaks: With the engine running, listen and feel for any leaks in the exhaust manifold or gaskets upstream of the sensor.
- Analyze Live Data: Use a scanner with live data capability to monitor the 'B1S1 Voltage' or 'A/F Sensor #1'. On this A/F sensor, the voltage should be relatively steady around 3.3V at idle. If it is flat, unresponsive, or stuck at a fixed value (e.g. 0.0V or 5.0V), it confirms a lack of activity. 🎬 Watch: Quick steps to test an O2 sensor using live data.
- Test the Sensor: If the wiring and fuse are good but the sensor is inactive, it has failed. Disconnect the sensor and test the resistance between the two heater circuit pins (usually the two wires of the same color). A reading outside of the 2-10 ohm range indicates a bad heater element.
- Replace the Sensor: If the sensor is confirmed to be faulty, replace it using a 22mm or 7/8" O2 sensor socket. 🎬 See this walkthrough on how to replace both Subaru O2 sensors.
Parts You'll Likely Need
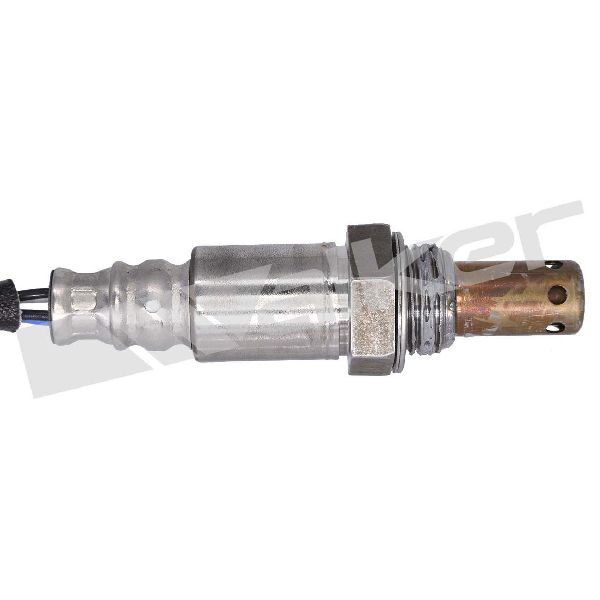
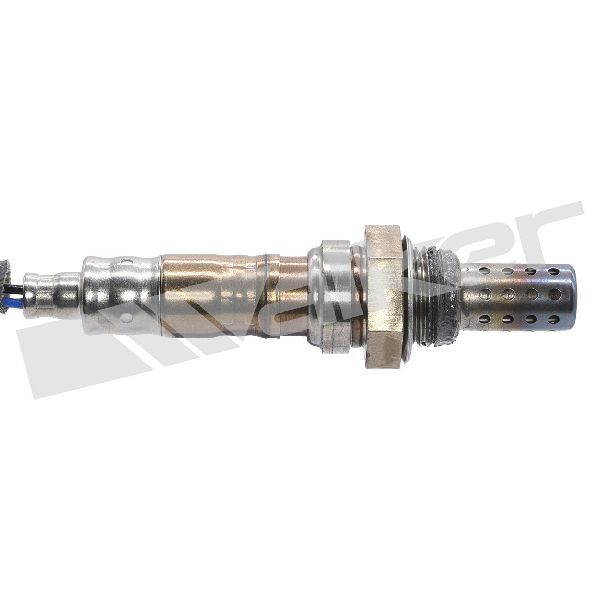
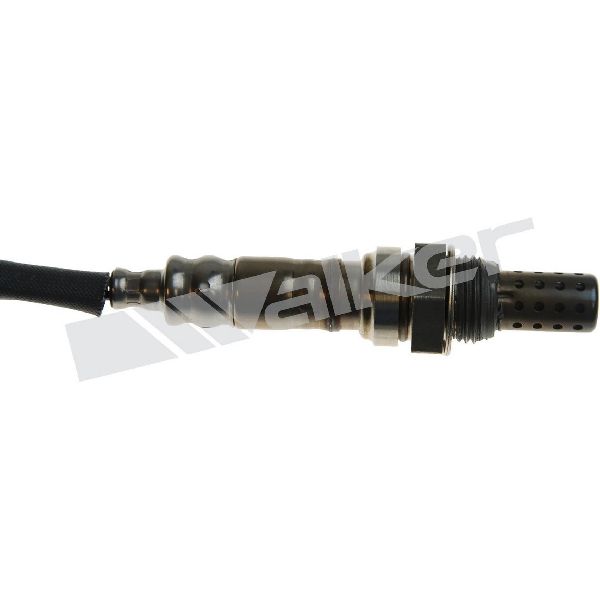
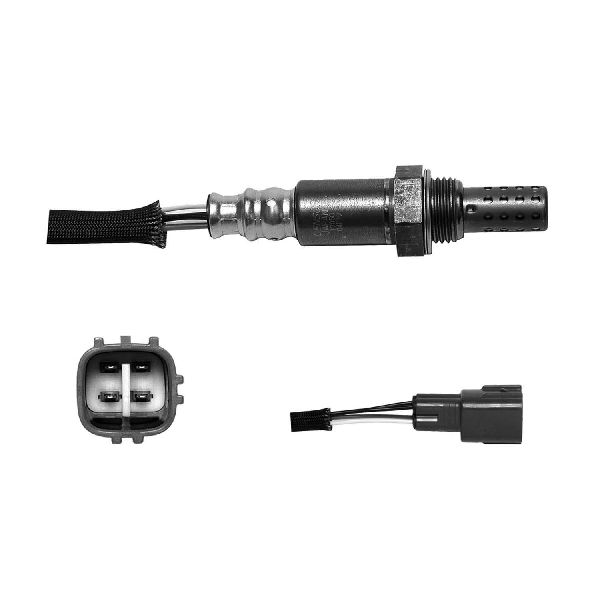
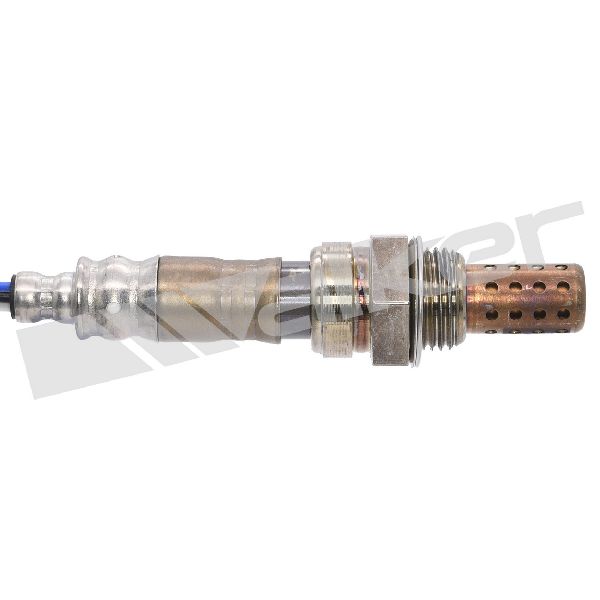
- Front Air/Fuel Ratio Sensor (Bank 1, Sensor 1)
(OEM #22641AA272 (Federal Emissions, AT), 22641AA381 (PZEV, AT), 22641AA40A (Federal Emissions, MT). Always verify by VIN.)— This is the sensor that the code directly identifies as inactive. Failure of its internal components, especially the heater, is the most common cause of P0134.
Trusted brands: Denso (OEM Supplier), NTK (OEM Supplier)
OEM price range: $150-$220
Aftermarket price range: $90-$160
Related Codes That Often Appear With This One
- P0030 — P0030 indicates a fault in the heater control circuit for the same sensor (Bank 1, Sensor 1). They often appear together when the sensor's internal heater has failed, which is the most common failure mode.
- P0031 — This code indicates the heater circuit resistance is low. It points to the same component and often accompanies P0134 if there's a short in the heater element.
Technical Service Bulletins (TSBs) & Recalls
- No major Technical Service Bulletins (TSBs) were found that directly alter the diagnostic path for a P0134 code on this vehicle. The problem is typically a straightforward component failure rather than a software or design issue requiring a TSB. A TSB from 2015 (for a different model) lists P0134 as one of several codes addressed by an ECM update, but this is not the primary fix for the Outback. Manufacturer TSB Bulletin #11-144-14 notes that reprogramming files are available for DTC P0134 on other Subaru models like the Impreza WRX, though for the Outback, physical sensor failure remains the leading cause.
Platform-Specific Known Issues
- Part Number Varies by Emissions Standard (PZEV vs. Federal): Subarus from this era were built to two different emissions standards: Federal (FED) and Partial Zero-Emission Vehicle (PZEV), often for cars sold in California and other CARB states. The front A/F sensor is different between these two types. Using the wrong sensor can cause persistent codes or poor performance. It is critical to verify the correct part number for your specific vehicle using the VIN.
Mechanic-Grade Diagnostic Values
- A/F Sensor Heater Circuit Resistance — expected: 2.0 to 10.0 Ohms at room temperature (approx. 20°C / 68°F). Failure: An open circuit (OL or infinite resistance) or a direct short (0.0 Ohms) indicates a failed heater element.
- A/F Sensor Live Data Voltage (B1S1) — expected: Relatively steady voltage around 3.3V at warm idle.. Failure: A flat, unchanging voltage (e.g., 0.0V, 5.0V, or another fixed value) indicates no activity. Note: This is a wideband A/F sensor, not a traditional O2 sensor that fluctuates between 0.1V and 0.9V.
- A/F Sensor #1 Resistance (Live Data) — expected: Around 32 Ohms once the sensor is at operating temperature (at idle).. Failure: A significantly different or fluctuating reading may indicate a problem with the sensor's internal calculations or components.
- A/F Sensor #1 Current (Live Data) — expected: -0.2 to +0.2 mA at warm idle.. Failure: A reading of 0.0 mA that does not change, or a value stuck outside the normal range, points to an inactive or faulty sensor.
Wiring & Ground Locations
- GE / Main Engine Ground — On the right rear of the engine block, often near the transmission bell housing. Additional grounds are located on the intake manifold directly behind the throttle body.. The ECM and its sensors rely on a clean ground path to the chassis. A corroded or loose main engine ground can introduce electrical noise or voltage offsets, causing the ECM to misinterpret the A/F sensor signal, potentially flagging it as inactive.
- GB-1 / GB-2 — Main grounding points located in the engine compartment, typically on the strut towers or inner fenders. GB-1 is on the right (passenger) side, GB-2 is on the left (driver) side.. These are central grounding locations for various engine bay components and harnesses. The A/F sensor's shielded ground may terminate near one of these points, making their integrity crucial for a clean signal.
- A/F Sensor Heater Circuit Pins — Within the sensor's electrical connector. The heater pins are typically connected to the two wires of the same color on the sensor pigtail (e.g., two black or two white wires).. These are the specific pins that must be probed with a multimeter to test the heater circuit's resistance. Knowing that polarity does not matter for this pair simplifies the test.
Real Owner Repair Stories
- Ultimate Subaru Message Board user 'genetgenet' (Subaru Outback 2.5L with MAP sensor) — Initial P0030 code, then P0134 after replacing front O2 sensor. High CO emissions at 2500rpm.
❌ Tried (didn't work) Replacing the front O2 sensor alone did not fix the final issue (P0134 and emissions). Fixing exhaust leaks also did not resolve the code on its own.
✅ What actually fixed it A combination of fixes were performed before the code was resolved: replaced the MAP sensor, spark plugs, spark plug wires, and the rear O2 sensor, cleaned the intake manifold, and calibrated the throttle position sensor. This resolved the P0134 and the high emissions.
Model Year Variations Within This Range
- 2005-2009: The front A/F sensor electrical connector may be a 4-pin or 6-pin design depending on the specific model year and emissions package (PZEV vs. Federal). It is important to visually inspect the vehicle's connector before ordering a replacement part to ensure compatibility.
Diagnostic Flowchart
Real Owner Stories
Aggregated from forums and TSBs cited above. Mileages and costs reflect what owners reported in those sources.
Subaru Outback Wagon 2.5L
Symptoms: Initially had a P0030 code and replaced the oxygen sensor, which made the car run fine. A few days later, a new P0134 code appeared along with exhaust leaks.
What fixed it: Fixed leaks in the exhaust system and checked for remaining leaks using a vacuum cleaner.
Source hint: Ultimate Subaru Message Board
2008 Subaru Outback 2.5i
Symptoms: Check engine light illuminated with both P0134 and P0031 codes present.
What fixed it: Replaced the front A/F sensor with an OEM-quality Denso part, which resolved both codes.
Source hint: subaruoutback.org: Owner story confirming fix
Subaru Outback 2.5L
Symptoms: Replaced the front A/F sensor with a cheap aftermarket Bosch unit, but the P0134 code persisted.
What fixed it: Removed the Bosch sensor and installed an OEM-quality Denso sensor, which resolved the code immediately.
Source hint: NASIOC: Warning against cheap sensors
Related OBD-II Codes
Frequently Asked Questions
Does it matter which replacement A/F sensor I buy for my 2005-2009 Outback?
Can I use a cheaper aftermarket sensor like Bosch to fix the P0134 code?
Where is the wiring connector for the front A/F sensor located on the 2.5L engine?
Are there any Technical Service Bulletins (TSBs) or ECM updates for the P0134 code on this specific Outback?
Could a blown fuse cause the P0134 code on my Outback?
What should the live data voltage look like for a healthy front A/F sensor on this 2.5L engine?
Helpful Videos

We Have This Part in Stock


The information in this article is provided for general reference and educational purposes only. Vehicle specifications, procedures, and part compatibility can vary by production date, trim level, and region. Always consult your vehicle's factory service manual and verify part numbers before purchasing or performing repairs. Safety-critical components such as airbags, seat belts, and braking systems should be installed by a qualified professional.
- Subaru Outback:
- 🧭 Diagnostic Flowchart
- 🎬 Helpful Videos
- 🛍️ Shop This Part
- What's Unique About the 2005-2009 Subaru Outback
- Symptoms You May Notice
- Most Likely Causes
- Rare But Worth Checking
- Diagnosis Steps
- Parts You'll Likely Need
- Related Codes That Often Appear With This One
- Technical Service Bulletins (TSBs) & Recalls
- Platform-Specific Known Issues
- Mechanic-Grade Diagnostic Values
- Wiring & Ground Locations
- Real Owner Repair Stories
- Model Year Variations Within This Range
- Real Owner Stories
- Subaru Outback Wagon 2.5L
- 2008 Subaru Outback 2.5i
- Subaru Outback 2.5L
- Related OBD-II Codes
- Frequently Asked Questions
- 🎟️ Get 5% Off