
P0134 on 2003-2009 Toyota 4Runner 4.0L V6: Causes and Fixes for No O2 Sensor Activity
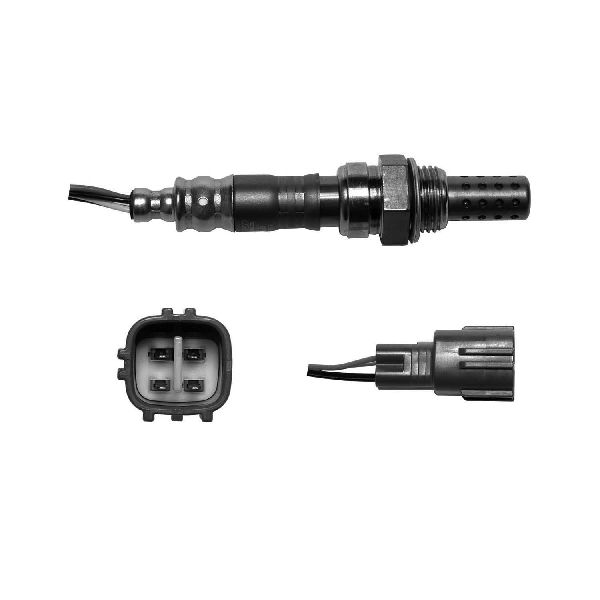
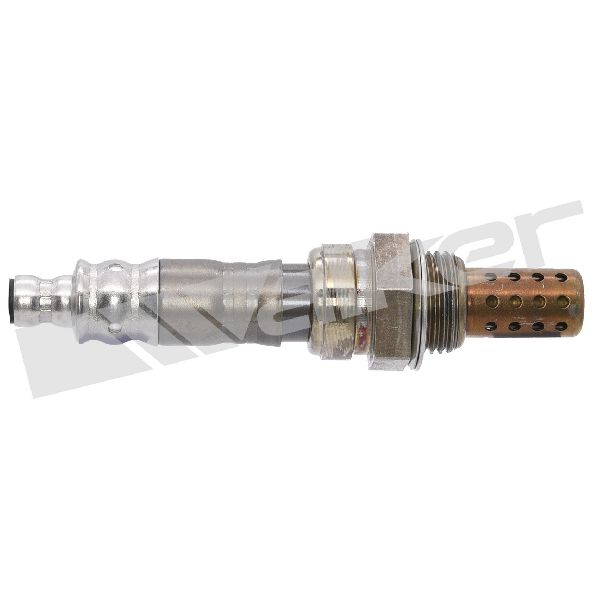
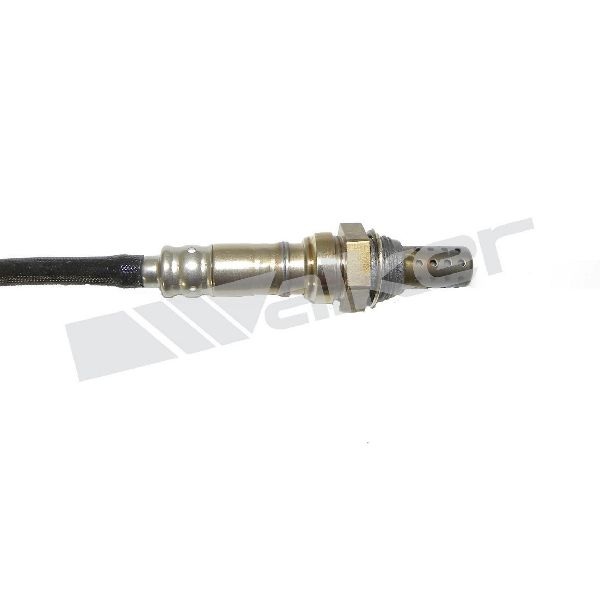
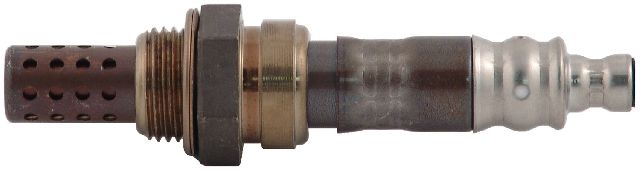
P0134 means the front Air/Fuel Ratio sensor on the passenger side (Bank 1, Sensor 1) has failed. This is a very common issue, and the fix is almost always to replace the sensor itself. Use a Denso 234-9040 direct-fit sensor. Expect to pay between $100 and $180 for the part. Before replacing, check the 20A 'A/F HTR' fuse in the engine bay.
- P0134 on a 2003-2009 4Runner points directly to a failed front passenger-side Air/Fuel Ratio sensor (Bank 1, Sensor 1).
- Do not ignore this code, as it will decrease fuel efficiency and can eventually damage your expensive catalytic converter.
- The most reliable fix is to replace the sensor. Using the OEM Denso part (234-9040) is highly recommended to ensure compatibility and longevity.
- Before buying a new sensor, perform a quick visual inspection of the wiring for obvious damage and check the 20A 'A/F HTR' fuse in the engine bay.
- This is a DIY-friendly repair for those with basic tools, but the sensor can be very difficult to remove if it is seized in the exhaust manifold. A 22mm offset O2 sensor socket and penetrating oil are key.
What's Unique About the 2003-2009 Toyota 4Runner
The 4th generation Toyota 4Runner with the 1GR-FE engine is known for its durability, and a P0134 code is typically a straightforward component failure due to age and mileage. Unlike some vehicles where this code might indicate complex electrical issues, on the 4Runner it almost always points directly to a bad Air/Fuel Ratio sensor. The diagnostic process is direct, and owners overwhelmingly report that replacing the sensor resolves the problem without further troubleshooting. The classic failure signature on a scan tool is seeing the B1S1 voltage stuck at a constant 3.2-3.4V.
Symptoms You May Notice
- Check Engine Light is on
- VSC and TRAC OFF lights may also illuminate
- Decreased fuel economy
- Rough or unstable idle
- Hesitation during acceleration
- In some cases, no symptoms other than the Check Engine Light.
- Replacing the wrong sensor (e.g., the downstream sensor, Bank 1 Sensor 2, or the sensor on the driver's side, Bank 2).
- Replacing the catalytic converter. A P0134 code indicates a problem with the sensor circuit, not the converter's efficiency.
- Cleaning the Mass Airflow (MAF) sensor. While a dirty MAF can cause other performance issues, it is not a direct cause for a 'no activity' code from an A/F sensor.
Most Likely Causes
- Failed Air/Fuel Ratio Sensor (Bank 1, Sensor 1) 🔴 High Probability → Shop Oxygen Sensor This is a standard wear-and-tear part. The internal heater element, crucial for quick activation, is a common failure point after many heat cycles and years of service. Contamination can also degrade the sensing element.
How to confirm: Use an OBD-II scanner with live data capabilities. Observe the voltage for 'B1S1' (Bank 1, Sensor 1). A healthy sensor's voltage will fluctuate rapidly. If the voltage is a flat line, typically stuck around 3.3V, or shows no reading, the sensor has failed. You can also test the resistance of the heater circuit, which should be between 8-12 ohms at room temperature.
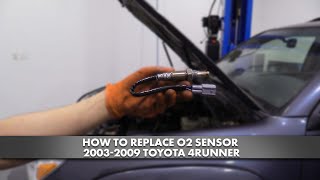
Typical fix: Replace the Bank 1, Sensor 1 Air/Fuel Ratio sensor. It is located on the passenger-side exhaust manifold. Using a 22mm offset O2 sensor socket is highly recommended. 🎬 Watch: Step-by-step guide to replacing your 4Runner's O2 sensor. The sensor can be seized; apply penetrating oil beforehand.
Est. part cost: $100-$180 - Damaged Wiring or Corroded Connector 🟡 Medium Probability The sensor wiring is routed near hot exhaust components and can become brittle, melt, or chafe over time. The connector, located on the side of the engine block, can accumulate dirt and moisture, leading to corrosion on the pins.
How to confirm: Visually inspect the entire wiring harness from the sensor to the main engine harness. Look for melted insulation, frayed wires, or any signs of physical damage. Unplug the connector and check for green or white corrosion on the pins. Perform a wiggle test on the harness while watching live data for any change.
Typical fix: Repair the damaged section of wire or clean the connector terminals with an electrical contact cleaner. If the damage is severe or at the connector itself, a new pigtail connector may need to be spliced in.
Est. part cost: $10-$40 - Blown A/F Heater Fuse ⚪ Low Probability
How to confirm: Consult your owner's manual or the fuse box diagram for the fuse box in the engine bay. Locate the 20A fuse labeled 'A/F HTR'. Pull the fuse and visually inspect if the internal wire is broken. Alternatively, use a multimeter to test for continuity.
Typical fix: Replace the blown fuse with a new one of the same amperage. If the new fuse blows immediately, it indicates a short circuit in the heater circuit wiring or the sensor itself that must be diagnosed.
Est. part cost: $1-$5
Rare But Worth Checking
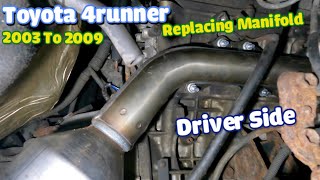
- Exhaust Leak: An exhaust leak in the manifold or collector pipe before the A/F sensor can allow outside oxygen into the exhaust stream. This can cause the sensor to send a steady, non-fluctuating signal, which the ECU may interpret as 'no activity'. This is particularly relevant as these engines can develop cracked exhaust manifolds, which often present with an audible ticking noise from the engine bay, especially when cold. 🎬 Watch: How to replace a cracked passenger side exhaust manifold.
- Faulty Powertrain Control Module (PCM): → Shop Engine Control Module (ECM) This is extremely rare. Before condemning the PCM, all other possibilities, including the sensor, wiring, and fuses, must be exhaustively tested and ruled out. A PCM failure is a last-resort diagnosis.
Diagnosis Steps
- Connect an OBD-II scanner and confirm that P0134 is the only code present. Note any other codes, but address P0134 first unless fuel trim or misfire codes are present.
- Visually inspect the Bank 1, Sensor 1 (passenger side, upstream) A/F sensor and its wiring harness. Look for any signs of melting, chafing, or loose connections.
- Check the engine bay fuse box for a blown 20A fuse labeled 'A/F HTR'. Replace if necessary.
- Using the live data function on your scanner, monitor the voltage for 'B1S1'. A healthy sensor will show voltage fluctuating rapidly. If the reading is a flat line (e.g., stuck at 3.3V) or moves very slowly, the sensor is not active and has likely failed.
- For advanced diagnosis, disconnect the sensor and use a multimeter to check the resistance of the heater circuit pins on the sensor side. It should be a low value, typically 8-12 ohms. An open circuit (infinite resistance) confirms a failed heater.
- If the wiring appears intact, the fuse is good, and the live data is flat, the A/F sensor itself is defective and needs to be replaced.
- After replacement, clear the codes with the scanner and perform a drive cycle to ensure the issue is resolved.
Parts You'll Likely Need
- Air/Fuel Ratio Sensor (Bank 1, Sensor 1)
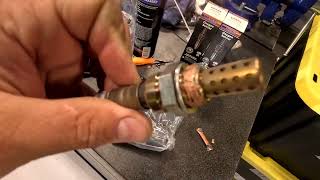
(OEM #89467-35110)— This is the upstream sensor on the passenger side. It is the primary component that fails and triggers the P0134 code. Denso is the original equipment manufacturer (OEM) for Toyota, and using the direct-fit Denso part is highly recommended 🎬 See this walkthrough for replacing both upstream and downstream sensors. for proper function and longevity.
Trusted brands: Denso (Recommended OEM), NGK/NTK
OEM price range: $150-$220
Aftermarket price range: $100-$180
Platform-Specific Known Issues
- Owners on forums consistently report that the sensor can be extremely difficult to remove due to rust and seizure in the exhaust manifold. A high-quality 22mm offset O2 sensor socket, a breaker bar, and generous use of penetrating oil are often required.
- It is highly recommended to use a Denso brand sensor. Many owners have reported issues with aftermarket brands like Bosch, including incorrect readings or premature failure on this specific platform.
Mechanic-Grade Diagnostic Values
- A/F Sensor Harness-Side Signal Voltage (Sensor Unplugged) — expected: 3.3V on one signal wire (AFL+) and 2.9-3.0V on the other (AFL-), measured to ground.. Failure: If these voltages are not present at the harness connector, the wiring from the PCM or the PCM itself is faulty.
- A/F Sensor Live Data Voltage (Stuck) — expected: Rapidly fluctuating voltage on a healthy sensor.. Failure: A flat-line voltage stuck at approximately 3.3V indicates a failed sensor with no activity.
- A/F Sensor Heater Circuit Resistance — expected: 8-12 Ohms at 20°C (68°F) between the two heater pins on the sensor itself.. Failure: Infinite resistance (open circuit) indicates a failed heater element within the sensor.
- DTC Set Condition — expected: The sensor output voltage should indicate RICH (>0.45V) at least once during specific driving conditions.. Failure: The P0134 code will set if the sensor output does not indicate RICH even once while driving over 25 mph at >1400 RPM for more than 65 seconds (after warmup).
Scan Tool Commands That Help
- Toyota Techstream: Active Test: A/F CONTROL — This bidirectional test is used to verify sensor functionality when live data is inconclusive. The technician can command the fuel mixture rich (+25%) or lean (-12.5%) while idling and watch the A/F sensor voltage on the data list. A healthy sensor will react immediately to these commands; a dead sensor will show no change.
- Toyota Techstream: Data List: AFS B1 S1 — This is the specific parameter to monitor for live data from the Bank 1, Sensor 1 A/F sensor. It provides more detailed information than a generic OBD-II scanner.
Wiring & Ground Locations
- EA — On the left side of the engine compartment.. This is a primary ground distribution point for the engine room. The shield wire for the Bank 1 Sensor 1 A/F sensor is grounded here, making it a critical point to check for corrosion or looseness if electrical interference is suspected.
- EC1 — Near the front differential, joining the engine wire and differential wire harnesses.. This is a major harness junction point. Damage or corrosion here could affect multiple engine systems, including sensor circuits.
- IM1 — Right side of the blower unit, joining the engine wire and instrument panel wire.. A potential source of electrical issues if water intrusion or damage occurs inside the cabin near the firewall.
Real Owner Repair Stories
- Reddit r/4thGen4Runner Community (2006 Toyota 4Runner V6) — Check Engine Light on, audible ticking from engine bay.
❌ Tried (didn't work) Considering replacing the O2 sensor first.
✅ What actually fixed it The consensus from experienced owners was that the cause was a cracked exhaust manifold, a common issue. The recommended fix was to replace the manifold with aftermarket long tube headers (e.g., Doug Thorley) which resolves the issue permanently, rather than just re-welding the crack. - YouTube channel 'RB The Mechanic' (2004 Toyota 4Runner) — Broken exhaust manifold.
❌ Tried (didn't work) The video documents the replacement of a previously installed aftermarket manifold that had already failed and cracked.
✅ What actually fixed it The mechanic replaced the failed aftermarket manifold with a new OEM Toyota manifold. He noted that aftermarket parts can have poor fitment, requiring prying and forcing, which may lead to premature failure. He strongly recommended using new OEM studs and gaskets and suggested replacing the oxygen sensor at the same time.
"I Checked Everything" — The Actual Cause
- A common scenario on the 1GR-FE (and 2UZ-FE) is a cracked exhaust manifold causing an intermittent P0134 or other O2/AF sensor codes. A standard smoke test performed on a warm engine may not reveal the leak. The crack often only leaks enough to affect the sensor when the engine is cold, producing an audible 'ticking' sound that disappears as the manifold heats up and the metal expands, sealing the crack. Technicians might miss this if they only test a fully warmed-up engine.
OEM Part Supersession History
89467-35110→89467-04060— Standard part number consolidation and revision by Toyota.
Heads up: The new part number is a direct replacement for the original. Both refer to the same OEM Denso sensor.
Model Year Variations Within This Range
- 2003-2004 vs. 2005-2009: The 1GR-FE engine itself has significant differences between these two periods. The '03-'04 is its own version, and the '05-'09 is an updated version with changes including different cam sensor wiring. While the A/F sensor part number appears to be the same, this engine variation is critical knowledge for any deeper electrical diagnosis or if sourcing a used engine.
- 2005+: Starting in the 2005 model year, the V6 4Runner was paired with a 5-speed automatic transmission, replacing the 4-speed used in 2003-2004 models.
Diagnostic Flowchart
Other Known Issues on This Vehicle
Issues unrelated to this code that are worth knowing about as an owner of this generation:
- Premature Head Gasket Failure 🔴 High — Most common on 2003-2005 model years, typically appearing after 100,000 miles. Often fails around cylinder #6. Symptoms include a rough cold start, coolant loss with no visible leak, and a gurgling sound from the heater core. (Ref: No official recall, but Toyota reportedly updated the head gasket design in mid-2005 to address the issue.)
- Frame Rust / Rot 🔴 High — Widespread in regions using road salt. Rust often starts from the inside out, particularly in the center and rear sections near the fuel tank and control arm mounts. (Ref: While other Toyota trucks were part of a large frame replacement program, the 4Runner was not officially included, though lawsuits were filed.)
- Seized Front Brake Calipers 🟠 Medium — Common after 80,000+ miles, especially in rust-prone areas. The lower pistons are particularly susceptible to seizing, causing uneven pad wear, pulling during braking, and a burning smell.
- Cracked Exhaust Manifolds 🟠 Medium — Can occur with age and heat cycles, leading to an audible ticking noise, especially when the engine is cold. This can also cause exhaust leak-related trouble codes.
- Oil Leaks from Front Timing Cover 🟡 Low — A common oil leak point on the 1GR-FE engine. Oil is often seen accumulating on or around the power steering pump, directly below the cover seal.
Used vs. New Parts: Buying Guide for This Vehicle
When a used part is the smart pick: For this specific repair, used parts are generally not recommended for the sensor itself. However, sourcing a used connector pigtail from a junkyard harness is a smart and cost-effective repair for a damaged connector. A used exhaust manifold can be considered if it passes a meticulous inspection for cracks, but the high labor cost of installation makes a new part a safer investment.
Donor-vehicle mileage cap: roughly under 50000 miles for the part to have meaningful remaining life.
What to inspect on the donor part:
- For a wiring pigtail: check for flexible, non-brittle insulation and clean, corrosion-free pins.
- For an exhaust manifold: inspect every weld and flange surface for hairline cracks, especially after bead blasting to clean the surface. Check for flatness on the cylinder head mounting flange.
OEM-only on this vehicle (don't cheap out):
- Air/Fuel Ratio Sensor
Aftermarket brands forum-validated for this vehicle:
- Denso (OEM)
- NGK / NTK
Brands owners have reported issues with on this vehicle:
- Bosch: Multiple forum sources report that while Bosch sensors work well in European vehicles where they are often OEM, they have a poor track record for reliability and correct operation in Toyota applications.
Real Owner Stories
Aggregated from forums and TSBs cited above. Mileages and costs reflect what owners reported in those sources.
2003-2009 Toyota 4Runner 4.0L V6
Symptoms: The code appeared intermittently at first, specifically during highway trips.
What fixed it: Replacement of the Bank 1 Sensor 1 A/F sensor.
Source hint: IH8MUD.com - Code P0134 on highway trips
2003-2009 Toyota 4Runner 4.0L V6
Symptoms: Check Engine Light with code P0134; community consensus identified the passenger side upstream sensor as the culprit.
What fixed it: Replacing the B1S1 A/F sensor with a Denso brand part.
Source hint: Reddit r/4Runner - P0134, what to do?
2003-2009 Toyota 4Runner 4.0L V6
Symptoms: P0134 code triggered; confirmed sensor location on the passenger side upstream manifold.
What fixed it: Replacement of the sensor using a 22mm offset O2 sensor socket and PB Blaster to handle the seized part.
Source hint: T4R.org - P0134 Bank 1 Sensor 1 Location & Fix
Related OBD-II Codes
Frequently Asked Questions
Which specific sensor do I need to replace for a P0134 code on my 4.0L V6 4Runner?
Why are my VSC and TRAC OFF lights on along with the Check Engine Light?
Can I use a Bosch sensor to fix the P0134 code on my 1GR-FE engine?
Is there a specific fuse I should check for the A/F sensor heater circuit?
What tools are recommended for removing the B1S1 sensor on a high-mileage 4Runner?
Could a ticking noise from my engine be related to this oxygen sensor code?
Helpful Videos
We Have This Part in Stock


The information in this article is provided for general reference and educational purposes only. Vehicle specifications, procedures, and part compatibility can vary by production date, trim level, and region. Always consult your vehicle's factory service manual and verify part numbers before purchasing or performing repairs. Safety-critical components such as airbags, seat belts, and braking systems should be installed by a qualified professional.
- Toyota 4Runner:
- 🧭 Diagnostic Flowchart
- 🎬 Helpful Videos
- 🛍️ Shop This Part
- What's Unique About the 2003-2009 Toyota 4Runner
- Symptoms You May Notice
- Most Likely Causes
- Rare But Worth Checking
- Diagnosis Steps
- Parts You'll Likely Need
- Platform-Specific Known Issues
- Mechanic-Grade Diagnostic Values
- Scan Tool Commands That Help
- Wiring & Ground Locations
- Real Owner Repair Stories
- "I Checked Everything" — The Actual Cause
- OEM Part Supersession History
- Model Year Variations Within This Range
- Other Known Issues on This Vehicle
- Used vs. New Parts: Buying Guide for This Vehicle
- Real Owner Stories
- 2003-2009 Toyota 4Runner 4.0L V6
- 2003-2009 Toyota 4Runner 4.0L V6
- 2003-2009 Toyota 4Runner 4.0L V6
- Related OBD-II Codes
- Frequently Asked Questions
- 🎟️ Get 5% Off