
P0134 on 2006-2012 Toyota RAV4 3.5L V6: Causes and Fixes for No O2 Sensor Activity
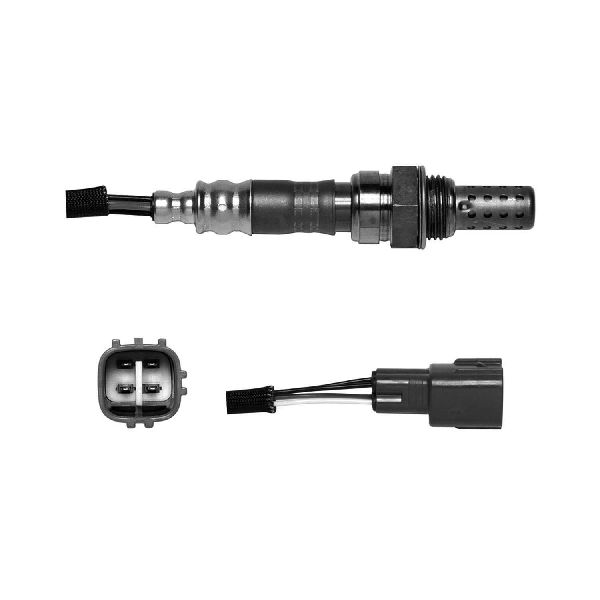
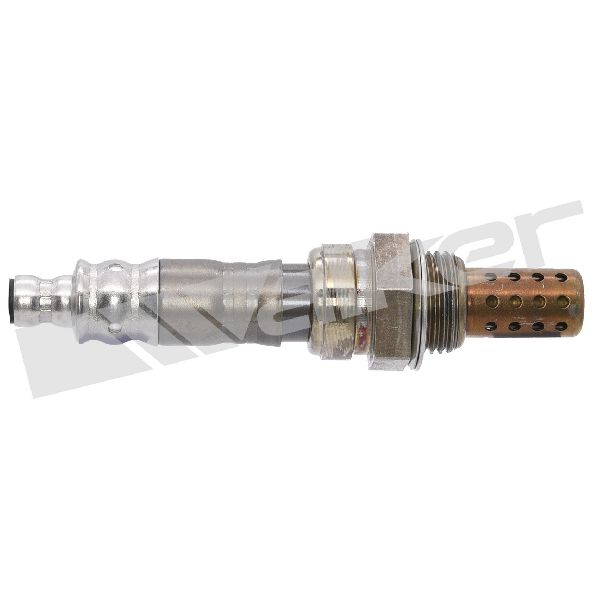
On the 3.5L V6 RAV4, P0134 almost always means the Air/Fuel Ratio Sensor on the rear cylinder bank (Bank 1) has failed. Access is tight against the firewall, but replacement with a Denso sensor (Part No. 234-9056) is the most common fix. Expect to pay $100-$200 for the part.
- P0134 points to the upstream Air/Fuel Ratio sensor on the REAR cylinder bank (near the firewall).
- The most probable cause is a failed sensor that needs to be replaced, with the Denso 234-9056 being a trusted aftermarket part.
- Before replacing, check the 'A/F HTR' fuse and inspect the sensor's wiring for damage.
- Access is tight; using a 7/8" or 22mm offset oxygen sensor socket or crow's foot wrench will make the job much easier.
- Always use a high-quality replacement sensor, like one from Denso, to avoid compatibility issues and premature failure.
What's Unique About the 2006-2012 Toyota RAV4
For the transversely mounted 2GR-FE V6 engine in the RAV4, 'Bank 1' is the rear cylinder bank, located near the firewall. 'Sensor 1' is the upstream Air/Fuel Ratio sensor in that rear exhaust manifold. Accessing this specific sensor is notoriously challenging compared to the Bank 2 sensor on the front of the vehicle. Many owners and technicians remove the plastic engine cover and cowl components to gain better access. The failure is typically a straightforward case of the sensor's internal heater element wearing out from age and heat cycles, not a sign of a wider systemic issue on the platform.
Symptoms You May Notice
- Check Engine Light is on
- Decreased fuel economy
- Rough or unstable idle
- Engine may hesitate on acceleration
- Failing an emissions test
- Excessive smoke from the exhaust
- Replacing the wrong sensor (e.g., the easily accessible Bank 2 sensor on the front manifold, or the downstream Sensor 2 after the catalytic converter). P0134 is specifically for Bank 1, Sensor 1.
- Replacing the sensor when the actual fault is a blown 'A/F HTR' fuse or damaged wiring.
Most Likely Causes
- Failed Bank 1 Air/Fuel Ratio Sensor 🔴 High Probability → Shop Oxygen Sensor The internal heater circuit of the sensor is a common failure point due to age and countless heat cycles. It's considered a wear-and-tear item. Denso is the OEM supplier, and using their aftermarket sensor is a reliable fix.
How to confirm: Use a scan tool to view live data for 'A/F Sensor B1S1'. If the voltage is stuck at a fixed value (e.g., 0V or 3.3V) and does not fluctuate as the engine runs, the sensor is inactive. You can also test the resistance of the sensor's heater circuit; an open circuit (infinite resistance) indicates failure. A healthy heater circuit typically has a resistance between 0.8 and 8.0 ohms when cold.
Typical fix: Replace the Bank 1, Sensor 1 Air/Fuel Ratio Sensor. This is the upstream sensor on the rear exhaust manifold (close to the firewall).
Est. part cost: $100-$220 - Damaged Wiring or Connector 🟡 Medium Probability The wiring harness is located in a hot, tight area of the engine bay. Over time, heat can make wires brittle, and vibrations can cause chafing or loose connections at the sensor connector. The connector clip can be difficult to release without breaking.
How to confirm: Visually inspect the wiring harness leading to the Bank 1 A/F sensor for any signs of melting, fraying, or breaks. Check that the connector is securely plugged in and free of corrosion or damage.
Typical fix: Repair the damaged section of wire or replace the connector pigtail.
Est. part cost: $10-$30 - Exhaust Leak ⚪ Low Probability Gaskets on the exhaust manifold can degrade over time, causing leaks. A leak before the sensor can introduce outside air, preventing the sensor from reading the exhaust stream correctly.
How to confirm: Listen for a ticking or puffing sound from the rear of the engine, especially when cold. You may also see black soot trails around the exhaust manifold flange or gasket.
Typical fix: Replace the exhaust manifold gasket.
Est. part cost: $20-$50
Rare But Worth Checking
- Blown Fuse or Relay: The A/F sensor's heater circuit is powered by a fuse (often labeled 'A/F HTR' or 'EFI NO. 2') in the under-hood fuse box. While rare for it to blow without a reason, it's a quick and easy check before replacing parts.
- Faulty Engine Control Module (ECM): → Shop Engine Control Module (ECM) This is extremely rare. The ECM should only be considered as the cause after all other possibilities, including the sensor, wiring, and fuses, have been exhaustively tested and ruled out.
Diagnosis Steps
- Verify the code: Use an OBD-II scanner to confirm that P0134 is the active code.
- Visual Inspection: Inspect the Air/Fuel Ratio sensor on the rear exhaust manifold (Bank 1). Look for obvious damage to the sensor itself or its wiring harness. Check for melting, chafing, or loose connections.
- Check Fuses: In the under-hood fuse box, locate and inspect the fuse for the A/F sensor heater, often labeled 'A/F HTR' or 'EFI NO. 2'. If it's blown, investigate for a short circuit in the wiring before replacing the fuse.
- Analyze Live Data: Use a scan tool to monitor the live data stream for 'A/F Sensor (Bank 1 Sensor 1)'. When the engine is warm, a healthy sensor shows fluctuating voltage. A flatline reading (often stuck at 3.3V on Toyotas) confirms the 'no activity' fault.
- Check for Exhaust Leaks: With the engine cool, start it and listen for any ticking or hissing sounds from the rear exhaust manifold that would indicate a leak.
- Test the Sensor: If possible, disconnect the sensor and measure the resistance between the two heater terminals (usually the two wires of the same color). An open circuit (infinite resistance) means the internal heater has failed and the sensor needs replacement.
- Test the Wiring: If the sensor tests good, check the harness connector for power and ground. The heater circuit should have battery voltage with the key on. This step confirms the issue is not with the vehicle's wiring.
- Replace the Sensor: If the sensor has failed its tests, replace it. Due to the tight access, a 7/8" or 22mm offset oxygen sensor socket or crow's foot wrench is highly recommended.
- Clear Code and Test Drive: After replacement, clear the trouble code with the scanner and perform a test drive to ensure the code does not return.
Parts You'll Likely Need
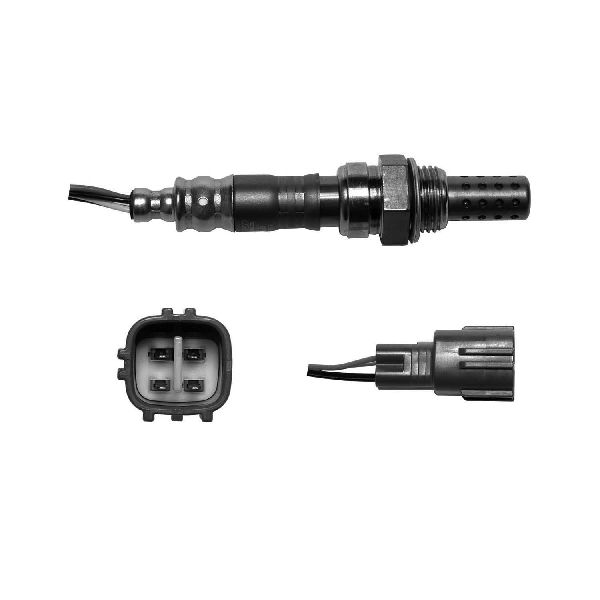
- Air/Fuel Ratio Sensor (Bank 1, Sensor 1)
(OEM #89467-42120)— This is the sensor that the code directly identifies as inactive. Its internal heater circuit is the most common point of failure, causing the P0134 code.
Trusted brands: Denso (OEM Supplier, Part No. 234-9056)
OEM price range: $180-$220
Aftermarket price range: $100-$160
Technical Service Bulletins (TSBs) & Recalls
- EG037-04 (superseded) / EG037-07 - While not for this specific code, these TSBs provide the official Toyota definitions for engine bank locations (Bank 1 vs Bank 2) which is critical for diagnosis.
Platform-Specific Known Issues
- Access to the Bank 1 Sensor 1 is very tight against the firewall. Many owners find that a flexible head ratchet combined with a 22mm (or 7/8") crow's foot wrench or a slotted O2 sensor socket is necessary for removal and installation.
- The electrical connector for the sensor can be brittle and difficult to unclip. Some owners report success using a small flathead screwdriver to carefully depress the locking tab while pulling the connector apart.
Mechanic-Grade Diagnostic Values
- A/F Sensor Heater Circuit Resistance — expected: 1.8 to 3.4 Ω at 20°C (68°F). Failure: Open circuit (OL on multimeter) or resistance outside the specified range.
- A/F Sensor Internal Resistance (via Scan Tool) — expected: Below 40 Ω after warmup. Failure: Resistance remains at 40 Ω or more for at least 90 seconds after engine start.
- A/F Sensor Harness Signal Voltage (KOEO) — expected: One wire at 3.0V, the other at 3.3V (measured at vehicle harness connector to ground).. Failure: Voltages are missing or significantly different, indicating a wiring or ECM issue.
- A/F Sensor Live Data Voltage (at stoichiometric) — expected: Centered around 3.3V. Failure: Stuck at a fixed value (e.g., 0V or 5V) or does not fluctuate.
Hidden / Shadow Codes Worth Checking
- Mode $06, TID $81: This Test ID often corresponds to the A/F Sensor Heater Circuit monitoring. A failing value here can confirm a heater-related issue even before P0134 is set as a hard fault. (see via Advanced OBD-II scanner with Mode $06 capability.)
Scan Tool Commands That Help
- Toyota Techstream: Active Test: 'Control the Injection Volume for A/F Sensor' — This allows a technician to command the engine to run rich or lean. Observing the A/F sensor's voltage response on the live data screen confirms if the sensor is capable of reading changes. If the voltage doesn't change during this test, the sensor is confirmed to be inactive.
Wiring & Ground Locations
- A/F Sensor Connector (Bank 1 Sensor 1) — On the rear of the engine, attached to a bracket near the exhaust manifold.. This is the primary connection point for testing. The pins for the heater circuit (usually same-colored wires) and signal wires can be tested here for voltage, ground, and resistance.
- A/F Relay — Located in the under-hood fuse/relay box (Engine Room R/B).. This relay supplies power to the A/F sensor's heater circuit. A failure of this relay will cut power and cause P0134.
- EFI NO. 2 Fuse — Located in the under-hood fuse/relay box.. This fuse protects the A/F sensor heater circuit. If it blows, the heater will not operate, leading to the 'No Activity' code.
- Engine Ground Points (e.g., 'EB') — Multiple ground points exist on the 2GR-FE engine block and cylinder heads. A key ground strap typically runs from the engine to the chassis near the passenger side motor mount.. A poor engine ground can cause floating voltages and erratic sensor behavior, including a lack of a stable signal from the A/F sensor, although this is a less common cause than sensor failure.
Real Owner Repair Stories
- PriusChat Forum User (2004-2009 Toyota Prius (Uses the same Denso sensor)) — Check Engine Light with code P0134.
❌ Tried (didn't work) Initial diagnosis was uncertain between wiring and sensor.
✅ What actually fixed it Replacement of the front Air/Fuel sensor with Denso part number 234-9056 resolved the code. The user recommended using an offset O2 sensor socket and penetrating oil for removal.
OEM Part Supersession History
89467-42120→N/A, this is the current part number.— N/A
Heads up: This part number is specified for 2009-2012 RAV4 models. Earlier models (2006-2008) may use a different part number. Always verify with VIN. The aftermarket equivalent from the OEM supplier is Denso 234-9056.
Model Year Variations Within This Range
- 2006-2008 vs 2009-2012: The 2.4L 4-cylinder engine (2AZ-FE) common in 2006-2008 models had known oil consumption issues, which is less of a concern for the 2GR-FE V6. However, part numbers for sensors and ECU software calibrations may differ between the pre-facelift (2006-2008) and post-facelift (2009-2012) models. The OEM part number 89467-42120 is primarily listed for 2009-2012 models.
Diagnostic Flowchart
Other Known Issues on This Vehicle
Issues unrelated to this code that are worth knowing about as an owner of this generation:
- Bank 1 VVT-i Oil Line Rupture 🔴 High — Common on 2006-2009 models. The original rubber hose section degrades and can burst, causing rapid, catastrophic oil loss and engine seizure. (Ref: LSC 90K / T-SB-0094-11 (Limited Service Campaign to replace the rubber line with an all-metal version).)
- Intermediate Steering Shaft Clunk 🟡 Low — Very common across 2006-2012 models, causing a clunk or pop noise when turning the wheel at low speeds due to wear in the shaft's U-joint. (Ref: T-SB-0318-08 / T-SB-0033-11)
- Water Pump Failure 🟠 Medium — A known wear item on the 2GR-FE, with failures reported anywhere from 80,000 to 150,000+ miles. Signs include a slow coolant leak (pink crust) from the weep hole or a grinding noise.
- Timing Chain Cover Oil Leak 🟠 Medium — Can develop over time at higher mileage (100k+ miles). It is a slow seep rather than a catastrophic leak, but the repair is labor-intensive.
Used vs. New Parts: Buying Guide for This Vehicle
When a used part is the smart pick: A used part is almost never a smart choice for the Air/Fuel sensor itself, as it is a wear item with a finite lifespan. A used wiring harness connector pigtail from a junkyard is a perfectly acceptable repair for a broken connector clip or damaged wires, provided the donor wires are in good condition.
Donor-vehicle mileage cap: roughly under 100000 miles for the part to have meaningful remaining life.
What to inspect on the donor part:
- For a connector pigtail, ensure the plastic is not brittle or cracked.
- Check for at least 6 inches of flexible, undamaged wire attached to the connector.
- Inspect the connector terminals for any signs of green or white corrosion.
OEM-only on this vehicle (don't cheap out):
- Air/Fuel Ratio Sensor
Aftermarket brands forum-validated for this vehicle:
- Denso (is the Original Equipment Manufacturer)
- NTK
Brands owners have reported issues with on this vehicle:
- Generic, unbranded sensors from online marketplaces have a very high failure and incompatibility rate with Toyota ECUs.
Real Owner Stories
Aggregated from forums and TSBs cited above. Mileages and costs reflect what owners reported in those sources.
2007 Toyota RAV4 3.5L V6
Symptoms: Check Engine Light on with codes P0134 and P0135. Discussion focused on the extreme difficulty of accessing the sensor near the firewall.
What fixed it: Replacing the Bank 1 (rear) A/F sensor using specific tools for tight access.
Source hint: RAV4World Forum - P0134 and P0135 on 2007 V6
2006-2012 Toyota RAV4 3.5L V6
Symptoms: The electrical connector for the sensor was brittle and very difficult to unclip from the harness.
What fixed it: Using a small flathead screwdriver to carefully depress the locking tab while pulling the connector apart.
Source hint: vehicle_specific_issues
2006-2012 Toyota RAV4 3.5L V6 — ~125000 miles
Symptoms: P0134 code appearing intermittently during highway trips.
What fixed it: Diagnosis suggested heater circuit failure; members recommended swapping sensors between banks to confirm the fault followed the sensor.
Source hint: IH8MUD Forum - Code P0134 on highway trips
Related OBD-II Codes
Frequently Asked Questions
Where is the Bank 1 Sensor 1 located on my 3.5L V6 RAV4?
Which fuse should I check for a P0134 code on my RAV4?
Does TSB EG037-07 apply to my P0134 diagnosis?
Can I use any aftermarket sensor to fix this issue?
What tools do I need to reach the sensor against the firewall?
Is the P0134 code related to the VVT-i oil line recall?
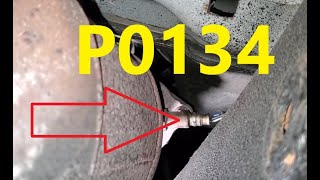
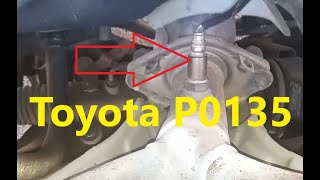
Helpful Videos


We Have This Part in Stock


The information in this article is provided for general reference and educational purposes only. Vehicle specifications, procedures, and part compatibility can vary by production date, trim level, and region. Always consult your vehicle's factory service manual and verify part numbers before purchasing or performing repairs. Safety-critical components such as airbags, seat belts, and braking systems should be installed by a qualified professional.
- Toyota RAV4:
- 🧭 Diagnostic Flowchart
- 🎬 Helpful Videos
- 🛍️ Shop This Part
- What's Unique About the 2006-2012 Toyota RAV4
- Symptoms You May Notice
- Most Likely Causes
- Rare But Worth Checking
- Diagnosis Steps
- Parts You'll Likely Need
- Technical Service Bulletins (TSBs) & Recalls
- Platform-Specific Known Issues
- Mechanic-Grade Diagnostic Values
- Hidden / Shadow Codes Worth Checking
- Scan Tool Commands That Help
- Wiring & Ground Locations
- Real Owner Repair Stories
- OEM Part Supersession History
- Model Year Variations Within This Range
- Other Known Issues on This Vehicle
- Used vs. New Parts: Buying Guide for This Vehicle
- Real Owner Stories
- 2007 Toyota RAV4 3.5L V6
- 2006-2012 Toyota RAV4 3.5L V6
- 2006-2012 Toyota RAV4 3.5L V6 — ~125000 miles
- Related OBD-II Codes
- Frequently Asked Questions
- 🎟️ Get 5% Off