
P0134 on 2019-2024 Toyota RAV4: Air/Fuel Sensor No Activity Causes and Fixes
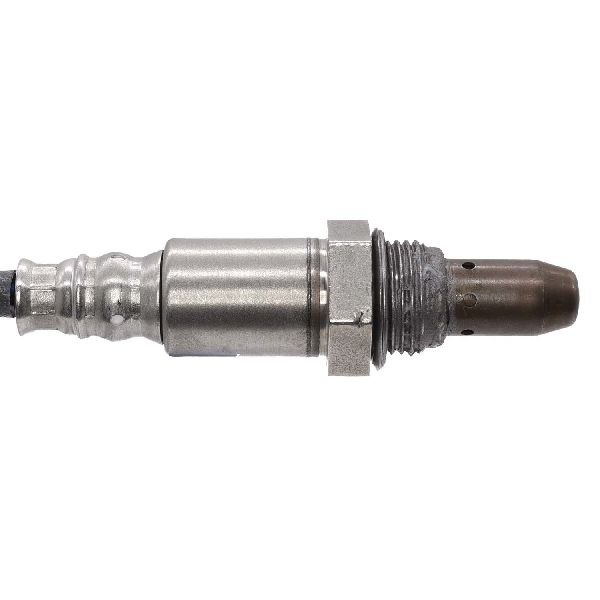
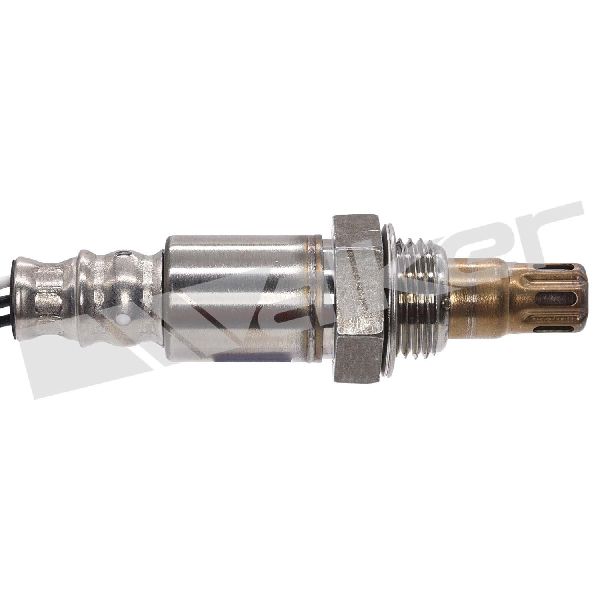
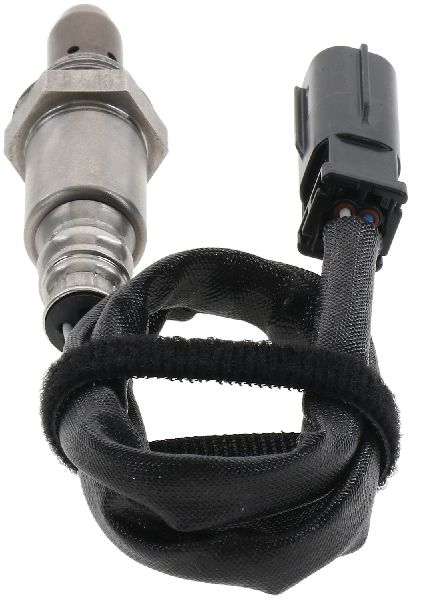
On a 2019-2024 Toyota RAV4, code P0134 almost always means the upstream Air/Fuel Ratio sensor (Bank 1, Sensor 1) has failed. The ECM is not receiving the expected fluctuating signal, often due to an internal failure of the sensor's heater circuit. Replacing it with a Denso sensor (part #234-9307) is the most common fix. Expect to pay around $150 for the part, with a DIY difficulty of 2/5.
- P0134 on a 2019-2024 RAV4 points directly to a problem with the upstream Air/Fuel Ratio sensor (Bank 1, Sensor 1).
- The most probable fix is to replace the sensor itself. Using an OEM-quality brand like Denso (part #234-9307) is highly recommended.
- Before buying a new sensor, always check its wiring and connector for damage, check the relevant fuse, and use a scan tool to confirm the sensor is not sending a signal.
- This is a DIY-friendly repair for those with basic tools, including a special 22mm oxygen sensor socket.
- Ignoring this code will lead to poor gas mileage and can cause expensive catalytic converter damage over time.
What's Unique About the 2019-2024 Toyota RAV4
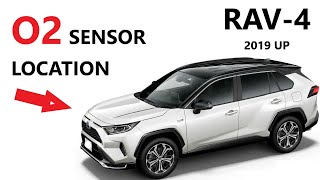
The 5th generation RAV4 (2019-2024) uses a wideband Air/Fuel Ratio sensor for its upstream (Bank 1, Sensor 1) position 🎬 Watch: Locate the Bank 1 sensor on your RAV4, which is more precise than a traditional oxygen sensor. These sensors, typically made by Denso for Toyota, are generally very reliable but can fail over time. The failure is often internal to the sensor's heater circuit, which is required to bring the sensor's ceramic element to its operating temperature of over 600°F quickly. Without a working heater, the sensor cannot produce a valid signal, leading the ECM to flag it as inactive. There are no widespread, documented TSBs specifically for P0134 on this RAV4 platform, so a failure is usually an isolated event due to normal wear and tear.
Symptoms You May Notice
- Check Engine Light is on
- Decreased fuel economy
- Rough or unstable idle
- Engine hesitation or lack of power during acceleration
- Failing an emissions test
- Black smoke from the exhaust (in some cases of a prolonged rich condition)
- Replacing the downstream (Bank 1, Sensor 2) oxygen sensor instead of the upstream (Bank 1, Sensor 1) Air/Fuel Ratio sensor.
- Replacing the Mass Airflow (MAF) sensor. While some generic advice suggests cleaning the MAF sensor, a faulty MAF typically causes lean (P0171) or rich (P0172) codes, not a 'no activity' code for a specific sensor.
- Assuming the sensor is bad without checking the wiring and connector for power, ground, and signal integrity first.
Most Likely Causes
- Failed Bank 1, Sensor 1 Air/Fuel Ratio Sensor 🔴 High Probability → Shop Oxygen Sensor This is the most common point of failure for this code due to sensor age, contamination, or an internal heater circuit failure. The heater element is a common failure point that prevents the sensor from reaching operating temperature.
How to confirm: Use an OBD-II scan tool to monitor live data for 'B1S1'. If the voltage or current value is flat and unresponsive when the engine is warm, the sensor has failed. A healthy sensor's readings will fluctuate rapidly. 🎬 See how to test A/F sensor response with a scanner You can also test the resistance of the heater circuit with a multimeter; an open circuit (infinite resistance) confirms a failed sensor.
Typical fix: Replace the upstream Air/Fuel Ratio sensor on the exhaust manifold.
Est. part cost: $140-$250 - Damaged Wiring or Connector 🟡 Medium Probability The wiring harness is exposed to high heat in the engine bay and can become brittle or damaged over time. Rodents can also chew on the wires. The connector itself can also suffer from corrosion or backed-out pins.
How to confirm: Visually inspect the wiring harness and connector leading to the A/F sensor for any signs of melting, corrosion, fraying, or breaks. Check for continuity and proper voltage at the connector with a multimeter. There should be 12V power to the heater circuit with the key on.
Typical fix: Repair the damaged section of the wiring harness or replace the connector pigtail.
Est. part cost: $15-$50 - Exhaust Leak ⚪ Low Probability Leaks can occur at the exhaust manifold gasket or at the manifold itself if a crack develops. This allows outside air into the exhaust stream, which can cause the sensor to provide a flat, non-responsive reading.
How to confirm: Listen for a ticking or puffing sound from the engine bay, especially when the engine is cold. Visually inspect the exhaust manifold for black soot trails, which indicate a leak. A shop can perform a smoke test to pinpoint the leak's location.
Typical fix: Replace the leaking gasket or repair/replace the cracked exhaust manifold.
Est. part cost: $20-$400
Rare But Worth Checking
- Blown Fuse for Sensor Heater Circuit: The A/F sensor's heater circuit is often protected by a fuse. Before replacing the sensor, it's wise to check the fuse box for any blown fuses related to emissions components or O2 sensors.
- Faulty Engine Control Module (ECM): → Shop Engine Control Module (ECM) This is extremely rare. The ECM should only be considered after all other possibilities, including the sensor, its entire circuit, and fuses have been thoroughly tested and ruled out.
Diagnosis Steps
- Connect an OBD-II scanner and confirm that P0134 is the only code present. If other codes exist, address them first.
- With the scanner, access the live data stream. Watch the parameter for the Bank 1, Sensor 1 A/F sensor (may be listed as O2S11, AFS B1S1, or similar).
- Start the engine and let it warm up to operating temperature. A healthy sensor will show rapidly changing voltage or current readings. If the reading is stuck at a fixed value (e.g., 0V or 3.3V) and does not change, it confirms a 'no activity' condition.
- Turn off the engine. Visually inspect the A/F sensor's wiring harness and connector for any obvious damage, melting, or corrosion. Pay close attention to the area near the hot exhaust manifold.
- If the wiring looks good, disconnect the sensor. Test the sensor's internal heater circuit for resistance using a multimeter. An open circuit (infinite resistance, or 'OL') indicates a failed heater and a bad sensor. A typical resistance is between 1.8-3.4 ohms for the modern planar-type sensor.
- With the key on and engine off, test the vehicle-side connector for proper power (should be 11-14V) and ground to the heater circuit. If power is missing, check the 20A A/F fuse in the engine room junction block.
- If the sensor and wiring test good, carefully inspect the exhaust manifold for any cracks or signs of a gasket leak between the cylinder head and the sensor.
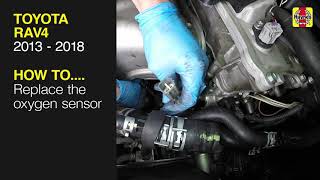
- If all other tests pass, the sensor itself is the most likely culprit. Replace the Bank 1, Sensor 1 Air/Fuel Ratio sensor. A special 22mm (7/8") oxygen sensor socket with a slit for the wire is highly recommended 🎬 Watch this guide to testing and replacing the sensor for removal and installation.
Parts You'll Likely Need
- Air/Fuel Ratio Sensor (Bank 1, Sensor 1)
(OEM #89467-42170)— This is the upstream sensor that fails and directly causes the P0134 code. Denso is the Original Equipment Manufacturer.
Trusted brands: Denso (OEM), NGK/NTK, Bosch
OEM price range: $170-$250
Aftermarket price range: $140-$220
Mechanic-Grade Diagnostic Values
- A/F Sensor Heater Circuit Resistance — expected: 1.8 to 3.4 Ω at 20°C (68°F). Failure: Open circuit (OL on multimeter) or resistance outside the specified range.
- A/F Sensor Internal Resistance (via Scan Tool) — expected: Below 40 Ω after warmup. Failure: Resistance remains at 40 Ω or more for at least 90 seconds after engine start.
- A/F Sensor Harness Signal Voltage (KOEO) — expected: One wire at 3.0V, the other at 3.3V (measured at vehicle harness connector to ground).. Failure: Voltages are missing or significantly different, indicating a wiring or ECM issue.
- A/F Sensor Live Data Voltage (Techstream Active Test) — expected: Should fluctuate below 3.0V when commanding +25% fuel and above 3.35V when commanding -12.5% fuel.. Failure: Voltage does not respond or responds sluggishly to commanded fuel changes.
Hidden / Shadow Codes Worth Checking
- Mode $06, TID $81, CID $11 (example): Mode $06 can provide manufacturer-specific test results, including data for the A/F sensor heater circuit current. A failing test here can pinpoint a heater issue before a full DTC is set. (see via Advanced OBD-II scanner with Mode $06 capability.)
- P22ABxx, P22B2xx, etc.: While P0134 is a generic 'no activity' code, Toyota's Techstream software can often reveal more specific sub-codes indicating shorts to ground, shorts to battery, or open circuits for the sensor's control lines. (see via Toyota Techstream software or equivalent high-end diagnostic scanner.)
Scan Tool Commands That Help
- Toyota Techstream: Active Test: 'Control the Injection Volume for A/F Sensor' — This is the definitive test to confirm if a sensor is lazy or non-responsive. It allows the technician to command a rich (+12.5% or +25%) or lean (-12.5%) fuel mixture and observe the A/F sensor's voltage response in real-time. A good sensor will react quickly and within expected voltage ranges.
Wiring & Ground Locations
- 20A A/F Fuse — Located in the Engine Room Junction Block No. 1 (under the hood).. This fuse supplies power to the A/F sensor's heater circuit. If this fuse is blown, the sensor will not heat up and will not become active, directly causing a P0134 code.
- Engine Control Ground Points — Refer to the 'Electrical Wiring Routing' section of the factory service manual for specific ground point locations (e.g., 'EA', 'EB') on the engine block and chassis.. A poor ground connection for the ECM or the sensor circuit can cause erratic or missing signals, mimicking a failed sensor.
OEM Part Supersession History
89467-42170→N/A— No supersession found. This part number remains current for the entire 2019-2024 generation.
Heads up: Fitment is consistent across the 2019-2024 RAV4 models with the 2.5L engine.
Model Year Variations Within This Range
- 2019-2024: While minor ECU software calibrations for transmission and efficiency were made in later years of the generation, there is no evidence of any change to the A/F sensor hardware, its part number, or the diagnostic procedure for P0134.
Diagnostic Flowchart
Other Known Issues on This Vehicle
Issues unrelated to this code that are worth knowing about as an owner of this generation:
- Roof Rail Water Leak 🔴 High — Common on 2019-2021 models. Degraded rubber gaskets under the roof rail clips allow water to enter, potentially damaging the headliner and A-pillar electronics, including airbag components. (Ref: Toyota Customer Support Program 22TE05; TSB T-SB-0016-23.)
- High Voltage Cable Corrosion ('Cablegate') 🔴 High — Affects 2019-2022 Hybrid models, particularly in regions with road salt. Corrosion at the rear motor's high-voltage cable connector can disable the hybrid system, leading to a very expensive repair. (Ref: Toyota extended the warranty for this component, but it is not a formal recall.)
- 12V Battery Parasitic Drain 🟠 Medium — Reported frequently on 2019-2021 models, especially Hybrids. The Data Communication Module (DCM) may fail to enter sleep mode, causing a parasitic draw that drains the 12V battery, sometimes overnight. (Ref: TSB T-SB-0021-20 addresses a required DCM firmware update.)
- 8-Speed Automatic Transmission Hesitation/Shudder 🟠 Medium — Common complaint on 2019+ non-hybrid models at low speeds. Drivers report a hesitation or lurching when accelerating from a near-stop. Some owners also report a shudder at steady speeds, potentially related to the torque converter. (Ref: Toyota has issued ECU software updates to improve shift logic.)
- Fuel Tank / Fuel Gauge Inaccuracy 🟡 Low — Affects some 2019-2020 Hybrid models. The design of the fuel tank may prevent it from being filled completely, and the fuel gauge may read less than full after a fill-up. (Ref: TSB 20TE04 addresses this issue.)
Used vs. New Parts: Buying Guide for This Vehicle
When a used part is the smart pick: For this specific repair, a used part is NOT recommended. A/F sensors are wear-and-tear items with a finite lifespan and are sensitive to contamination. The risk of premature failure from a used sensor is very high.
Donor-vehicle mileage cap: roughly under 30000 miles for the part to have meaningful remaining life.
What to inspect on the donor part:
- If considering a used sensor (not advised), it must come from a very low-mileage vehicle.
- Ensure the electrical connector is free of corrosion or damage.
- The sensor tip should be free of heavy carbon deposits, oil, or white (coolant) contamination.
OEM-only on this vehicle (don't cheap out):
- Air/Fuel Ratio Sensor
Aftermarket brands forum-validated for this vehicle:
- Denso (is the OEM)
- NGK/NTK
Brands owners have reported issues with on this vehicle:
- Unbranded 'white-box' sensors from online marketplaces should be avoided as their calibration and longevity are often poor and can cause persistent issues.
Related OBD-II Codes
Frequently Asked Questions
Is there a TSB for the P0134 code on my 2019-2024 RAV4?
Can I use an aftermarket sensor to fix the P0134 code on my RAV4?
Could the 12V battery drain issue on my 2020 RAV4 Hybrid be related to this sensor code?
Where is the fuse for the Air/Fuel sensor heater located on a 2019+ RAV4?
Is the P0134 code common on the 2019-2024 RAV4?
What is the correct resistance for the A/F sensor heater on this vehicle?
Helpful Videos


We Have This Part in Stock

The information in this article is provided for general reference and educational purposes only. Vehicle specifications, procedures, and part compatibility can vary by production date, trim level, and region. Always consult your vehicle's factory service manual and verify part numbers before purchasing or performing repairs. Safety-critical components such as airbags, seat belts, and braking systems should be installed by a qualified professional.
- Toyota RAV4:
- 🧭 Diagnostic Flowchart
- 🎬 Helpful Videos
- 🛍️ Shop This Part
- What's Unique About the 2019-2024 Toyota RAV4
- Symptoms You May Notice
- Most Likely Causes
- Rare But Worth Checking
- Diagnosis Steps
- Parts You'll Likely Need
- Mechanic-Grade Diagnostic Values
- Hidden / Shadow Codes Worth Checking
- Scan Tool Commands That Help
- Wiring & Ground Locations
- OEM Part Supersession History
- Model Year Variations Within This Range
- Other Known Issues on This Vehicle
- Used vs. New Parts: Buying Guide for This Vehicle
- Related OBD-II Codes
- Frequently Asked Questions
- 🎟️ Get 5% Off