
P0135 on 2010-2012 Audi A6: O2 Sensor Heater Circuit Fault Causes and Fixes
This code indicates a failure in the heater circuit of the upstream oxygen sensor on Bank 1 (passenger side). The most common fix is to replace the Bank 1, Sensor 1 O2 sensor. This is a DIY-friendly job costing $75-$200 for the part, but requires a special 22mm O2 sensor socket. Be extra careful during oil changes on 3.0T engines, as spilled oil can drip onto and destroy the sensor.
- P0135 almost always means you need a new upstream oxygen sensor for the passenger side (Bank 1).
- On 3.0T engines, be extremely careful when changing your oil. Spilled oil from the filter housing is a known killer of the Bank 1 O2 sensor.
- The job is DIY-friendly but requires a special 22mm slotted socket to fit over the sensor's wire.
- The specified 2010-2012 vehicle range spans two different A6 generations (C6 and C7), so you must verify the correct part number for your specific year and engine (e.g., 3.2L vs 3.0T).
- Before replacing the sensor, always check the 15A fuse for the heater circuit, which is typically located in the engine bay fuse box.
What's Unique About the 2010-2012 Audi A6
The 2010-2012 year range for the Audi A6 is split between two vehicle generations: the C6 (2010-2011) and the C7 (2012), which may have different engine options and sensor locations. A notable Technical Service Bulletin (TSB) for the 2010 model groups P0135 with manufacturer-specific codes P1196 and P1197, which also point to O2 sensor heater circuit faults, indicating a recognized pattern of this issue by Audi. Owners on forums have noted that on the 3.0T engine, oil leaks from higher up on the engine, such as from the oil filter housing during a messy oil change, can drip down and contaminate the O2 sensor connector and wiring, leading to this specific fault.
Diagnostic Flowchart
Tap your situation to follow the diagnostic path that matches what you're seeing on this vehicle.
Generation note: The 2010-2012 range covers two distinct generations. Model years 2010 and 2011 belong to the C6 generation. The 2012 model year marks the beginning of the C7 generation. While the meaning of the code is the same, engine configurations and the exact location and part number for the sensor may differ. Always verify parts for your specific model year and engine. For V-engines, Bank 1 is the cylinder bank that includes cylinder #1, which on Audis is the passenger side for LHD vehicles.
Symptoms You May Notice
- Check Engine Light is on
- Decreased fuel economy
- Potential for rough idling, especially on cold starts
- Failing an emissions test
- Engine running rough or misfiring
- Replacing the wrong oxygen sensor (e.g., the post-catalyst Sensor 2, or the sensor on Bank 2). Always confirm Bank 1 is the passenger side and Sensor 1 is pre-catalyst.
- Replacing the sensor without checking for a blown fuse first.
- Replacing the sensor without inspecting the wiring for oil contamination from a messy oil change, leading to repeat failure.
Most Likely Causes
- Failed Bank 1, Sensor 1 Oxygen Sensor 🔴 High Probability → Shop Oxygen Sensor The internal heater element is a common failure point in oxygen sensors due to constant, extreme heat cycles. This is the most frequent reason for a P0135 code.
How to confirm: Test the resistance of the heater circuit pins on the sensor with a multimeter. A healthy sensor will typically show a low resistance reading, often between 2 and 20 ohms, with some VAG-specific sources citing 2.5-10.0 ohms at room temperature. An infinite (open circuit) or very high resistance reading confirms a failed heater element. 🎬 See a mechanic demonstrate how to test and replace it.
Typical fix: Replace the Bank 1, Sensor 1 oxygen sensor. Bank 1 is on the passenger side of the engine for North American vehicles.
Est. part cost: $75-$200 - Damaged Wiring or Corroded/Contaminated Connector 🟡 Medium Probability The wiring harness is exposed to intense heat, oil, and road debris. Specifically on the 3.0T engine, the oil filter is located high in the engine bay. Spilling oil during an oil change can cause it to drip directly onto the Bank 1 O2 sensor's connector and wiring loom, saturating it and causing failure.
How to confirm: Visually inspect the wiring harness and connector for the Bank 1 Sensor 1 O2 sensor. Look for frayed or melted wires, and check inside the connector for green corrosion or oil contamination. A YouTube video by 'Torque Tactics' shows a sensor completely soaked in oil for this exact reason.
Typical fix: Repair the damaged section of the wiring harness or clean the connector thoroughly with electrical contact cleaner. If corrosion is severe or the connector is oil-saturated, it may need to be replaced.
Est. part cost: $10-$50 - Blown Fuse ⚪ Low Probability
How to confirm: Locate the fuse box and identify the fuse for the O2 sensor heaters. For the C6 A6 (2008-2011), this is often Fuse 6 (15A) in the engine compartment fuse holder, labeled 'Lambda probe heater'. Visually inspect the fuse to see if it is blown. C7 locations may vary.
Typical fix: Replace the blown fuse. If the new fuse blows immediately, it indicates a short circuit in the wiring that must be diagnosed and repaired.
Est. part cost: $1-$5
Rare But Worth Checking
- Faulty Engine Control Module (ECM): → Shop Engine Control Module (ECM) This is very uncommon. The ECM's internal driver for the heater circuit can fail, but all other possibilities (sensor, wiring, fuse) should be exhausted before considering ECM replacement. A user on Reddit with a 2012 A6 reported a P0606 (Internal Control Module Fault) alongside P0135, which could point to this rare scenario.
Diagnosis Steps
- Read the fault codes with an OBD-II scanner to confirm P0135 is present.
- Locate the Bank 1 (passenger side), Sensor 1 (pre-catalyst) oxygen sensor. It will be in the exhaust manifold before the catalytic converter. 🎬 Watch this video to see the exact sensor location.
- Visually inspect the sensor's connector and wiring for any signs of damage, melting, or oil contamination. Pay close attention to the area below the oil filter on 3.0T engines.
- Check the vehicle's fuse panel for a blown fuse related to the 'O2 Heater' or 'Lambda probe heater'. For C6 models, this is often a 15A fuse in the engine bay fuse box.
- If wiring and fuse are okay, disconnect the sensor. Use a multimeter to measure the resistance between the two heater pins on the sensor side of the connector (often two wires of the same color, typically pins 3 and 4). A reading outside the 2.5-10.0 ohm range (or infinity) indicates a failed sensor.
- With the key on and engine off, use a multimeter to check for battery voltage and a good ground signal on the vehicle harness side of the connector. One pin (often Pin 4) should have ~12V to ground, and the other (Pin 3) is the control wire from the ECM.
- If voltage and ground are present and the sensor's resistance is bad, replace the oxygen sensor.
- If voltage or ground is missing, trace the wiring harness back towards the ECM to find the open or short circuit.
Parts You'll Likely Need
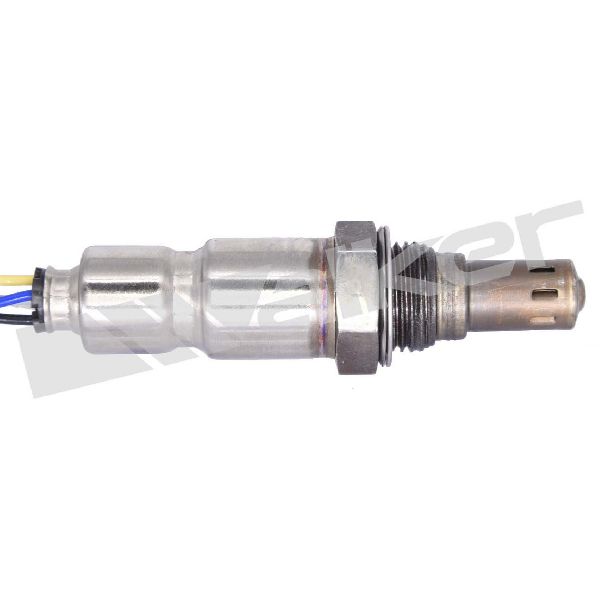
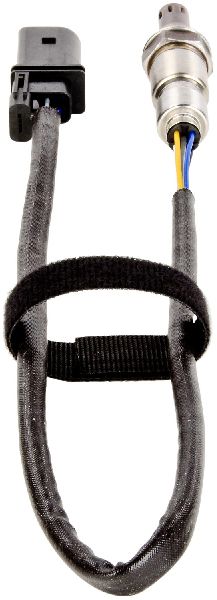
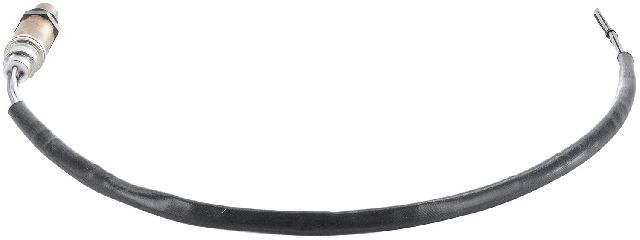
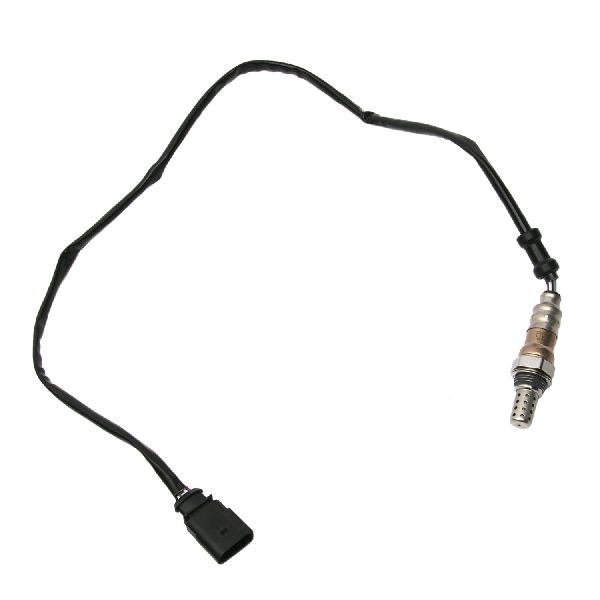
- Oxygen Sensor (Bank 1, Sensor 1)
(OEM #C6 (3.2L): 06E906265S, C7 (3.0T): 06E906262T)— The internal heater element fails from age and heat cycles, which is the direct cause of the P0135 code. Part numbers differ between generations and engines; always verify with your VIN.
Trusted brands: Bosch (OEM supplier), NGK/NTK, Denso
OEM price range: $150-$250
Aftermarket price range: $75-$200
Related Codes That Often Appear With This One
- P0155 — This is the identical heater circuit fault code but for Bank 2, Sensor 1 (driver's side). Seeing both codes together may suggest a common power or ground issue (like a blown fuse for both heaters), or simply that both sensors have failed around the same time due to age.
- P1196 — This is an Audi-specific code for 'O2S Heater Circuit, Bank 1-Sensor-1 Electrical Malfunction'. It is essentially the same as P0135 and is mentioned in the same TSB, confirming the heater circuit as the root cause.
- P0133 — This code indicates 'O2 Sensor Circuit Slow Response (Bank 1, Sensor 1)'. It can appear alongside P0135 because a failing heater can prevent the sensor from reaching operating temperature quickly, causing slow response times. An AudiWorld forum user reported having both codes simultaneously, pointing to a single failed sensor.
Technical Service Bulletins (TSBs) & Recalls
- 01139020337671: A TSB for 2010 models notes a 'heater circuit fault lambda sensor' and groups DTCs P1196, P1197, and P0135, indicating a known issue pattern.
Platform-Specific Known Issues
- On 3.0T V6 engines, the oil filter is located at the top of the engine. Spilling oil during a filter change is a very common cause of this code, as the oil runs down the engine block and directly onto the Bank 1 O2 sensor and its electrical connector, leading to contamination and failure.
- Access to the Bank 1 Sensor 1 can be tight, often requiring removal of the air intake tubing to gain better access from the top. A user on AudiWorld forums described it as a 'miserable job' on a C5, but manageable with long extensions 🎬 Watch this walkthrough for replacing the sensor on a C7. and a universal joint for the socket wrench.
Mechanic-Grade Diagnostic Values
- O2 Sensor Heater Element Resistance — expected: 2.5 to 10.0 Ohms (Ω) at room temperature (approx. 20°C).. Failure: A reading of infinity (open circuit) or significantly outside the specified range indicates a failed heater element.
- Voltage Supply to Heater Circuit — expected: Battery voltage (~12V) with ignition on.. Failure: No voltage indicates a blown fuse or a break in the power supply wire.
- Live Data O2 Sensor Voltage (VCDS) — expected: Voltage should fluctuate. For upstream sensors, it may hover around 1.3-1.5V on some models, while downstream sensors fluctuate between ~0.1V and ~0.8V.. Failure: A static voltage reading (e.g., stuck at 0V) when revving the engine points to a non-responsive sensor.
Scan Tool Commands That Help
- VCDS (VAG-COM): Engine (01) -> Advanced Measuring Values — To graph the live voltage output of the O2 sensor. This can visually confirm if a sensor is non-responsive (stuck at a fixed voltage) when the engine is running, which is a clear sign of failure.
- VCDS (VAG-COM): Engine (01) -> Basic Settings (04) -> Group for O2 Heater Test — To command the ECU to run a self-test on the oxygen sensor heater circuits. This can help confirm if the ECU sees a problem with the circuit after a repair or during diagnosis.
- VCDS (VAG-COM): Turbo Button in Measuring Blocks — When logging live data from engine controllers, pressing the 'Turbo' button can significantly increase the data sampling rate, providing a more detailed view of sensor behavior.
Wiring & Ground Locations
- Heater Circuit Pins — On the O2 sensor's electrical connector itself.. For multimeter testing, resistance should be measured across terminals 3 and 4. The voltage supply from the vehicle harness is typically on terminal 4, while terminal 3 is the control line to the ECM.
- G646 — On the right side of the firewall (for C6 models).. This is a primary ground point for multiple engine components. A corroded or loose connection here could potentially cause various electrical issues, including faults in sensor circuits.
- Engine Block Ground — On the C7, a common ground point is located in the right side of the engine compartment, near the alternator.. The O2 sensor circuit relies on a solid ground connection. Verifying engine ground points is a crucial step if you suspect a wiring issue beyond the sensor itself.
OEM Part Supersession History
06E-906-265-F→06E-906-265-S— Part revision by the manufacturer, likely for improved durability or performance.
Heads up: The new part number (S) is the correct replacement for the old one (F) for applicable C6 models.
Model Year Variations Within This Range
- 2012 (C7): The 2012 C7 generation features a more advanced CAN bus electrical system compared to the 2010-2011 C6. For diagnostics, this may require using the 'Advanced Measuring Blocks' function in tools like VCDS, as the older 'Measuring Blocks' may not be available for all control modules.
Helpful Videos


We Have This Part in Stock


The information in this article is provided for general reference and educational purposes only. Vehicle specifications, procedures, and part compatibility can vary by production date, trim level, and region. Always consult your vehicle's factory service manual and verify part numbers before purchasing or performing repairs. Safety-critical components such as airbags, seat belts, and braking systems should be installed by a qualified professional.
- Audi A6:
- 🧭 Diagnostic Flowchart
- 🎬 Helpful Videos
- 🛍️ Shop This Part
- What's Unique About the 2010-2012 Audi A6
- Symptoms You May Notice
- Most Likely Causes
- Rare But Worth Checking
- Diagnosis Steps
- Parts You'll Likely Need
- Related Codes That Often Appear With This One
- Technical Service Bulletins (TSBs) & Recalls
- Platform-Specific Known Issues
- Mechanic-Grade Diagnostic Values
- Scan Tool Commands That Help
- Wiring & Ground Locations
- OEM Part Supersession History
- Model Year Variations Within This Range
- 🎟️ Get 5% Off