
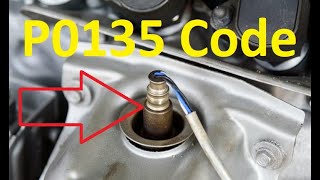
P0135 on 2010-2012 Audi Q5: O2 Sensor Heater Fault Causes and Fixes
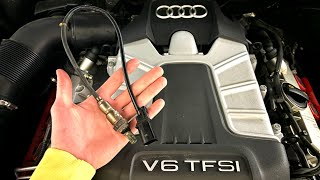
P0135 on a 2010-2012 Audi Q5 almost always means the front oxygen sensor (Bank 1, Sensor 1) has failed. The internal heater element burns out, requiring sensor replacement. Expect to pay $70-$150 for an aftermarket part or $180-$250 for an OEM sensor. It's a common DIY repair, but requires a special O2 sensor socket.
- P0135 means the heater inside your primary, pre-catalytic converter oxygen sensor has failed.
- The most common fix by far is to replace the Bank 1, Sensor 1 oxygen sensor.
- Before buying a new sensor, always check the fuse first and inspect the wiring for damage, especially for oil contamination on 3.2L V6 models.
- This is a DIY-friendly repair for those with basic tools, but it requires a special 22mm (7/8") O2 sensor socket.
- Ignoring the code will lead to poor fuel mileage, will cause your vehicle to fail an emissions test, and can eventually damage the expensive catalytic converter.
What's Unique About the 2010-2012 Audi Q5
For the Audi Q5, this code is very straightforward. The vehicle's diagnostic system specifically monitors the sensor's temperature, triggering P0135 if it fails to reach its target temperature within a specified time after the heater is activated. An official Audi Technical Service Bulletin (TSB #01139020337671) acknowledges this fault, grouping it with related electrical malfunction codes for the same sensor. On models with the 3.2L V6 engine, the sensor's wiring is highly susceptible to damage from oil leaks originating from the oil filter housing gasket, which can drip directly onto the harness and connector, a failure mode documented by owners in forums.
Diagnostic Flowchart
Tap your situation to follow the diagnostic path that matches what you're seeing on this vehicle.
Symptoms You May Notice
- Check Engine Light is on
- Reduced fuel economy
- Rough idle, especially when the engine is cold
- Failure to pass an emissions test
- Bad smell from exhaust or black smoke
- Replacing the wrong oxygen sensor (e.g., the downstream Sensor 2 instead of the upstream Sensor 1).
- Replacing the sensor without first checking the fuse and wiring, leading to a repeat failure if the underlying cause was a short circuit.
Most Likely Causes
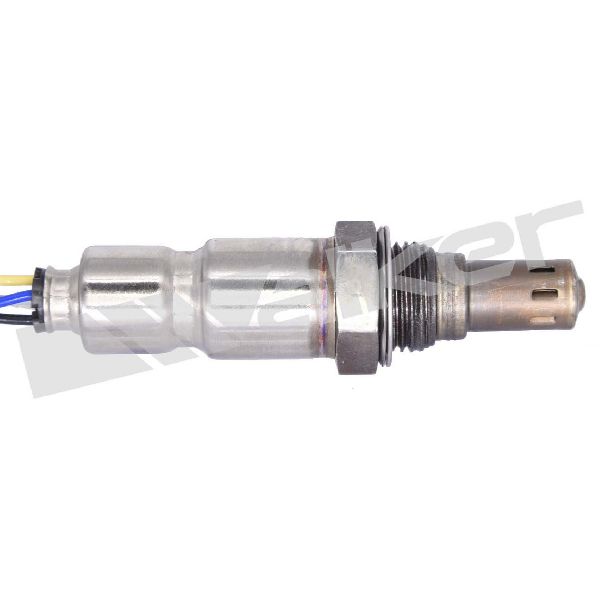
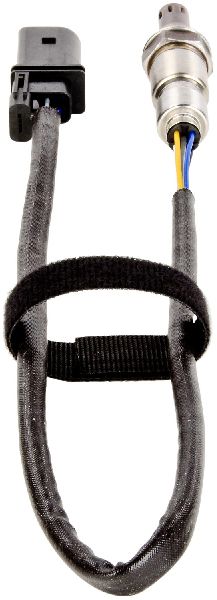
- Failed Oxygen Sensor (Bank 1, Sensor 1) 🔴 High Probability → Shop Oxygen Sensor The internal heater element is a common failure point due to constant exposure to extreme exhaust temperatures and thermal cycling. These sensors typically have a lifespan of 60,000 to 100,000 miles before the heater circuit fails.
How to confirm: After checking the fuse and wiring, test the resistance across the two heater circuit pins on the sensor itself (usually the two same-colored wires) using a multimeter. 🎬 Watch: How to test and replace an O2 sensor for P0135. A healthy sensor for a VAG vehicle should have a resistance between 8-12 ohms, though some sources state a wider range of 5-20 ohms is acceptable. An open circuit (infinite resistance) or a reading far outside this range confirms a bad heater element.
Typical fix: Replace the Bank 1, Sensor 1 oxygen sensor. This requires a special slotted socket (often 22mm or 7/8") to accommodate the sensor's wiring.
Est. part cost: $70-$250 - Damaged Wiring or Connector 🟡 Medium Probability On 3.2L V6 models, oil from a leaking oil filter housing gasket is a known issue that can saturate the sensor's wiring harness, causing it to fail. On all models, the harness is close to the hot exhaust and can become brittle, melted, or chafed over time.
How to confirm: Visually inspect the wiring harness leading to the O2 sensor for any signs of melting, chafing, corrosion, or oil contamination. Check for stable battery voltage and ground at the connector with the key on, engine off.
Typical fix: Repair the damaged section of the wiring harness or clean the oil-soaked connector with electrical contact cleaner. If the oil leak is from the filter housing, that gasket must also be replaced 🎬 See this walkthrough for replacing the oil filter housing gasket. to prevent a repeat failure.
Est. part cost: $10-$50 - Blown Fuse ⚪ Low Probability
How to confirm: Locate the fuse for the oxygen sensor heater circuit. For the 2010-2012 Q5 (8R generation), fuse panels are located on the left and right sides of the instrument panel and in the right side of the luggage compartment. Consult the vehicle's fuse diagram to identify the correct fuse (often labeled with 'O2 sensor' or similar). Visually inspect it or test for continuity with a multimeter.
Typical fix: Replace the blown fuse. If the new fuse blows immediately, it indicates a short circuit in the wiring or within the sensor's heater element that must be found and repaired.
Est. part cost: $1-$5
Rare But Worth Checking
- Faulty Engine Control Module (ECM): → Shop Engine Control Module (ECM) This is very uncommon. All other possibilities, especially the sensor, wiring, and fuses, should be exhaustively ruled out before considering the ECM as the cause.
Diagnosis Steps
- Read the codes with an OBD-II scanner to confirm P0135 is present and note any other codes.
- Locate Bank 1, Sensor 1. On the 2.0T engine, it's the upstream sensor in the downpipe just past the turbo outlet. On the 3.2L V6, it's the upstream sensor on the passenger side (Bank 1 is the cylinder bank with cylinder #1).
- Inspect the fuse for the O2 sensor heater circuit. Fuse panels are on the driver's side dash, passenger side dash, and in the right rear cargo area. Check the owner's manual or fuse diagram for the specific location. Replace if blown.
- Perform a thorough visual inspection of the sensor's wiring harness and connector. Look for frayed wires, melting, corrosion, or oil saturation from leaks, particularly from the oil filter housing on the 3.2L V6.
- If the wiring looks good, disconnect the sensor. Use a multimeter set to Ohms to measure the resistance between the two heater pins on the sensor side of the connector (typically the two wires of the same color). The reading should be between 8-12 Ohms. An infinite reading (OL) means the heater is burned out and the sensor must be replaced.
- If the sensor resistance is within spec, test the vehicle-side connector for power and ground. With the ignition on, you should have battery voltage across the heater circuit pins.
- If there is no voltage at the connector, the problem lies in the wiring or, rarely, the ECM. If voltage is present and the sensor's resistance is good, the connection may be poor or the sensor may be failing intermittently.
Parts You'll Likely Need
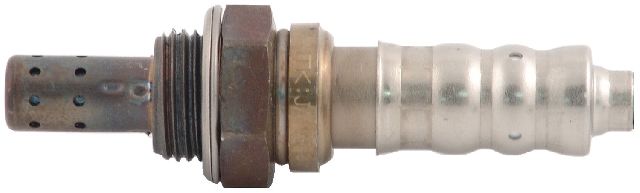
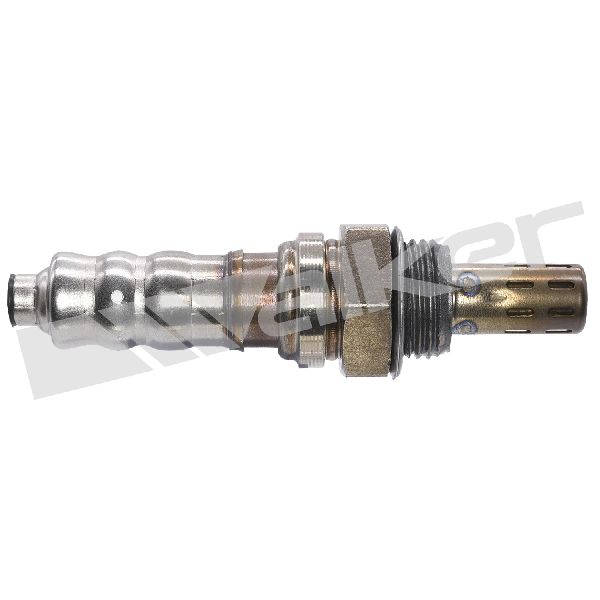
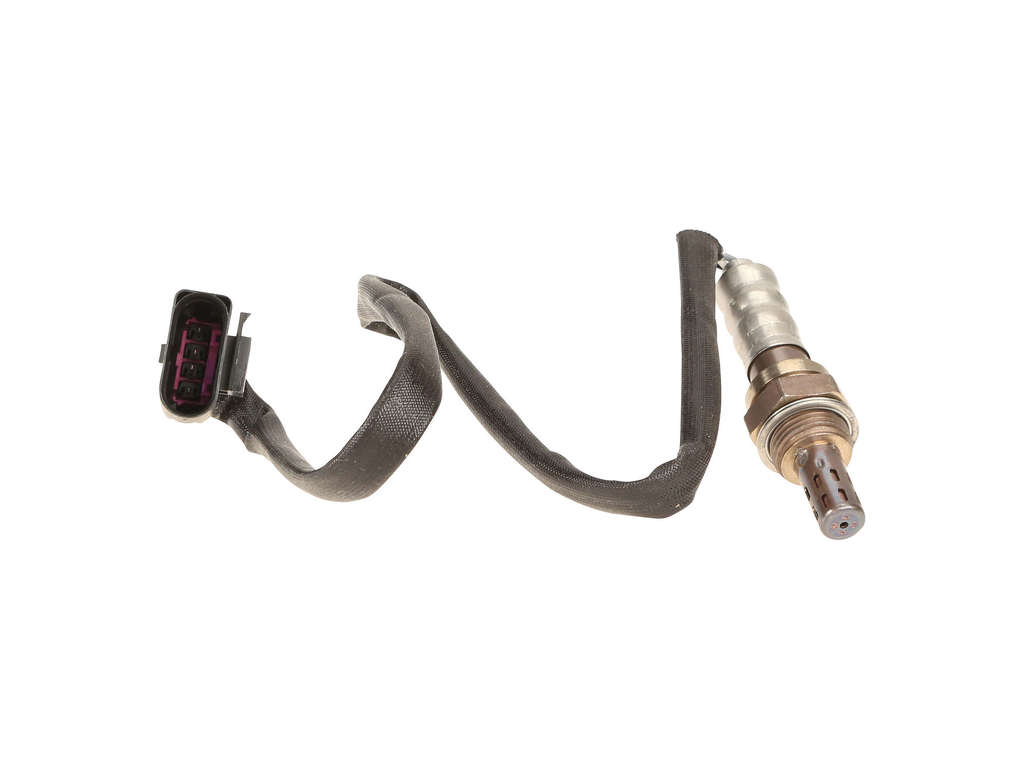
- Oxygen Sensor (Bank 1, Sensor 1)
(OEM #3.2L V6: 06E906265S (superseded by 06E906265AJ) | 2.0T TFSI: 06J906262T)— The internal heater element fails from age and heat, which is the direct cause of the P0135 code.
Trusted brands: Bosch (OEM supplier), NTK, Denso
OEM price range: $180-$250
Aftermarket price range: $70-$150 - Oxygen Sensor Socket — Required for removal and installation of the O2 sensor, as a standard socket will not fit 🎬 Watch: How to change the upstream O2 sensor on an Audi. over the wiring. A 22mm or 7/8" slotted socket is typical.
Trusted brands: Lisle, OEMTools, Bav Auto Tools
OEM price range: $10-$30
Aftermarket price range: $10-$30
Related Codes That Often Appear With This One
- P1196 — This is an Audi-specific code for 'Oxygen (Lambda) Sensor Heater Circuit B1 S1, Electrical Malfunction'. It points to the exact same fault and is often triggered alongside P0135, as noted in Audi TSB #01139020337671.
- P0130 — This code indicates a general malfunction in the O2 sensor circuit for Bank 1, Sensor 1. A heater circuit failure (P0135) can sometimes lead to this more general code being stored as well.
- P0155 — On the 3.2L V6 engine, this code indicates an O2 sensor heater circuit malfunction for Bank 2, Sensor 1. Seeing P0135 and P0155 together strongly suggests a common failure point, such as a shared fuse or a systemic issue like oil contamination affecting both sensor harnesses.
Technical Service Bulletins (TSBs) & Recalls
- 01139020337671: MIL on (DTC P1196/P1197/P0135, heater circuit fault lambda sensor) - Repair Authorization. This TSB confirms the fault and links it to Audi-specific codes for the same issue.
Platform-Specific Known Issues
- Audi issued Technical Service Bulletin #01139020337671 which directly addresses DTC P0135 as a 'heater circuit fault lambda sensor' on 2010 models, authorizing repair.
- On 3.2L V6 engines, a leaking oil filter housing gasket is a known issue that can cause oil to drip onto and destroy the Bank 1 Sensor 1 wiring harness, leading to this code. This has been documented by owners in forums like AudiWorld and Audizine.
- Some owners have reported receiving the P0135 code as a stored/pending code without an active Check Engine Light. It's recommended to clear the code and see if it returns before replacing parts.
Mechanic-Grade Diagnostic Values
- Bank 1 Sensor 1 Heater Circuit Resistance — expected: 8-12 Ohms between the two same-colored wires (heater pins) on the sensor connector.. Failure: An open circuit (OL or infinite resistance) or a value significantly outside the expected range.
- VCDS Advanced Measuring Value - Lambda Probe Voltage (Bank 1, Sensor 1) — expected: Should jump from ~0mV to >=450mV within 5 seconds of a cold start. Should stabilize between 700-900mV when warm.. Failure: Slow or no voltage rise on cold start indicates a faulty heater.
- VCDS Measuring Block Group 033 — expected: Field 1 shows Lambda regulation for Bank 1, Field 2 shows Bank 1 Sensor 1 voltage.. Failure: Voltage that is static or does not respond as expected during warm-up.
- VCDS Measuring Block Group 036 — expected: Shows the status of the heater circuit test. 'B1-S1 Htg. ON' should be displayed during warm-up.. Failure: A status of 'Htg. OFF' or a test failure message when the heater should be active.
Scan Tool Commands That Help
- VCDS (VAG-COM): Engine -> Advanced Measuring Values — To monitor live data such as O2 sensor voltage, heater status, and internal resistance to confirm if the heater is activating and if the sensor is responding. This is critical for diagnosing intermittent issues or confirming a failed heater before replacement.
- VCDS (VAG-COM): Engine -> Basic Settings -> Group 200 — To run the oxygen sensor aging and response test. The ECU will run a guided test, and the results can indicate a slow or failing sensor even if the heater circuit itself tests okay.
Wiring & Ground Locations
- O2 Sensor Heater Fuse — In the fuse panel on the right side of the luggage compartment. For 2009-2012 models, this is in the 'Black' carrier, fuse number 4, rated at 15A. It is labeled 'Lambda probe'.. This fuse provides the power for the heater circuits of all oxygen sensors. If it blows, P0135 (and potentially other O2 heater codes) will be set. It is a critical first check before replacing any parts.
- Bank 1 Sensor 1 Connector Pins — On the 6-pin connector for the front O2 sensor.. For testing: Pins 3 and 4 are for the heater element (resistance test). With the key on, engine off, you should have battery voltage between Pin 3 (from fuse) and Pin 4 (ECM-controlled ground).
- Ground Connection 12 — In the engine compartment, on the left side, near the suspension strut tower.. This is a primary ground point for the engine wiring harness. A corroded or loose connection here can cause various electrical issues, including erratic sensor behavior and incorrect ground references for the ECM, potentially leading to a P0135 code.
Real Owner Repair Stories
- Reddit user in r/MechanicAdvice (2003 Honda Civic (Illustrates a common diagnostic path applicable to Audi)) — P0135 code returned immediately after replacing the Bank 1 Sensor 1 O2 sensor.
❌ Tried (didn't work) Replacing the oxygen sensor.
✅ What actually fixed it The user was advised to check the fuse for the heater circuit. The implication is that a blown fuse was the root cause, which would prevent the new sensor's heater from working and immediately re-trigger the code.
OEM Part Supersession History
06E906265S→06E906265AJ— Updated design or supplier change for improved longevity or performance.
Helpful Videos


We Have This Part in Stock


The information in this article is provided for general reference and educational purposes only. Vehicle specifications, procedures, and part compatibility can vary by production date, trim level, and region. Always consult your vehicle's factory service manual and verify part numbers before purchasing or performing repairs. Safety-critical components such as airbags, seat belts, and braking systems should be installed by a qualified professional.
- Audi Q5:
- 🧭 Diagnostic Flowchart
- 🎬 Helpful Videos
- 🛍️ Shop This Part
- What's Unique About the 2010-2012 Audi Q5
- Symptoms You May Notice
- Most Likely Causes
- Rare But Worth Checking
- Diagnosis Steps
- Parts You'll Likely Need
- Related Codes That Often Appear With This One
- Technical Service Bulletins (TSBs) & Recalls
- Platform-Specific Known Issues
- Mechanic-Grade Diagnostic Values
- Scan Tool Commands That Help
- Wiring & Ground Locations
- Real Owner Repair Stories
- OEM Part Supersession History
- 🎟️ Get 5% Off