
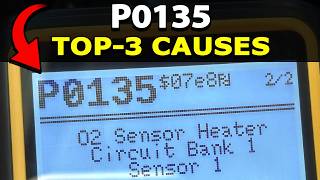
P0135 on 2000-2005 Buick LeSabre 3.8L: Diagnosing and Fixing the O2 Sensor Heater Circuit
This code means the heater inside the rear, upstream oxygen sensor has failed. The most likely fix is replacing the Bank 1, Sensor 1 O2 sensor, which is located on the exhaust manifold closer to the firewall. Expect to pay $40-$80 for an aftermarket sensor and $90-$150 for an OEM part. Before replacing, always check the 'O2 SENS' or similarly labeled fuse in the under-hood fuse box.
- P0135 almost always points to a failed oxygen sensor on Bank 1 (the rear, firewall side).
- Before buying parts, always check the 'SENSORS' or 'O2 SENS' fuse in the under-hood fuse box—it's a quick and cheap potential fix.
- The biggest challenge is accessing the sensor on the rear exhaust manifold. Be prepared with a 6-inch extension, a swivel joint, and a proper 7/8" O2 sensor socket.
- Using a small amount of anti-seize compound on the threads of the new sensor is critical and will make future replacement much easier.
- Always ensure you are replacing the correct sensor: Bank 1 (rear bank), Sensor 1 (upstream, before the catalytic converter).
What's Unique About the 2000-2005 Buick LeSabre
On the Buick 3.8L V6 (L36) engine, 'Bank 1' refers to the cylinder bank against the firewall, which is notoriously harder to access than the front bank (Bank 2). 'Sensor 1' is the upstream sensor, located directly in the rear exhaust manifold before the catalytic converter. While the P0135 code is common on many vehicles, owners of this LeSabre often find the main challenge is the physical difficulty of reaching the sensor due to tight clearance between the engine, firewall, and heater hoses. A 6-inch extension and a specialized O2 sensor socket are often cited as essential tools for the job.
Symptoms You May Notice
- Check Engine Light is on
- Reduced fuel mileage (potentially by 10-20%)
- Engine may run slightly rough or hesitate, especially during cold start or idle
- Failure to pass an emissions test
- Replacing the wrong oxygen sensor (e.g., the downstream sensor (Sensor 2) or the sensor on the front bank (Bank 2)). It is critical to confirm Bank 1 is the rear bank on this transverse-mounted engine.
- Replacing the sensor without checking the fuse first.
- Assuming the sensor is bad when the true fault is in the wiring harness.
Most Likely Causes
- Failed Oxygen Sensor Heater Element 🔴 High Probability → Shop Oxygen Sensor The internal heater element is a common failure point on O2 sensors as they age, due to constant heat cycles and exposure to exhaust gases. These sensors have a typical lifespan of 60,000 to 100,000 miles.
How to confirm: Disconnect the sensor and use a multimeter to test the resistance between the two heater circuit wires (typically the two wires of the same color, often black). An infinite resistance reading (OL - open circuit) confirms the heater has failed. A normal reading is typically low, often between 4 and 20 ohms.
Typical fix: Replace the Bank 1, Sensor 1 oxygen sensor.
Est. part cost: $40-$150 - Blown O2 Sensor Fuse 🟡 Medium Probability → Shop Oxygen Sensor A short in the sensor's heater element or its wiring can cause the fuse to blow as a protective measure. This should always be the first check.
How to confirm: Locate the fuse boxes, one under the hood and one under the rear seat passenger side. Check the fuse labeled 'O2 SENS', 'ENG SENS', or similar in the under-hood fuse box. It is often a 10A or 15A fuse. Visually inspect the fuse to see if the metal strip inside is broken. A forum user on a similar GM platform confirmed a blown fuse was their issue.
Typical fix: Replace the blown fuse with one of the same amperage. If it blows again immediately, a short circuit exists in the wiring or the new sensor itself that must be traced.
Est. part cost: $1-$5 - Damaged Wiring or Connector ⚪ Low Probability The wiring harness for the rear O2 sensor is routed in a hot, tight area near the firewall and exhaust. Over time, the plastic loom can degrade, and wires can become brittle, melt against the exhaust manifold, or chafe, causing a short or open circuit. Experts suggest wiring issues account for a significant number of P0135 cases.
How to confirm: Visually and physically inspect the wiring harness and connector leading to the Bank 1, Sensor 1 O2 sensor. Look for any signs of melting, chafing, broken wires, or corrosion on the connector pins. The connector is often clipped to a bracket on the back of the engine.
Typical fix: Repair the damaged section of the wiring harness with a new connector pigtail or by splicing, soldering, and heat-shrinking the damaged wires.
Est. part cost: $15-$40
Rare But Worth Checking
- Powertrain Control Module (PCM) Fault: → Shop Engine Control Module (ECM) This is extremely rare. The PCM's driver circuit for the heater can fail, but all other potential causes (sensor, fuse, wiring) must be definitively ruled out before considering PCM replacement.
Diagnosis Steps
- Use an OBD-II scanner to confirm P0135 is present. Note any other codes, like P0141, but address P0135 first.
- Locate the fuse for the oxygen sensor heater circuit. On a 2001 LeSabre, this is typically a 15A fuse labeled 'SENSORS' in the under-hood fuse block. Check your owner's manual for the exact fuse. Inspect and replace if blown.
- If the fuse is good, locate the Bank 1, Sensor 1 oxygen sensor. It is on the rear exhaust manifold, closer to the firewall. Access is tight, often requiring removal of the engine cover.
- Inspect the sensor's wiring harness and connector for any visible signs of damage, such as melting, fraying, or corrosion. The connector is often clipped to a bracket near the heater hoses.
- Disconnect the sensor's electrical connector. Use a multimeter set to Ohms (Ω) to measure the resistance across the two heater pins on the sensor side of the connector (usually the two wires that are the same color, e.g., black).
- A reading of infinite resistance (OL) means the heater circuit is open and the sensor must be replaced. A good heater should have low resistance, typically between 4-20 ohms.
- If the sensor's resistance is good, check for voltage at the connector. With the key in the 'On' position (engine off), carefully use a multimeter to check for 12V power on the corresponding pin in the harness-side connector (usually a pink wire on GM vehicles).
- If there is no 12V power at the connector and the fuse is good, there is an open circuit in the wiring between the fuse box and the sensor that needs to be traced and repaired.
- If power is present and the sensor resistance is good, the issue could be in the ground control side of the circuit or, in very rare cases, the PCM itself.
Parts You'll Likely Need
- Oxygen Sensor (Bank 1, Sensor 1)
(OEM #ACDelco 213-1553)— This is the upstream sensor on the rear exhaust manifold. The internal heater element is the most common failure point for code P0135.
Trusted brands: ACDelco (OEM), Denso, Bosch, NGK/NTK
OEM price range: $90-$150
Aftermarket price range: $40-$80 - Oxygen Sensor Socket — A special 7/8" (22mm) slotted socket is required to remove and install the oxygen sensor without damaging the wire. Given the tight access on the rear bank, this tool is considered essential.
Trusted brands: Lisle, OEMTOOLS, GearWrench
Aftermarket price range: $10-$25
Related Codes That Often Appear With This One
- P0141 - O2 Sensor Heater Circuit Malfunction (Bank 1, Sensor 2): If the downstream sensor's heater fails around the same time, which is common due to age. One owner reported both codes appearing simultaneously.
Technical Service Bulletins (TSBs) & Recalls
- While no TSB is specific to P0135 on this model, a TSB for a different GM vehicle with DTCs P0135, P0141 & P0155 (all O2 heater codes) noted the cause was a faulty O2 sensor, reinforcing that multiple heater circuit codes often point to sensor failure rather than a systemic electrical issue.
Platform-Specific Known Issues
- Difficult Access to Bank 1 Sensor 1: The primary challenge for this repair is not diagnosis, but access. The sensor is located on the rear exhaust manifold, tucked between the engine and the firewall. Mechanics and DIYers in forums frequently mention the need for long extensions and a swivel joint to reach the sensor from above. A video for a Pontiac Bonneville with the same engine shows the technician navigating around heater hoses to get the socket onto the sensor. 🎬 Watch: This walkthrough shows how to reach that difficult rear sensor.
Mechanic-Grade Diagnostic Values
- O2 Sensor Heater Element Resistance — expected: 5-12 Ohms at ambient temperature. Some sources give a wider range of 4-20 Ohms.. Failure: Infinite resistance (OL) indicates an open circuit (failed heater). A reading of zero ohms indicates a short circuit.
- Heater Circuit Power Supply Voltage — expected: 10-12 Volts DC with Key On, Engine Off (KOEO).. Failure: 0 Volts indicates a blown fuse or an open in the power supply wire.
- Heater Circuit Ground — expected: The PCM provides a ground path for the heater circuit. This is a controlled ground, often pulsed (Pulse Width Modulated).. Failure: An open in the ground wire between the sensor connector and the PCM will prevent the heater from working.
Scan Tool Commands That Help
- Tech 2 / Professional Scan Tool: HO2S Heater Resistance Learn Reset — After replacing a heated oxygen sensor, this function should be performed. It resets the PCM's learned resistance value for the heater circuit. Failing to do this can lead to premature failure of the new sensor or persistent codes on some newer GM systems that actively monitor heater resistance. On many systems of this era, simply clearing codes after the repair achieves the same result.
Wiring & Ground Locations
- HO2S B1S1 Connector - Pin D (Harness Side) — On the engine wiring harness connector for the rear, upstream O2 sensor.. This pin, connected to a Pink wire, is the 12V power supply from the fuse block to the O2 sensor's heater element. A voltage test here confirms if the fuse and wiring to the sensor are intact.
- HO2S B1S1 Connector - Pin C (Harness Side) — On the engine wiring harness connector for the rear, upstream O2 sensor.. This pin is the heater control circuit, providing a path to ground controlled by the PCM. A fault in this wire back to the PCM will prevent the heater from functioning even if the sensor and power supply are good.
- G103 and G104 — On some GM trucks of a similar era, these grounds are located at the back of the cylinder heads on the engine block. While the exact designator for the LeSabre may differ, the primary engine-to-chassis grounds are critical for the PCM and its sensor circuits to operate correctly.. A corroded or loose main engine ground can cause a variety of intermittent electrical issues and sensor codes, including P0135, by creating unstable voltage references for the PCM.
Real Owner Repair Stories
- Owner experience on a 2002 Buick LeSabre (2002 Buick LeSabre 3.8L V6, 142,000 miles) — Check engine light, rough idling at stoplights, and slightly worse fuel economy.
✅ What actually fixed it The owner scanned the codes and found P0135 and P0141 (heater circuit failures for both upstream and downstream sensors). The fix was replacing both the upstream and downstream oxygen sensors. The owner confirmed that a Denso part (234-4087) was a compatible replacement for the original.
OEM Part Supersession History
GM Genuine Part, number may vary by exact year→ACDelco 213-1553 / GM 19209814— Standard part evolution and consolidation.
Heads up: The ACDelco 213-1553 is listed as fitting 2004-2005 LeSabre models. Earlier models in the 2000-2003 range may use a different part number. It is critical to verify the part number for the specific model year, as heater resistance values can differ. For example, one source notes that sensors made before 2000 used different resistance values than those post-2001 due to emissions standard changes.
Model Year Variations Within This Range
- 2000-2005: The L36 3.8L Series II V6 engine was used consistently throughout this generation of the LeSabre, with no major mechanical changes affecting the P0135 code. However, there may be minor differences in wiring harness connectors or O2 sensor part numbers between early (2000-2003) and late (2004-2005) models. For example, the primary OEM replacement sensor is often listed for 2004-2005 models, so owners of earlier years should double-check fitment.
Diagnostic Flowchart
Used vs. New Parts: Buying Guide for This Vehicle
When a used part is the smart pick: For this repair, a used part is almost never a smart choice. The primary failure is the O2 sensor itself, which is a wear-and-tear item with a finite lifespan. A used sensor from a junkyard has unknown remaining life and is not worth the labor to install. A used wiring harness pigtail could be a viable option if the original connector is damaged and a new pigtail is unavailable.
Donor-vehicle mileage cap: roughly under 50000 miles for the part to have meaningful remaining life.
What to inspect on the donor part:
- If sourcing a connector pigtail, inspect for brittle plastic, cracked wire insulation, or corrosion on the pins.
- Ensure the locking tab on the connector is intact and functional.
Aftermarket brands forum-validated for this vehicle:
- ACDelco (OEM)
- Denso
- NTK/NGK
- Bosch
Brands owners have reported issues with on this vehicle:
- Unnamed, 'white box' or generic eBay/Amazon sensors are frequently reported on forums as being dead-on-arrival, having incorrect heater resistance, or failing prematurely.
Real Owner Stories
Aggregated from forums and TSBs cited above. Mileages and costs reflect what owners reported in those sources.
1998 Buick LeSabre L36 3.8L V6
Symptoms: Check Engine Light was on with code P0135.
What fixed it: A mechanic confirmed the heater circuit in the Bank 1, Sensor 1 O2 sensor had failed using a multimeter (it showed an open circuit) and replaced the faulty sensor.
Source hint: YouTube - 1998 Buick Lesabe P0135 by Astral Auto Repairs
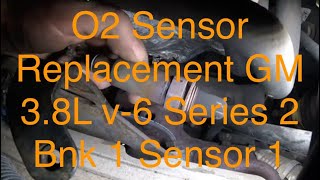
2001 Pontiac Bonneville L36 3.8L V6
Symptoms: Check Engine Light on for the upstream O2 sensor on the rear manifold.
What fixed it: The Bank 1, Sensor 1 oxygen sensor was replaced. The job required a 6-inch extension and a specialized O2 sensor socket to access the sensor near the firewall.
Source hint: YouTube - OXYGEN SENSOR REPLACEMENT GM 3.8l V-6 SERIES 2 (BANK 1 SENSOR 1) by Barbour's Auto Help
GM V6 Vehicle
Symptoms: Owner experienced significant confusion and frustration trying to locate the correct sensor for the P0135 code.
What fixed it: The problem was resolved only after the owner correctly identified and replaced the difficult-to-access rear (Bank 1) sensor, having initially replaced the wrong, more accessible sensor.
Source hint: 2CarPros Forum Post
GM Platform Vehicle
Symptoms: Check Engine Light on with code P0135.
What fixed it: The issue was resolved by replacing a blown fuse for the O2 sensor circuit, which had blown due to a short in the old sensor.
Source hint: Forum user on a similar GM platform cited in diagnosis context
Related OBD-II Codes
Frequently Asked Questions
Where is the oxygen sensor for code P0135 located on my 2000-2005 LeSabre?
What is the very first thing I should check when I get a P0135 code?
How can I test the oxygen sensor itself to confirm it's bad?
Are there any recommended brands for the replacement O2 sensor on this car?
I have a Pontiac Bonneville with the 3.8L V6, not a LeSabre. Is this P0135 information still relevant?
What are the common symptoms of a P0135 besides the Check Engine Light?
Helpful Videos
We Have This Part in Stock


The information in this article is provided for general reference and educational purposes only. Vehicle specifications, procedures, and part compatibility can vary by production date, trim level, and region. Always consult your vehicle's factory service manual and verify part numbers before purchasing or performing repairs. Safety-critical components such as airbags, seat belts, and braking systems should be installed by a qualified professional.
- Buick LeSabre:
- 🧭 Diagnostic Flowchart
- 🎬 Helpful Videos
- 🛍️ Shop This Part
- What's Unique About the 2000-2005 Buick LeSabre
- Symptoms You May Notice
- Most Likely Causes
- Rare But Worth Checking
- Diagnosis Steps
- Parts You'll Likely Need
- Related Codes That Often Appear With This One
- Technical Service Bulletins (TSBs) & Recalls
- Platform-Specific Known Issues
- Mechanic-Grade Diagnostic Values
- Scan Tool Commands That Help
- Wiring & Ground Locations
- Real Owner Repair Stories
- OEM Part Supersession History
- Model Year Variations Within This Range
- Used vs. New Parts: Buying Guide for This Vehicle
- Real Owner Stories
- 1998 Buick LeSabre L36 3.8L V6
- 2001 Pontiac Bonneville L36 3.8L V6
- GM V6 Vehicle
- GM Platform Vehicle
- Related OBD-II Codes
- Frequently Asked Questions
- 🎟️ Get 5% Off