
P0135 on 2005-2009 Chevrolet Equinox 3.4L V6: O2 Sensor Heater Failure Causes and Fixes
This code is almost always caused by a failed upstream oxygen sensor (Bank 1, Sensor 1). On this vehicle, it's the sensor in the rear exhaust manifold near the firewall. Expect to pay $30-$70 for a quality aftermarket sensor and $60-$120 for an OEM ACDelco part. It's a DIY-friendly fix with the right tool, but check the 'OXY SEN' fuse first.
- P0135 on your Equinox means the heater inside the upstream O2 sensor has failed.
- The correct sensor to replace is the one in the rear exhaust manifold, closer to the firewall, which is best accessed from below.
- The most likely fix is to replace the sensor (ACDelco 213-2827 is the OEM part). This is a common wear item.
- Before buying a new sensor, check the 15A 'OXY SEN' fuse in the underhood fuse box to rule out a simpler electrical issue.
- You will need a special 7/8" O2 sensor socket to perform this repair yourself.
What's Unique About the 2005-2009 Chevrolet Equinox
The 3.4L V6 LNJ engine in the first-generation Equinox and its platform-mate, the Pontiac Torrent, has a simple exhaust setup with two oxygen sensors. The P0135 code specifically refers to the upstream sensor (Bank 1, Sensor 1), which is located in the rear exhaust manifold against the firewall. Access is known to be tight, requiring work from underneath the vehicle. Its failure is a very common and straightforward wear-and-tear issue on this platform with no specific recalls or widespread design flaws noted for the sensor itself.
Symptoms You May Notice
- Check Engine Light is on
- Decreased fuel economy
- Rough or unstable idle
- Failure to pass an emissions test
- Vehicle may run rough during start-up
- "Reduced Propulsion" message on the dashboard (as noted in similar Chevrolet propulsion system failures)
- Replacing the downstream (post-catalyst) oxygen sensor. This code is specifically for the upstream sensor's heater circuit.
Most Likely Causes
- Failed Upstream Oxygen Sensor (Bank 1, Sensor 1) 🔴 High Probability → Shop Oxygen Sensor The internal heater element is a common failure point in O2 sensors as they age from constant heat cycles. It's considered a regular wear-and-tear item, much like a light bulb burning out.
How to confirm: With the engine off and cool, disconnect the sensor and measure the resistance between the two heater circuit pins (often the two wires of the same color) using a multimeter set to Ohms. An open circuit (infinite resistance or 'OL') confirms a failed heater. A good heater on this GM application typically has a resistance between 3.0 and 10.0 Ohms.
Typical fix: Replace the Bank 1, Sensor 1 oxygen sensor located in the rear exhaust manifold.
Est. part cost: $30-$120 - Damaged Wiring or Connector 🟡 Medium Probability The wiring harness for the rear O2 sensor is exposed to high heat from the exhaust manifold and road debris. The plastic loom can become brittle and break, and wires can melt or chafe against the engine or firewall.
How to confirm: Visually inspect the entire wire harness from the O2 sensor to where it connects to the main engine harness. Look for melted plastic, chafing, breaks, or green corrosion in the connector pins.
Typical fix: Repair the damaged section of wire or clean/replace the connector pigtail.
Est. part cost: $5-$30 - Blown Fuse for the Heater Circuit ⚪ Low Probability An electrical short in the heater circuit, caused by a failed sensor or damaged wiring, can cause the fuse to blow as a protective measure. In some Chevrolet models, a blown fuse for the heater circuit can be triggered by a short in a related component like the EGR valve (NHTSA ODI #11632222).
How to confirm: Locate the underhood fuse box. Check the 15A fuse, which may be labeled 'OXY SEN', 'HO2S', or 'A/F heater'. Visually inspect the fuse or test for continuity with a multimeter. A blown fuse is often a symptom of a shorted sensor or wiring, not the root cause.
Typical fix: Replace the blown fuse after diagnosing and fixing the underlying short circuit. If the fuse blows again immediately, a short to ground exists in the harness or sensor.
Est. part cost: $1-$5
Rare But Worth Checking
- Faulty Powertrain Control Module (PCM): → Shop Engine Control Module (ECM) This is extremely rare. The PCM's driver circuit for the O2 heater can fail, but this should only be considered after all other possibilities (sensor, wiring, fuses) have been exhaustively ruled out. NHTSA ODI #10156207 describes a case where P0135 was present alongside other codes, and while items tested good per the trouble tree, the warnings persisted, suggesting complex electrical or module-level issues.
Diagnosis Steps
- Confirm the code: Use an OBD-II scanner to confirm P0135 is the only code present. If other codes exist, address them first. Note that P0135 can appear in a long list of concurrent electrical codes (NHTSA ODI #11681144).
- Check the fuse: Before inspecting the sensor, check the O2 sensor heater fuse (often labeled 'OXY SEN') in the underhood fuse box.
- Locate the sensor: Identify the Bank 1, Sensor 1 O2 sensor. On the 3.4L V6 Equinox, it is in the rear exhaust manifold, near the firewall, and is best accessed from under the vehicle.
- Inspect wiring: Carefully inspect the sensor's wiring harness and connector for any signs of melting, chafing, corrosion, or loose connections. Pay close attention to where the harness may contact the engine or exhaust components.
- Test the heater circuit: Disconnect the sensor and use a multimeter to measure the resistance across the heater element pins on the sensor side. A reading of 'OL' (over-limit/open) means the heater is broken. A good heater typically has a resistance between 3 and 10 ohms for this engine.
- Test for power: With the key on and engine off, use a multimeter to check for 12V power at the heater circuit power pin on the harness-side connector. If there is no power, the problem is upstream in the wiring or fuse box.
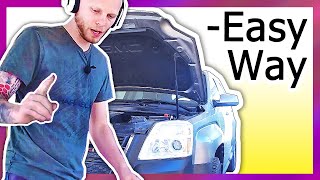
- Replace the sensor: If the sensor's heater element has failed the resistance test and the wiring/fuse are confirmed to be good, replace the oxygen sensor. 🎬 Watch this step-by-step walkthrough for replacing the upstream sensor.
Parts You'll Likely Need
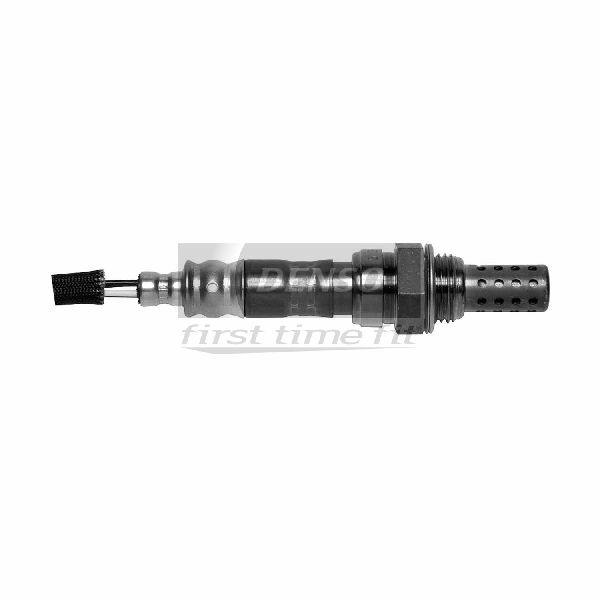
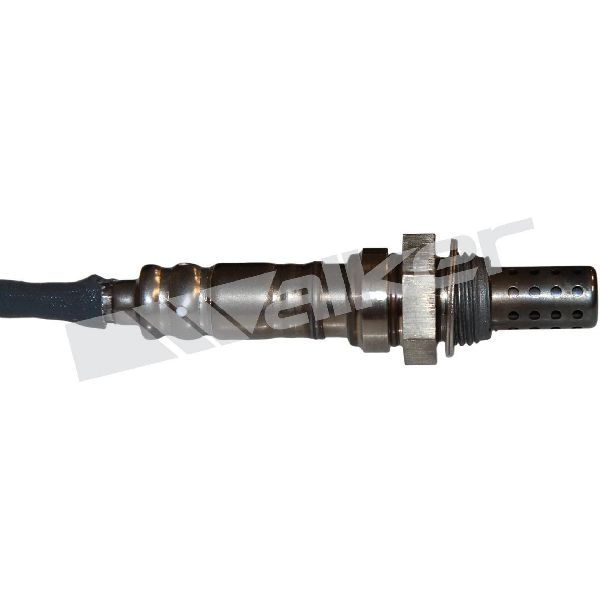
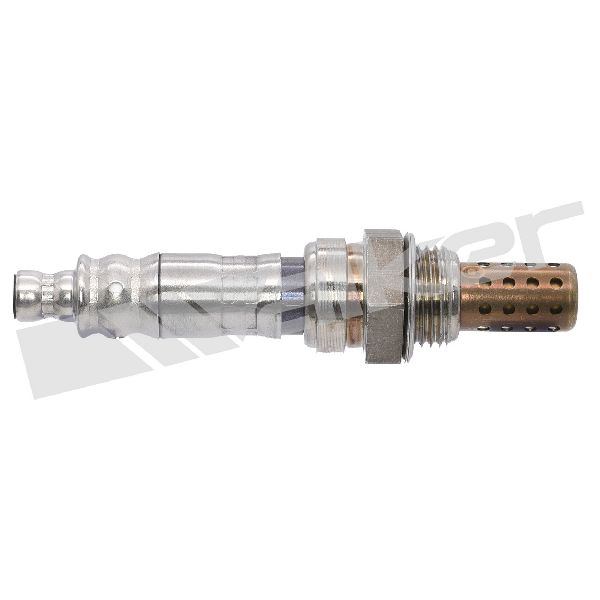
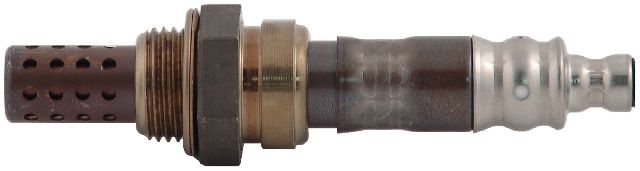
- Upstream Oxygen Sensor (Bank 1, Sensor 1)
(OEM #ACDelco 213-2827)— This is the component that contains the heater element reported as faulty by the P0135 code. It is the most common point of failure.
Trusted brands: ACDelco (OEM), Denso (234-4668), NTK, Bosch
OEM price range: $60-$120
Aftermarket price range: $30-$70 - Oxygen Sensor Socket Set — A special 7/8" (22mm) socket with a cutout for the wire is often required to remove and install O2 sensors, especially in tight locations like the rear manifold.
OEM price range: $15-$30
Aftermarket price range: $10-$25
Mechanic-Grade Diagnostic Values
- O2 Sensor Heater Element Resistance — expected: 3.0 to 10.0 Ohms. Failure: An open circuit (OL) or infinite resistance reading on a multimeter.
- O2 Sensor Heater Circuit Voltage — expected: 12V (Battery Voltage) at the harness-side connector with Key On, Engine Off.. Failure: No voltage indicates a problem with the fuse or wiring upstream.
- O2 Sensor Heater Current Draw (PCM Monitored) — expected: Typically between 0.5 to 2.0 amps.. Failure: The PCM will set code P0135 if the current is higher or lower than the specified range for a set period.
Wiring & Ground Locations
- HO2S B1S1 Heater Circuit Wires — At the 4-pin connector for the upstream oxygen sensor located on the rear exhaust manifold.. A wiring diagram for a 2006 Equinox shows the heater circuit wires are GRY/WHT (Heater Control) and PNK/BLK (Ignition 1 Voltage). Testing for 12V on the PNK/BLK wire and checking the integrity of the GRY/WHT wire back to the PCM is critical for diagnosing a circuit fault vs. a failed sensor.
- Heater Circuit Power Source — The Pink/Black (PNK/BLK) wire receives power from the underhood fuse block, typically from a 15A fuse labeled 'EMIS 2' or similar.. This confirms the power source for the heater circuit. If the fuse is good but there is no power on this wire at the sensor connector, it indicates an open circuit between the fuse block and the sensor.
- G105 (Engine Ground) — Located at the lower right rear (passenger side, firewall side) of the engine.. While not directly for the heater circuit (which is grounded through the PCM), a poor main engine ground can cause erratic electrical behavior and introduce noise into sensor circuits, potentially leading to incorrect diagnoses. Ensuring this ground is clean and tight is a good practice during any electrical diagnosis.
- G111 (Engine Ground) — Located at the rear of the engine, near the crankshaft sensor.. This is another primary engine ground. A loose or corroded connection here can affect various engine sensors and actuators. Verifying its integrity is important for overall engine electrical health.
Real Owner Repair Stories
- YouTube user comment on '2005 Chevy equinox oxygen sensor location bank 1 sensor 1' (2005 Chevrolet Equinox 3.4L) — Check engine light with codes P0053 and P0171 (P0135 is often related to P0053, which is also a heater circuit code).
✅ What actually fixed it Replacing the Bank 1 Sensor 1 oxygen sensor (used Denso part # 234-4668) resolved the check engine light. The user noted the job took 30 minutes with the correct O2 sensor wrench. - NHTSA ODI #10207750 — An owner reported that after several start attempts, an OBDII scanner read a failure code P0135. In this specific instance, the owner associated the code with a crank position sensor failure and noted an ongoing investigation (EA06016) regarding related engine cooling and starting failures.
- NHTSA ODI #11448862 — A Chevrolet owner experienced a situation where the vehicle would eventually stop with an "engine offline" message on the console, accompanied by P0135 and a series of other circuit-related codes including P0031 and P0403.
OEM Part Supersession History
12590790→ACDelco 213-2827— GM regularly updates production and service part designs to integrate new materials and technologies.
Heads up: Some vendor listings for 213-2827 state that programming or special setup procedures may be required, though this is uncommon for a simple O2 sensor and may be generic text. No widespread incompatibility issues are reported.
Diagnostic Flowchart
Other Known Issues on This Vehicle
Issues unrelated to this code that are worth knowing about as an owner of this generation:
- Lower Intake Manifold (LIM) Gasket Failure 🔴 High — Extremely common failure between 60,000 and 120,000 miles. The original nylon gaskets degrade from Dex-Cool coolant and heat. (Ref: Multiple TSBs were issued for the broader engine family regarding gasket design updates.)
- Head Gasket Failure 🔴 High — A well-documented and costly problem, often occurring after 100,000 miles and sometimes as a consequence of overheating caused by LIM gasket failure.
- Heater Core Failure / Clogging 🟠 Medium — Commonly reported by owners, leading to no heat in the cabin, a sweet coolant smell, and a foggy film on the windshield.
- HVAC Blend Door Actuator Failure 🟡 Low — A common annoyance where the plastic gears inside the actuator fail, causing a loud clicking from the dash and an inability to control air temperature or direction.
Used vs. New Parts: Buying Guide for This Vehicle
When a used part is the smart pick: For this repair, a used part is generally not recommended for the oxygen sensor itself due to its nature as a wear item with a finite lifespan. However, sourcing a used connector pigtail from a junkyard is a very sensible and cost-effective option if only the connector or a short section of wiring is damaged.
Donor-vehicle mileage cap: roughly under 80000 miles for the part to have meaningful remaining life.
What to inspect on the donor part:
- For a connector pigtail, ensure the plastic is not brittle or cracked.
- Check that the locking tab is intact and functional.
- Inspect the wire insulation for at least 6 inches back from the connector, ensuring it's not melted, chafed, or oil-soaked.
- Look at the pins inside the connector for any signs of green or white corrosion.
Aftermarket brands forum-validated for this vehicle:
- Denso (often the original equipment manufacturer for GM)
- NTK (NGK)
- Bosch
Brands owners have reported issues with on this vehicle:
- No-name, unbranded, or 'white-box' sensors sold at exceptionally low prices (e.g., under $20) are frequently reported on forums to fail prematurely or be dead-on-arrival.
Real Owner Stories
Aggregated from forums and TSBs cited above. Mileages and costs reflect what owners reported in those sources.
2005-2009 Chevrolet Equinox 3.4L V6
Symptoms: The user replaced the O2 sensor but the vehicle was still throwing the same P0135 code.
What fixed it: The discussion indicated the fix required looking beyond the sensor to potential wiring issues or PCM faults.
Source hint: chevroletforum.com: Thread 'o2 Replaced and still throwing same code'
Related OBD-II Codes
Frequently Asked Questions
Where is the Bank 1, Sensor 1 oxygen sensor located on my 3.4L V6 Equinox?
What is the correct resistance for a new O2 sensor heater on this GM application?
Which fuse should I check for the P0135 code on my 2005-2009 Equinox?
Can I use a used oxygen sensor to fix this code?
Are there any specific brands I should look for when replacing the sensor?
Could my Equinox's common intake gasket issues cause this code?
Helpful Videos
We Have This Part in Stock


The information in this article is provided for general reference and educational purposes only. Vehicle specifications, procedures, and part compatibility can vary by production date, trim level, and region. Always consult your vehicle's factory service manual and verify part numbers before purchasing or performing repairs. Safety-critical components such as airbags, seat belts, and braking systems should be installed by a qualified professional.
- Chevrolet Equinox:
- 🧭 Diagnostic Flowchart
- 🎬 Helpful Videos
- 🛍️ Shop This Part
- What's Unique About the 2005-2009 Chevrolet Equinox
- Symptoms You May Notice
- Most Likely Causes
- Rare But Worth Checking
- Diagnosis Steps
- Parts You'll Likely Need
- Mechanic-Grade Diagnostic Values
- Wiring & Ground Locations
- Real Owner Repair Stories
- OEM Part Supersession History
- Other Known Issues on This Vehicle
- Used vs. New Parts: Buying Guide for This Vehicle
- Real Owner Stories
- 2005-2009 Chevrolet Equinox 3.4L V6
- Related OBD-II Codes
- Frequently Asked Questions
- 🎟️ Get 5% Off