
P0135 on 2011-2016 Dodge Grand Caravan 3.6L: O2 Sensor Heater Failure Causes and Fixes
For a 2011-2016 Grand Caravan with the 3.6L engine, code P0135 almost always means the Bank 1, Sensor 1 (upstream, firewall side) oxygen sensor has failed. The internal heater element burns out, triggering the check engine light. Expect to pay $40-$85 for a quality aftermarket sensor (NTK is the OEM supplier) and $115-$190 for an OEM Mopar part. It's a DIY-friendly fix if you have the right tools, like a 22mm (7/8") slotted O2 sensor socket, but access to the rear sensor is notoriously tight.
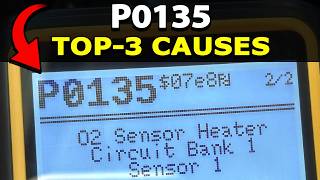
- P0135 points to a failure in the heater circuit of the upstream oxygen sensor on the rear cylinder bank (Bank 1).
- The most common fix is to replace the Bank 1, Sensor 1 O2 sensor.
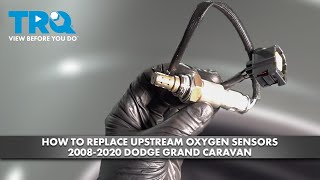
- Accessing this specific sensor is difficult due to its location near the firewall; it is often easier to reach from underneath the vehicle.
- Before replacing the sensor, it's wise to quickly check for blown fuses (ASD/PCM) and any visible damage to the sensor's wiring.
- Using a quality replacement sensor from brands like NTK or Denso is highly recommended for Chrysler vehicles to ensure compatibility and prevent the code from returning.
What's Unique About the 2008-2016 Dodge Grand Caravan
On the 3.6L Pentastar V6, the exhaust manifolds are integrated into the cylinder heads, meaning the catalytic converters bolt directly to the engine. Bank 1 is the rear cylinder bank, located against the firewall, which makes accessing the P0135-related sensor (Bank 1, Sensor 1) significantly more difficult than the front (Bank 2) sensors. While the failure itself is a common O2 sensor issue, the repair is complicated by the tight space, often requiring the technician to work from underneath the vehicle or by reaching down from the top behind the engine.
Generation note: The specified year range 2008-2016 covers the fifth generation (RT) of the Dodge Grand Caravan. However, the specified 3.6L Pentastar V6 engine was only available from the 2011 model year onward. This guide is specifically applicable to the 2011-2016 models.
Symptoms You May Notice
- Check Engine Light is on.
- Reduced fuel economy.
- Rough idle or poor engine performance, especially during cold starts.
- Failing an emissions test.
- Engine may run rough or hesitate on acceleration.
- Replacing the wrong oxygen sensor, such as the downstream (Sensor 2) or the incorrect bank (Bank 2, front/radiator side).
- Replacing the sensor without first checking the wiring and fuses, leading to the code returning.
- Using a cheap, incompatible aftermarket sensor. Chrysler vehicles are known to be sensitive, and using OEM Mopar or OEM-supplier brands like NTK or Denso is highly recommended to avoid compatibility issues.
Most Likely Causes
- Failed Oxygen Sensor (Bank 1, Sensor 1) 🔴 High Probability → Shop Oxygen Sensor The internal heater element within the oxygen sensor is a common failure point due to constant heat cycles, typically failing between 60,000 and 100,000 miles. This is the most frequent cause for P0135.
How to confirm: Disconnect the sensor and test the resistance across the two heater circuit pins (usually the two same-colored wires) with a multimeter. A healthy sensor for a Pentastar engine should read between 3 and 15 ohms when cold. An open circuit (infinite resistance/OL) or a short (near-zero ohms) confirms the heater has failed.
Typical fix: Replace the Bank 1, Sensor 1 oxygen sensor. This is the upstream sensor on the rear exhaust manifold (near the firewall). A 22mm or 7/8" oxygen sensor socket is highly recommended for removal.
Est. part cost: $40-$190 - Damaged Wiring or Connector 🟡 Medium Probability The wiring for the rear O2 sensor is routed in a tight, hot area near the exhaust and firewall, making it susceptible to melting, chafing, or corrosion over time. Some estimates suggest wiring issues account for up to 40% of P0135 cases.
How to confirm: Visually inspect the wiring harness and connector leading to the sensor for any signs of melting, breaks, or corrosion in the pins. Check for battery voltage (approx. 12V) at the harness-side connector on the power supply wire with the key on, engine off.
Typical fix: Repair or replace the damaged section of the wiring harness or the connector. Ensure the harness is properly secured away from hot exhaust components.
Est. part cost: $10-$50 - Blown Fuse or Faulty Relay ⚪ Low Probability While less common, a blown fuse can disable the entire heater circuit. The O2 sensor heaters are often powered by the Auto Shutdown (ASD) relay circuit within the Totally Integrated Power Module (TIPM).
How to confirm: Check the fuse box (TIPM) in the engine bay. On some similar Chrysler platforms, fuse F25 (20A) is designated for the ASD which powers the O2 heaters. Check all fuses related to the ASD and PCM.
Typical fix: Replace the blown fuse. If it blows again, a short circuit in the wiring must be diagnosed and repaired.
Est. part cost: $1-$5
Rare But Worth Checking
- Faulty Powertrain Control Module (PCM): → Shop Engine Control Module (ECM) This is extremely rare. The PCM's internal driver for the heater circuit can fail. This should only be considered after all other possibilities (sensor, wiring, fuses) have been exhaustively ruled out. In some cases, a PCM software update may be required, as noted in TSBs for other O2 heater codes on this engine family. Manufacturer service bulletins for other models in the lineup, such as TSB Bulletin #25-002-14, TSB Bulletin #25-003-13, and TSB Bulletin #25-004-12, explicitly link P0135 to "Internal Control Module O2 Sensors Processor Performance," suggesting the PCM's internal processing of the heater circuit is a documented concern for the manufacturer.
Diagnosis Steps
- Confirm the code P0135 is present using an OBD-II scanner.
- Identify the correct sensor: Bank 1 is the rear cylinder bank (near the firewall), and Sensor 1 is the upstream sensor (before the catalytic converter).
- Visually inspect the sensor's wiring harness and connector for any obvious damage, such as melting, fraying, or corrosion.
- Check the fuse box (TIPM) for any blown fuses related to the ASD or PCM, which power the O2 heater circuit. On similar platforms, this may be fuse F25.
- If no visual issues are found, disconnect the sensor. Use a multimeter to measure the resistance between the two heater circuit pins on the sensor itself (often two white wires). A reading of infinite resistance (OL) means the internal heater is broken. A good heater typically reads between 3 and 15 ohms.
- If the sensor's resistance is good, test the vehicle's wiring harness. With the ignition on (engine off), check for battery voltage (approx. 12V) on one of the heater circuit pins in the harness-side connector.
- If power is present at the harness and the sensor resistance is good, check the ground control wire from the PCM. A persistent lack of ground signal could indicate a wiring or PCM issue.
- If the sensor heater circuit is open (infinite resistance), replace the Bank 1, Sensor 1 oxygen sensor. It is highly recommended to use an OEM Mopar or an OEM-equivalent brand like NTK or Denso.
Parts You'll Likely Need
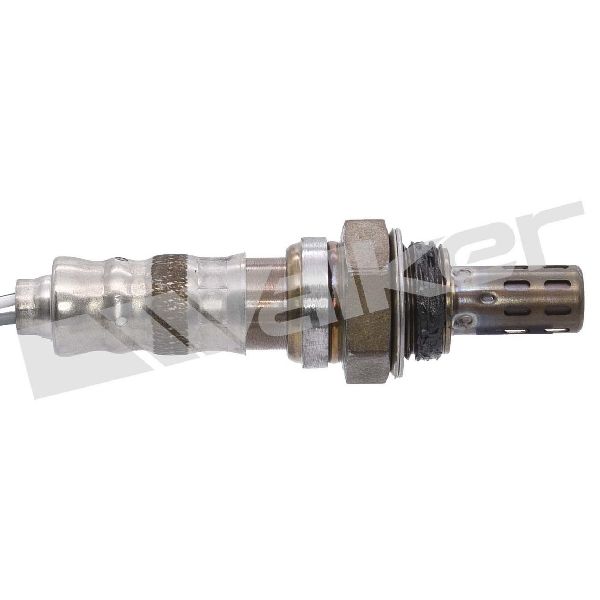
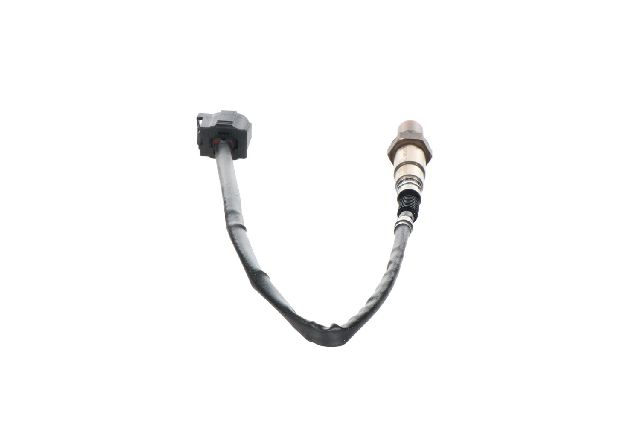
- Upstream Oxygen Sensor (Bank 1, Sensor 1)
(OEM #5149171AB)— The internal heater element is the most common point of failure, making sensor replacement the definitive fix for P0135 in most cases. The original part number 5149171AA has been superseded by 5149171AB.
Trusted brands: Mopar, NTK, Denso
OEM price range: $115-$190
Aftermarket price range: $40-$85 - Oxygen Sensor Socket — A specialized 22mm (7/8") socket with a cutout for the wire is essential for removing and installing the sensor, especially in the tight confines of Bank 1.
Trusted brands: Lisle, OEMTOOLS, GearWrench
Aftermarket price range: $10-$30
Related Codes That Often Appear With This One
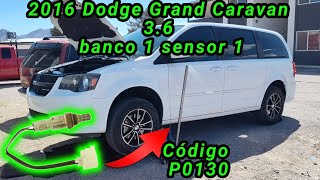
- P0130 — P0130 indicates a general O2 sensor circuit malfunction for Bank 1, Sensor 1. It can appear alongside P0135 if the sensor is failing electrically in more ways than just the heater.
- P0141 — This code is for the Bank 1, Sensor 2 (downstream) heater circuit. If both sensors are of a similar age, it's not uncommon for their heaters to fail around the same time.
- P0155 — This is the equivalent heater circuit code (Bank 2, Sensor 1) for the front bank. If connectors were swapped during a repair, it's possible to see both P0135 and P0155.
Technical Service Bulletins (TSBs) & Recalls
- TSB 18-059-16: While not for P0135 specifically, this TSB addresses other O2 sensor heater circuit codes on 3.6L Pentastar applications and involves a PCM software update, indicating a history of software-related heater circuit faults.
- TSB Bulletin #25-002-14: This manufacturer bulletin identifies P0135 as "O2 Sensor 1/1 Heater Performance" and associates it with internal control module processor performance issues.
- TSB Bulletin #25-003-13: Notes that P0135 relates to O2 Sensor 1/1 Heater Performance and may be linked to the internal processor performance of the control module.
- TSB Bulletin #25-004-12: A manufacturer service bulletin that lists P0135 as a heater performance fault for the 1/1 O2 sensor, potentially involving the internal control module.
Platform-Specific Known Issues
- Access to the Bank 1 (rear) sensors is notably difficult due to tight clearance against the firewall, often requiring work from below the vehicle or reaching from above.
- Oil leaks from the oil filter housing/cooler assembly, a known issue on the 3.6L Pentastar engine, can drip onto the O2 sensor or its wiring harness, causing contamination and premature failure. It is wise to inspect the area above the sensor for any signs of oil leaks.
Mechanic-Grade Diagnostic Values
- O2 Sensor Heater Element Resistance (Cold) — expected: 3 to 15 Ohms. Some sources cite a tighter range of 4-7 Ohms.. Failure: Infinite resistance (OL - Open Circuit) or near-zero resistance (Short Circuit).
- O2 Sensor Heater Power Supply (KOEO) — expected: Battery Voltage (approx. 12V) should be present on one of the heater circuit wires at the harness connector. The PCM controls the power side via pulse-width modulation, so a test light or scope is more effective than a multimeter for diagnosis during engine operation.. Failure: Zero volts indicates an open in the power supply from the TIPM/ASD relay.
- O2 Return Upstream Circuit Voltage (KOEO) — expected: Approximately 2.5 Volts at the sensor harness connector.. Failure: Voltage significantly different from 2.5V points to a wiring issue or a fault within the PCM.
- O2 Return Upstream Circuit Resistance to Ground — expected: Greater than 100 Ohms.. Failure: Resistance below 100 Ohms indicates a short to ground in the return circuit.
Scan Tool Commands That Help
- wiTECH (or equivalent high-level scan tool): O2 Sensor Heater Actuation Test — This function allows a technician to command the O2 sensor heater on and off manually. It is used to verify that the PCM driver, wiring, and heater element are all functional without having to wait for the engine to be cold. If the heater can be activated with the scan tool but fails to activate on a cold start, it could point to a PCM logic or input issue (e.g., incorrect temperature reading).
Wiring & Ground Locations
- Bank 1 Sensor 1 Connector — Clipped to the rear of the driver's side cylinder head, near the firewall. Access is tight.. This is the primary connection point to test. It is susceptible to heat damage, and poor pin fitment can cause intermittent P0135 codes.
- G300 — Located at the base of the left (driver's side) 'B' pillar.. This is a major interior and chassis ground point. While not the primary engine ground, poor grounding here can introduce electrical noise and issues with modules powered inside the cabin, though it's less likely to be a direct cause of P0135.
- Engine Ground Strap / PCM Ground — A primary ground point for the PCM and engine sensors is typically located on the right side of the engine bay, sometimes designated as G300 in wiring diagrams for this platform. Another key ground is located at the left rear of the engine.. The PCM controls the O2 heater circuit. A corroded or loose main PCM or engine ground can cause a host of issues, including erratic sensor behavior and repeated heater failures due to high resistance, as suggested by a master tech in a forum post.
Real Owner Repair Stories
- 2CarPros.com Forum (Dodge Caravan (year not specified, but behavior is relevant)) — Check Engine Light with code P0135 returns every 500-1,000 miles.
❌ Tried (didn't work) Replacing the O2 sensor with a Mopar part., Replacing the O2 sensor again with a Denso part.
✅ What actually fixed it A master technician advised that repeated heater element burnouts are symptomatic of a bad ground for the sensor circuit, which causes high resistance. The final fix was to perform a wiring check to find and repair the faulty ground, rather than continuing to replace the sensor. - DodgeForum.com (2005 Dodge Grand Caravan) — CEL with codes P0135 and P0032 (O2 sensor 1/1 heater circuit high).
❌ Tried (didn't work) Replacing EGR and O2 sensors., Replacing a clogged catalytic converter., Replacing O2 sensors again with new Bosch sensors., Re-flashing the computer.
✅ What actually fixed it The resolution posted in the thread was the diagnosis that the PCM was not sending the 12v signal to the heater circuit. The user was advised that the heater only activates on a cold, running engine for a limited time and that a scan tool is needed to actuate the heater for proper voltage testing, implying a wiring or PCM fault was the final area of diagnosis. - NHTSA ODI #10577984 — An owner reported that a P0135 code for an O2 sensor heater persisted even after replacing the sensor. The report mentions that a service bulletin suggested the repair was to flash the body controller to resolve the issue.
OEM Part Supersession History
5149171AA→5149171AB— Standard part number update, likely for minor revisions in manufacturing or materials. No significant incompatibility is noted between the two.
Heads up: While 5149171AB is the correct replacement, other part numbers like 5149141AF or 5149180AA exist for different banks or sensor positions on the same engine family. Using the wrong part, even if it physically fits, can cause immediate or intermittent codes due to different internal calibration or wire lengths.
Model Year Variations Within This Range
- 2011-2016: While the engine and sensor are consistent from 2011-2016, the TIPM (Totally Integrated Power Module) itself is a known weak point across these model years. There are no major documented changes within this range that would alter the diagnosis of P0135, but it's important to source a replacement TIPM specific to the vehicle's year if it is diagnosed as the cause.
Diagnostic Flowchart
Other Known Issues on This Vehicle
Issues unrelated to this code that are worth knowing about as an owner of this generation:
- Left Cylinder Head Failure (2011-2013 models) 🔴 High — Common on early Pentastar engines, often presenting as misfire codes (P0300, P0302, P0304, P0306). (Ref: TSB 09-002-14 Rev. B; Covered under extended warranty X56 (10 years/150,000 miles).)
- Oil Filter Housing / Oil Cooler Assembly Leaks 🔴 High — Very common across all Pentastar applications. The plastic housing can crack, leading to significant oil and/or coolant leaks.
- Rocker Arm / Cam Follower Failure 🟠 Medium — A common source of engine ticking noise. Needle bearings in the rocker arms can fail, causing wear on the camshaft lobes.
- Water Pump and Thermostat Housing Failure 🟠 Medium — The water pump can fail, and the plastic thermostat housing can crack, leading to coolant leaks and overheating.
- Faulty Totally Integrated Power Module (TIPM) 🔴 High → Shop Fuse Box — Affects many Chrysler/Dodge/Jeep vehicles of this era. Can cause a wide range of bizarre electrical issues, including fuel pump, starter, and power window problems. (Ref: Subject of a class-action lawsuit, but no universal recall.)
Used vs. New Parts: Buying Guide for This Vehicle
When a used part is the smart pick: For this repair, a used part only makes sense for a replacement wiring harness pigtail or a complete engine harness if the original is damaged. A used TIPM can be an option, but it must be from an identical year/model and carries the risk of having the same internal relay issues as the original.
Donor-vehicle mileage cap: roughly under 80000 miles for the part to have meaningful remaining life.
What to inspect on the donor part:
- For a wiring pigtail, inspect for any signs of melting, brittleness, or corrosion on the pins.
- Ensure the locking tab on the connector is intact.
- For a TIPM, check for any signs of water intrusion, corrosion on the external connectors, or a burnt smell.
OEM-only on this vehicle (don't cheap out):
- Oxygen Sensor: This is a critical emissions and fuel control component and a wear item. Aftermarket sensors, especially from unknown brands, are a common cause of recurring codes on Chrysler vehicles. Always use OEM (Mopar) or the direct OEM supplier (NTK/Denso).
- Powertrain Control Module (PCM): A used PCM will require dealer programming to the vehicle's VIN and security system, making it a complex and often costly option compared to repairing the original or buying a pre-programmed unit from a specialty service.
Aftermarket brands forum-validated for this vehicle:
- NTK (OEM Supplier)
- Denso
Brands owners have reported issues with on this vehicle:
- Bosch (Some forum users have reported compatibility issues and premature failures with Bosch sensors on this platform, despite being a reputable brand for other makes).
- Generic, unbranded, or 'white-box' sensors from online marketplaces.
Real Owner Stories
Aggregated from forums and TSBs cited above. Mileages and costs reflect what owners reported in those sources.
2012 Jeep Wrangler (JK) 3.6L Pentastar
Symptoms: The owner observed both P0135 and P0155 codes immediately after performing an exhaust job.
What fixed it: The owner discovered that the Bank 1 and Bank 2 upstream sensor connectors had been accidentally swapped during the reinstallation of the exhaust.
Source hint: JK-Forum.com - "Installed new exhaust... and getting p0155/p0135"
2008-2016 Dodge Grand Caravan 3.6L Pentastar
Symptoms: The owner reported repeatedly burning out the heater elements in brand new Mopar and Denso sensors.
What fixed it: A master technician identified that a bad ground for the sensor circuit was causing high resistance and repeated heater failures, requiring a wiring repair.
Source hint: 2CarPros.com - "Code P0135: Already Three Sensors Are Replaced..."
2008-2016 Dodge Grand Caravan 3.6L Pentastar — ~80000 miles
Symptoms: Check engine light with P0135; the internal heater element failed due to constant heat cycles.
What fixed it: Replacement of the Bank 1, Sensor 1 oxygen sensor (upstream sensor on the rear exhaust manifold).
Source hint: common_causes - Failed Oxygen Sensor (Bank 1, Sensor 1)
NHTSA Reported Incident
Symptoms: An owner filed a complaint (NHTSA ODI #10577984) regarding a persistent P0135 code for the O2 sensor heater that remained even after the sensor was replaced.
What fixed it: The owner noted that a service bulletin indicated the necessary repair was to flash the body controller to resolve the underlying electronic communication issue.
Source hint: NHTSA ODI #10577984
Related OBD-II Codes
Frequently Asked Questions
Where is the Bank 1 Sensor 1 located on my 3.6L Pentastar Grand Caravan?
I see TSB 18-059-16 mentioned for Pentastar engines; does it fix P0135?
Could an oil leak cause my P0135 code on this specific engine?
What resistance should I look for when testing the O2 sensor heater on my Dodge?
Is there a specific fuse I should check for the O2 heater circuit in the TIPM?
Why is the wiring for the rear sensor so prone to failure on the Grand Caravan?
Helpful Videos


We Have This Part in Stock


The information in this article is provided for general reference and educational purposes only. Vehicle specifications, procedures, and part compatibility can vary by production date, trim level, and region. Always consult your vehicle's factory service manual and verify part numbers before purchasing or performing repairs. Safety-critical components such as airbags, seat belts, and braking systems should be installed by a qualified professional.
- Dodge Grand Caravan:
- 🧭 Diagnostic Flowchart
- 🎬 Helpful Videos
- 🛍️ Shop This Part
- What's Unique About the 2008-2016 Dodge Grand Caravan
- Symptoms You May Notice
- Most Likely Causes
- Rare But Worth Checking
- Diagnosis Steps
- Parts You'll Likely Need
- Related Codes That Often Appear With This One
- Technical Service Bulletins (TSBs) & Recalls
- Platform-Specific Known Issues
- Mechanic-Grade Diagnostic Values
- Scan Tool Commands That Help
- Wiring & Ground Locations
- Real Owner Repair Stories
- OEM Part Supersession History
- Model Year Variations Within This Range
- Other Known Issues on This Vehicle
- Used vs. New Parts: Buying Guide for This Vehicle
- Real Owner Stories
- 2012 Jeep Wrangler (JK) 3.6L Pentastar
- 2008-2016 Dodge Grand Caravan 3.6L Pentastar
- 2008-2016 Dodge Grand Caravan 3.6L Pentastar — ~80000 miles
- NHTSA Reported Incident
- Related OBD-II Codes
- Frequently Asked Questions
- 🎟️ Get 5% Off