
P0135 on 1998-2011 Ford Ranger 2.3L: O2 Sensor Heater Fault Causes and Fixes
This code means the upstream O2 sensor's internal heater has failed. Before you buy a new sensor, check the shared emissions fuse in the engine bay—it's a common failure point. For 2001-2003 models, check fuse #41 (15A); for 2004-2006, check fuse #43 (20A). If the fuse is good, the O2 sensor itself is the most likely culprit, costing about $30-$80 for a quality aftermarket replacement.
- Always check the emissions system fuse in the engine bay before buying any parts. It's a common failure and can save you time and money.
- If P0135 is present with other codes like P0141, P0403, or P0443, a blown fuse is the most probable cause.
- If the fuse is good and P0135 is the only code, the upstream O2 sensor's internal heater has likely failed and the sensor needs to be replaced.
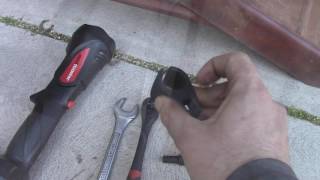
- An O2 sensor socket is highly recommended for removal and installation to avoid damaging the new sensor's wiring.
What's Unique About the 1998-2011 Ford Ranger
The 2.3L Duratec engine was used in Rangers from mid-2001 to 2011. On these trucks, the O2 sensor heater circuit often shares a fuse with other emissions components like the EGR valve and EVAP purge solenoid. Because of this, seeing P0135 alongside codes like P0141, P0403, or P0443 is a strong indicator of a single blown fuse rather than multiple component failures. Owners often chase this code by replacing the sensor first, when a simple fuse check could have solved the problem. Specifically, 2001-2003 models often use fuse #41 (15A) in the under-hood power distribution box, while 2004-2006 models use fuse #43 (20A).
Generation note: The specified 1998-2011 range covers two different 2.3L engines. The 1998-2001 (mid-year) models used the 2.3L/2.5L Lima OHC engine, while the mid-2001-2011 models used the 2.3L Duratec DOHC engine. While the code's meaning is the same, fuse locations and specific wiring may differ. This guide focuses on the 2.3L Duratec but the diagnostic principles are nearly identical for the Lima. For the earlier Lima engine, the relevant fuse is often #20 (15A) for a 1997 model, for example.
Symptoms You May Notice
- Check Engine Light is on.
- Slightly reduced fuel economy.
- Failing a state emissions inspection.
- In some cases, a slightly rough idle, especially during warm-up.
- Replacing the O2 sensor without first checking the fuse, especially when multiple heater circuit codes are present (P0135, P0141, P0403, etc.).
Most Likely Causes
- Blown Fuse 🔴 High Probability The O2 sensor heaters share a power fuse with other emissions components. A short in any of these components or their wiring can blow the single fuse, triggering multiple codes.
How to confirm: Locate the power distribution box under the hood. Check the fuse for the Heated Oxygen Sensors (HO2S)/emissions components. The fuse number varies by year: check fuse #41 (15A) for 2001-2003 models, and fuse #43 (20A) for 2004-2006 models. Always verify with your owner's manual. If the fuse is blown, this is likely the cause.
Typical fix: Replace the blown mini fuse. If it blows again immediately, you have a short circuit in the wiring to one of the sensors or in one of the sensors themselves that must be located.
Est. part cost: $1-$5 - Failed Upstream O2 Sensor 🔴 High Probability → Shop Oxygen Sensor The internal heater element is a common point of failure due to age and constant heat cycles. It's a standard wear-and-tear part.
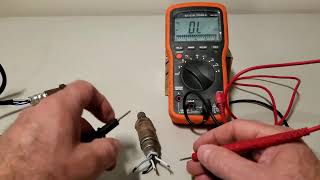
How to confirm: If the fuse is good, the next step is to test the sensor. Disconnect the sensor and use a multimeter to measure the resistance between the two heater pins (usually the two same-colored wires, often white) on the sensor side of the connector. A good sensor should have a low resistance, typically between 4 and 7 ohms when cold, although some sources state a wider acceptable range of 2 to 30 ohms. An 'OL' or infinite reading means the heater circuit is open and the sensor is bad.
Typical fix: Replace the upstream (Bank 1, Sensor 1) oxygen sensor.
Est. part cost: $30-$80 - Damaged Wiring or Connector 🟡 Medium Probability The wiring harness is exposed to heat from the exhaust and road debris, which can cause it to melt, chafe, or break over time. The connector can also become contaminated with moisture or dirt, or pins can become recessed.
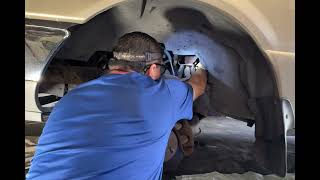
How to confirm: Visually inspect the wiring harness leading to the O2 sensor for any signs of melting, cracking, or physical damage. Check the electrical connector for corrosion, moisture, or bent pins. One Ranger owner found the issue was a pin that had been pushed back into the connector housing, preventing a solid connection. With the key on and engine off, use a multimeter to confirm 12V power is reaching the harness-side connector.
Typical fix: Repair the damaged section of wiring or clean/replace the connector. Ensure all pins are fully seated in the connector housing.
Est. part cost: $5-$25
Rare But Worth Checking
- Faulty Powertrain Control Module (PCM): → Shop Engine Control Module (ECM) This is very rare, but has been documented on Ranger forums. It should only be considered after all other possibilities (fuse, sensor, wiring) have been exhaustively ruled out. A user on Reddit with a '97 2.3L Ranger experienced simultaneous P0135 and P0141 codes that were only resolved by replacing the PCM after new sensors and verified wiring failed to fix the issue.
Diagnosis Steps
- Read the codes with an OBD-II scanner. Note if P0135 appears alone or with other codes like P0141, P0403, or P0443.
- Check the Fuse First. Open the power distribution box in the engine bay. For 2001-2003 models, inspect fuse #41 (15A). For 2004-2006 models, inspect fuse #43 (20A). If it's blown, replace it, clear the codes, and see if they return. If it blows again, a short circuit is present.
- If the fuse is good, perform a visual inspection. Look at the O2 sensor wiring and connector for any obvious signs of damage, such as melting on the exhaust manifold, chafing, or corrosion.
- Test the Sensor's Heater Circuit. Disconnect the upstream O2 sensor. Using a multimeter set to Ohms (Ω), measure the resistance across the two heater pins on the sensor itself (usually two white wires). A reading between 4 and 7 Ω is ideal. An infinite reading (OL) means the sensor is bad and needs replacement.
- Test for Power at the Harness. With the sensor still disconnected and the ignition key in the 'On' position (engine off), use a multimeter to check for 12V at the corresponding heater power wire in the vehicle's harness connector. If no power is present and the fuse is good, you have a break in the wire between the fuse box and the sensor.
- Check Connector Integrity. Closely inspect the female pins on the harness-side connector. A documented case on Ford-Trucks.com showed a pin had been pushed back into the housing, causing an intermittent connection. All pins should be flush and secure.
- If power is present and the sensor's resistance is good, the issue may be in the ground wire controlled by the PCM, which is a more complex diagnosis and may require professional help.
Parts You'll Likely Need
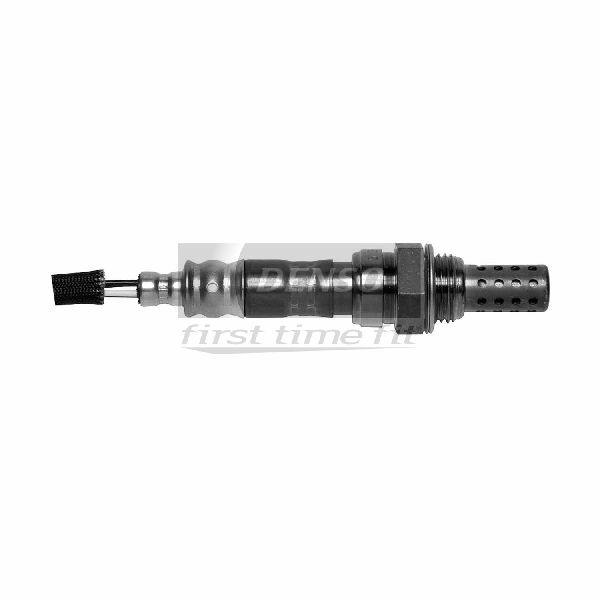
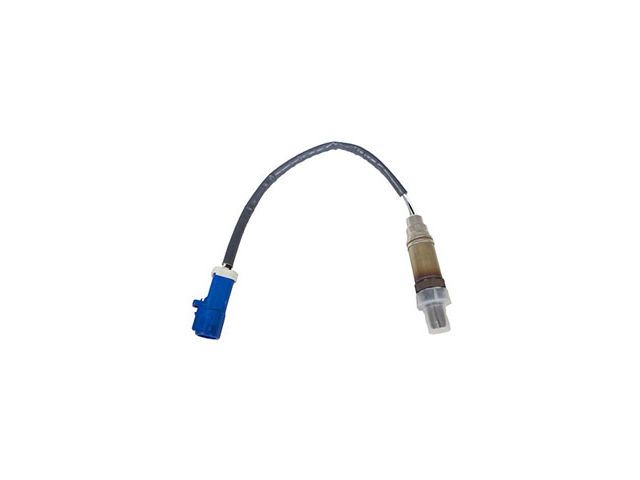
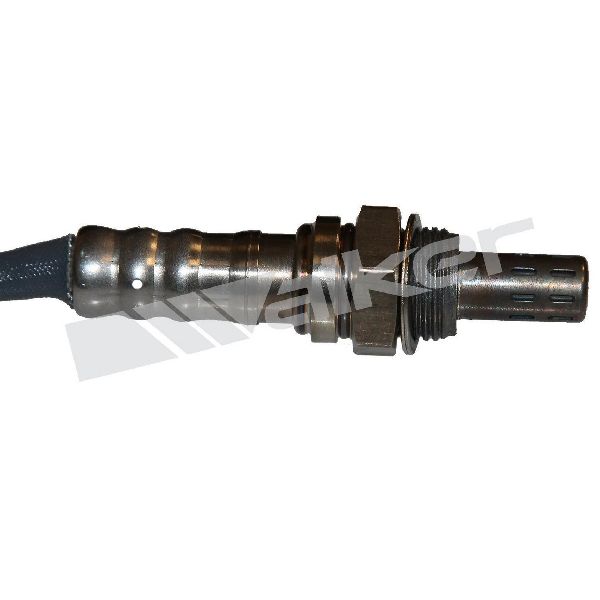
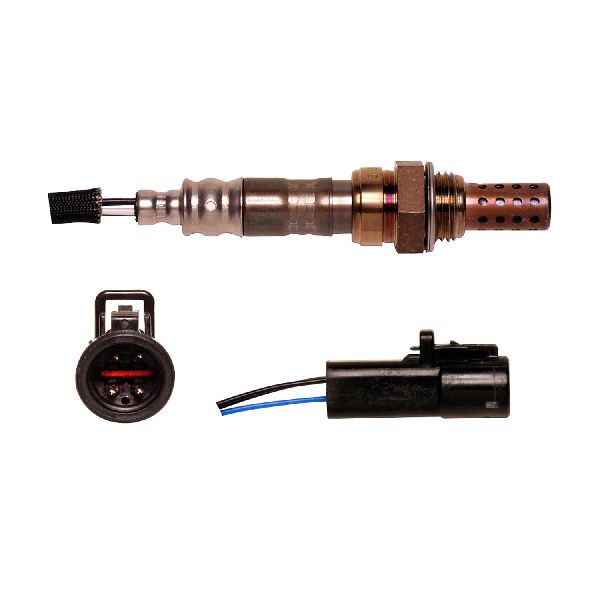
- Upstream Oxygen Sensor (Bank 1, Sensor 1)
(OEM #5L8Z-9G444-A)— The internal heater element fails from age and heat, making this the most common part to fail when the fuse is confirmed to be good.
Trusted brands: Motorcraft (OEM), Bosch (e.g., 15716), Denso, NGK/NTK (e.g., 22500)
OEM price range: $70-$120
Aftermarket price range: $30-$80 - Automotive Mini Fuse (15A or 20A) — This is the most common cause when multiple heater circuit codes are present, as several emissions components share one fuse.
Trusted brands: Bussmann, Littlefuse
OEM price range: $1-$5
Aftermarket price range: $1-$5
Related Codes That Often Appear With This One
- P0141 — This is the heater circuit code for the downstream O2 sensor (Bank 1, Sensor 2). When P0135 and P0141 appear together, it strongly points to a shared power problem, most commonly a blown fuse.
- P0403 — This code for the EGR valve circuit can appear with P0135 because the EGR valve solenoid shares the same power fuse on many 2.3L Duratec Rangers.
- P0443 — This code for the EVAP purge control valve circuit can also appear with P0135, as it too may be on the same fused circuit. A combination of these codes is a tell-tale sign of a blown fuse.
Platform-Specific Known Issues
- On 2004-2006 models, a short in the wiring harness for the downstream O2 sensor where it runs over the transmission crossmember has been reported to blow the shared fuse, causing P0135.
- A user on Ford-Trucks.com reported solving a persistent P0135 code by discovering a recessed pin in the O2 sensor's electrical connector. Pushing the wire back into the connector housing to reseat the pin fixed the problem.
Mechanic-Grade Diagnostic Values
- O2 Sensor Heater Element Resistance — expected: 4-7 Ohms is typical, but a range of 2-30 Ohms is considered acceptable.. Failure: An 'OL' or infinite reading indicates an open circuit. A reading near zero indicates a short.
- Heater Circuit Power Supply Voltage — expected: 10 to 12 Volts DC with key on, engine off.. Failure: 0 Volts indicates a blown fuse or a break in the power wire from the fuse box.
- Heater Circuit Ground Signal — expected: 10 to 12 Volts DC when back-probing the ground wire with the red lead on the battery positive terminal (key on, engine off).. Failure: 0 Volts indicates the PCM is not providing ground, which could be a PCM or wiring fault.
- Voltage Drop on Power and Ground Wires — expected: Less than 0.1 Volts DC.. Failure: A voltage drop greater than 0.1V (e.g., 0.5V) indicates high resistance in the circuit that needs to be located and repaired. A Reddit user noted a minimal 0.03V drop on a healthy circuit.
Scan Tool Commands That Help
- Ford IDS, FORScan, high-end bidirectional scanners (Autel, Snap-on): Heated Oxygen Sensor (HO2S) Heater On/Off Command — This command allows a technician to manually turn the O2 sensor heater on and off while monitoring live data. It's used to confirm if the PCM driver is capable of commanding the circuit and to observe the heater's effect on the O2 sensor voltage and warm-up time, helping to isolate a faulty PCM from a wiring issue.
Wiring & Ground Locations
- Upstream O2 Sensor Connector (C1043 on some diagrams) — On the 2.3L Duratec, it's located on the passenger side of the engine, attached to a bracket on the cylinder head or intake manifold area, leading down to the sensor in the exhaust manifold.. This is the primary connection point for all power, ground, and signal wires for the sensor. Corrosion, pushed-out pins, or harness damage here will directly cause P0135.
- Harness-Side Connector Pinout (Typical Duratec) — Pin 1: Heater Power (e.g., Light Blue/Orange wire). Pin 2: Heater Ground (e.g., Red/White wire, controlled by PCM). Pin 3: Signal Wire (e.g., Grey/Red). Pin 4: Signal Ground (e.g., Grey/Light Blue). Wire colors can vary by year, so verification is critical.. Knowing the specific pin functions is essential for accurately testing for 12V power and PCM-controlled ground without guessing, preventing misdiagnosis.
- G101 — Typically located on the driver's side of the upper radiator support.. This is a critical engine bay ground point. A loose or corroded G101 can cause a variety of sensor and PCM-related issues, including erratic sensor readings or faulty ground-side switching by the PCM.
- G104 — For the 2.3L engine, this is often found on the lower driver's side front of the engine compartment, on the frame rail.. This is a major chassis and engine block ground. Poor connection here can lead to insufficient grounding for the entire engine management system, potentially causing the PCM to incorrectly diagnose circuit faults.
Real Owner Repair Stories
- Reddit user on r/MechanicAdvice (1997 Ford Ranger 2.3L (Lima engine, but same diagnostic principle)) — Persistent P0135 and P0141 codes that would appear simultaneously after 6-8 miles of driving, preventing passing a smog check.
❌ Tried (didn't work) Replacing both upstream and downstream O2 sensors., Checking all related fuses., Verifying 12V power and PCM-switched ground at both sensor connectors., Performing voltage drop tests on wiring., Running supplementary power wires to rule out intermittent breaks.
✅ What actually fixed it Replacing the Powertrain Control Module (PCM). The original PCM was erroneously triggering both heater circuit fault codes despite the circuits being healthy.
OEM Part Supersession History
YL8Z-9G444-CA→5L8Z-9G444-G, then 5L8Z-9G444-A— Standard part revision and consolidation by Ford.
Heads up: The OEM part number 5L8Z-9G444-A is often listed for the downstream sensor on Escape/Mariner models but is also specified as the upstream sensor for the Ranger 2.3L. It's critical to verify fitment using the vehicle's VIN, as wire harness length is the most common variation.
Model Year Variations Within This Range
- 2001-2003: These early 2.3L Duratec engines featured an Intake Manifold Runner Control (IMRC) system and an electrically heated thermostat, which were controlled by the PCM. The wiring and PCM logic are unique to these years.
- 2004-2011: Ford removed the IMRC system and electric thermostat for a simpler design. This resulted in changes to the intake manifold, PCM, and associated wiring. Fuse locations for the O2 heater circuit also changed around this time (e.g., from #41 to #43 in the power distribution box).
- 2001-2011: The 2.3L Duratec engine was only available with Rear-Wheel Drive (RWD) from the factory. No 4WD option was offered with this engine in the third-generation Ranger.
Diagnostic Flowchart
Other Known Issues on This Vehicle
Issues unrelated to this code that are worth knowing about as an owner of this generation:
- Intake Manifold Runner Control (IMRC) Failure 🟠 Medium — Common on 2001-2003 models. The plastic actuator linkage can break or the vacuum solenoid can fail, causing codes like P2004, rough idle, and poor performance.
- Cracked Plastic Thermostat Housing 🟠 Medium — Very common across all Duratec 2.3L years. The plastic housing becomes brittle with age and heat cycles, leading to coolant leaks. Early models ('01-'03) used a pricey electronic thermostat, while later models used a simpler, cheaper design.
- Intake Manifold Vacuum Leak at IMRC Shaft Plug 🔴 High — Specific to 2001-2003 models with the IMRC system. A small plastic plug on the end of the IMRC butterfly shaft can fall out, creating a massive vacuum leak that causes severe rough idle and stalling.
- PCV Valve and Hose Replacement Difficulty 🟡 Low — A common maintenance item that is notoriously difficult to access, being located under the intake manifold. The hose often becomes brittle and cracks, causing vacuum leaks.
Used vs. New Parts: Buying Guide for This Vehicle
When a used part is the smart pick: A used part is a smart choice for a replacement wiring harness connector (pigtail) if the original is damaged. Sourcing a pigtail from a junkyard vehicle is far more cost-effective than buying a new harness. A used Power Distribution Box (fuse box) is also a viable option if the original has widespread corrosion or damage beyond a single fuse.
Donor-vehicle mileage cap: roughly under 150000 miles for the part to have meaningful remaining life.
What to inspect on the donor part:
- For a wiring pigtail, ensure the connector body is not cracked or brittle.
- Check that the locking tab is intact.
- Inspect the wire insulation for flexibility; avoid any that are stiff, cracked, or oily.
- Ensure at least 6-8 inches of wire is available for splicing.
OEM-only on this vehicle (don't cheap out):
- Powertrain Control Module (PCM) - While a used PCM can work, it often requires programming to the vehicle's VIN and key information, which can be complex. A remanufactured unit from a reputable supplier that is pre-programmed is a safer bet.
Aftermarket brands forum-validated for this vehicle:
- O2 Sensors: NGK/NTK, Denso, and Bosch are widely trusted by mechanics and forum members for reliable performance.
- Connectors: Dorman, Standard Motor Products (SMP), and Motorcraft offer quality replacement pigtails.
Brands owners have reported issues with on this vehicle:
- Avoid 'no-name' or unbranded oxygen sensors from online marketplaces. These often have a high failure rate, incorrect heater resistance, or slow response times, leading to the code returning quickly.
Real Owner Stories
Aggregated from forums and TSBs cited above. Mileages and costs reflect what owners reported in those sources.
2001-2003 Ford Ranger 2.3L I4
Symptoms: The vehicle was throwing P0135, P0141, and P0155 codes simultaneously.
What fixed it: Replacing a single blown 15A fuse in the power distribution box.
Source hint: Ranger-Forums.com: Thread titled 'O2 Codes Help' (2020)
1999 Ford Ranger 4.0L
Symptoms: Persistent P0135 O2 Sensor Heater Circuit (Bank 1 Sensor 1) code.
What fixed it: Discovered a recessed pin inside the O2 sensor's electrical connector; pushing the wire back into the housing to reseat the pin fixed the connection.
Source hint: Ford-Trucks.com: Thread titled '1999 Ranger 4x4 4.0 - P0135 O2 Sensor Heater Circuit (Bank 1 Sensor 1)'
2022 Ford Ranger (Michael7S)
Symptoms: Simultaneous O2 sensor heater circuit failures (P0135 & P0141) that persisted after extensive troubleshooting.
What fixed it: The ultimate cause was determined to be a bad PCM (Powertrain Control Module).
Source hint: Ranger-Forums.com: Thread titled 'Simultaneous 02 Sensor Heater Circuit Failure P0135 & P0141 what's left to test?'
Related OBD-II Codes
Frequently Asked Questions
Which fuse should I check for a P0135 code on my 2002 Ford Ranger 2.3L?
My 2005 Ranger has P0135; is the fuse location different than earlier Duratec models?
Can a problem with my downstream O2 sensor cause a P0135 code for the upstream sensor?
What resistance reading should I see when testing the heater circuit on a new Duratec 2.3L O2 sensor?
I replaced the sensor and the fuse is good, but I still have P0135. What else should I check on my Ranger?
Does the Mazda B2300 suffer from the same P0135 issues as the Ford Ranger?
Helpful Videos
Used OEM Parts in Stock
New Aftermarket Parts Available


The information in this article is provided for general reference and educational purposes only. Vehicle specifications, procedures, and part compatibility can vary by production date, trim level, and region. Always consult your vehicle's factory service manual and verify part numbers before purchasing or performing repairs. Safety-critical components such as airbags, seat belts, and braking systems should be installed by a qualified professional.
- Ford Ranger:
- 🧭 Diagnostic Flowchart
- 🎬 Helpful Videos
- 🛍️ Shop This Part
- What's Unique About the 1998-2011 Ford Ranger
- Symptoms You May Notice
- Most Likely Causes
- Rare But Worth Checking
- Diagnosis Steps
- Parts You'll Likely Need
- Related Codes That Often Appear With This One
- Platform-Specific Known Issues
- Mechanic-Grade Diagnostic Values
- Scan Tool Commands That Help
- Wiring & Ground Locations
- Real Owner Repair Stories
- OEM Part Supersession History
- Model Year Variations Within This Range
- Other Known Issues on This Vehicle
- Used vs. New Parts: Buying Guide for This Vehicle
- Real Owner Stories
- 2001-2003 Ford Ranger 2.3L I4
- 1999 Ford Ranger 4.0L
- 2022 Ford Ranger (Michael7S)
- Related OBD-II Codes
- Frequently Asked Questions
- 🎟️ Get 5% Off